Basic Information
Location: Site Configuration > {Module name} > Media File Converters > Create Media File Converter
In the 'Basic Information' tab information about INPUT and OUTPUT format is configured together with the source and destination locations.
'Destination' is setup in Media File Holders:
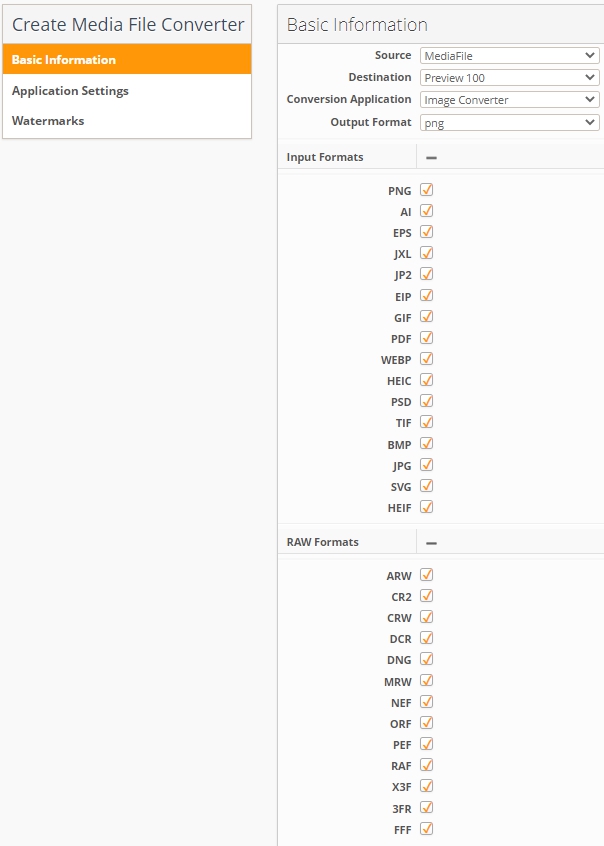
Note: SVG file format will be available from version 11.0.0 onwards
Limitations:
For input format WEBP only the follow output formats are supported: JPG, PNG and vice versa.
For input format SVG only the follow output formats are supported: .JPG, PNG and TIF.
Currently no convertion to SVG format is supported.
Application Settings
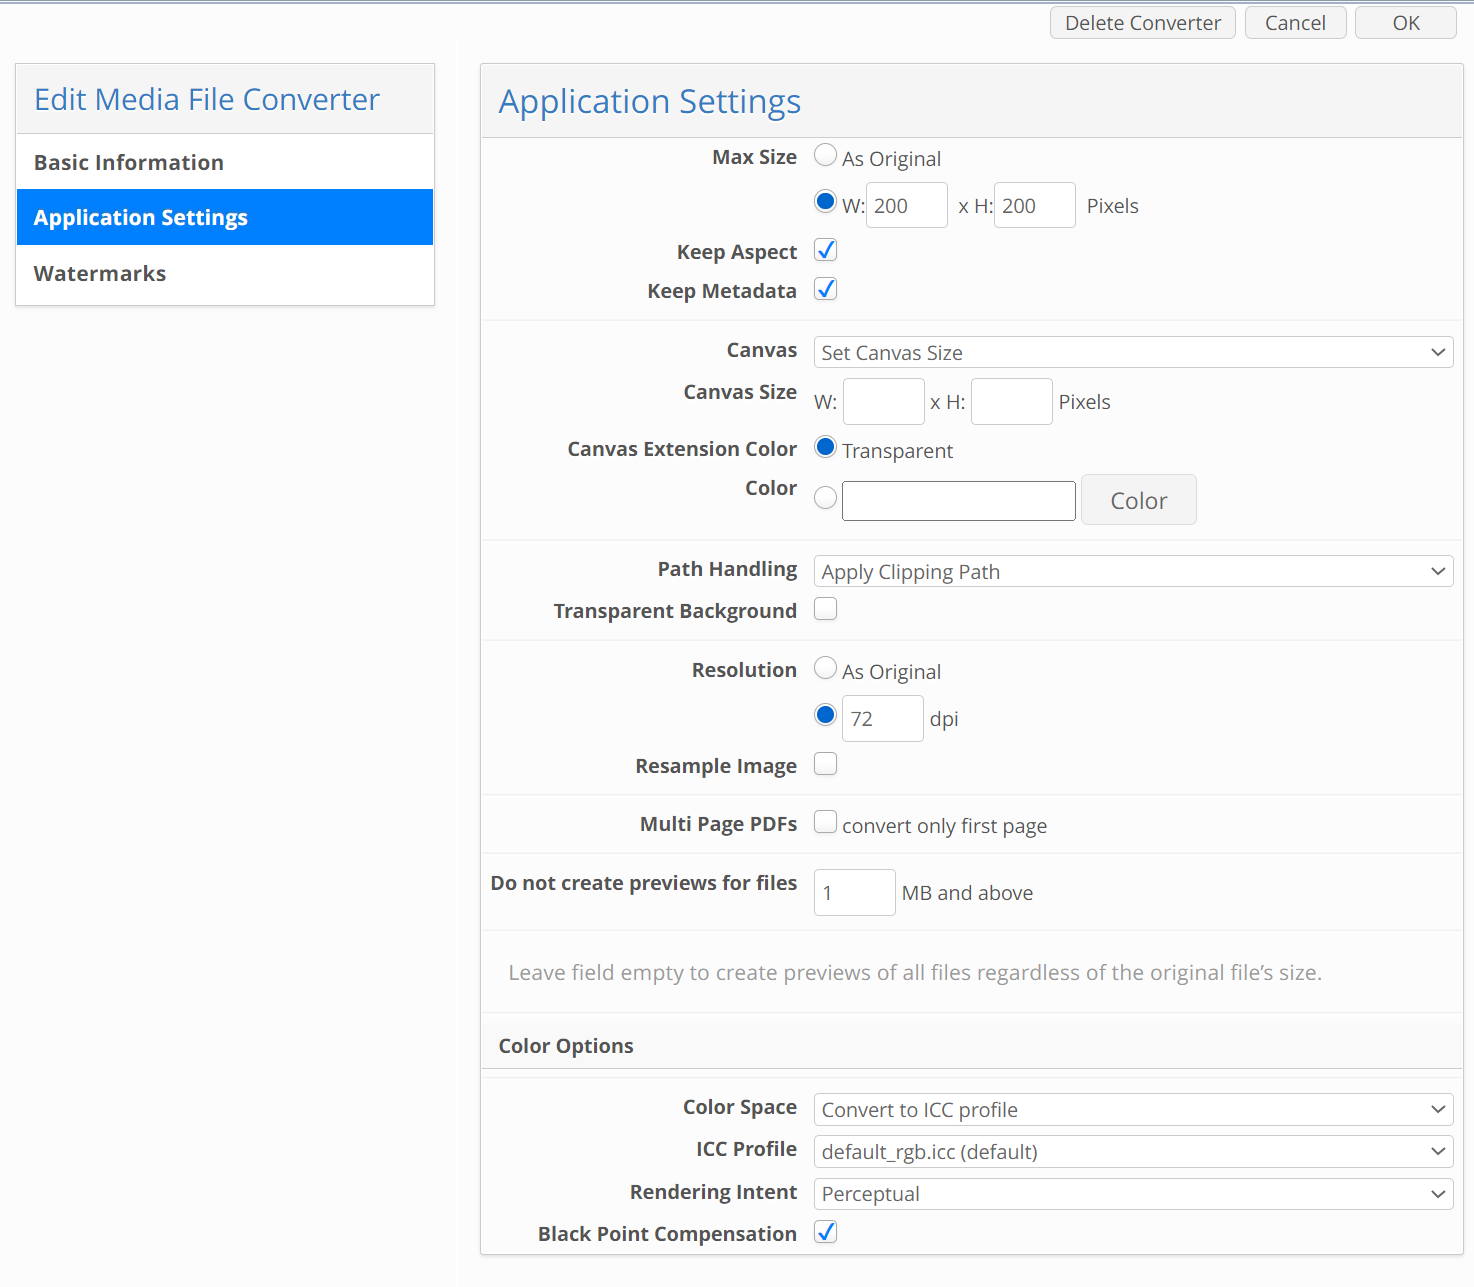
The 'Apllication Settings' tab allows detailed configuration of the output file.
Option | Default | Meaning |
|---|---|---|
Max Size | None | Maximum size of the image. Width and Height are given in pixels. |
Keep Aspect | Enabled | When enabled, this ensures that the relative dimensions of the image are not altered and therefore not vertically or horizontally stretched or compressed. |
Metadata | Disabled | When enabled, metadata from the original image is transferred over to the output image. Note: PNG Doesn't support embedding EXIF metadata. Hence EXIF metadata will get lost when output format is PNG. |
Canvas | Same as Converted File | Allow to add the canvas area (colored or transparent) around the image, for example, in order to have the same dimensions of the resulted images. |
Canvas Size | None | The user can enter numeric values into the two input fields, specifying the desired size of the output file. “Canvas Size” Values can be both bigger and smaller than the values set in the “Max Size”-field. If Canvas Size is smaller than Max Size, the result image will be cropped from the center. |
Canvas Extension Color | Transparent | “Canvas Extension Color” consists of two radio buttons: The first option is “Transparent” which will make the extended areas transparent if the output file format supports transparency (Please note that transparency is not supported for all output file types, so if transparency is selected for a file type that does not support transparency (JPG), the canvas color will be white). The second option is “Color”, where the user can enter a hex value or click the “Color”-button which will display a color picker. |
Path Handling | Apply Clipping Path | Defines which path to apply on conversion: Clipping Path (Default), First Path or Ignore All Paths. Setting is available only for input format JPG, TIFF, PSD, EPS, WEBP |
Transparent Background | Disabled | Defines whether the transparent background (checkerboard) will be applied to converted image. If disabled, the background will be white. If enabled together with colored canvas, background will have the canvas color. Setting is available only for output format PNG, TIFF, PSD, GIF, WEBP, SVG |
Resolution | As Original | Resolution of the resulting image (specified in dpi). This setting is applicable to all resolution-based image formats that the image converter supports. |
Resample Image | Disabled | Select the check box to change image resolution without affecting the dimensions of the file. Changing the dpi value with the Resampling option enabled will change image size in pixels but not the size in millimeters. |
Multi page PDFs (convert only first page) | Disabled | When the PDF format is selected as an input format, select the check box to generate preview only for the 1st page of the uploaded PDF document. |
Do not create previews for files | None | When enabled, it is possible to specify the size of the file in MB for which preview will not be generated. |
Limitations
Canvas is not applied to vector input formats AI, EPS.
Metadata from/to JXL files won’t be copied.
Exiftool doesn’t support writing metadata to WEBP files (only metadata copied by imageMagic will be present when output format is WEBP).
Exiftool doesn’t support embedding IPTC, Photoshop metadata to HEIC, HEIF, GIF, JP2 file formats.
Color Options
Option | Default | Meaning |
|---|---|---|
Color Space | Convert to ICC profile | Specify whether to use the selected icc profile, or leave image’s icc profile unchanged during conversion. |
ICC profile | default_rgb.icc (default) | Select the icc profile that will be used during image conversion. |
Rendering Intent | Perceptual | Select one of the following options:
|
Black Point Compensation | Enabled | Enable or disable the Black Point Compensation |
Limitations
Transparent background is not applied:
to PSD and PDF with premultiplied and layer mask transparency (without clipping paths);
to Photoshop PDF with clipping path;
to Photoshop EPS with clipping path and RGB colorspace.
“Ignore All Paths” setting is not applied to EPS and PDF files (clipping is always done if path is present in the file).
ICC Profile convertion to CMYK as target format for PNG and WEBP not supported:
PNG and WEBP formats are designed for transferring images on the Internet, not for professional-quality print graphics, and therefore do not support non-RGB color spaces such as CMYK.
Watermarks
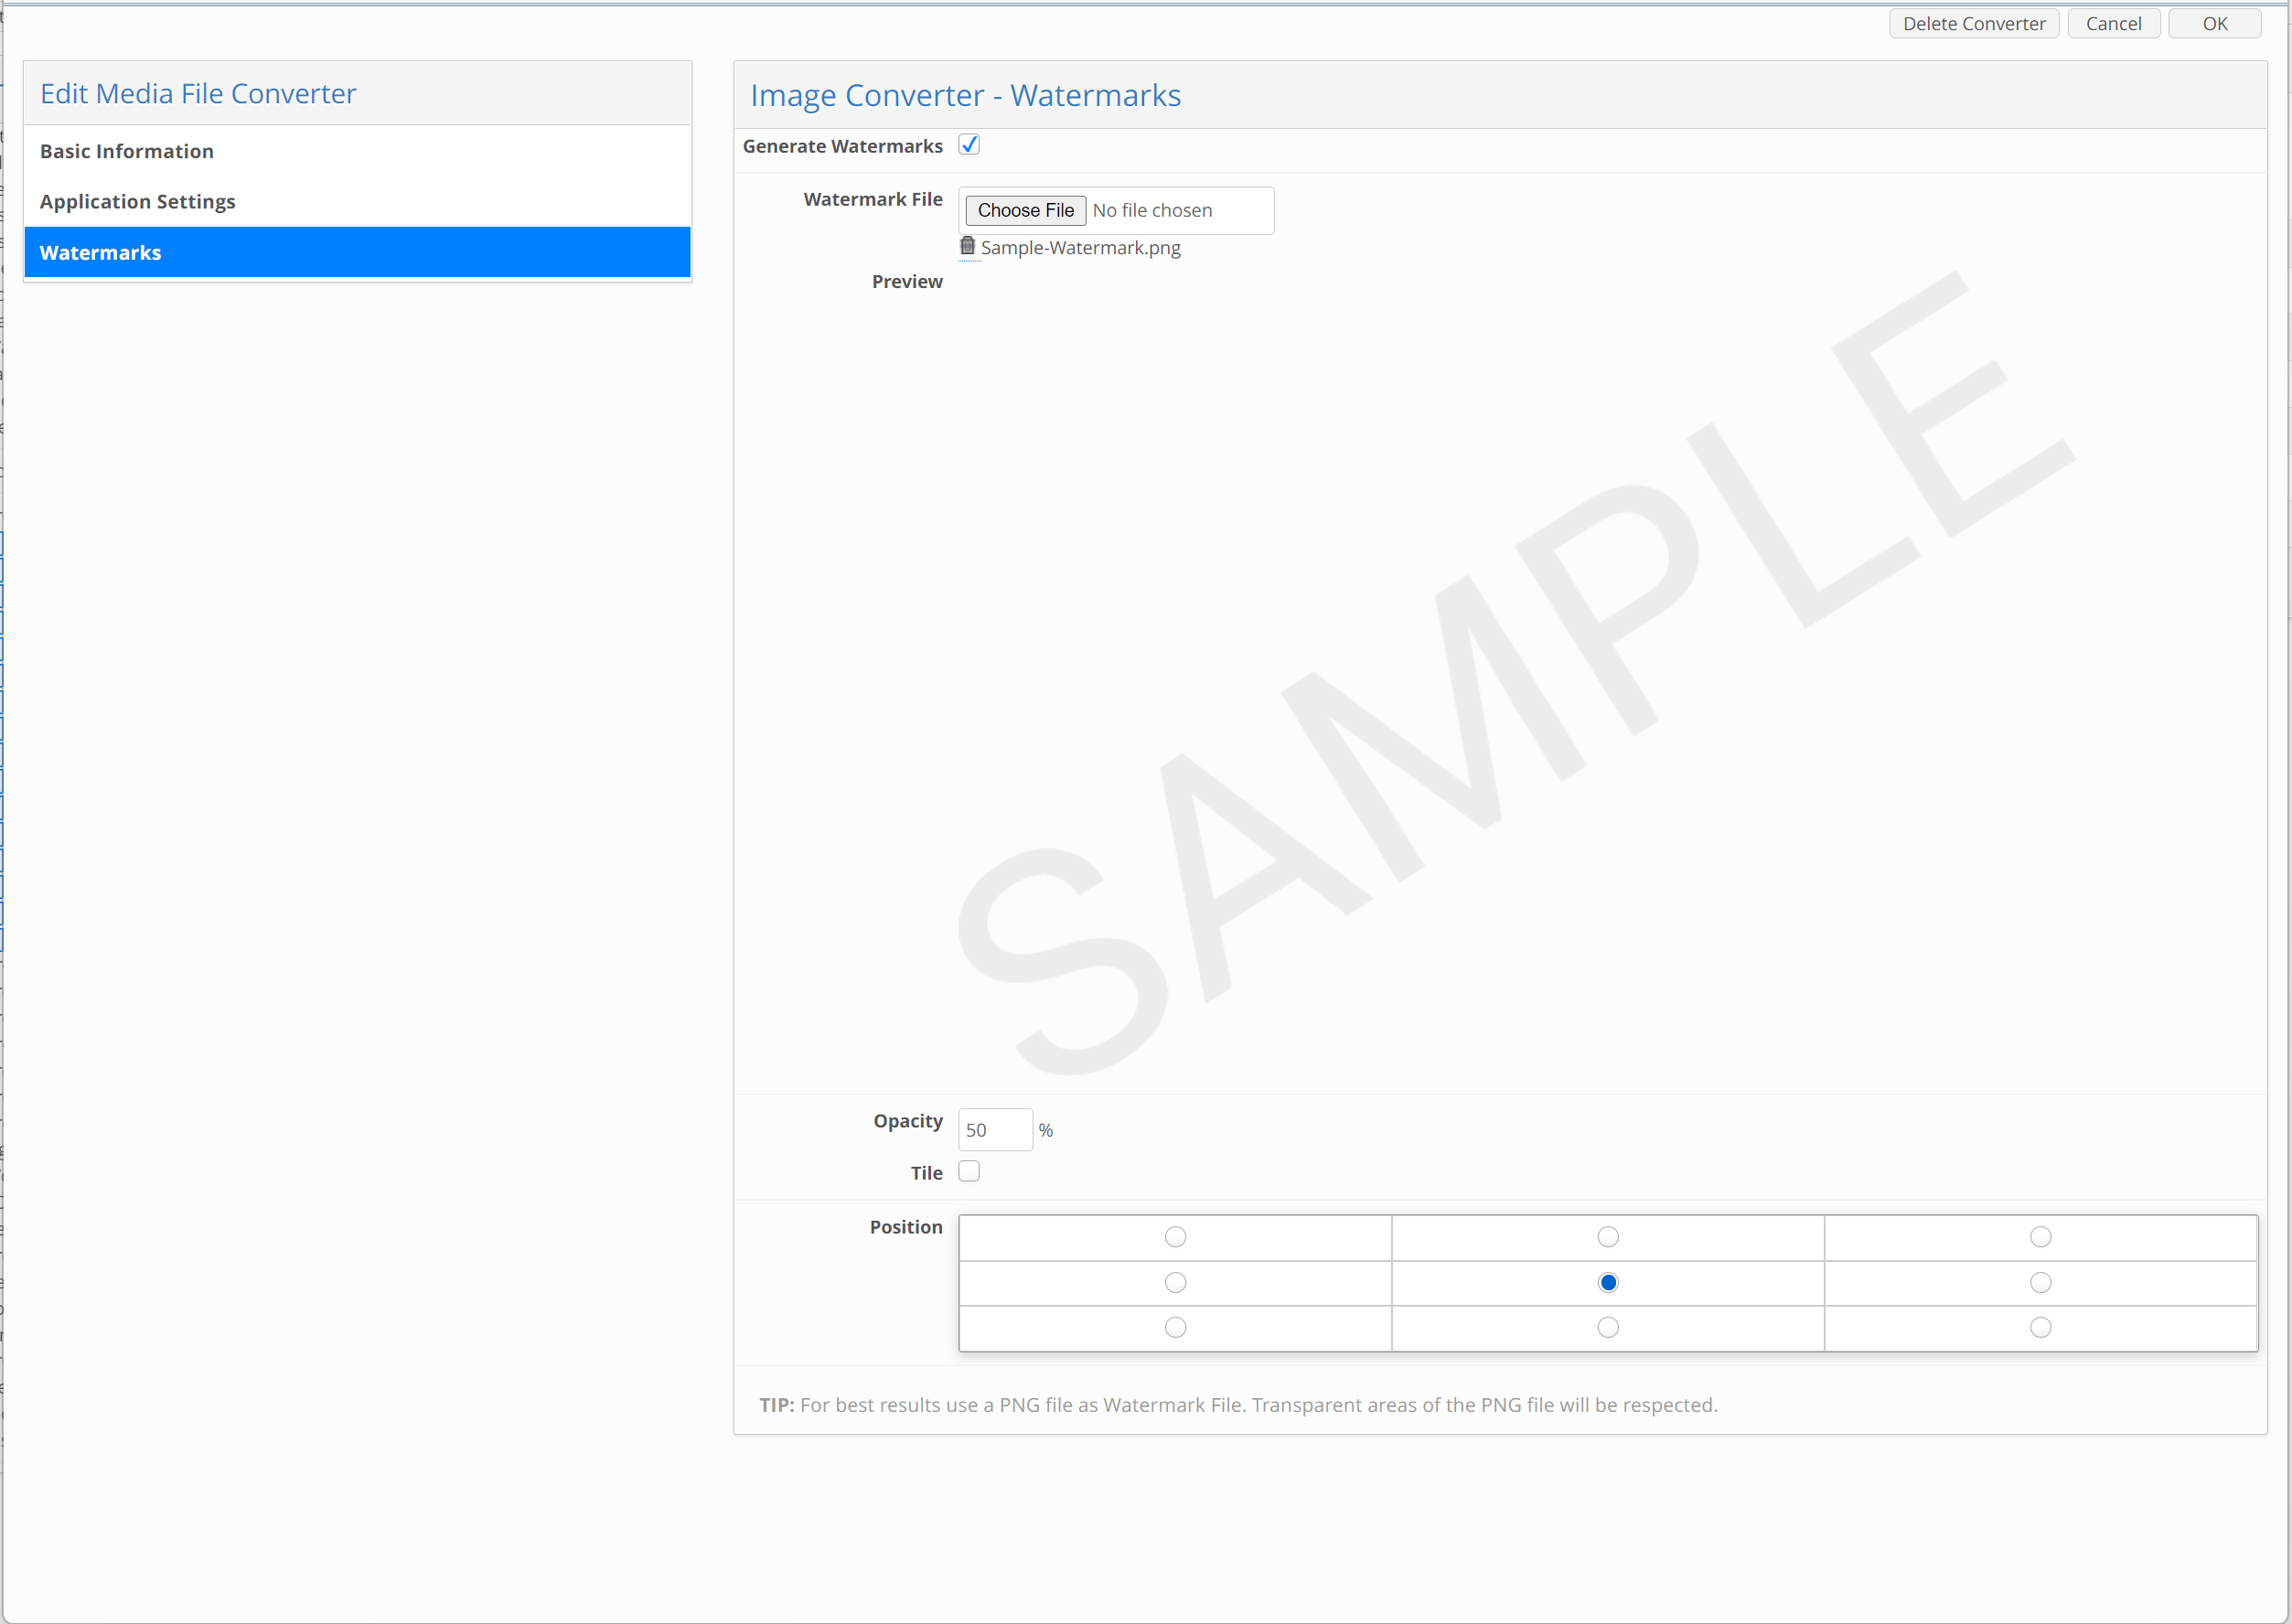
A watermark is a “stamp” or logos embedded to the preview files.
This functionality only works for image converters and can be activated on the “Watermark”-tab in the “Edit Media Converter”-window. User can enable the Watermark feature and upload the desired Watermark file (PNG-file is recommended). Watermark file is not scaled automatically, so it is necessary to prepare the file of the size which corresponds the size of preview produced by image converter.
Option | Meaning |
|---|---|
Generate Watermark | This checkbox activates the functionality |
Watermark file | Watermark image file should be uploaded to this field |
Opacity | Defines the watermark’s transparency (0% is completely transparent, 100% is opaque). |
Tile | Watermark image can be tiled all over the preview area |
Position | If “Tile”-option is disabled, the position of the watermark could be defined by this option. |
Remember, adding Watermarks to preview is only applicable to image files (converters). Watermarks cannot be configured and applied to Video, swf and Copy File converters.
The watermark is only applied to the output file of the converter, not the original.
Convertible image files
Below follows the list of image file extensions that can be converted in our system. The first list represents the list of image file input formats that are supported in our system, the second lists image output formats to which the files can be converted.
List of image input formats supported in our system:
.jpg | .tif | .gif | .psd | .png |
.bmp | .eps | .ps | .ai | |
.arw | .cr2 | .nef | .dcr | .crw |
.dng | .mrw | .orf | .pef | .raf |
.x3f | .3fr | .fff | .webp | .svg |
.heic | .heif | .eip | .jp2 | .jxl |
List of image output formats supported in our system:
.jpg | .gif | .png | .ps | |
.tif | .psd | .bmp | .eps | .webp |
.heic | .heif | .jp2 | .jxl |
|
Note: naming of converted from PDF to image files will have dynamic format, depending on amount of pages in input file
Example 1:
Input file - "test.pdf". Amount of pages is 1 or only first page will be converted
Output file - "test.jpeg"
Example 2:
Input file - "test.pdf". Amount of pages < 10
Output files - "test-1.jpeg", "test-2.jpeg",... "test-9.jpeg"
Example 3
Input file - "test.pdf". Amount of pages >=10 and < 100
Output files - "test-01.jpeg", "test-02.jpeg",... "test-99.jpeg"
Example 4:
Input file - "test.pdf". Amount of pages >=100 and < 1000
Output files - "test-001.jpeg", "test-002.jpeg",... "test-999.jpeg"