Where to Edit a Workflow
Edit Workflow actions are available on the same screens described in View Workflows: the Workflow Overview and the Workflow Status View. Navigate to these screens the same way, then use the actions below to enable, disable, or manage transitions.
Enabling and Disabling a Workflow
From the Workflow Overview, workflows are grouped into two tabs: Enabled and Disabled.
The Disabled tab lists active modules that have at least one Status field configured in the module's Field Definitions, where that workflow has not yet been made active. Once enabled, the workflow moves to the Enabled tab and becomes active for that module. This is available in both Diagram view and List view - a workflow can be enabled or disabled from either view.
To enable a workflow, open the Disabled tab, open Workflow Settings for the workflow, and set its state to enabled. To disable a workflow, open the Enabled tab, open Workflow Settings, and set its state to disabled.
For further information on enabling a workflow, refer to Configuring a Workflow.
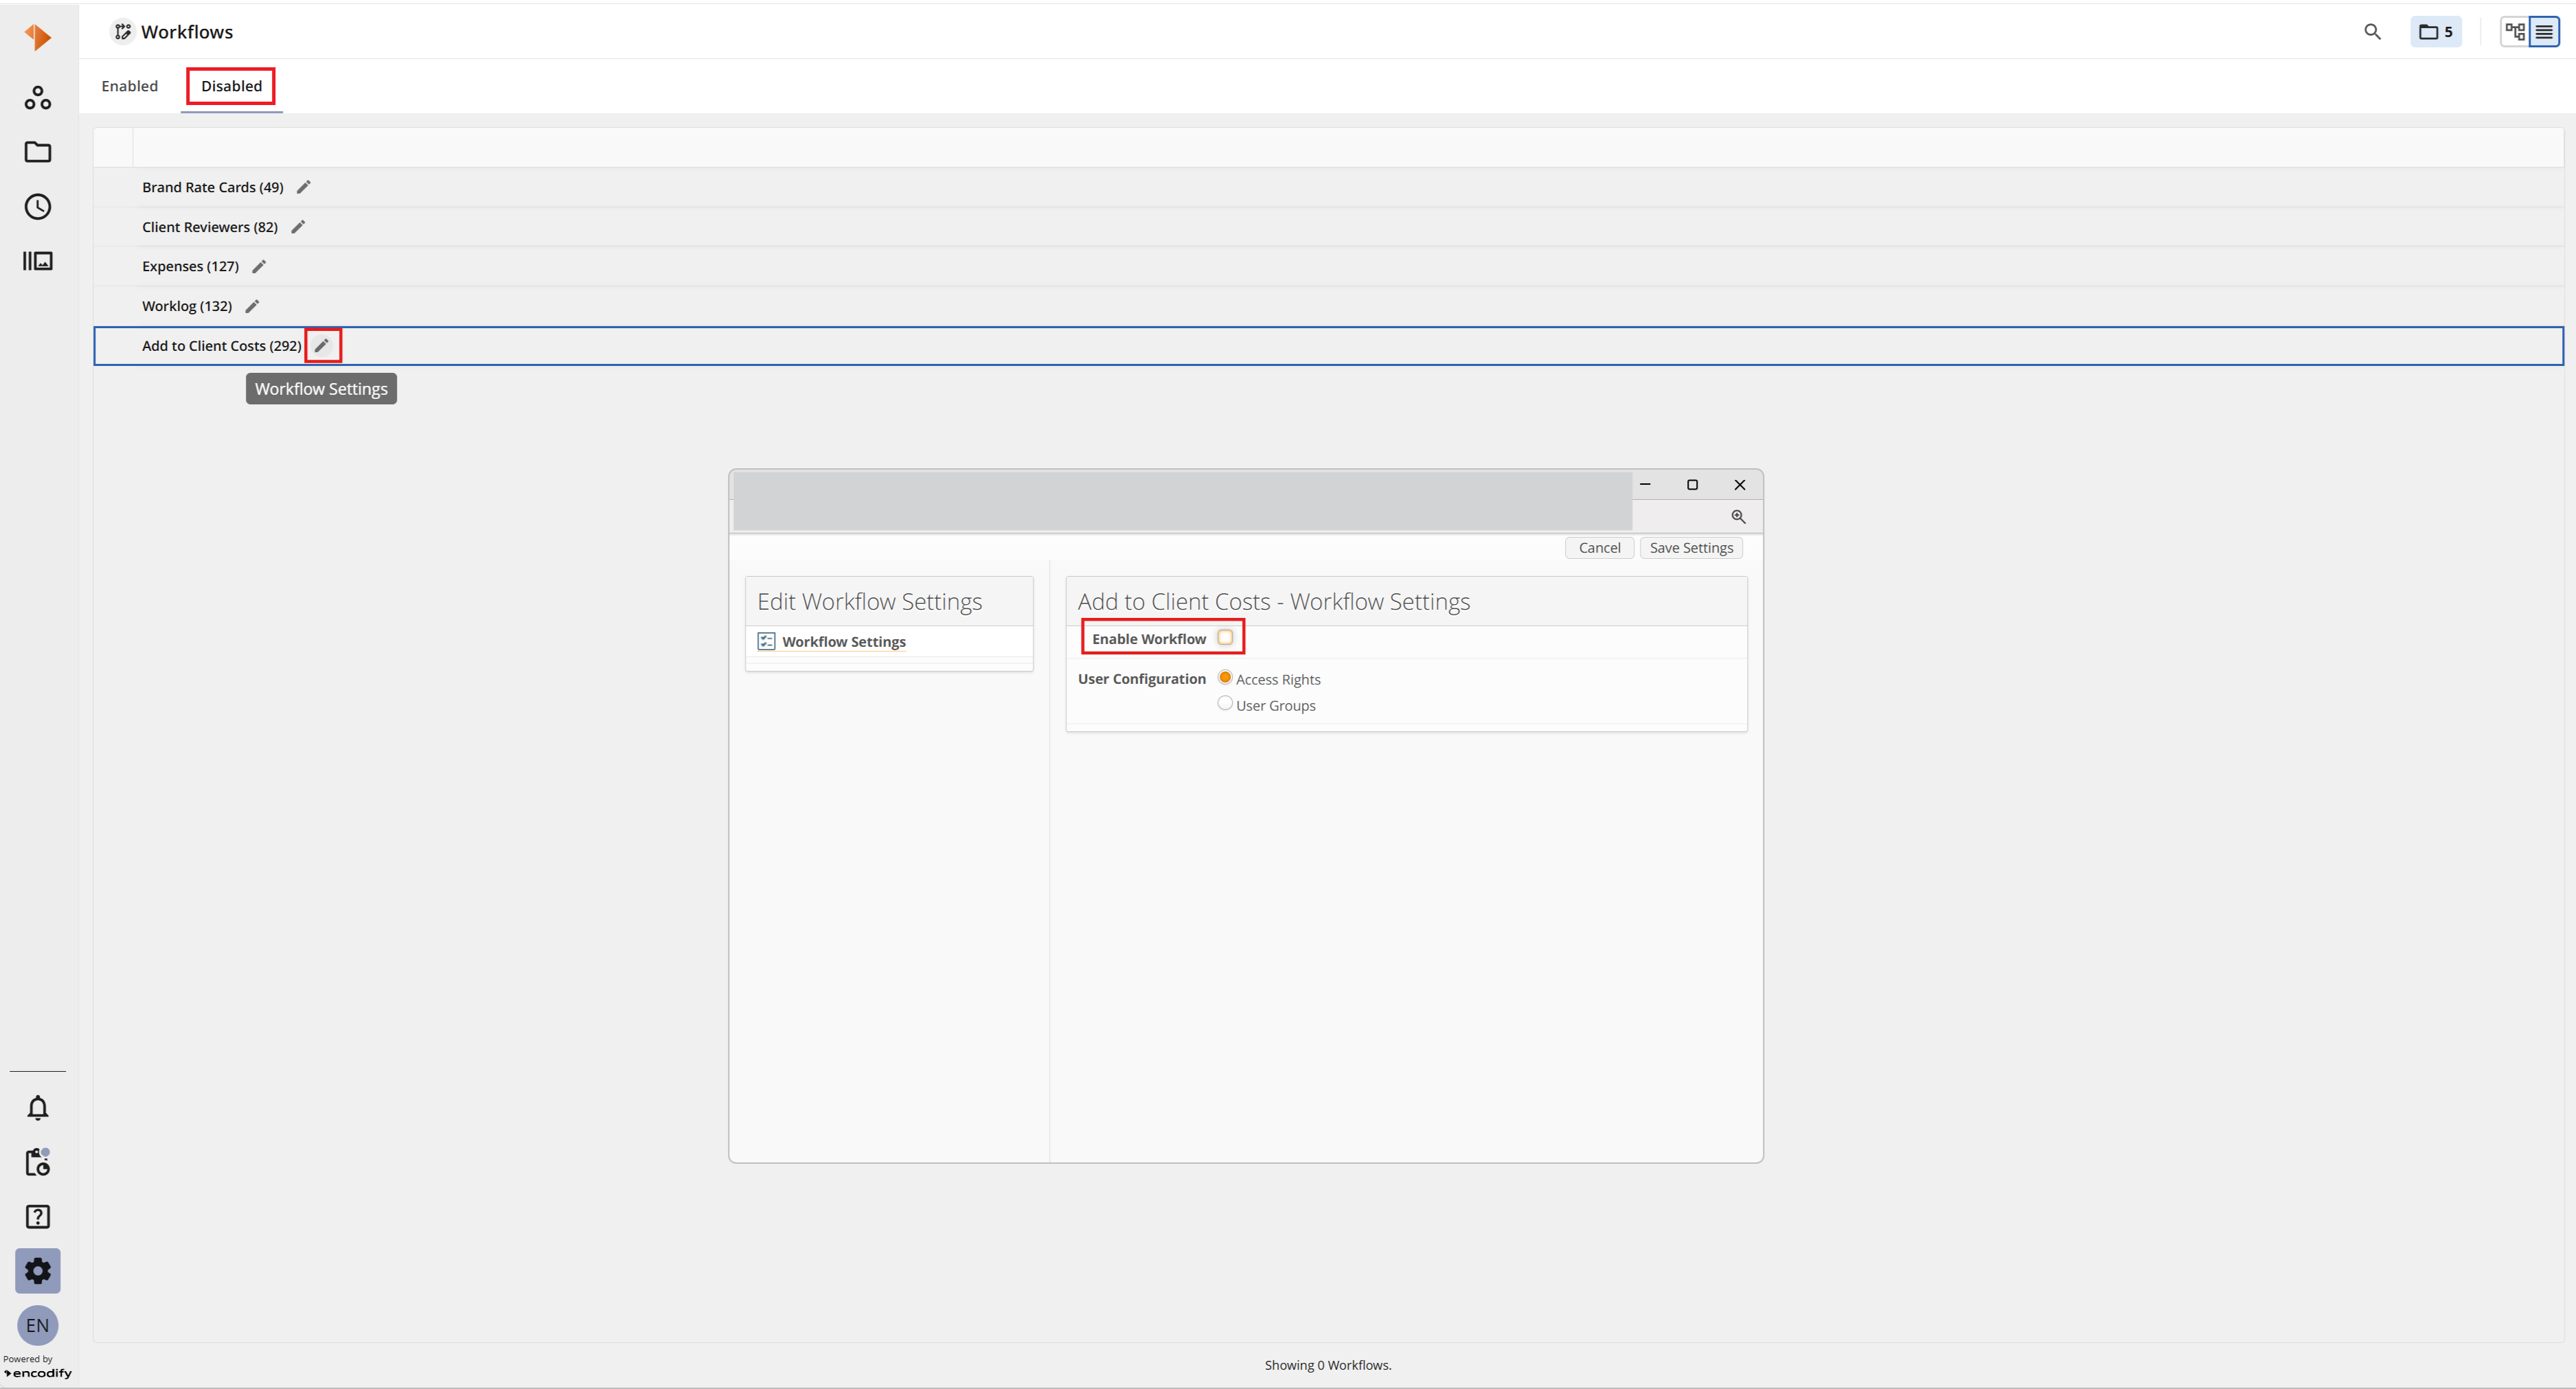
An image highlighting disabled workflows with Edit Workflow Settings window open in List view
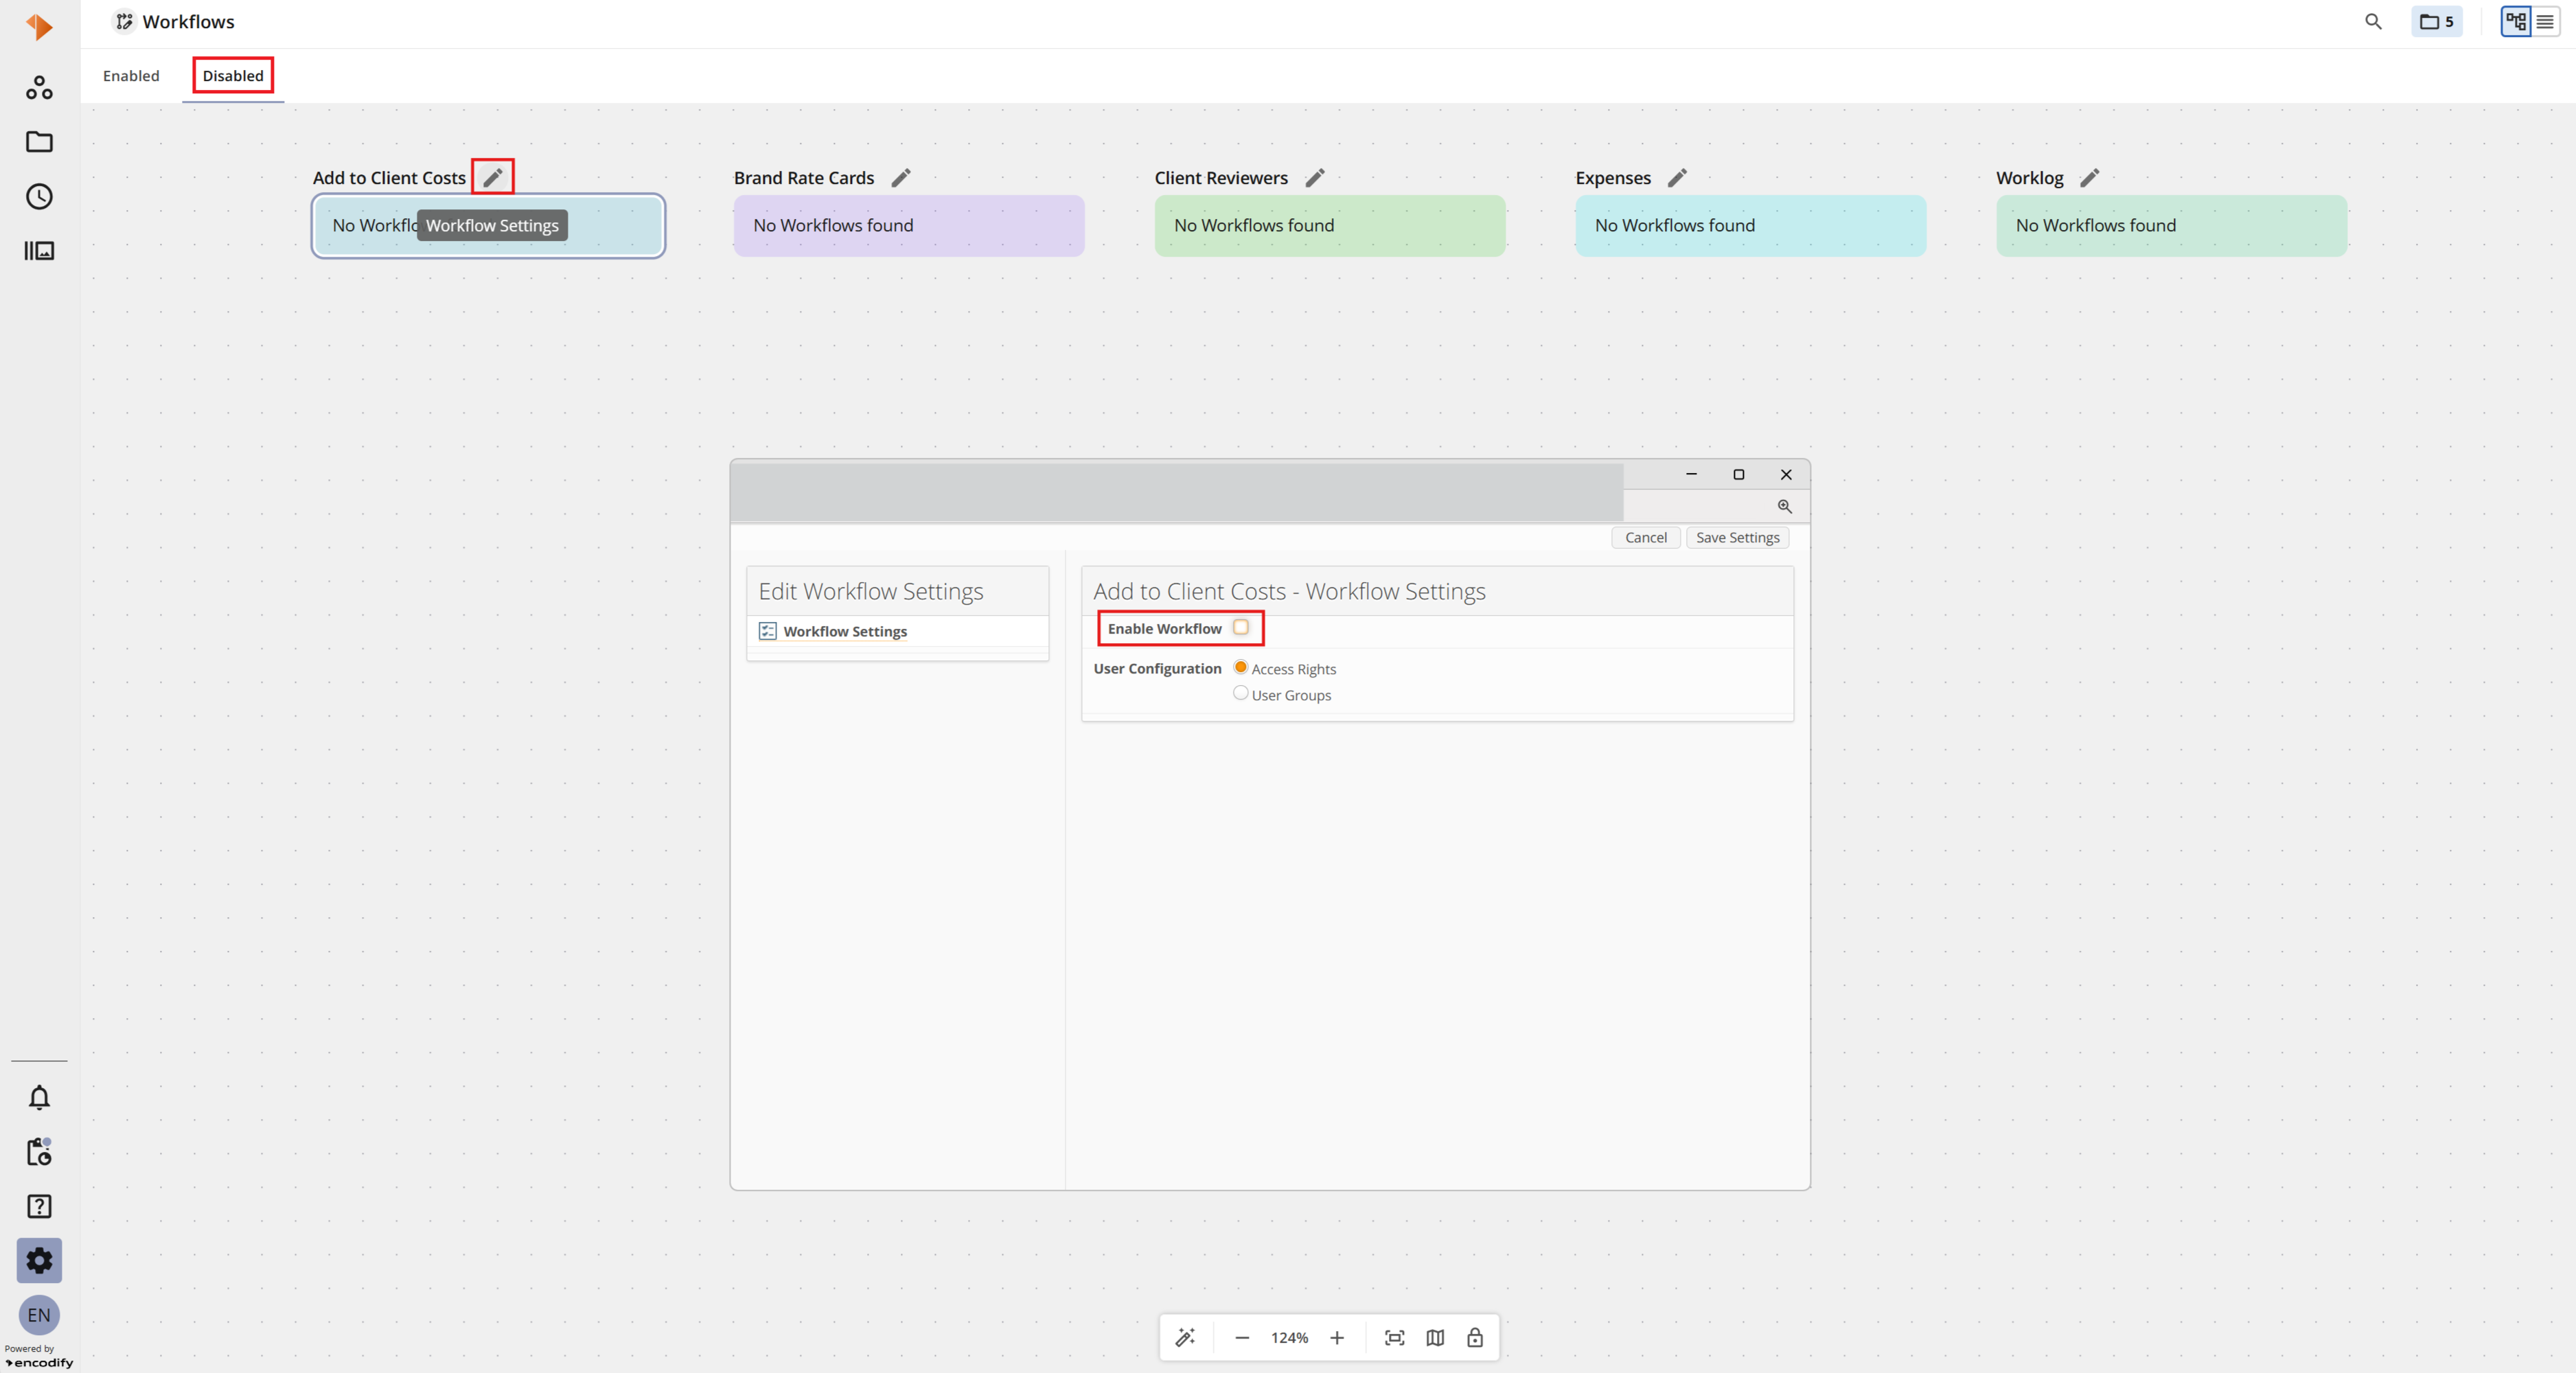
An image displaying disabled workflows with Edit Workflow Settings window open in Diagram view
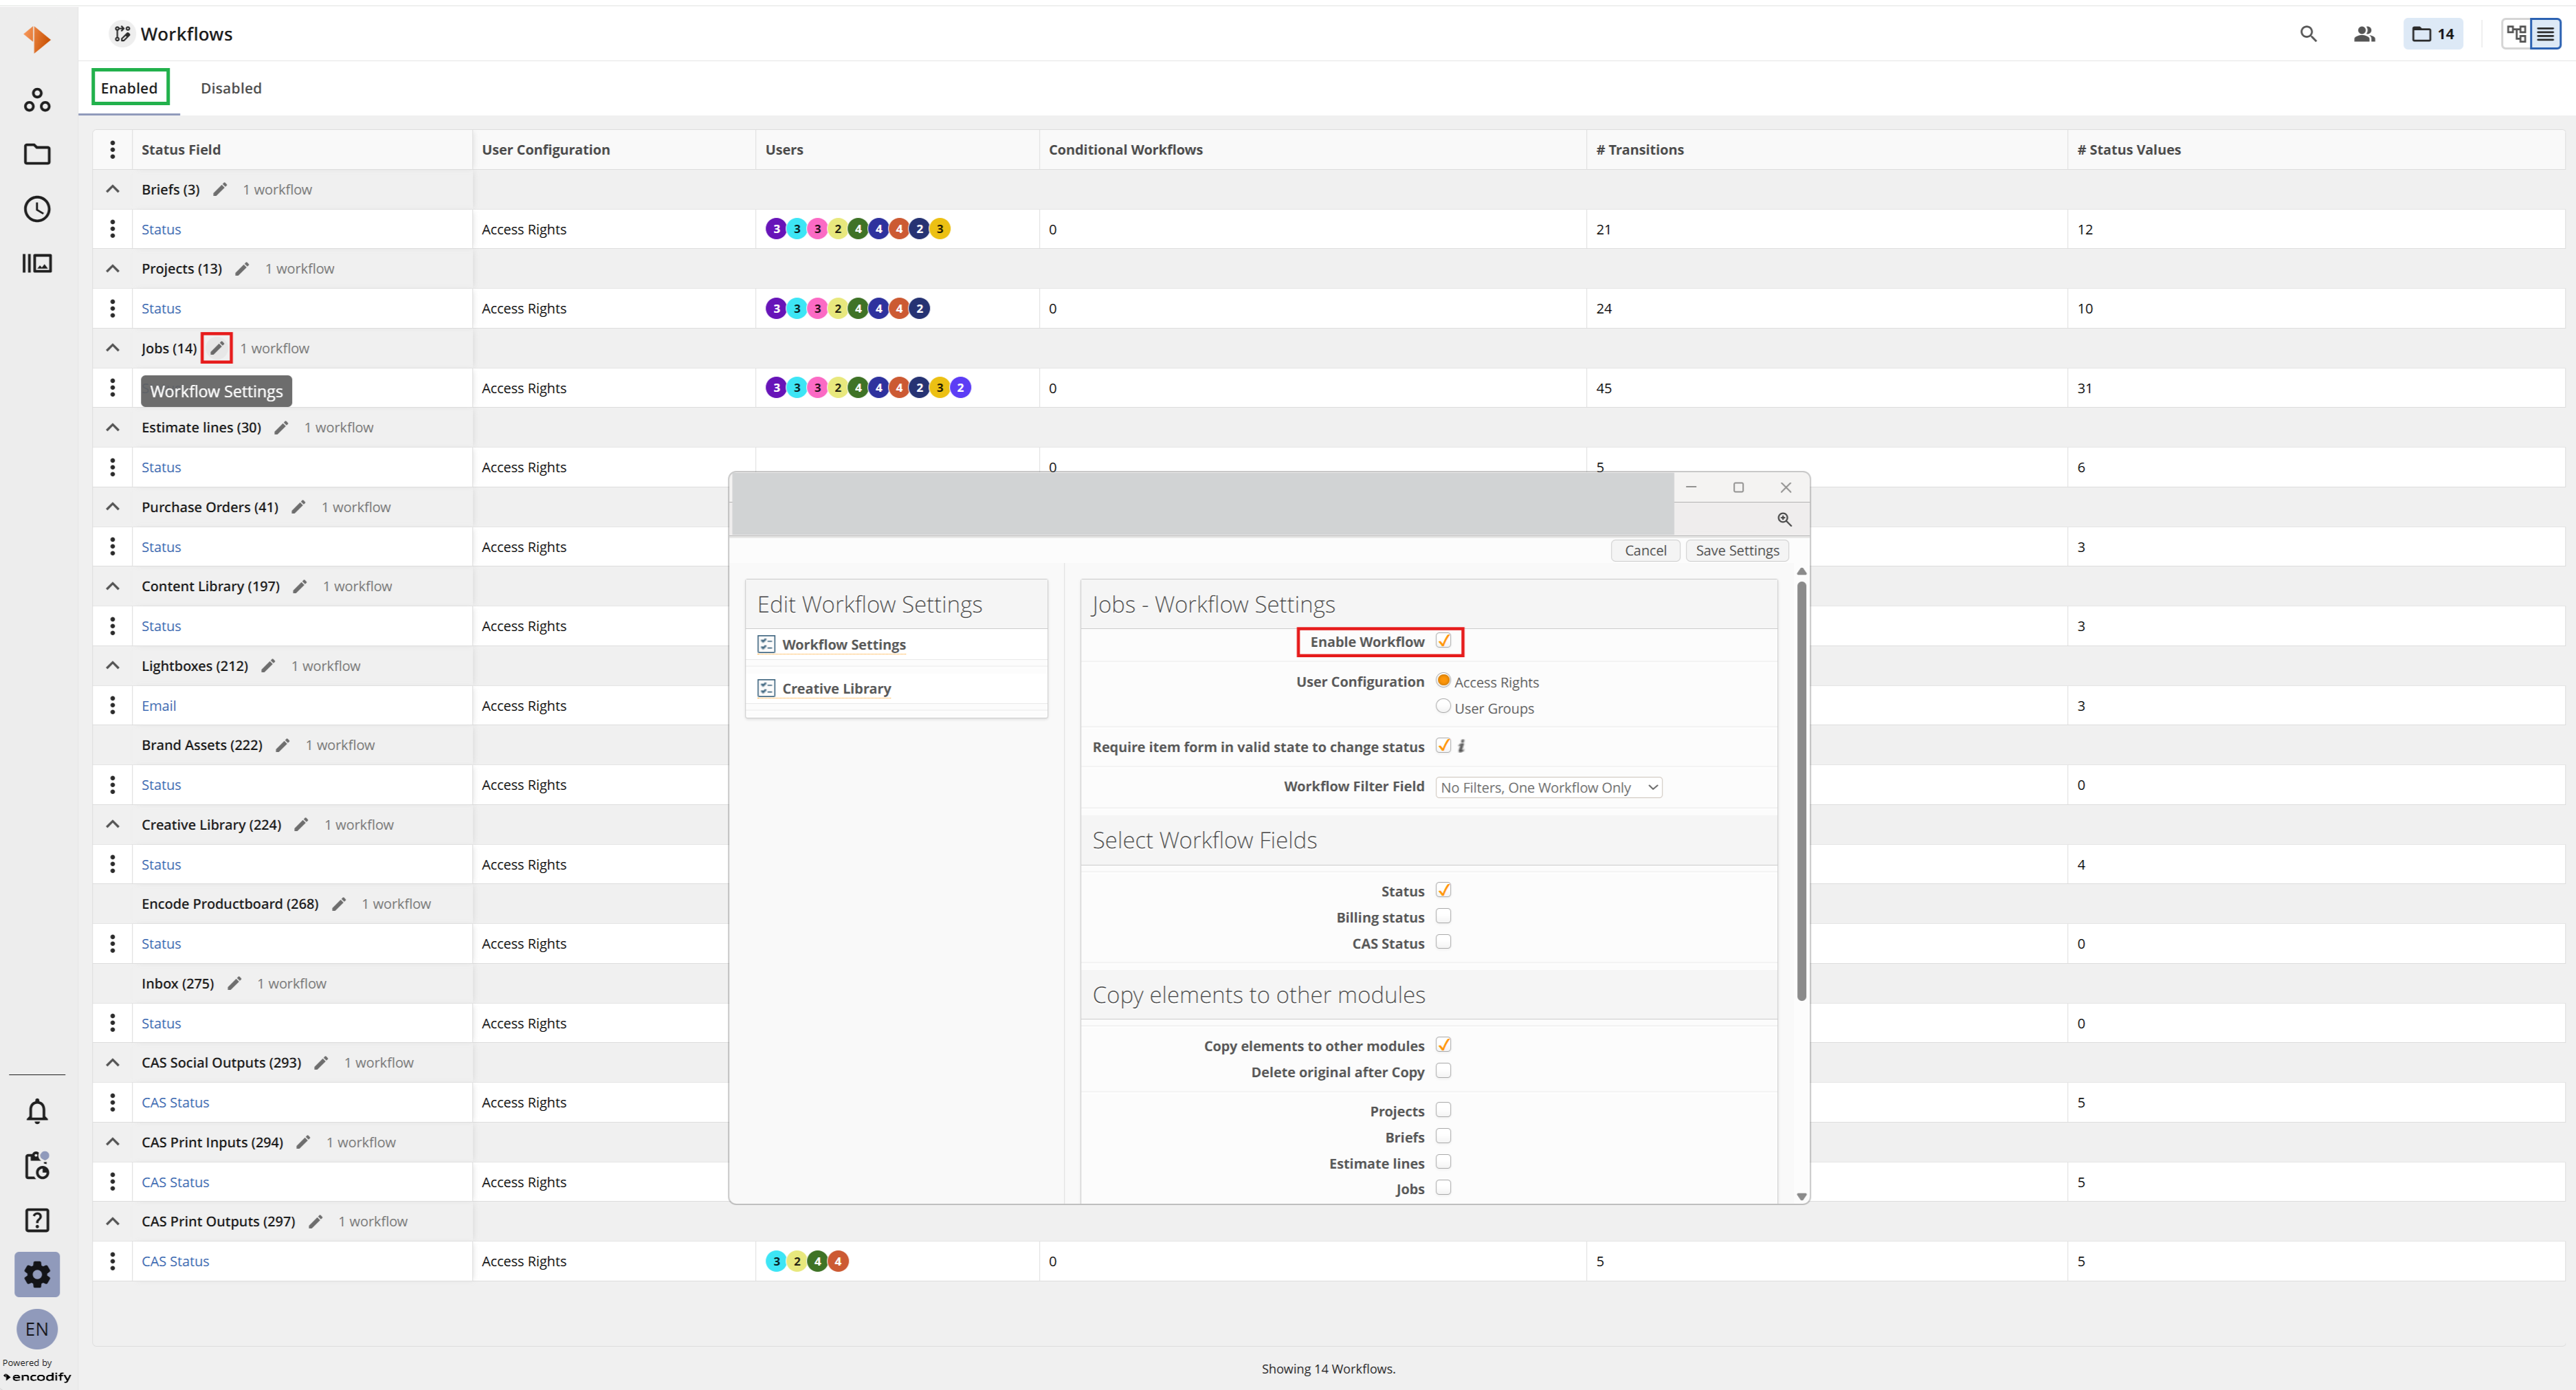
An image highlighting enabled workflows with Edit Workflow Settings window open in List view
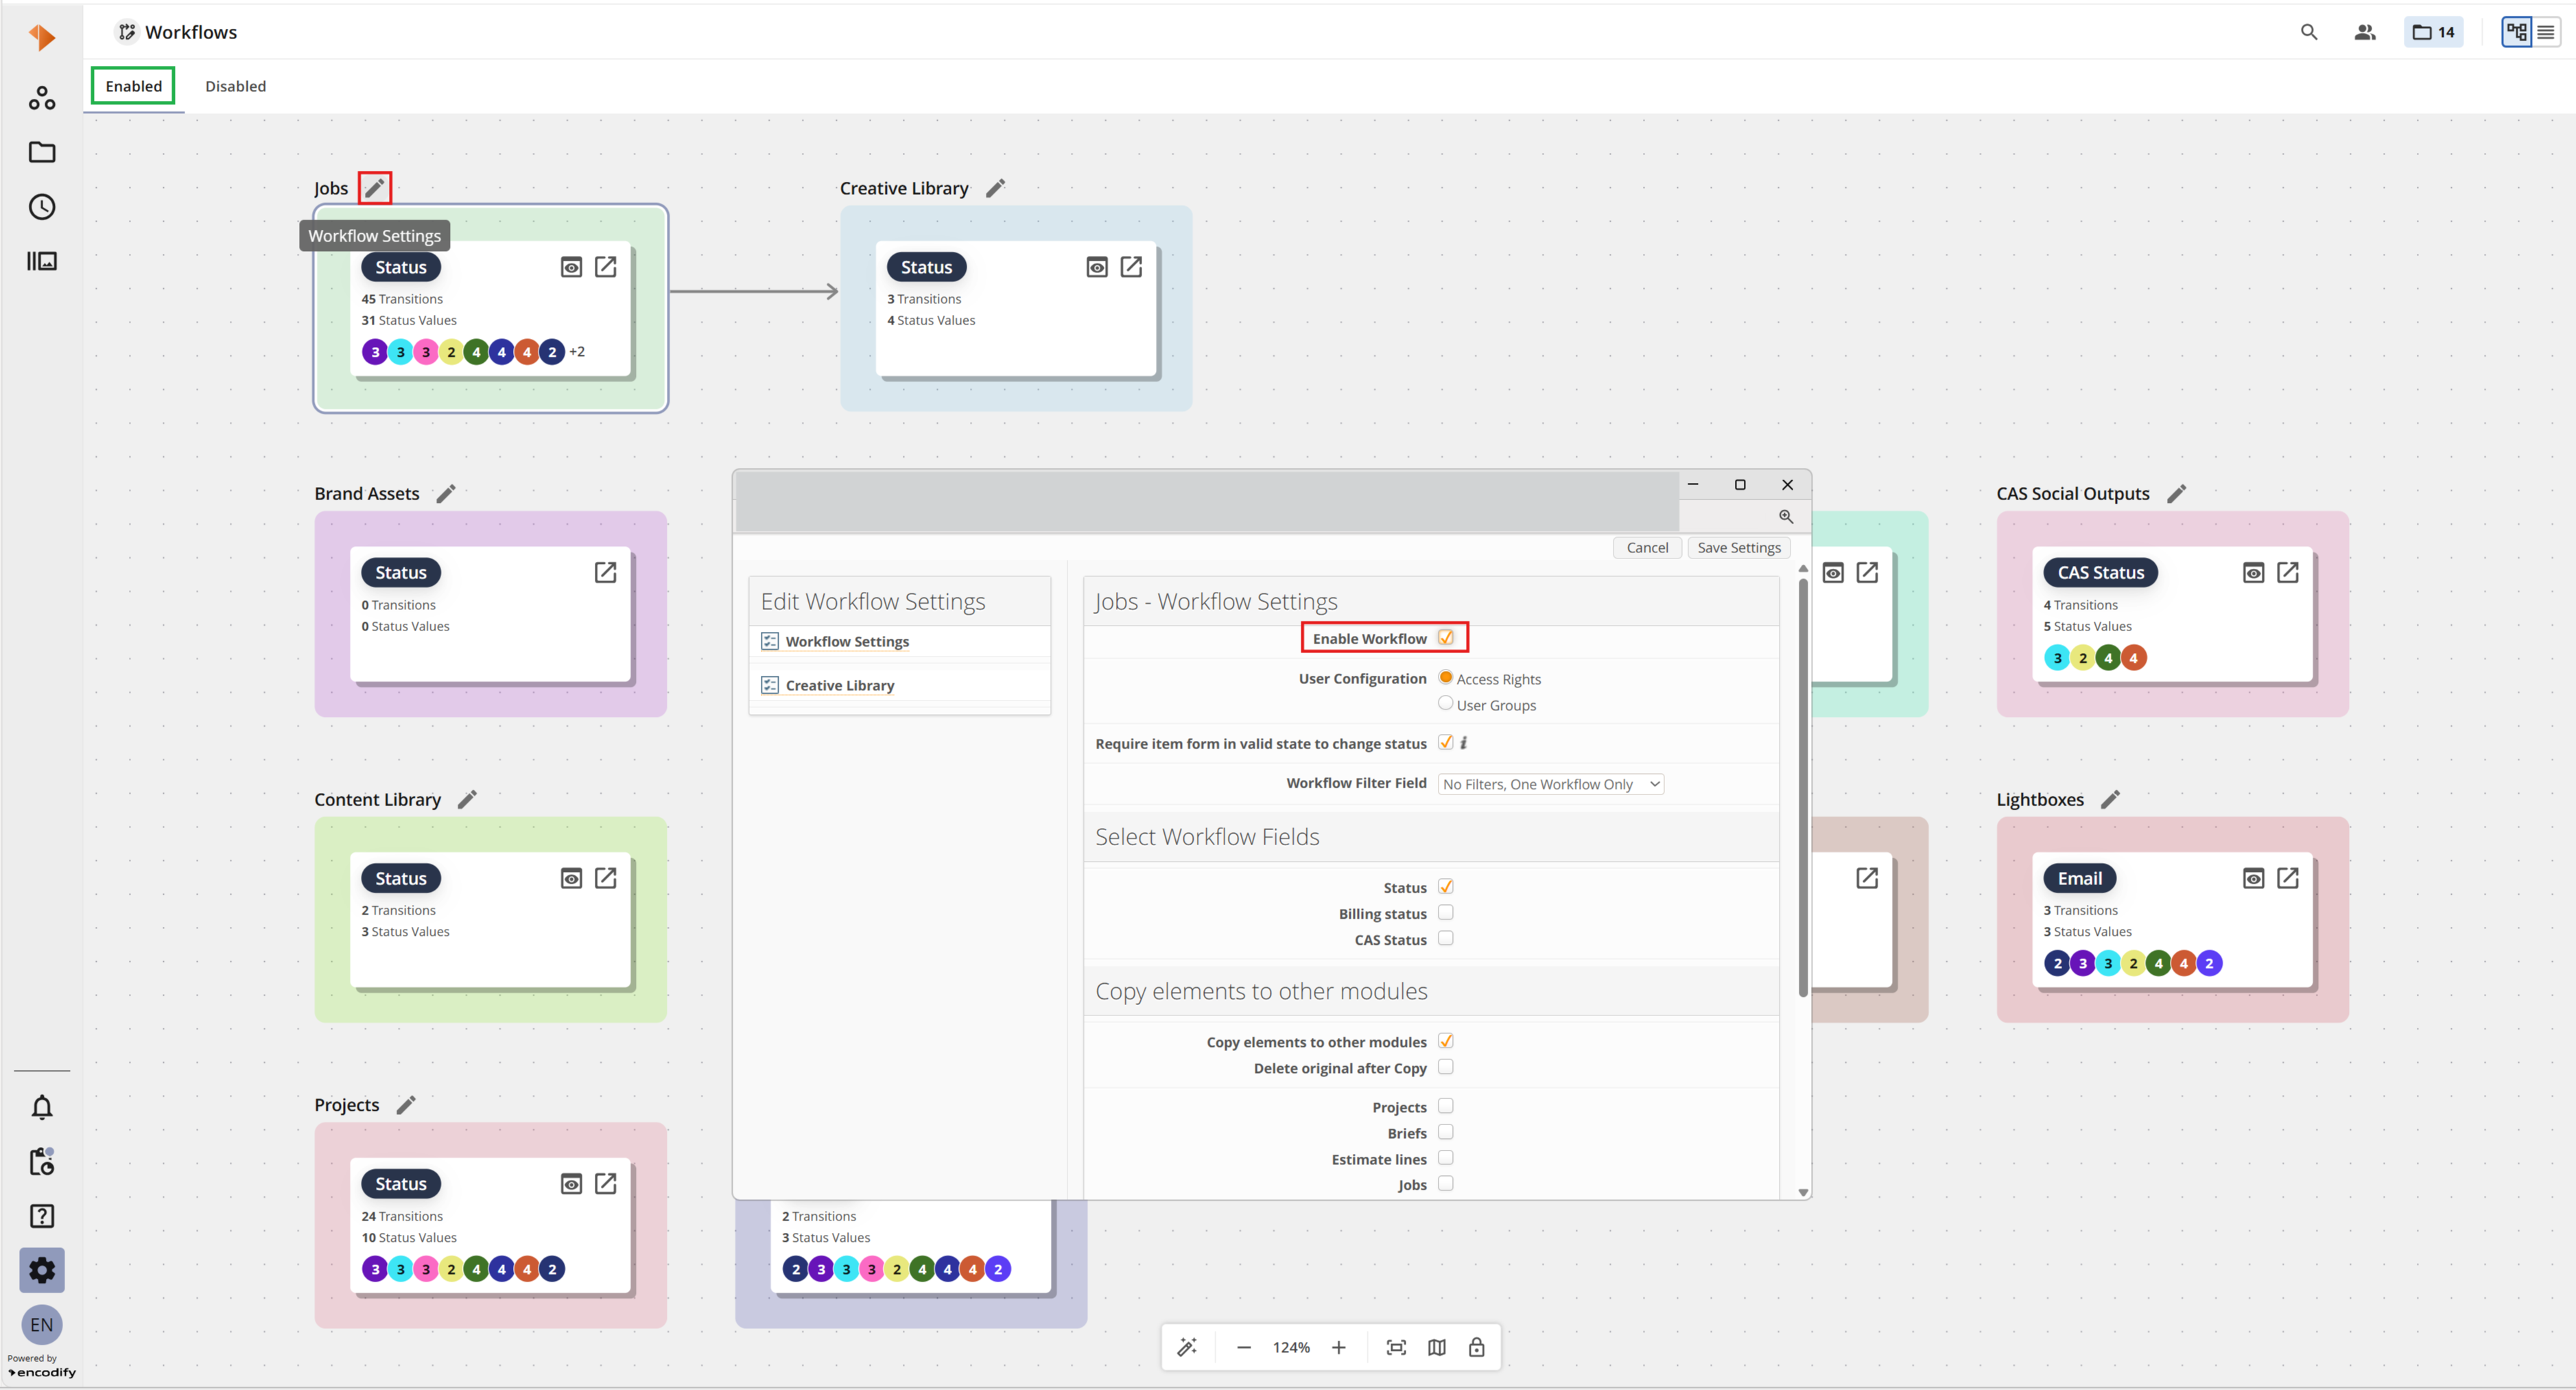
An image displaying enabled workflows with Edit Workflow Settings window open in Diagram view
Adding a New Transition
From the Workflow Status View, new transitions can be added using the Add Transition button. This opens the transition configuration window, where the source and target status values, transition label, and any associated actions, bulk change settings, reasons, comments, or access rights can be configured. For further information on configuring a workflow transition, refer to Configuring a Workflow.
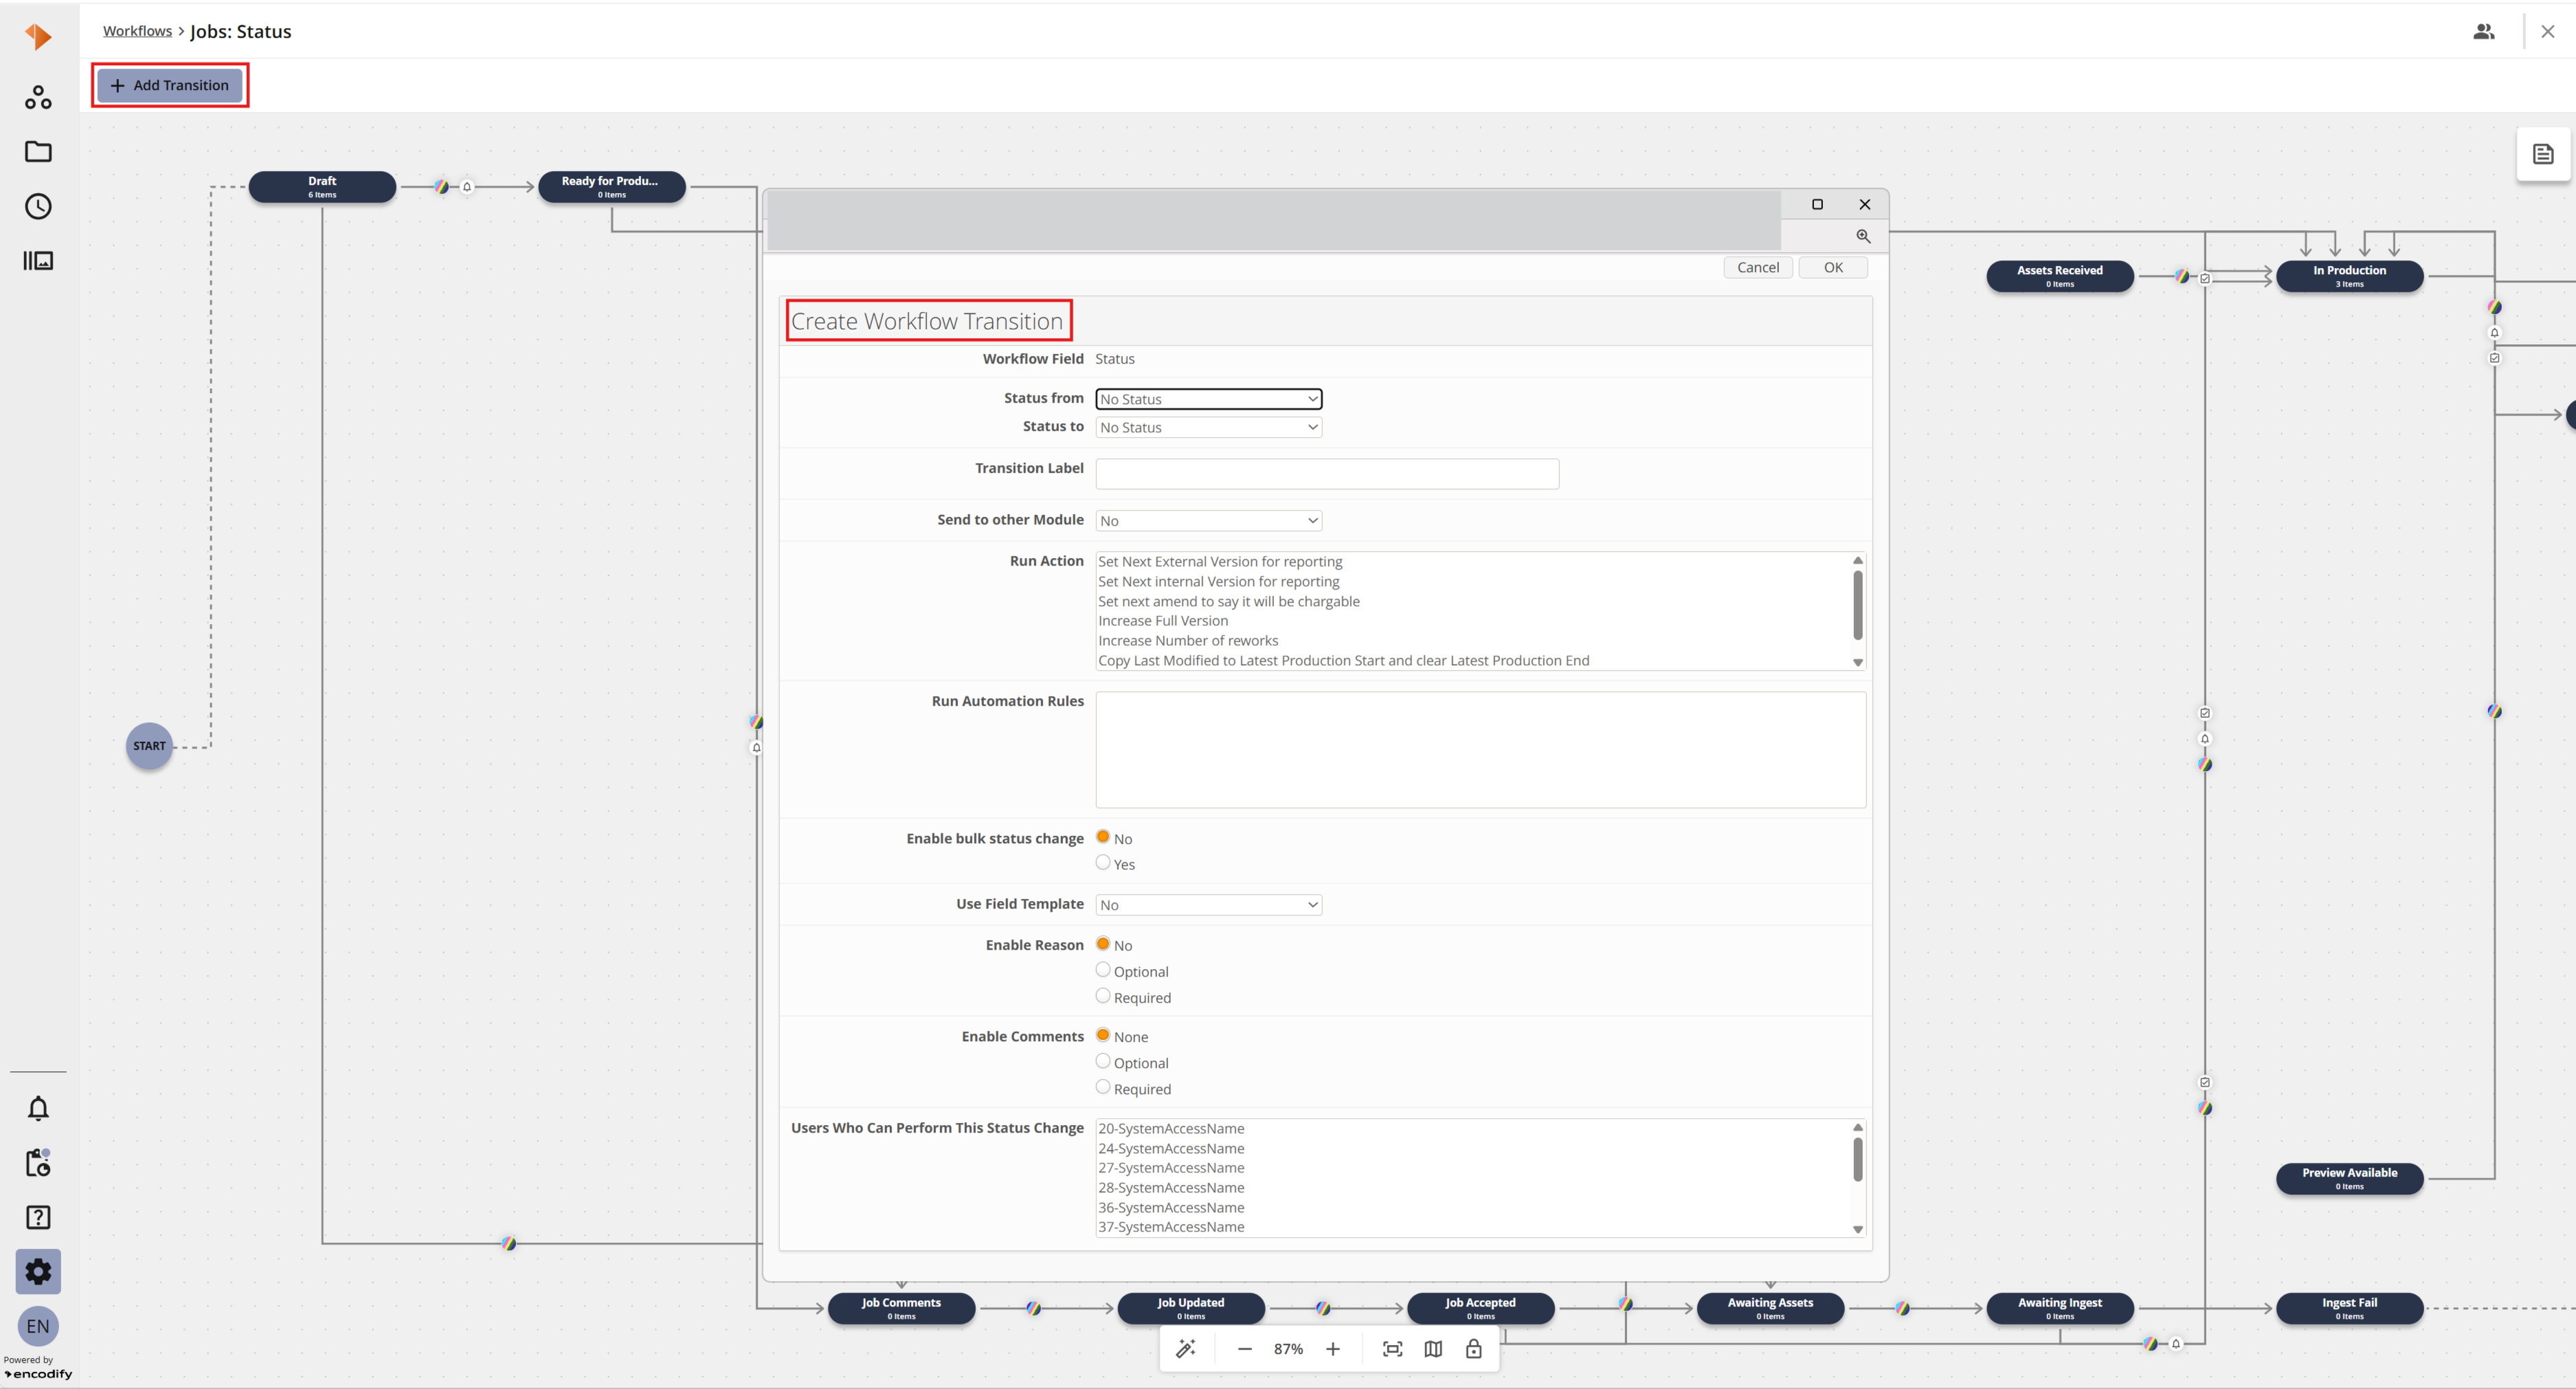
An image highlighting the 'Add Transition' button and Create Workflow Transition window in Workflow Status view (Diagram view)
.png)
An image highlighting the 'Add Transition' button and Create Workflow Transition window in Workflow Status view (List view)
Editing an Existing Transition
Clicking a transition line on the Workflow Status View opens the transition popup, showing a summary of that transition's configuration. Selecting the Edit icon opens the transition configuration window, where its settings can be updated, or the transition can be deleted.
For further information on the available transition settings, refer to Configuring a Workflow.
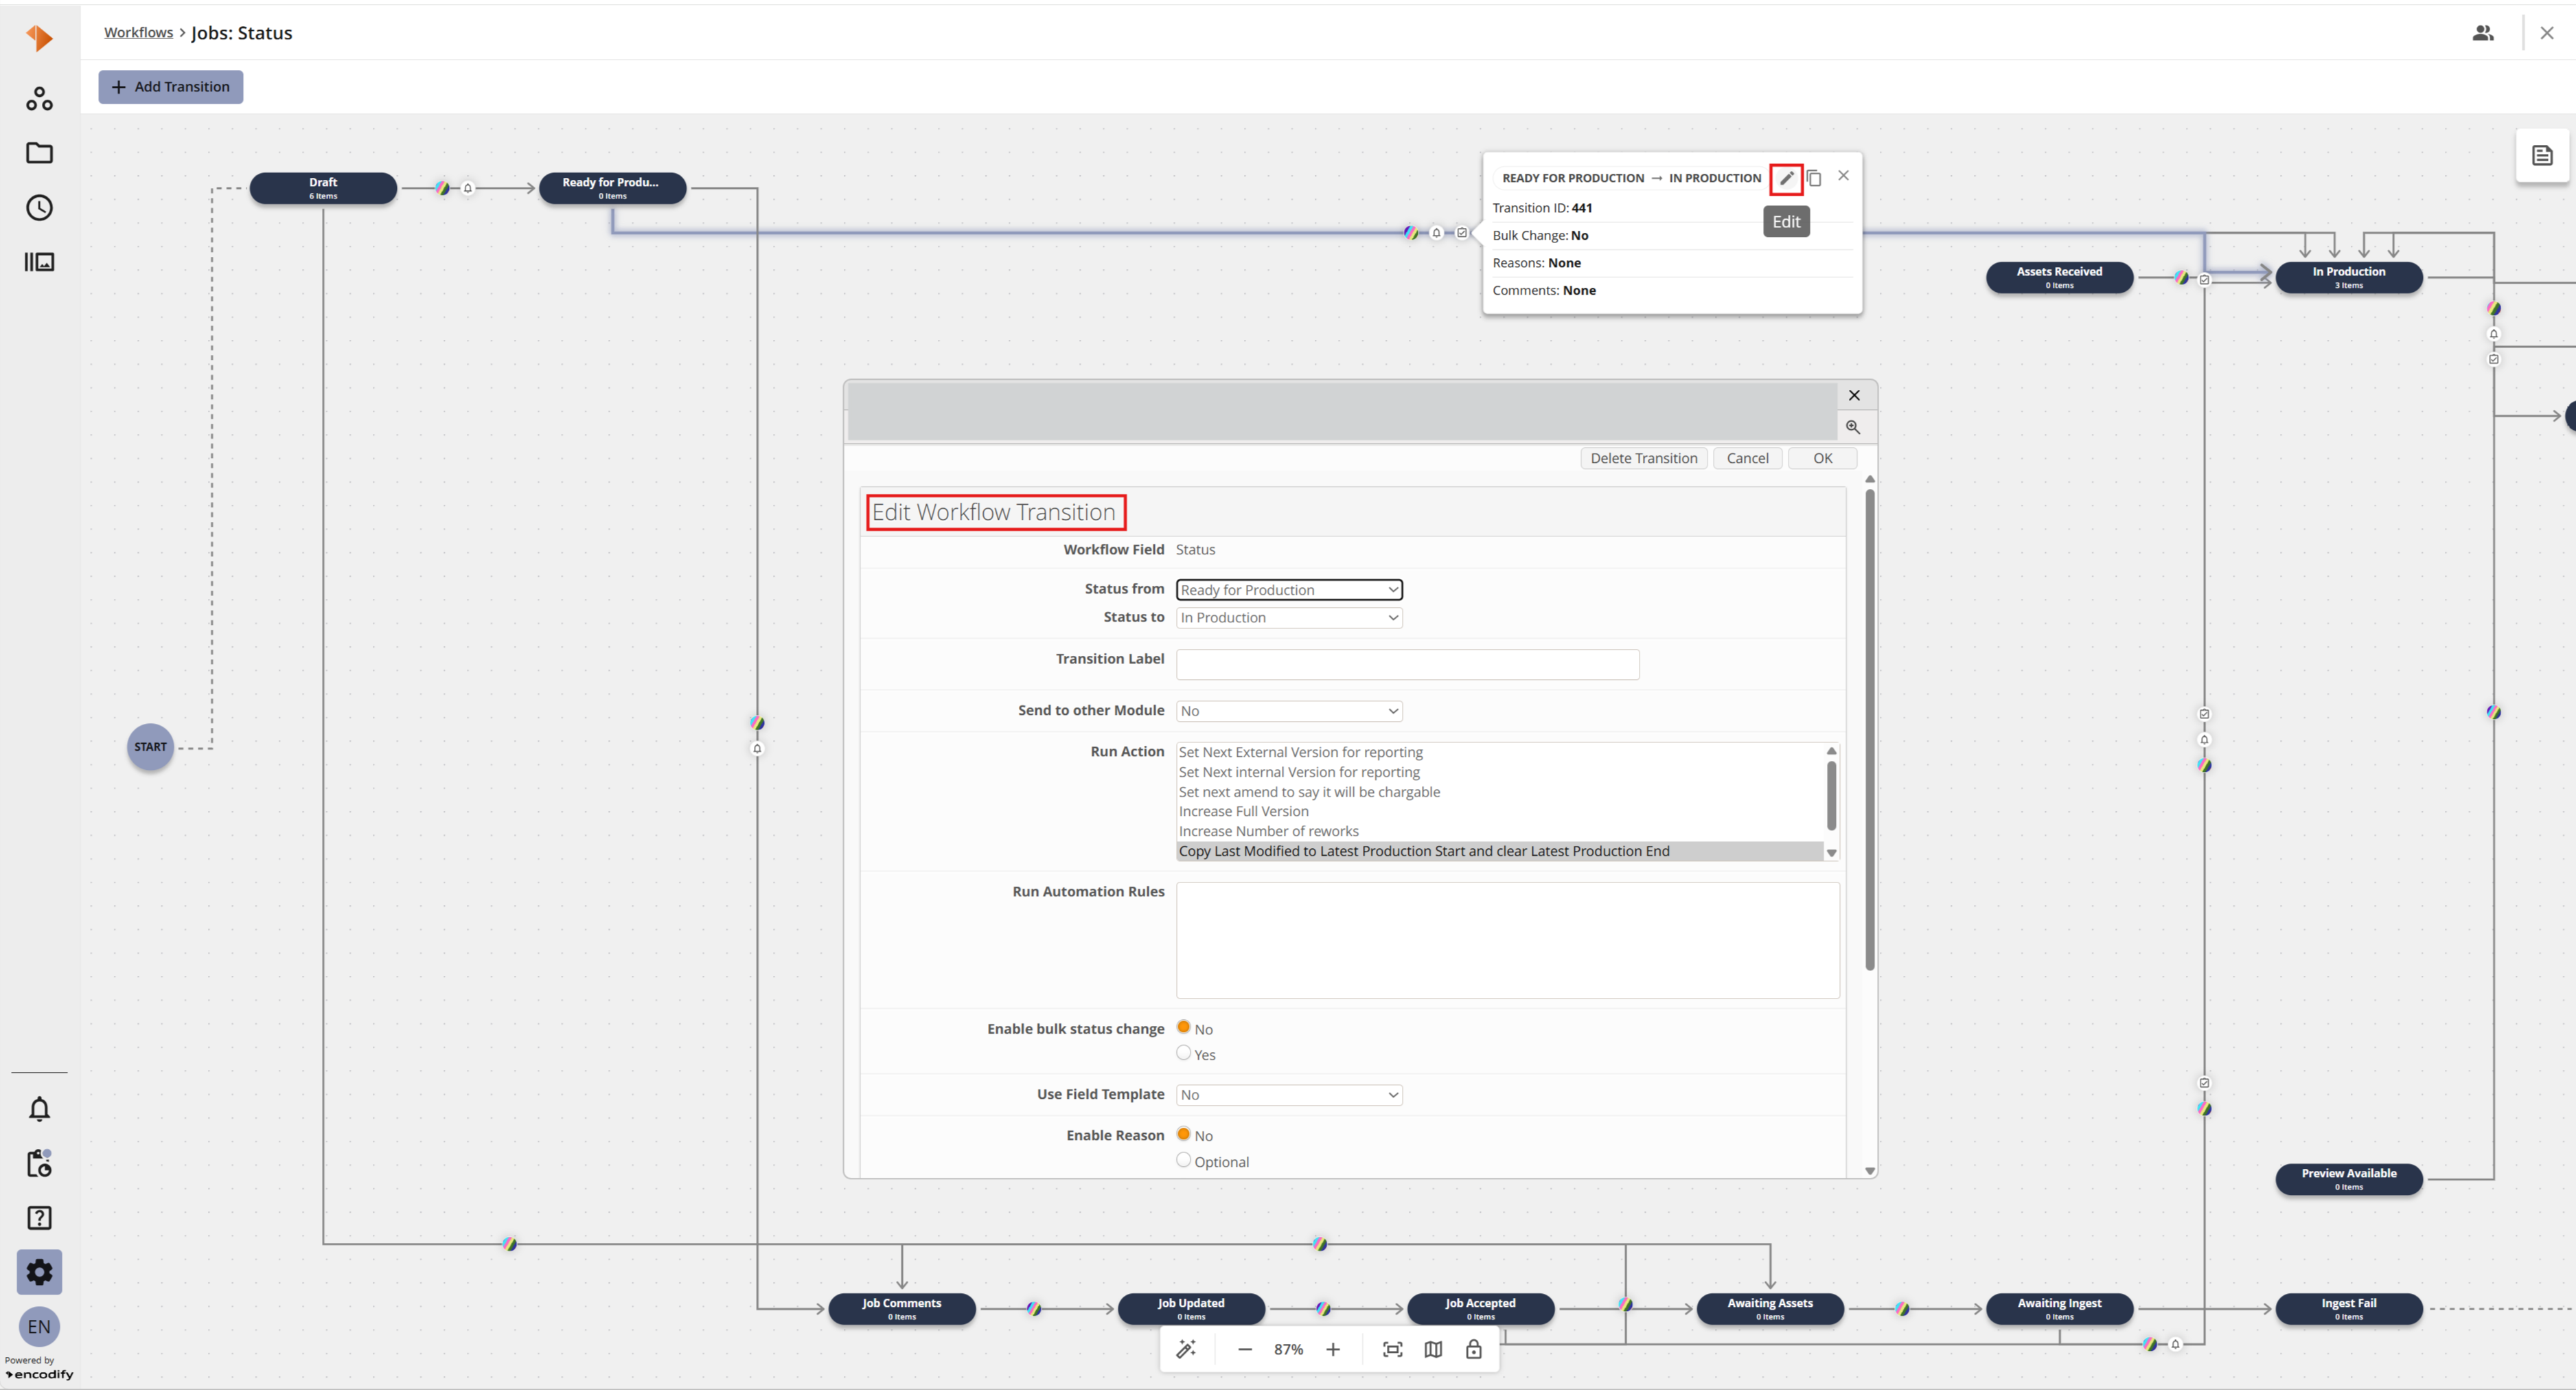
An image displaying the 'Edit' Workflow icon and Edit Workflow Transition window in Workflow Status view (Diagram view)
.png)
An image displaying the 'Edit' Workflow icon and Edit Workflow Transition window in Workflow Status view (List view)
Copying an Existing Transition
The Copy icon in the transition popup duplicates an existing transition. Selecting Copy opens a confirmation prompt, where the action can be cancelled or confirmed. Once confirmed, a new transition is created matching the source transition's configuration.
Known Limitation: After copying a transition in Diagram view, focus remains on the original transition rather than shifting to the newly created copy.
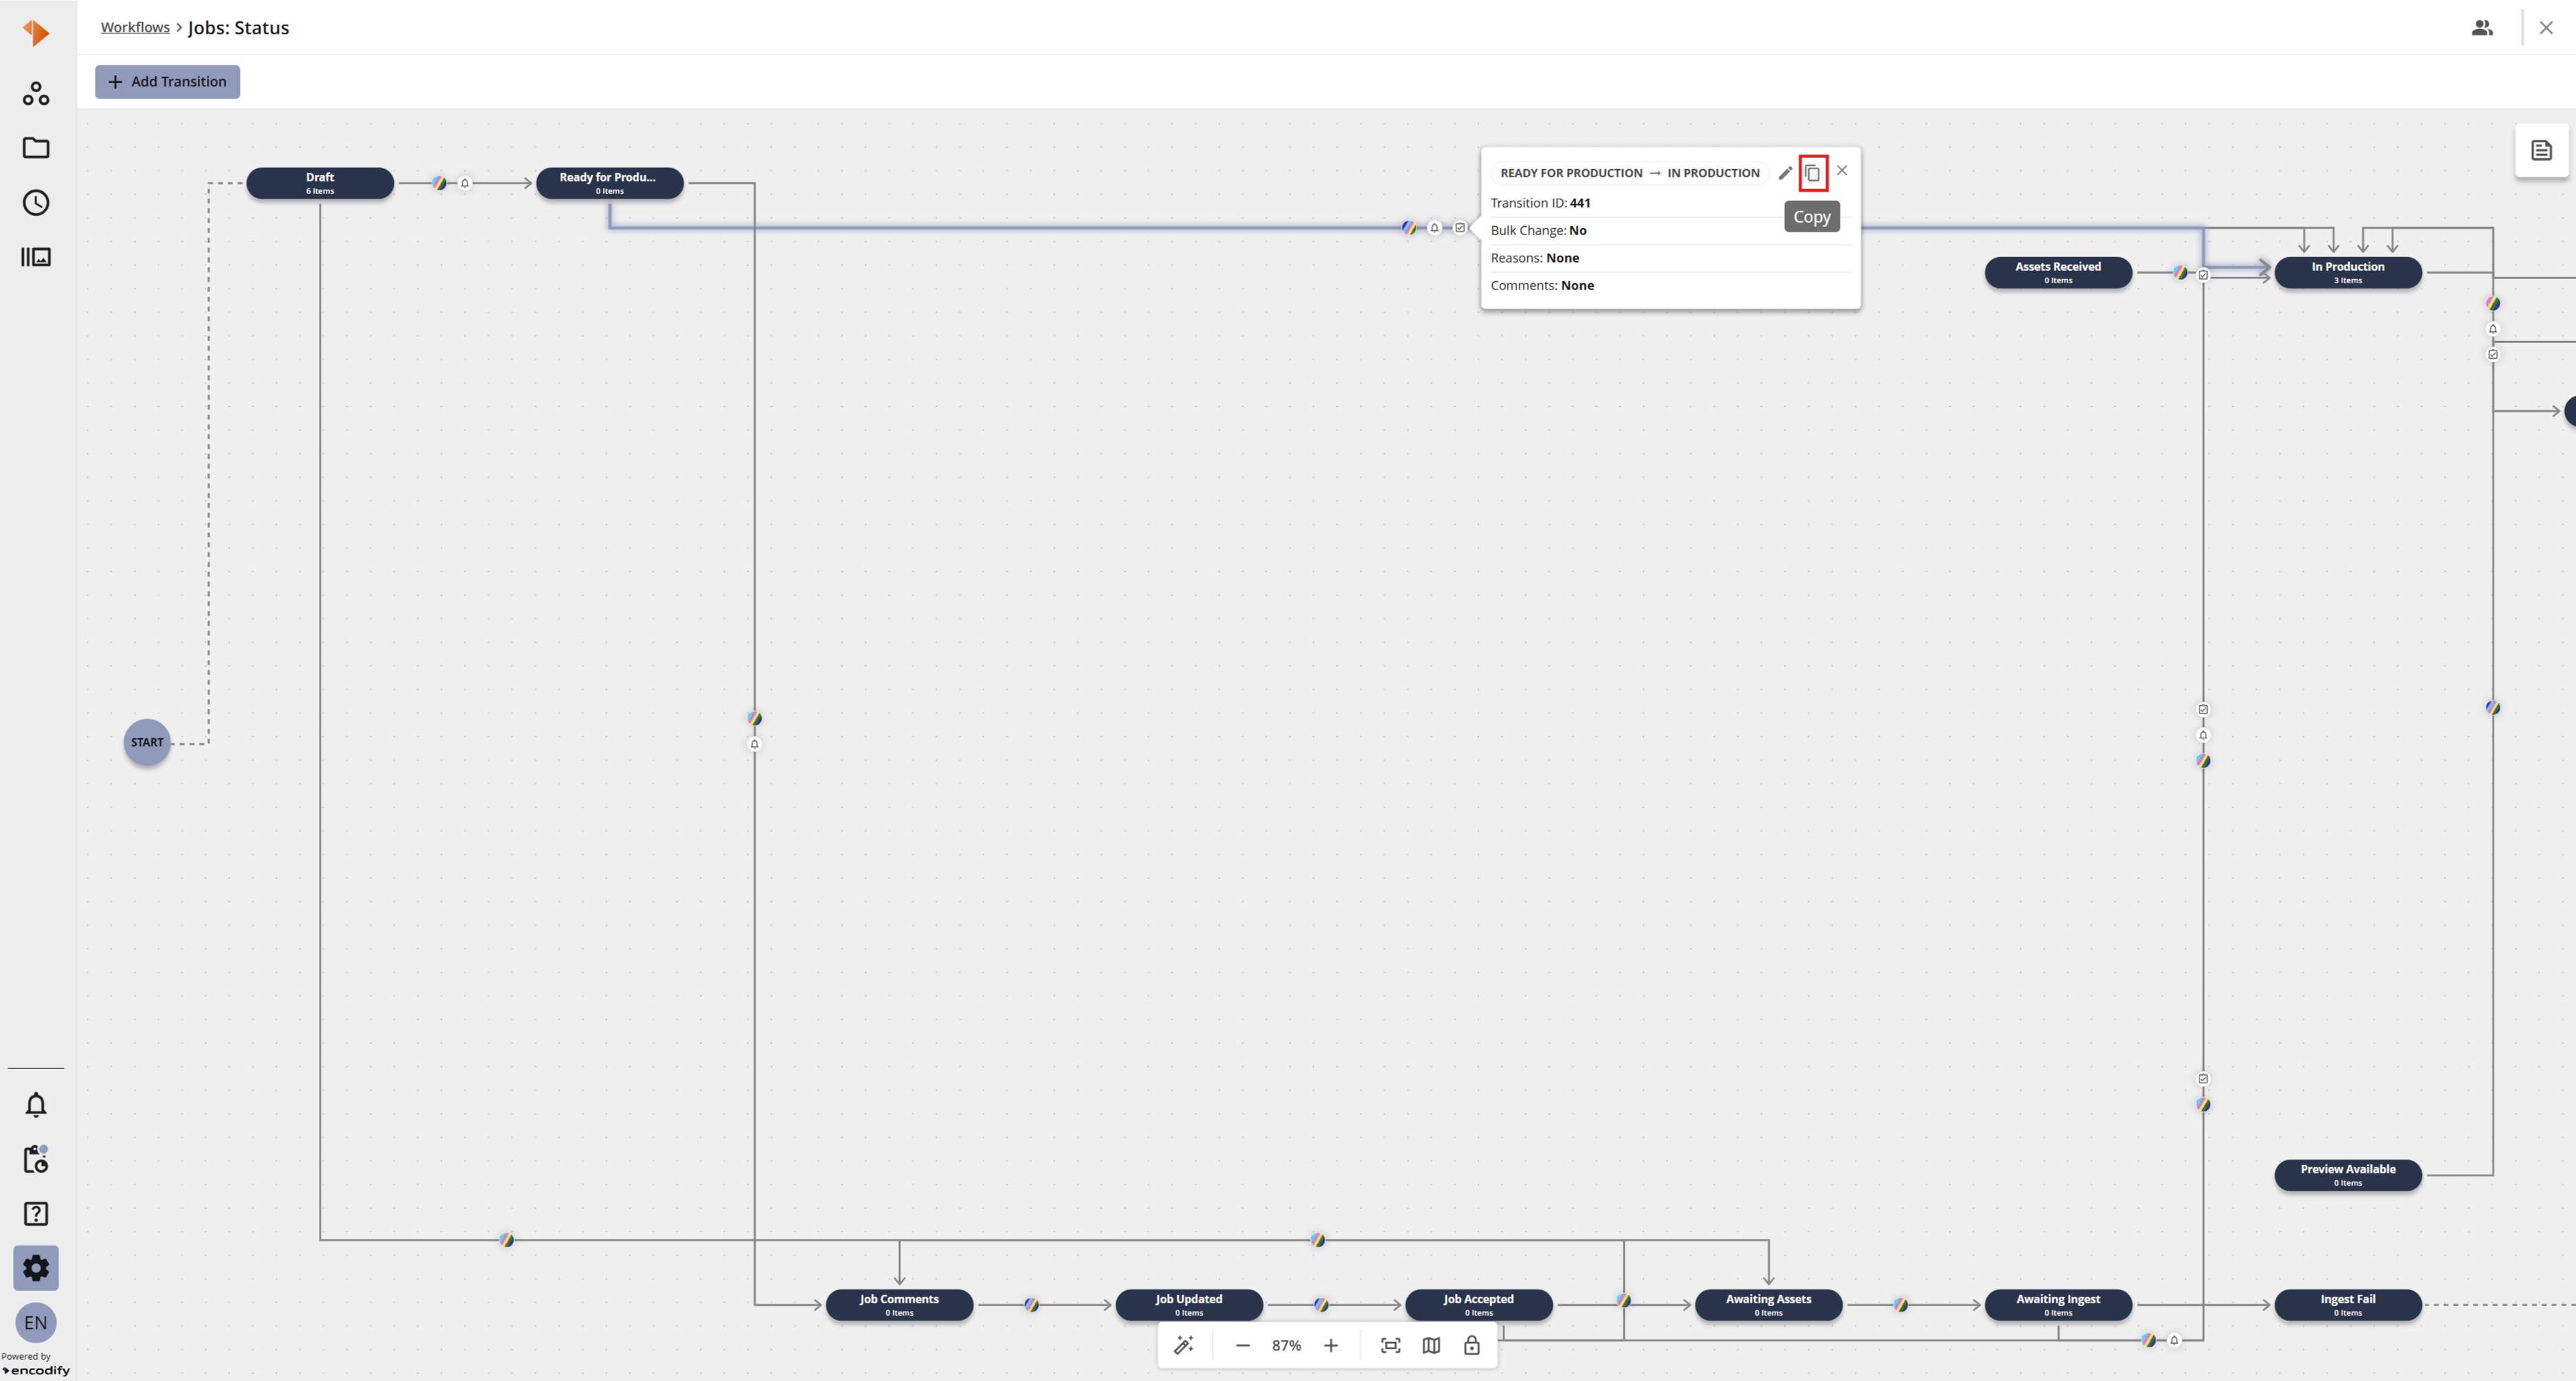
An image highlighting the workflow transition popup with the 'Copy' transition icon (Diagram view)
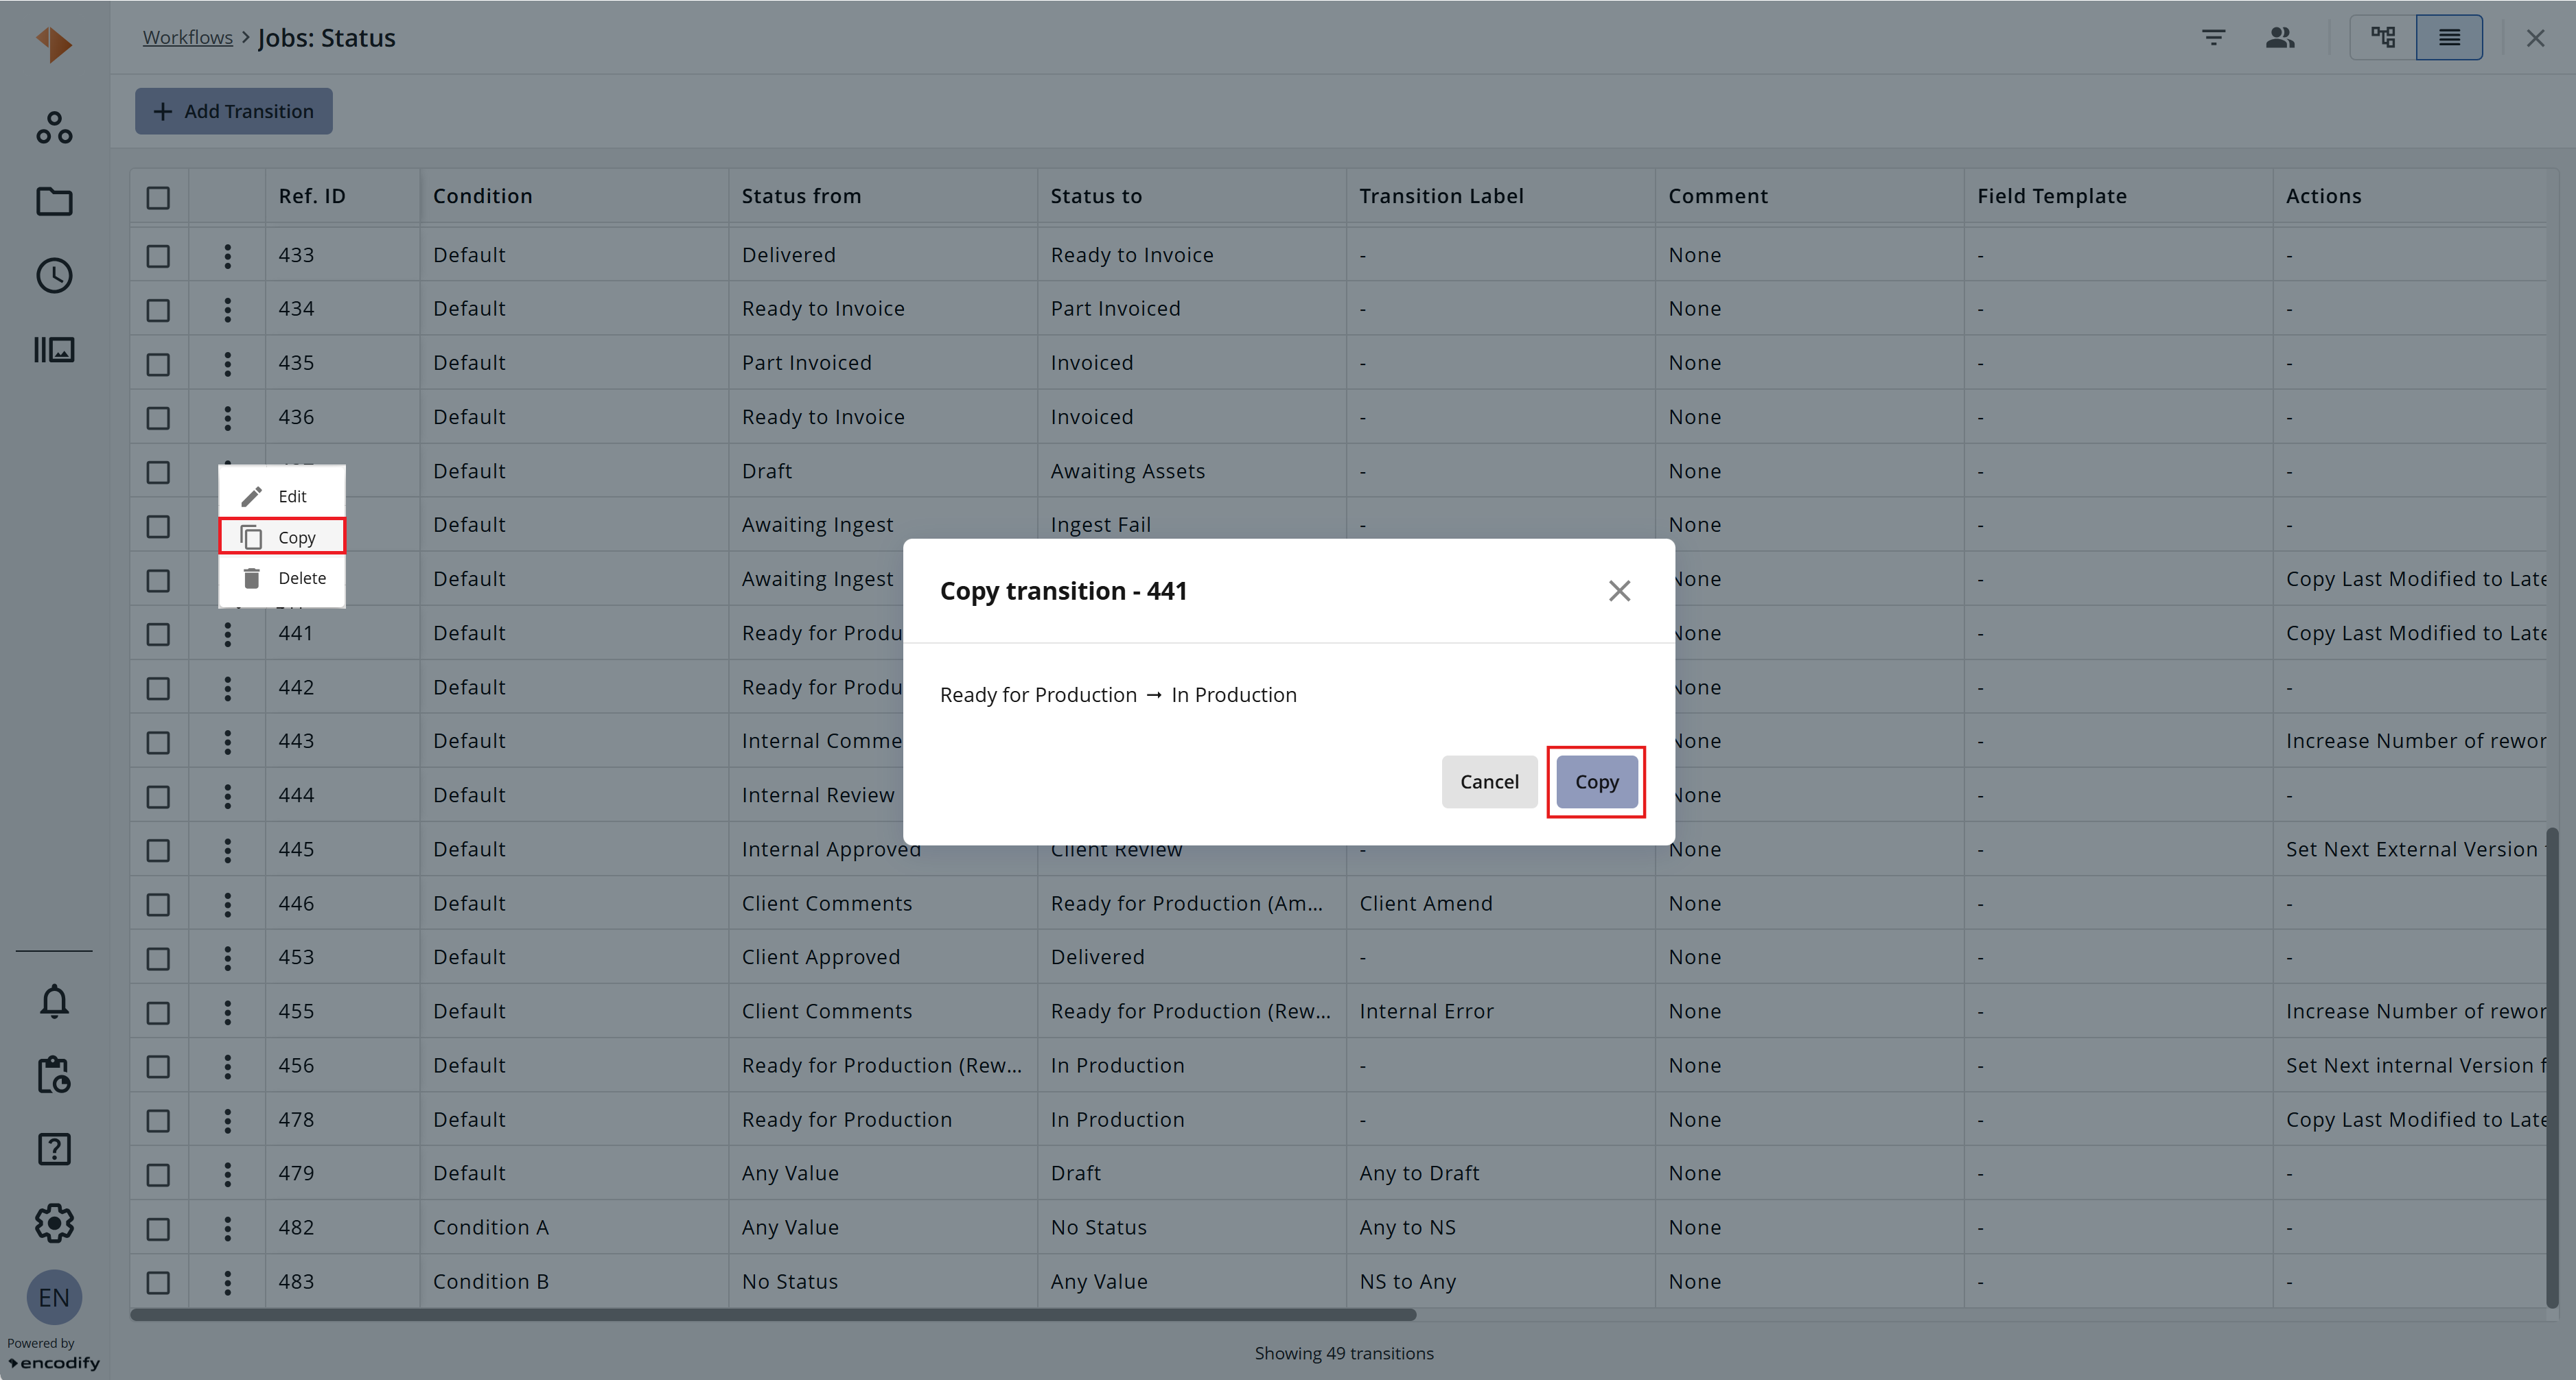
An image highlighting the workflow transition popup with the 'Copy' transition icon (List view)
Bulk Editing Transitions in List View
List view in Workflow Status View allows you to select multiple transitions and update conditions or delete them together, without opening each transition individually.
Bulk actions are only available in List view. In Diagram view, transitions are still edited one at a time.
Note: The bulk actions on this page update transition configuration. This is different from Bulk Status Change, which updates the status of multiple items.
Bulk Updating Transition Conditions
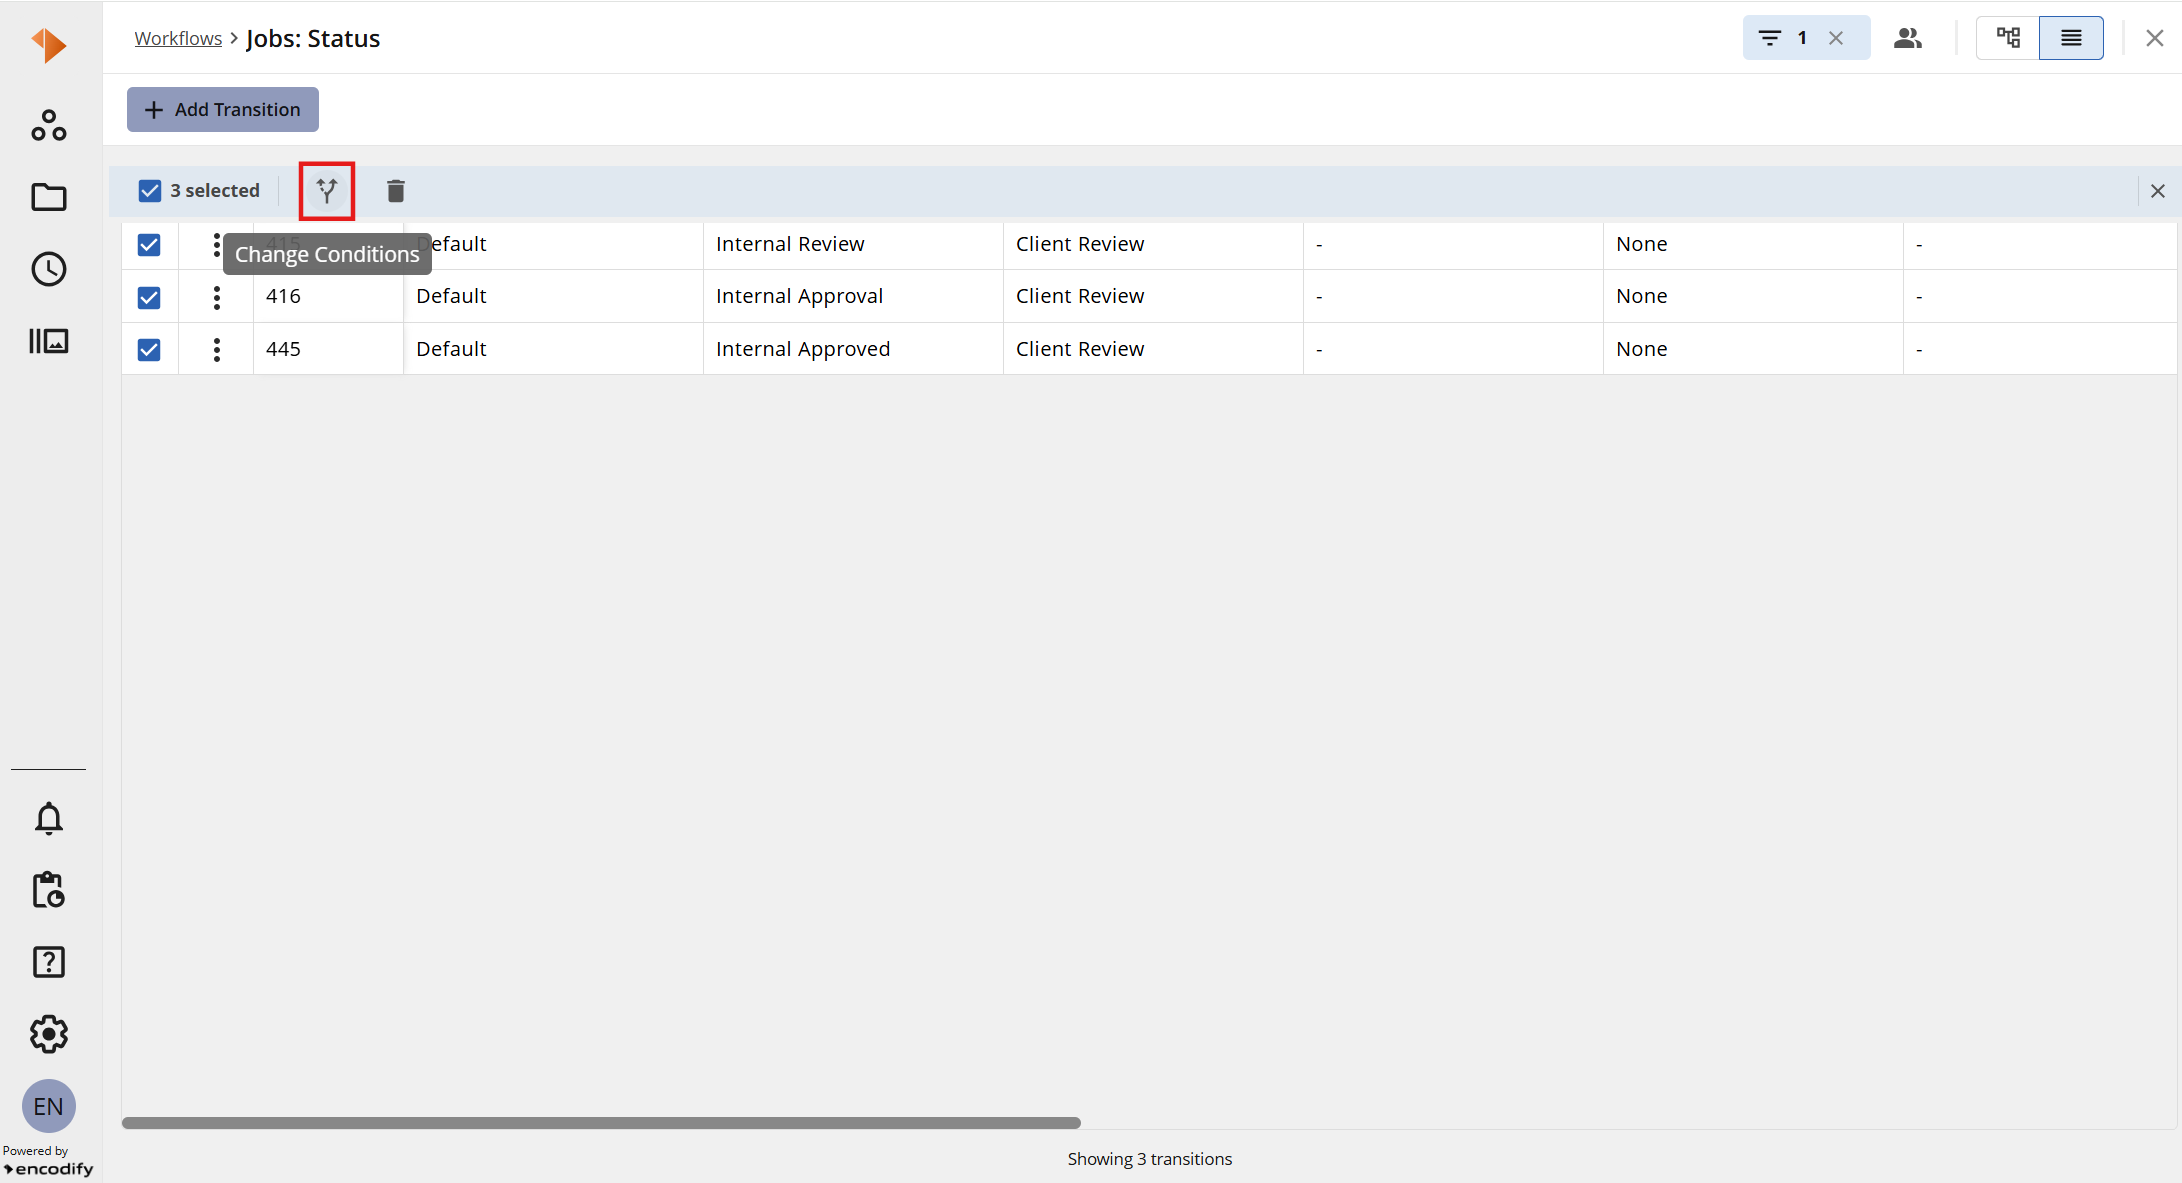
Select the transitions you want to update, then click the Change Conditions icon from the header to open the Change Conditions window:
Choose one or more values in the Condition field, then select Assign to Conditions to add the selected transitions to those conditions, or Unassign from Conditions to remove them:
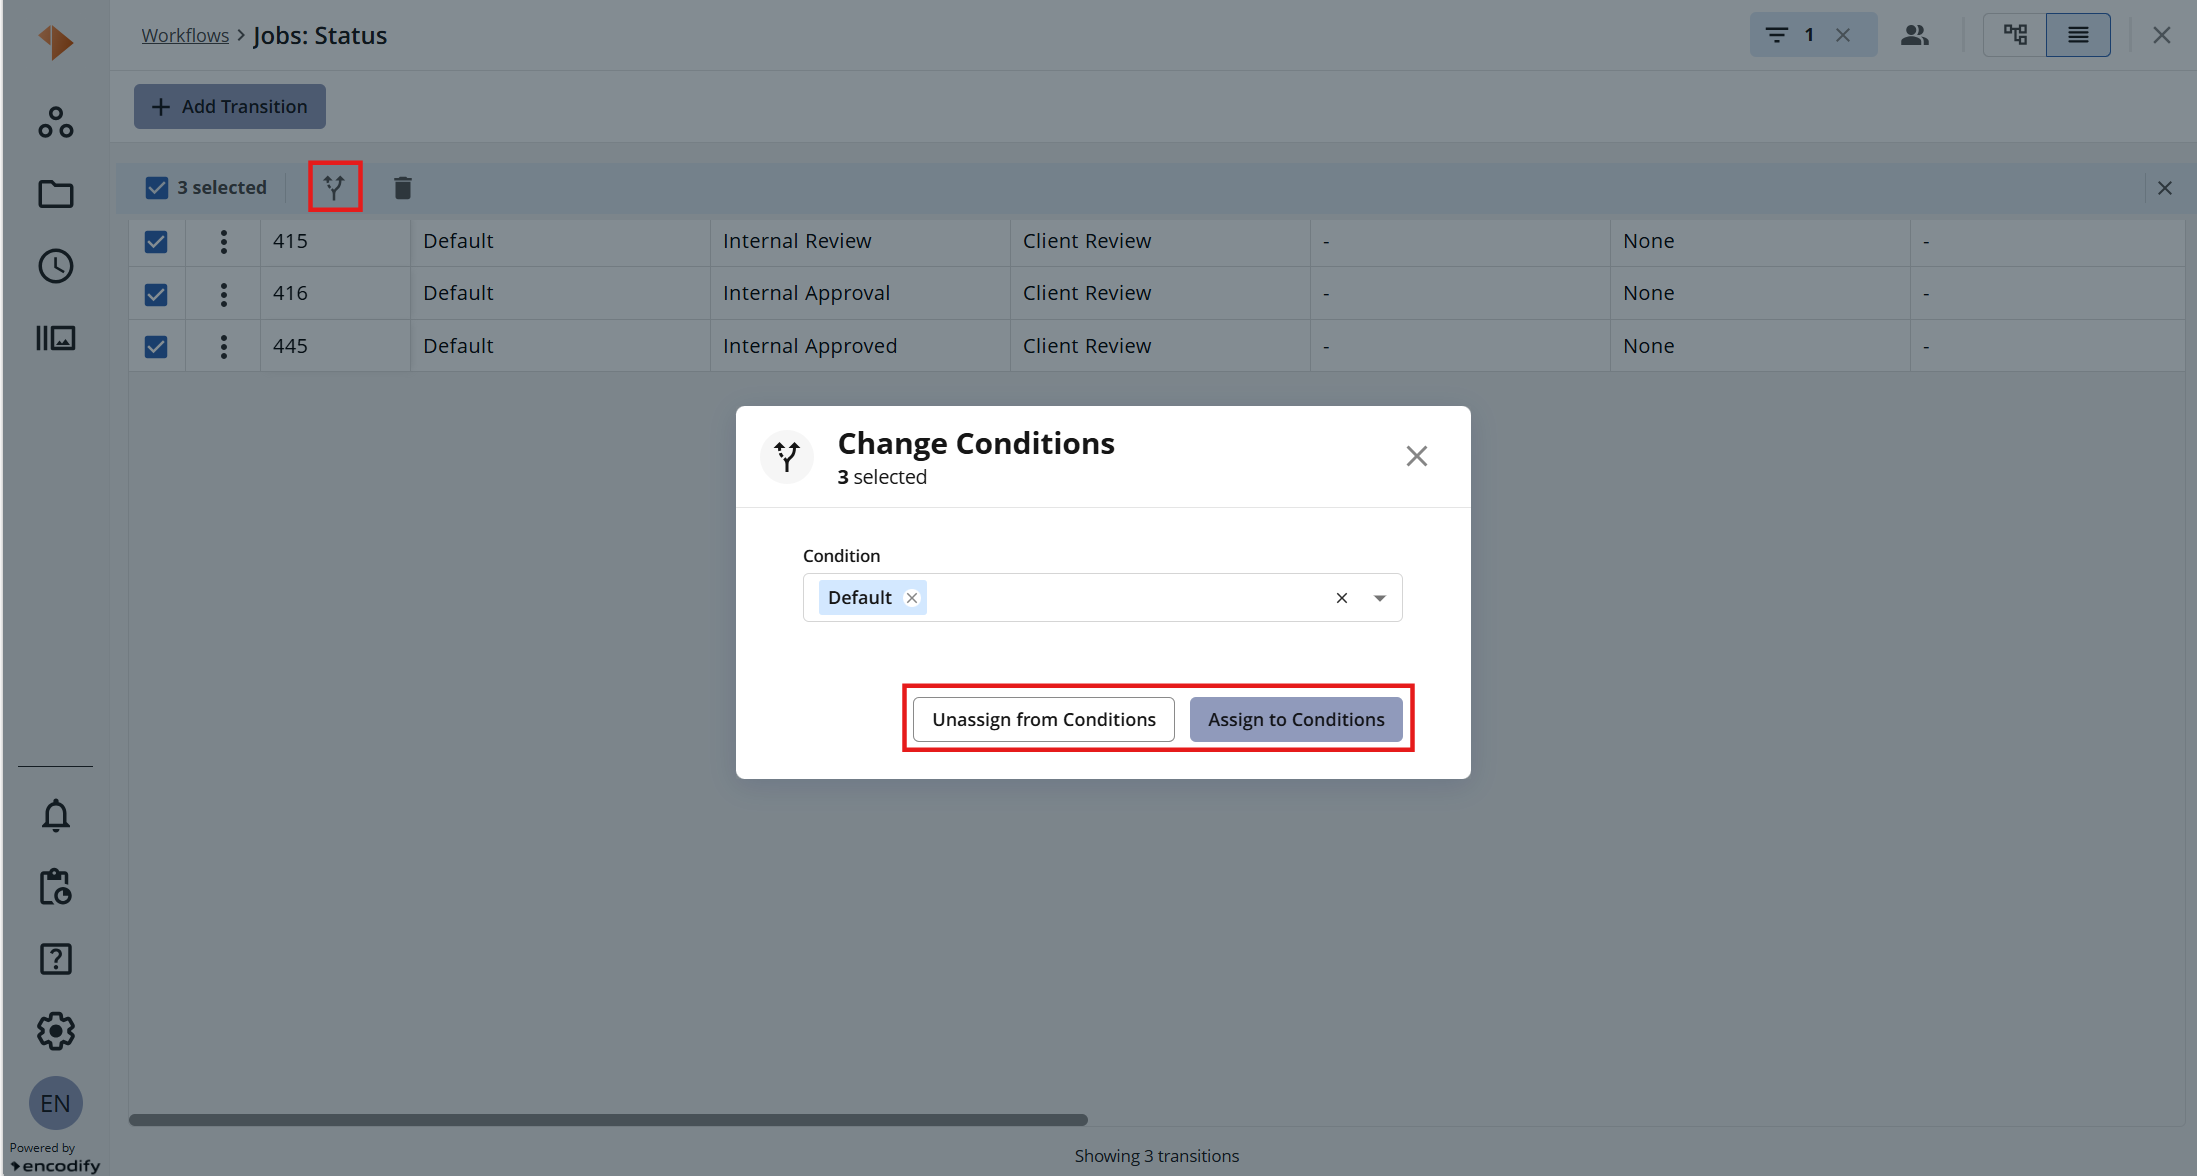
An image highlighting the Change Conditions window with the Condition field and the Assign to Conditions / Unassign from Conditions options
For more details on configuring a Conditional Workflow, refer to Conditional Workflows.
Bulk Deleting Transitions
Select the transitions you want to remove, then delete all selected transitions in one action. A confirmation prompt with Confirm and Cancel options is shown before the transitions are deleted.
.png)
An image highlighting the bulk deletion of multiple workflow transitions in List view