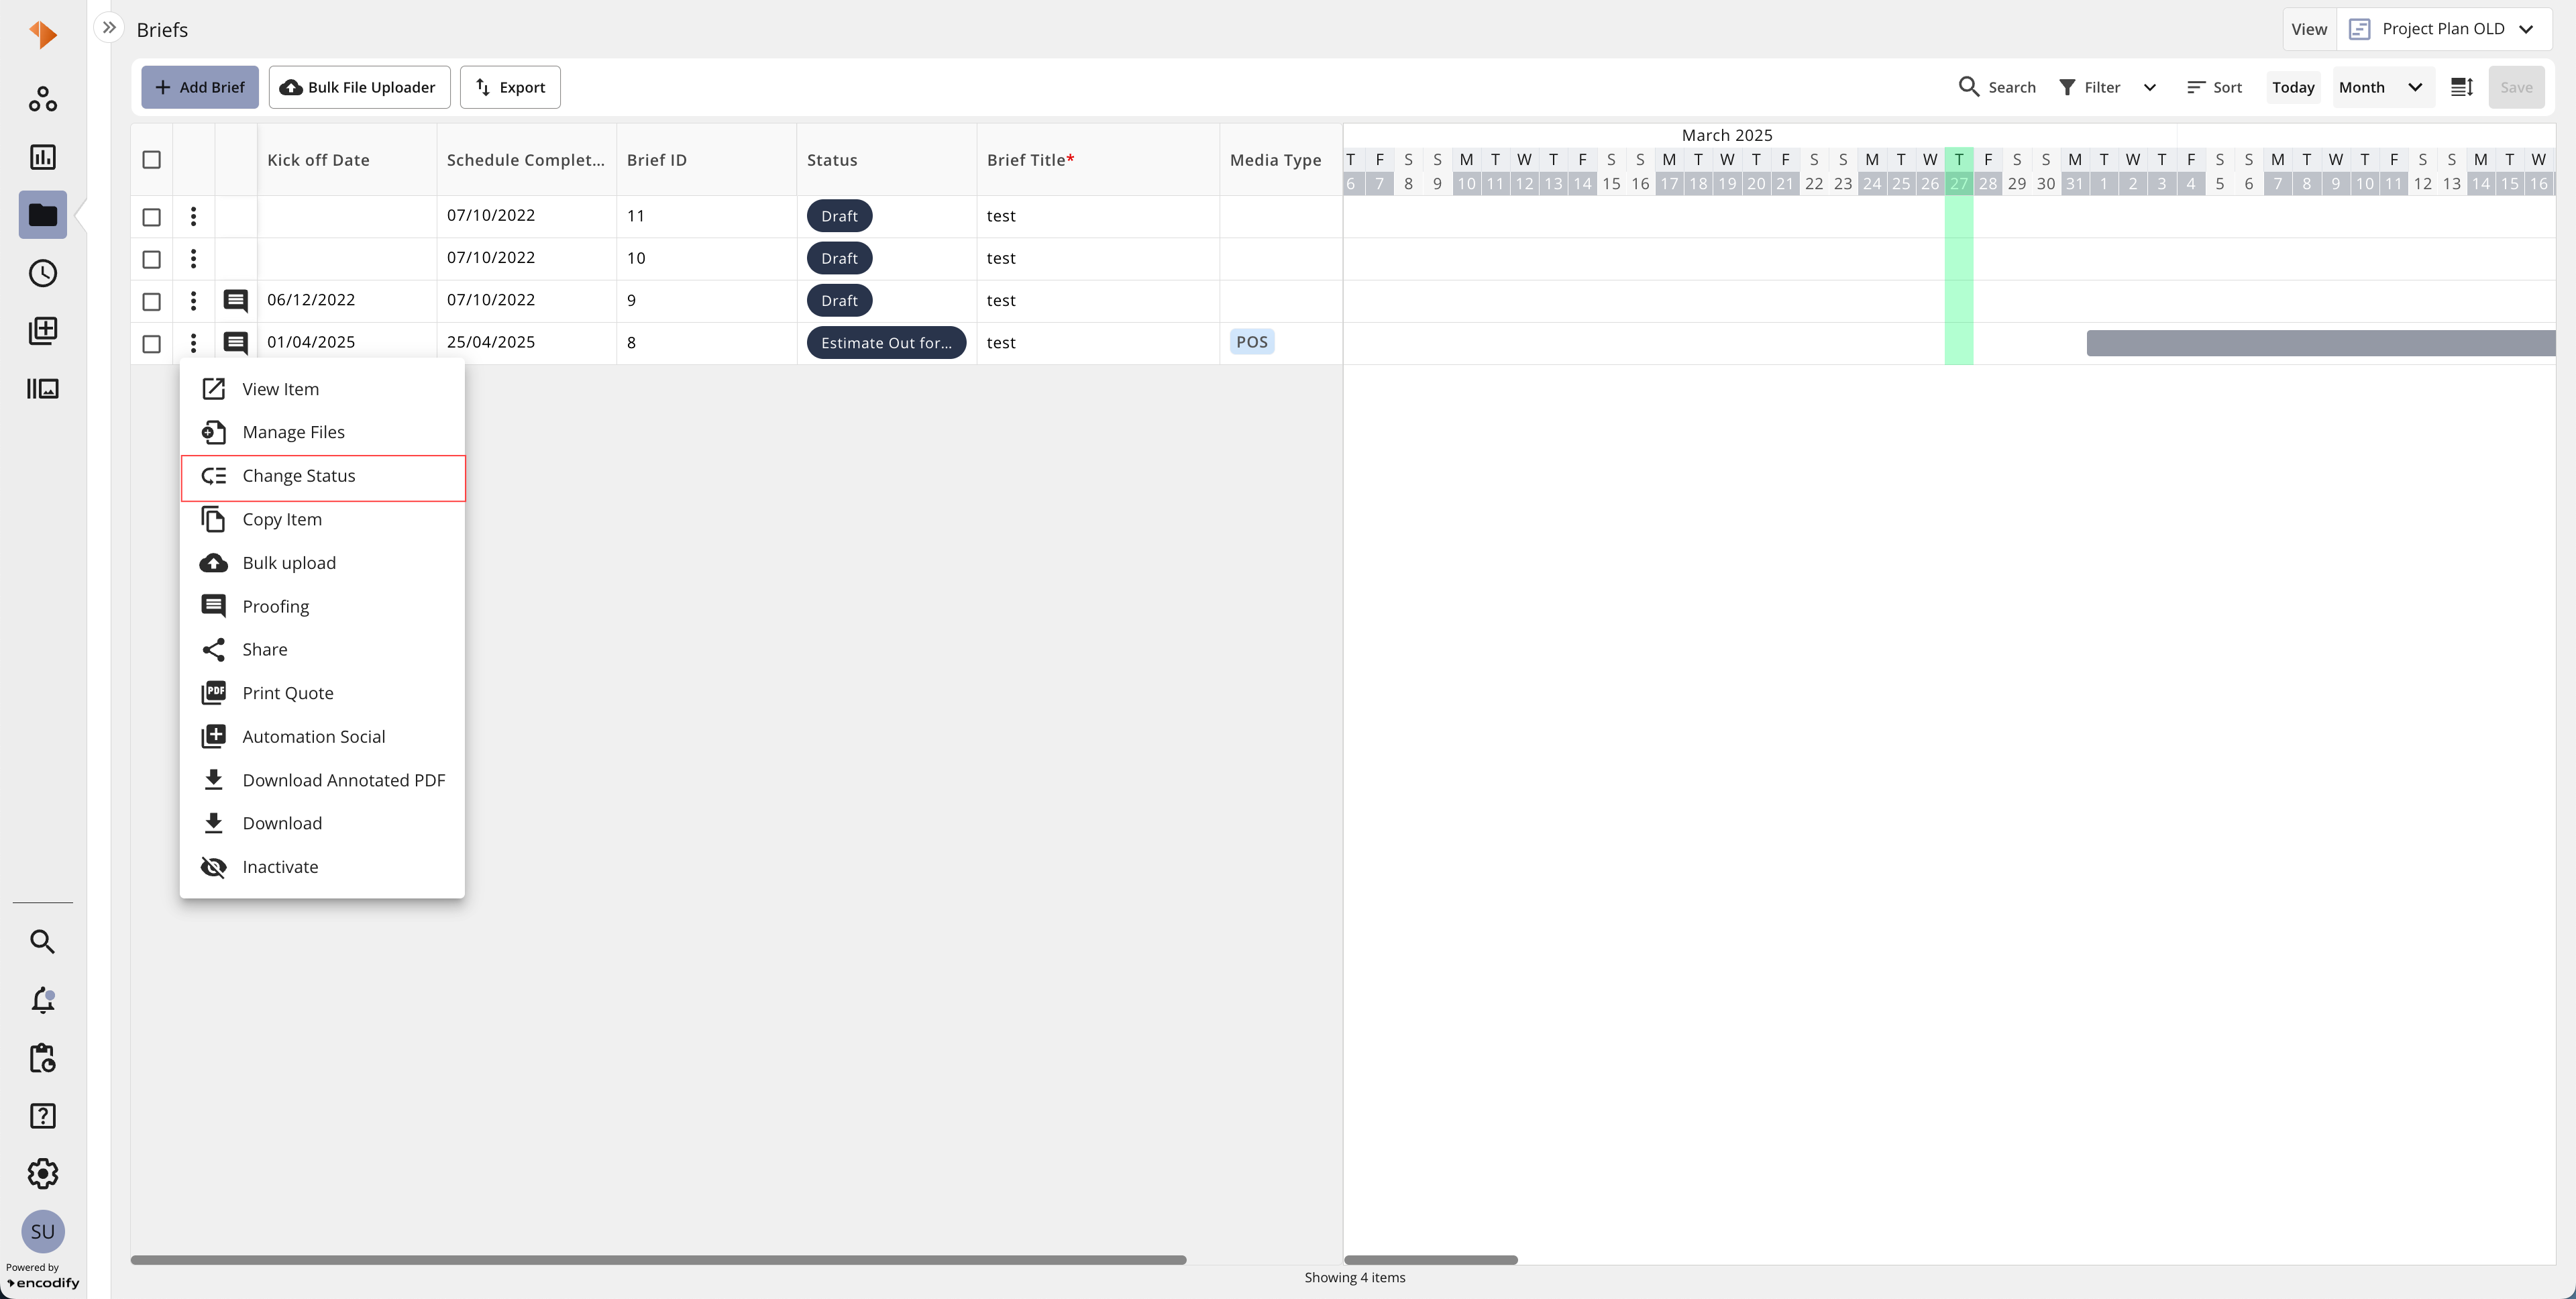
Where to find Change Status
Once a workflow has been successfully configured, you will be able to change the status from the following locations:
Location | Description | Visual Guide |
|---|---|---|
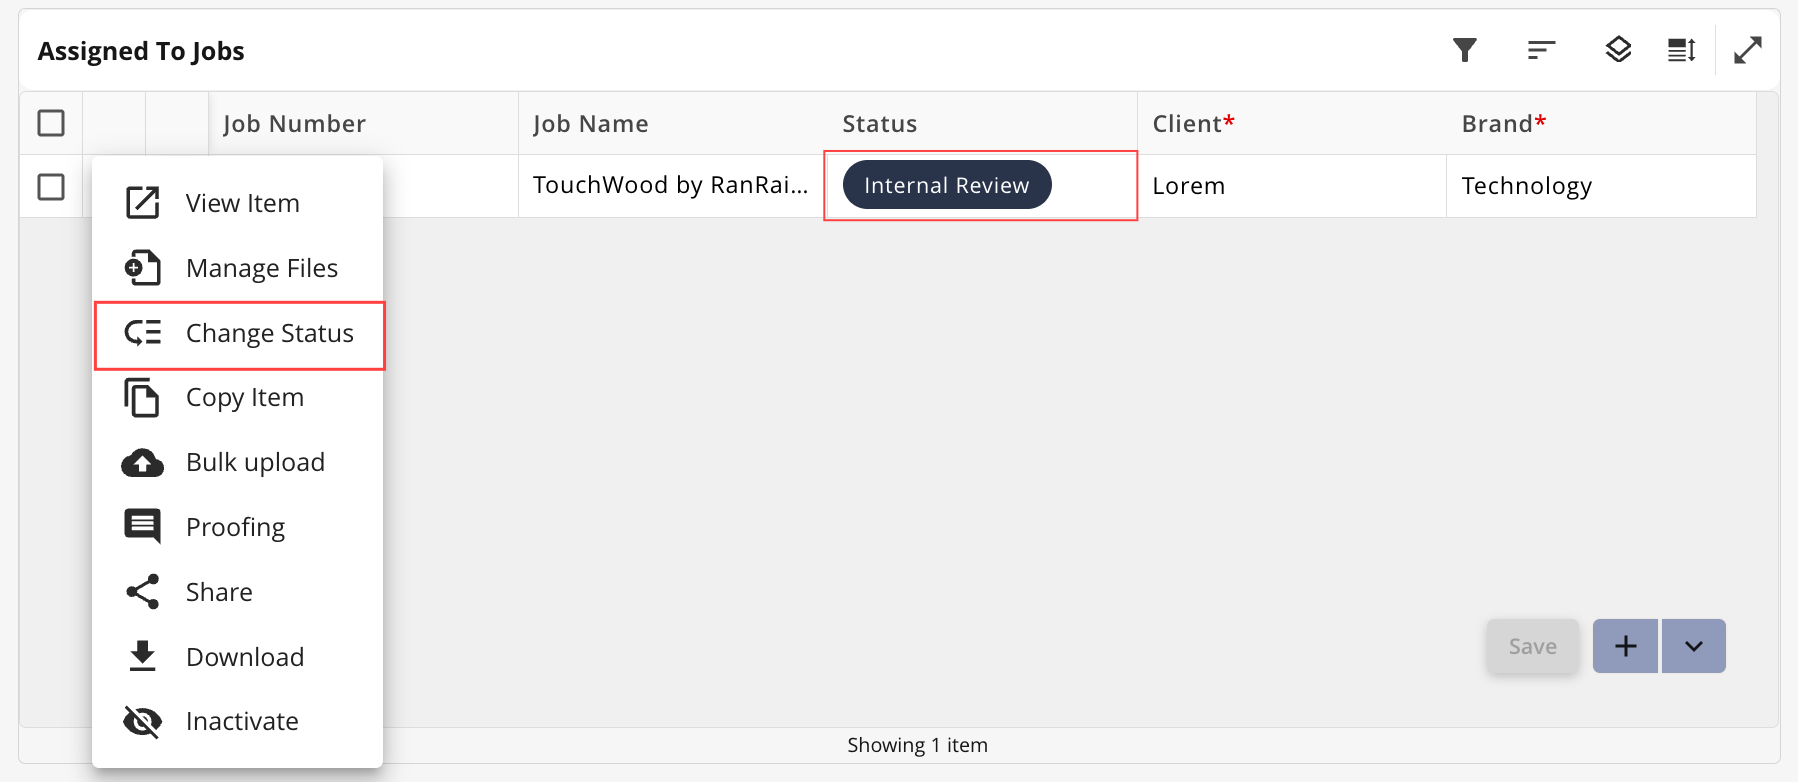
Spreadsheet Widget | In Spreadsheet Widget, you can change the status from two different locations:
|
|
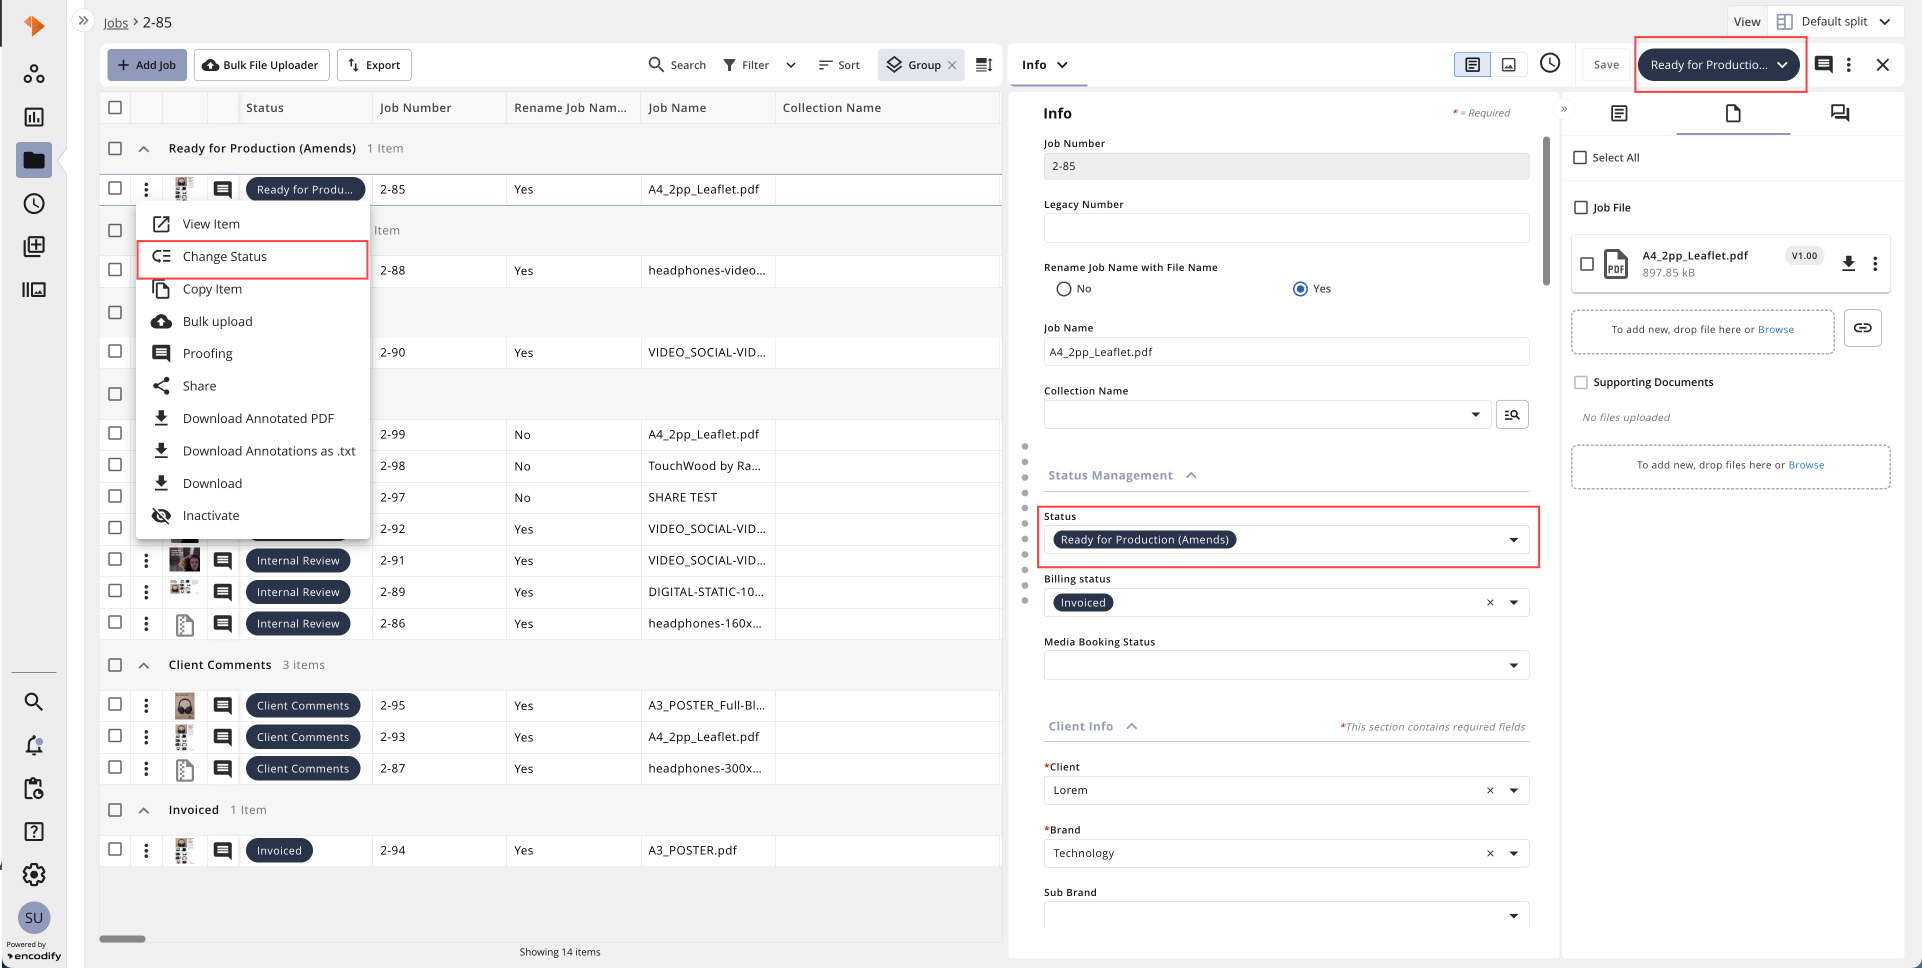
Split View | In Split View, you can change the status from three different locations:
|
|
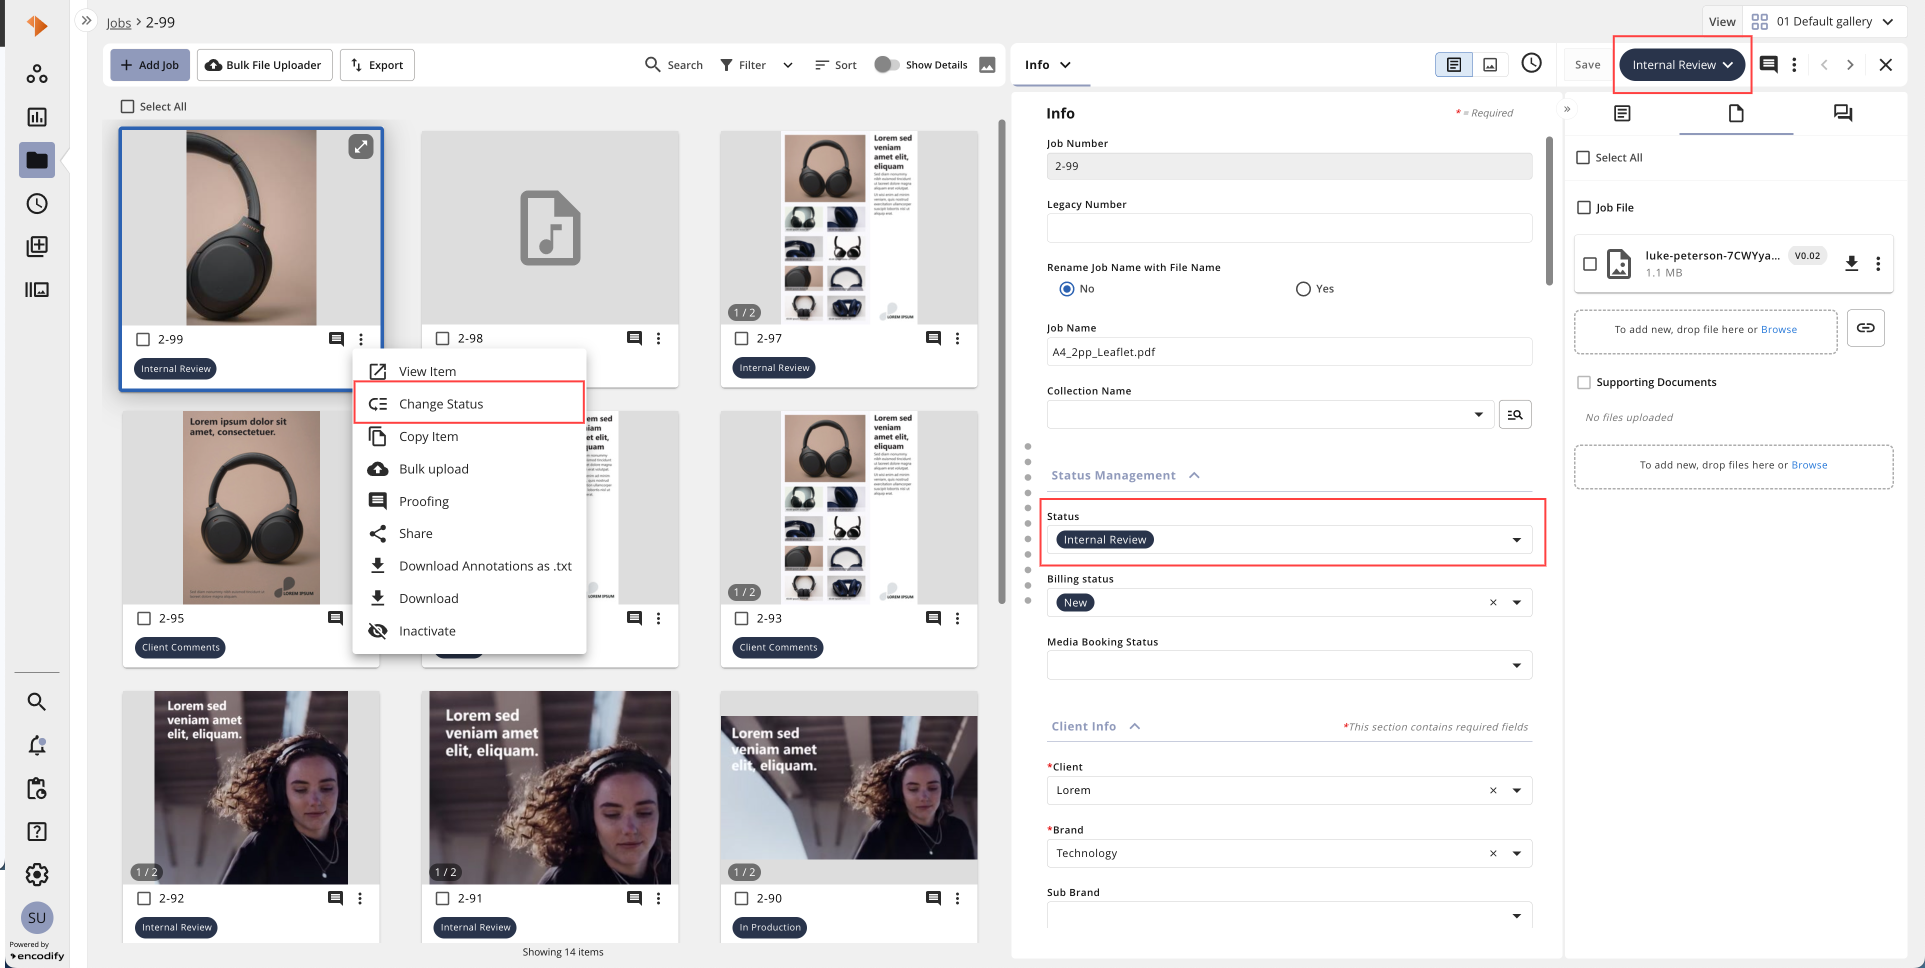
Gallery View | In Gallery View, you can change the status from three different locations:
|
|
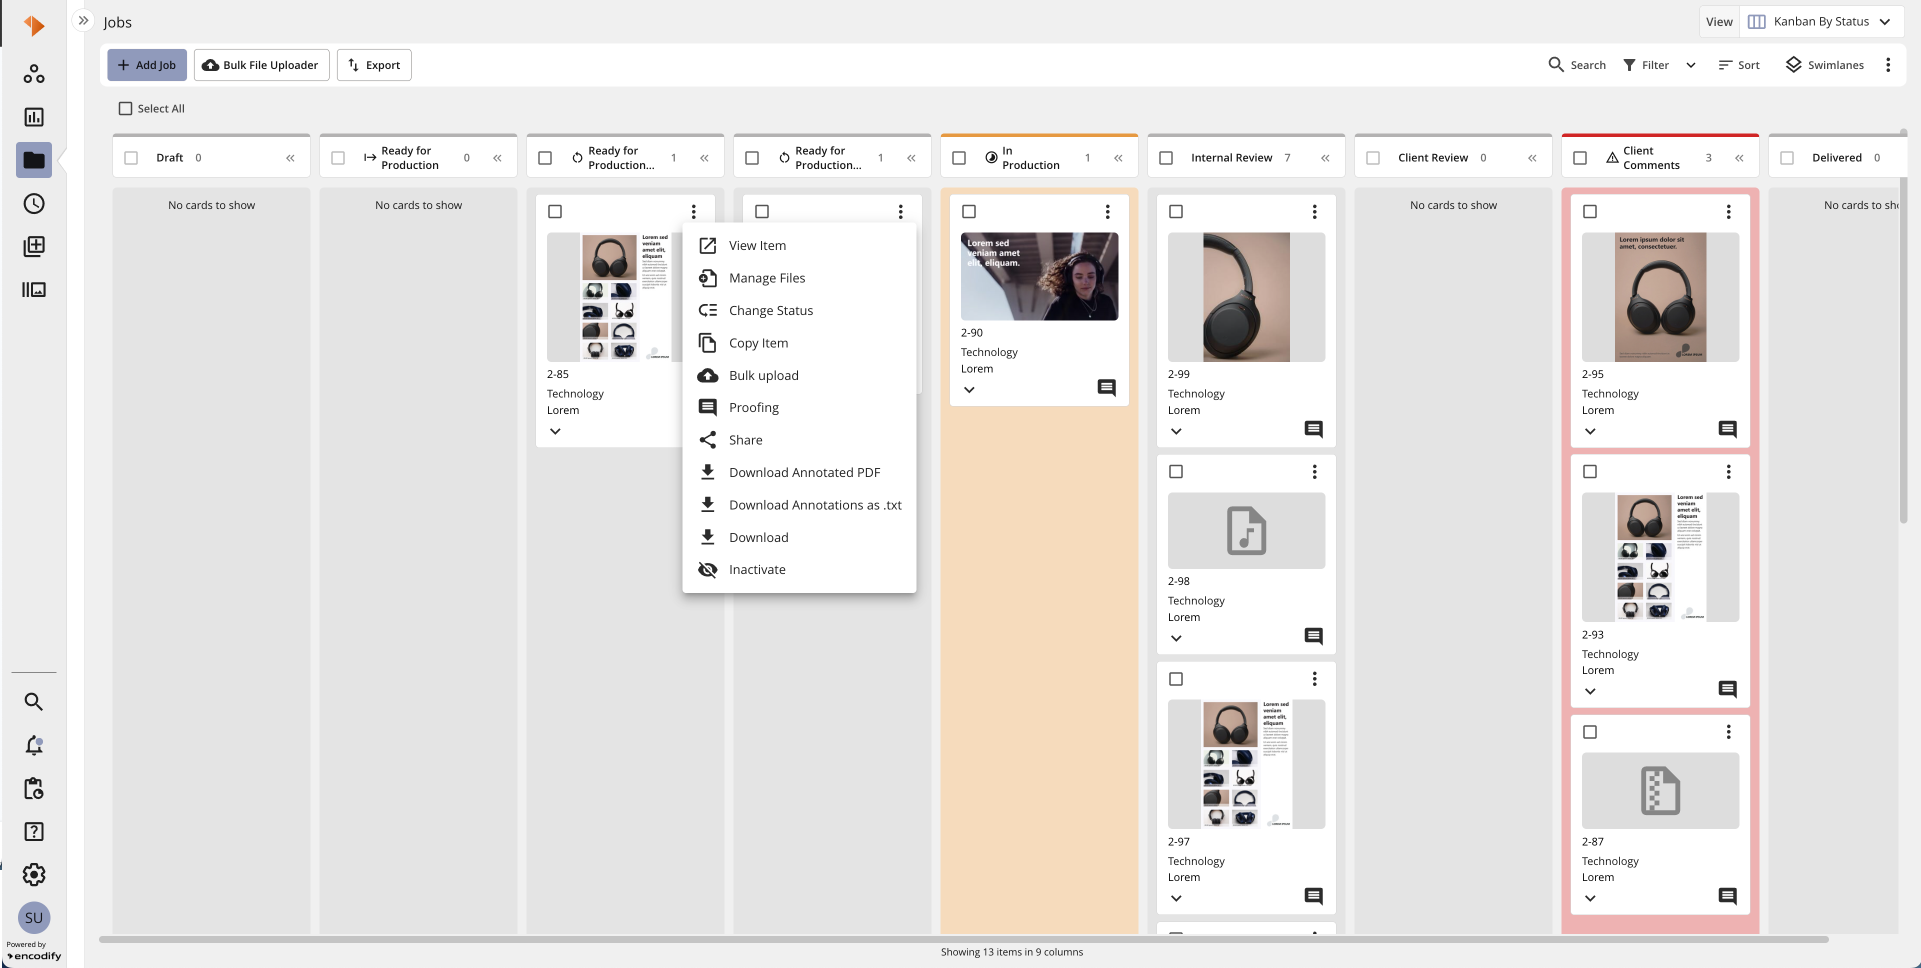
Kanban View | In Kanban View, you can change the status from four different locations:
|
|
Timeline View | In Timeline View, you can only change the status from the Change Status icon within an action menu for individual items. |
|
Timeline 2.0 View | In Timeline 2.0 View, you can change the status from
|
|
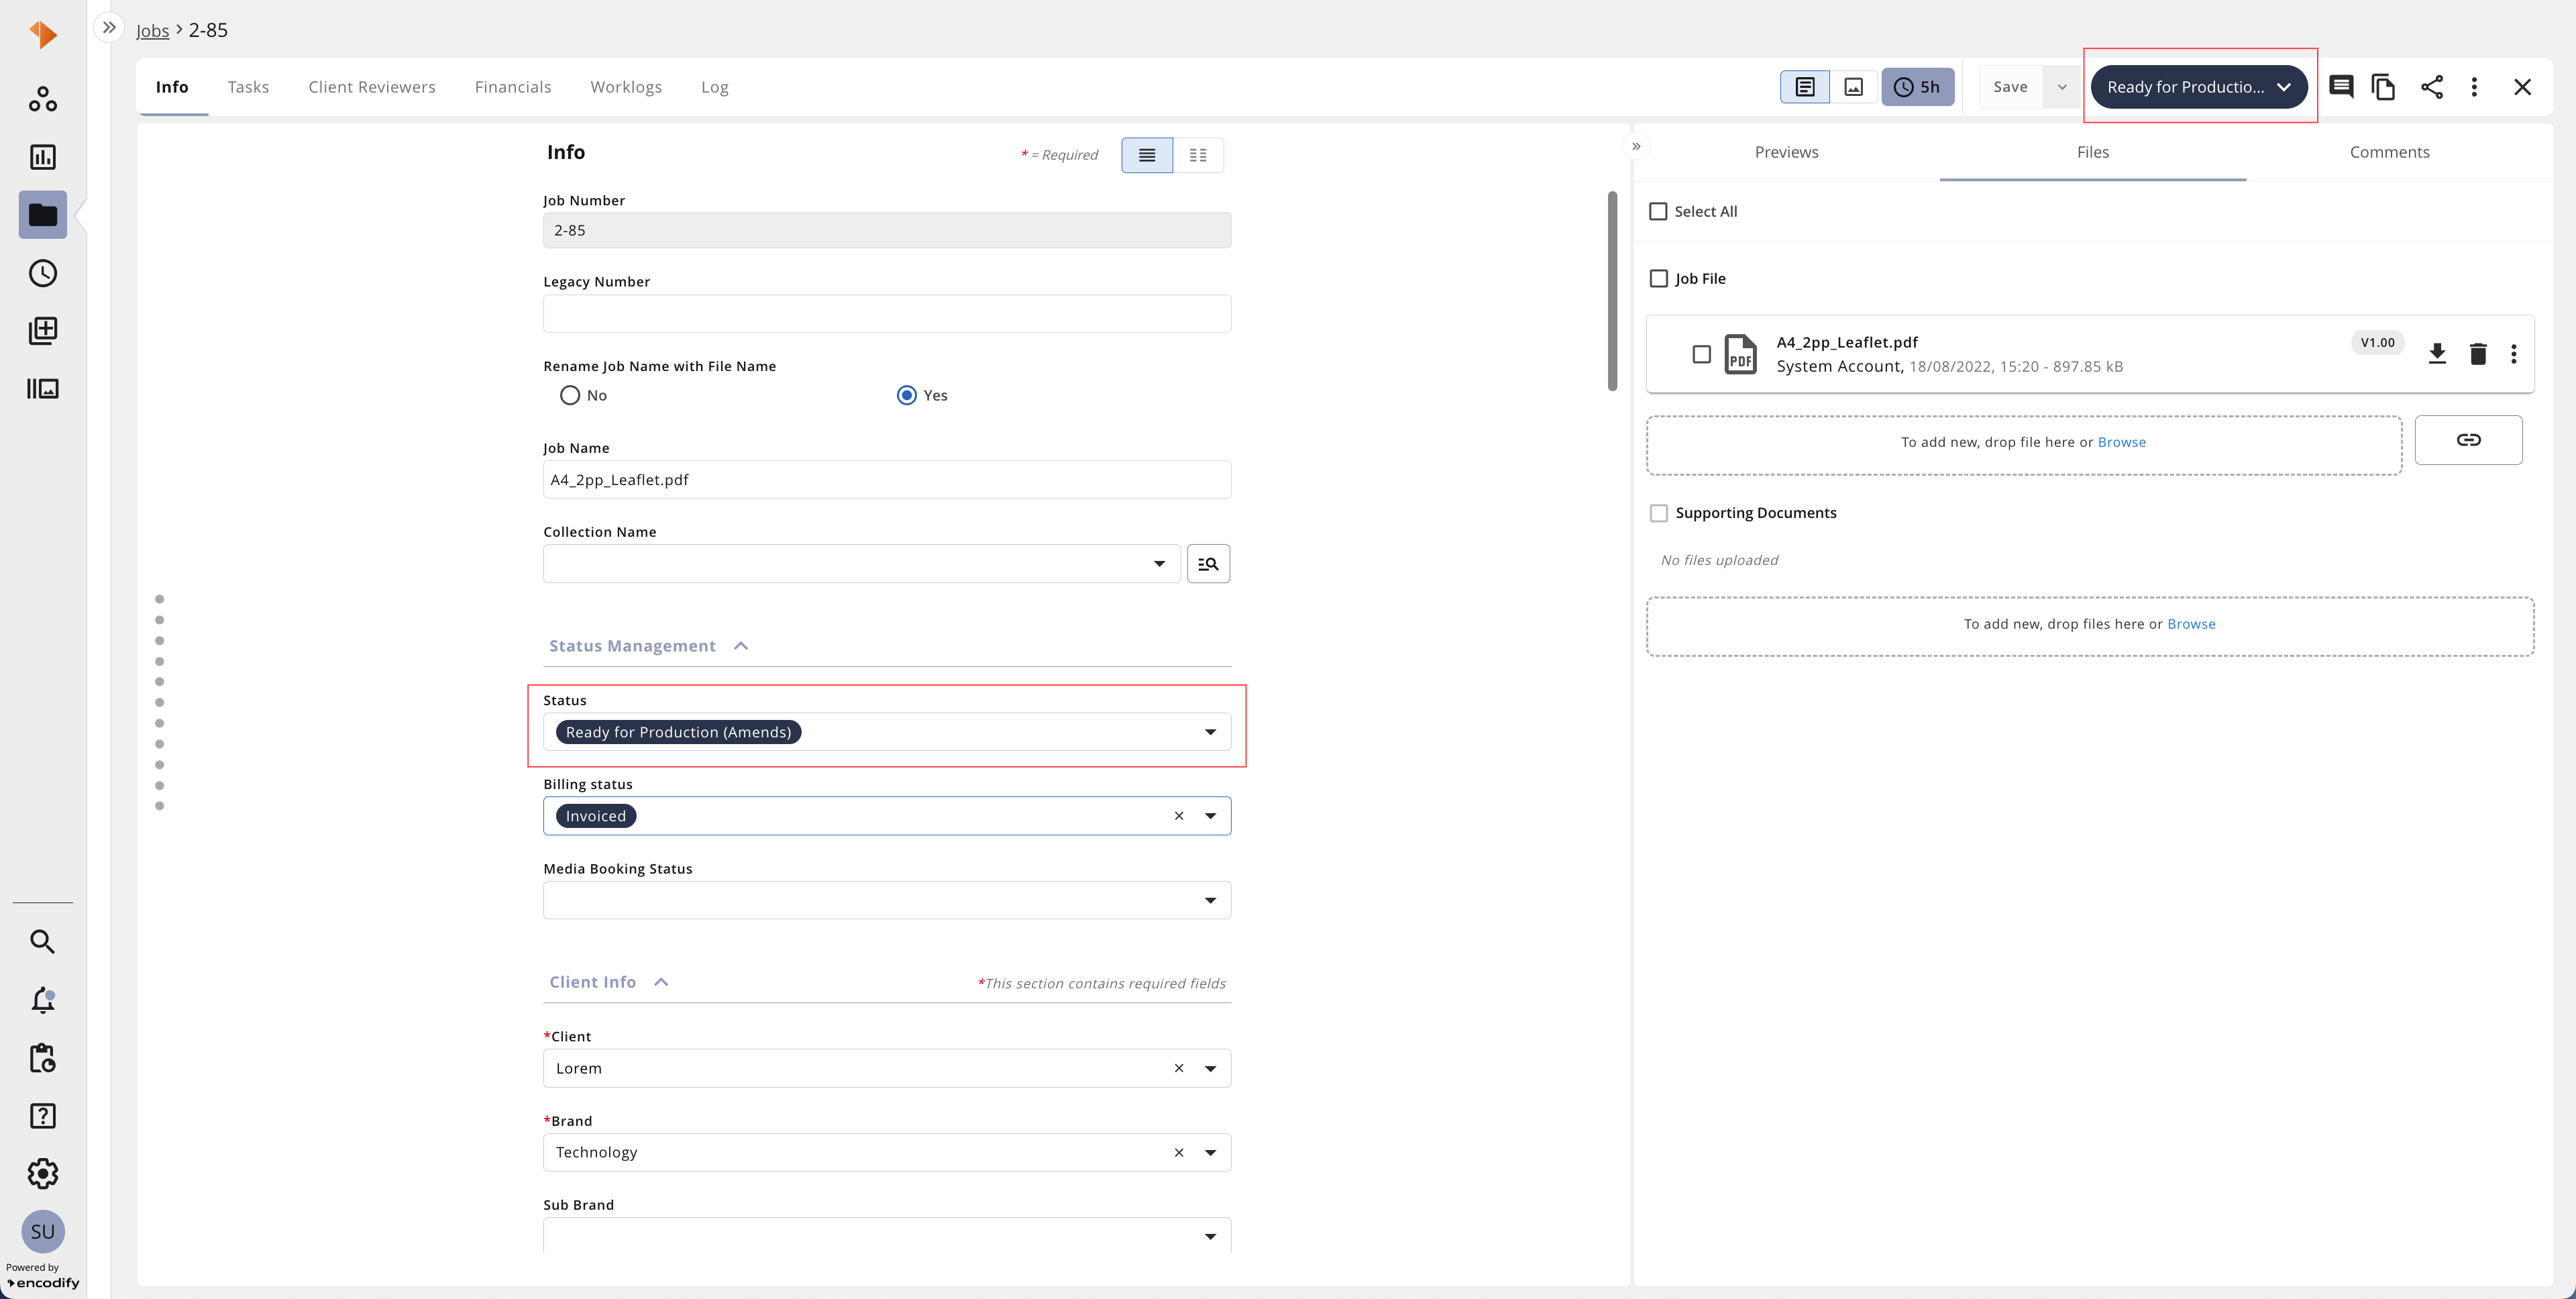
Form with Tabs | In Form with Tabs, you can change the status from two different locations:
|
|
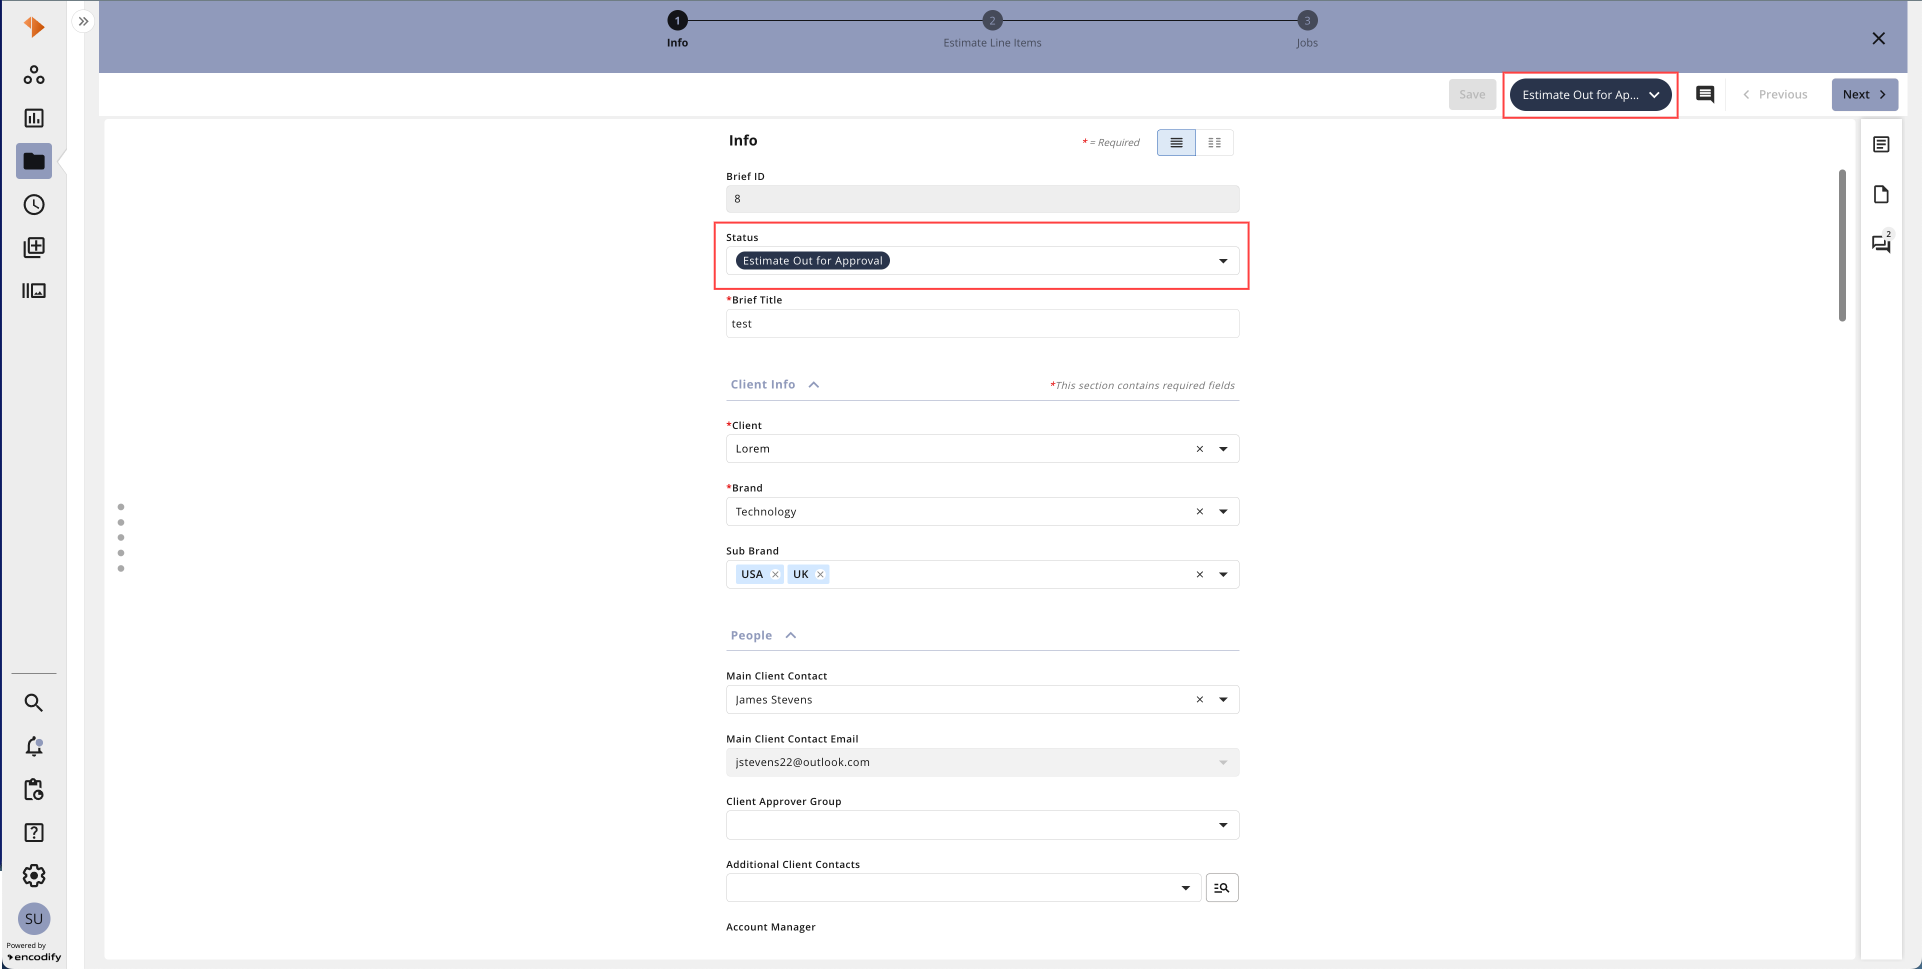
Wizard Form | In Wizard Form, you can change the status
|
|
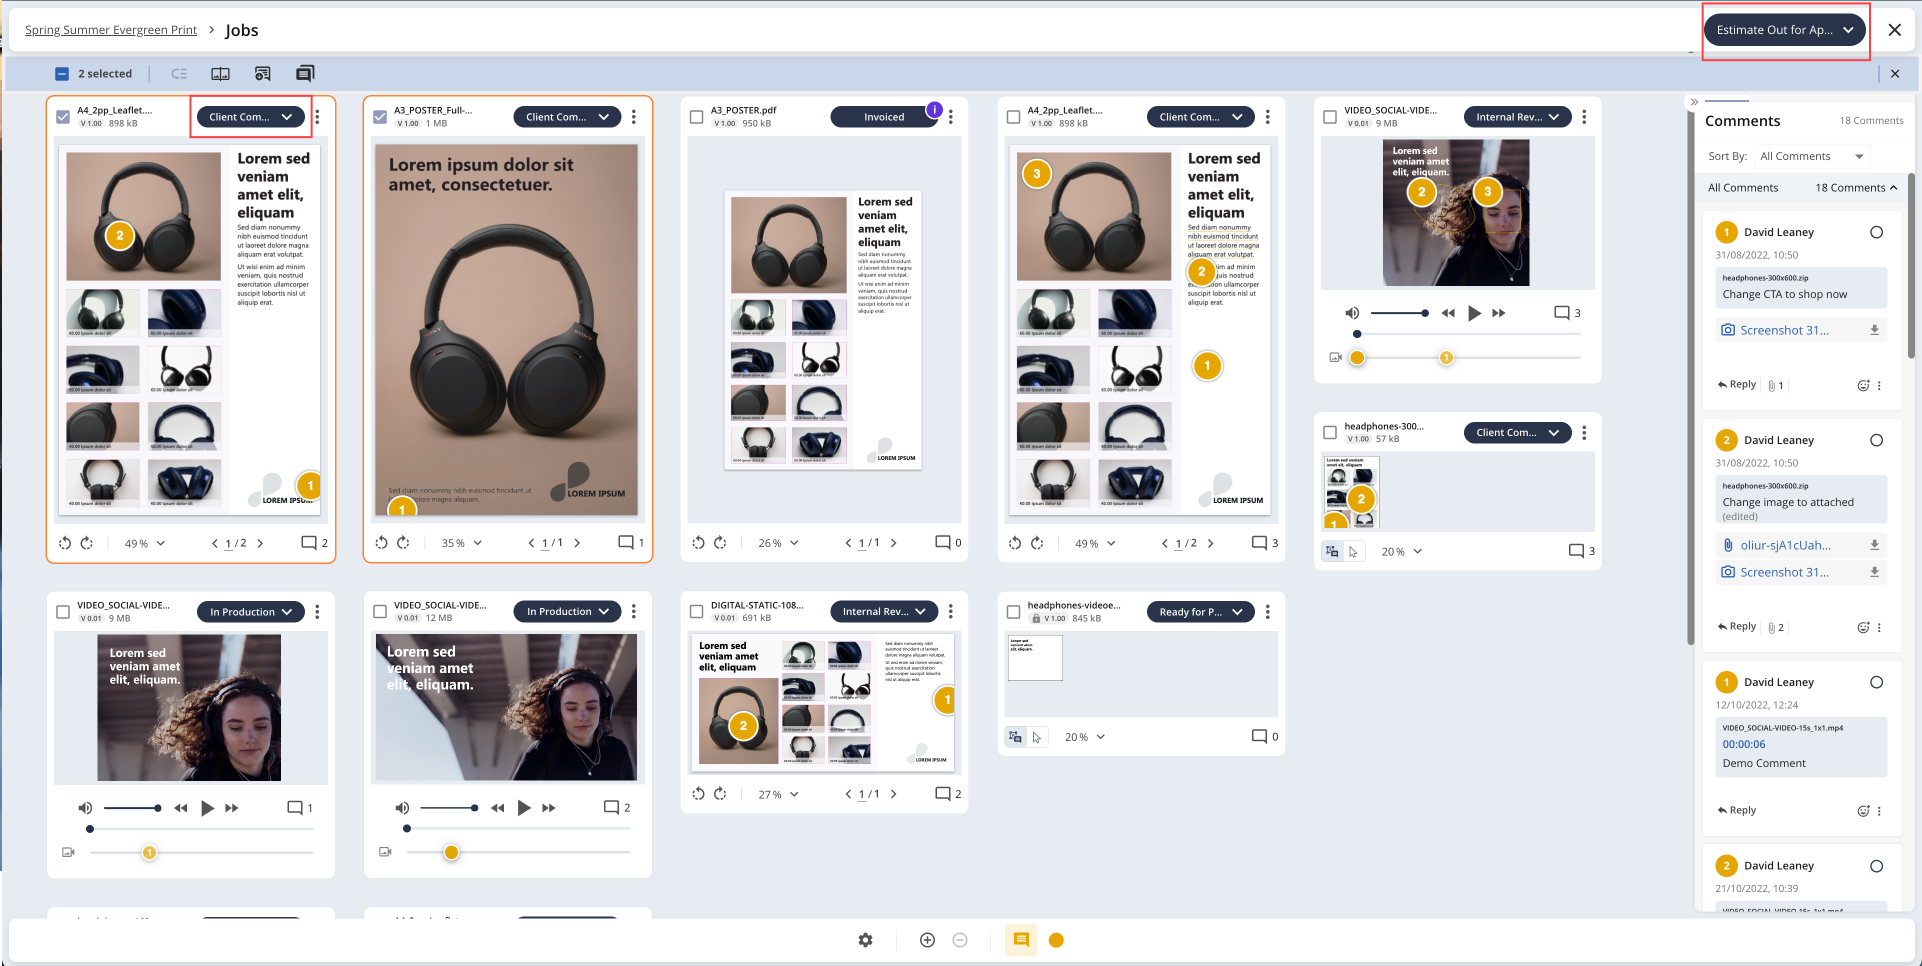
Multiple File Proofing | In Multiple File Proofing, you can change the status from two different locations:
|
|
Online Proofing | In Online Proofing, you can only change the status from the action toolbar within the header. |
|


Starting a Workflow
The appearance of the Change Status button will vary depending on whether a pre-selected status value is defined. The possible states include:
Pre-selected – The predefined status value configured within the status field will be displayed.
No Status – If no pre-selected status value exists, a transition from "No Status" must be configured.
Empty – If neither of the above conditions are met, the button will appear empty with a message informing the user that no transitions are available.
Understanding How to Transition Workflow Statuses
After changing the status from one of these views, you will be directed to the workflow change status modal to confirm the workflow transition.
Important: If the workflow transition does not include any reasons, comments, field templates for adjusting item metadata, or file uploads, the workflow change status modal will be completely bypassed.
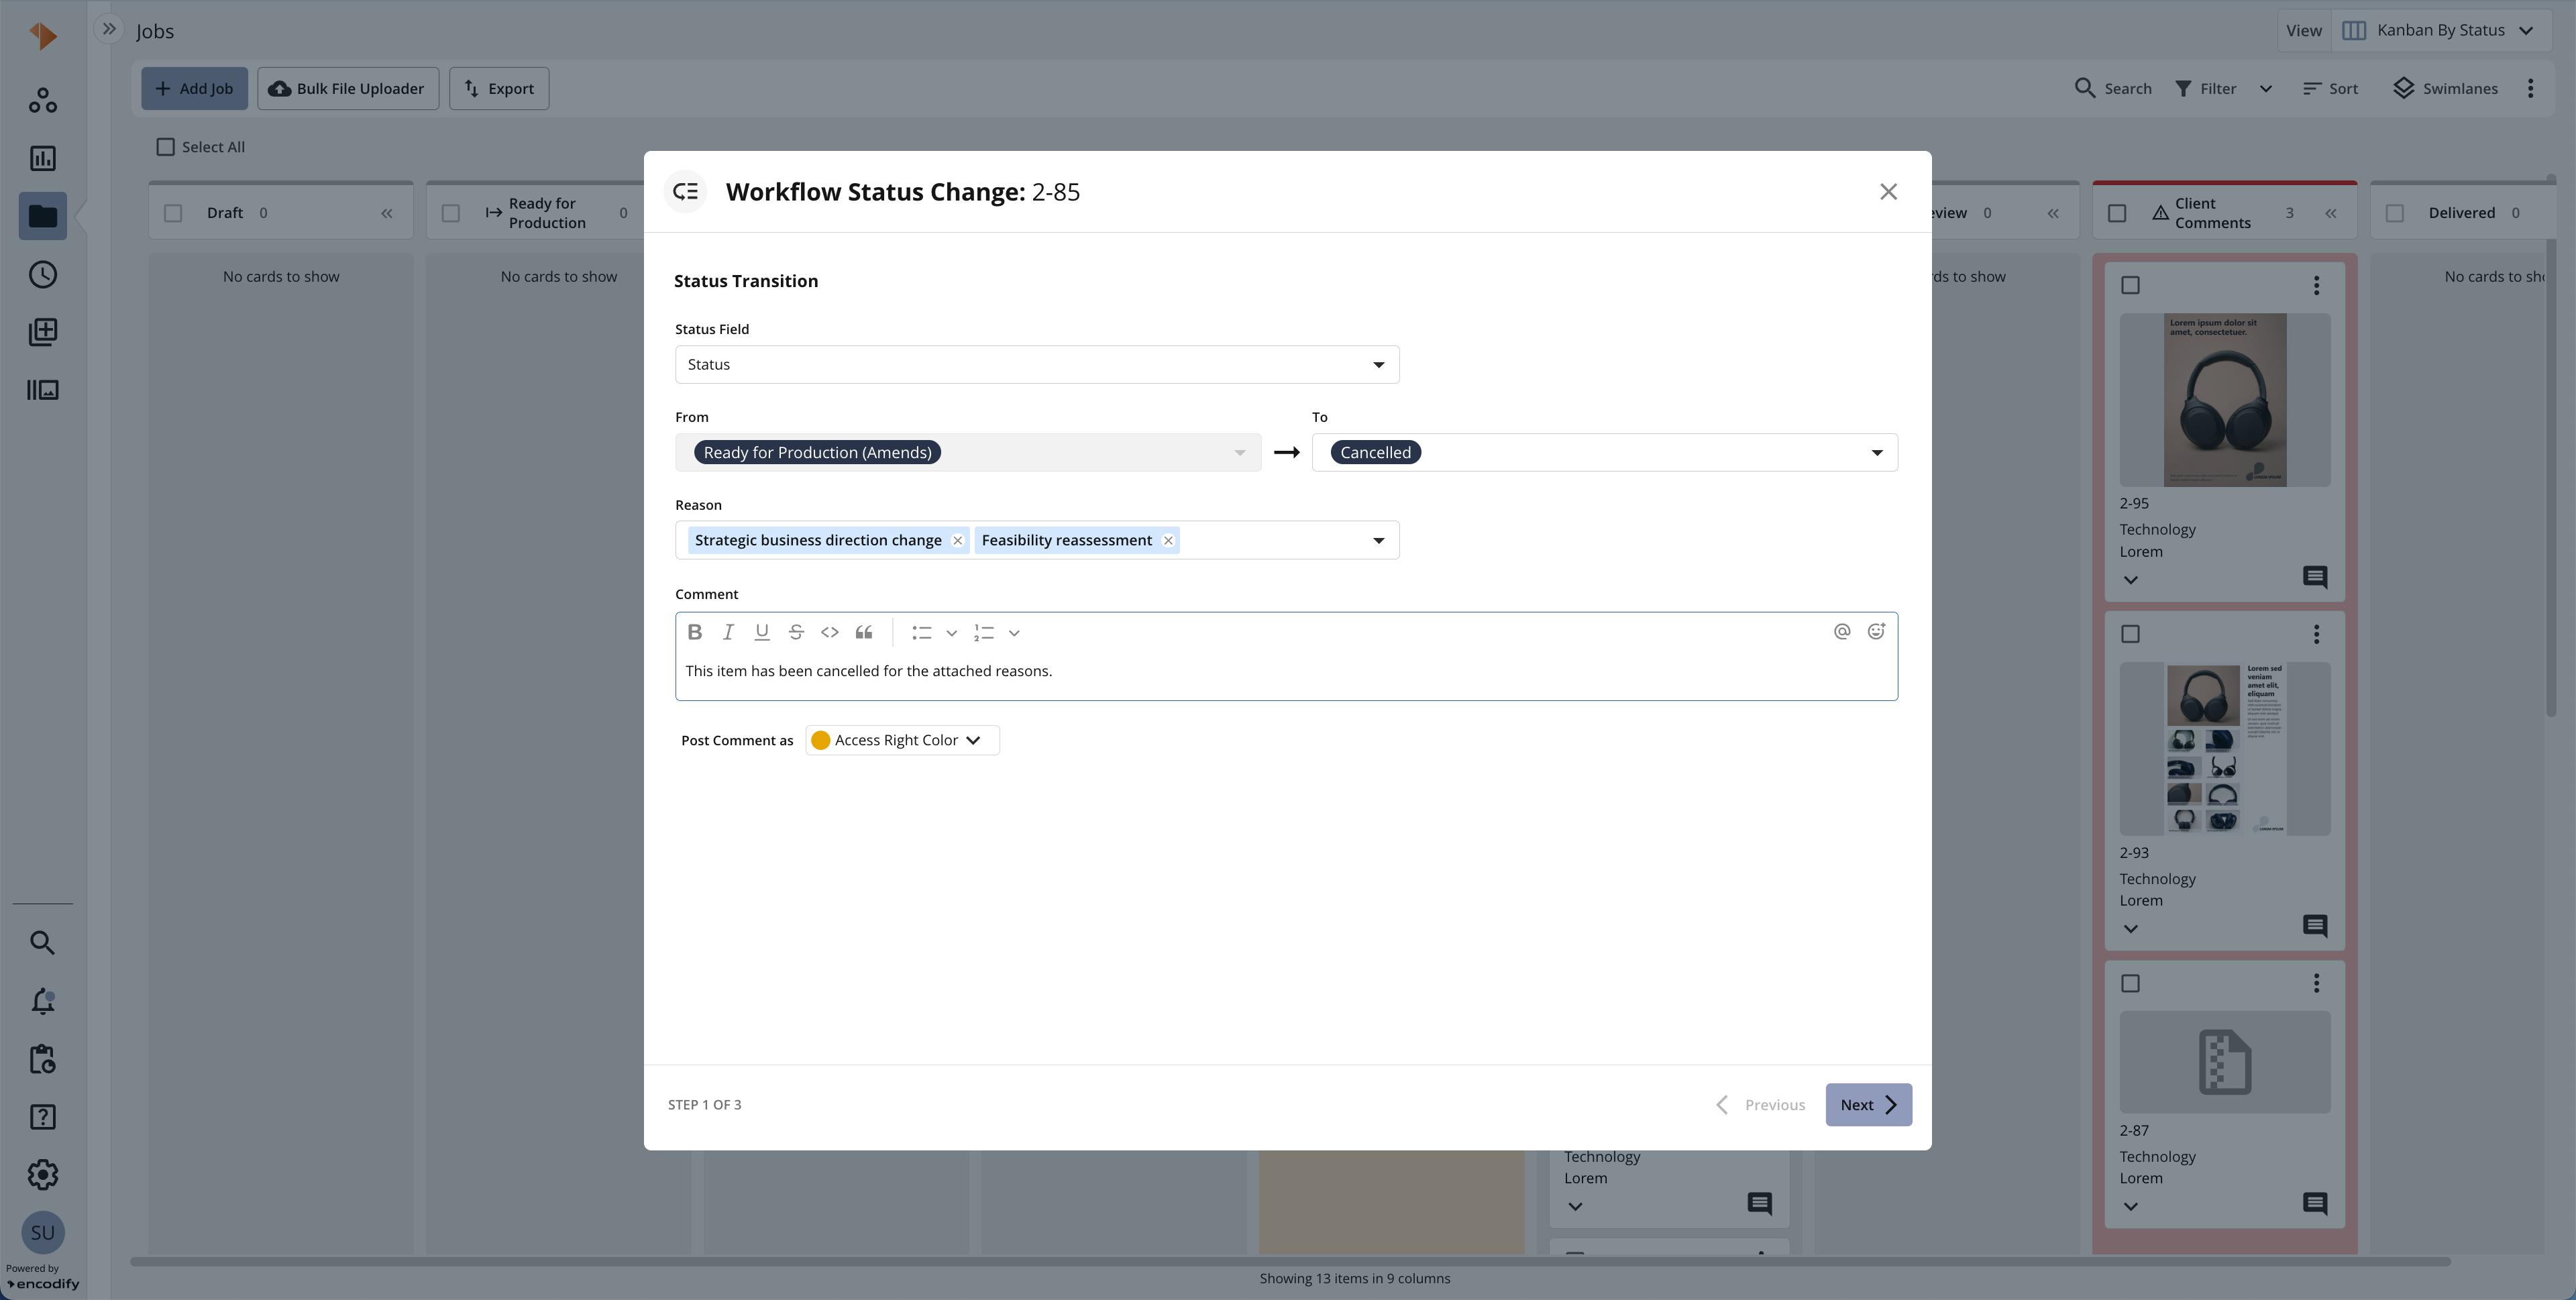
An image illustrating the workflow transition from ‘Ready for Production (Amends)’ → ‘Cancelled’
The table below provides a quick overview of the change status modal:
Action | Visual Guide |
|
|
|
|
|
|
|
|
|
|


Known limitations:
Any formatting (bold, italics, underline, strikethrough, bullet points etc) applied within the comment will be shown as HTML markup in the workflow log