Understanding the Calendar View
When the Time Tracking App is configured, clicking the respective icon in the side navigation takes the user to “My Time,” where they can access the calendar to manage their time. To access it, the user must select ‘Calendar’ from the top-right corner of the screen. The Calendar View provides a visual overview of your time entries across the week or month.
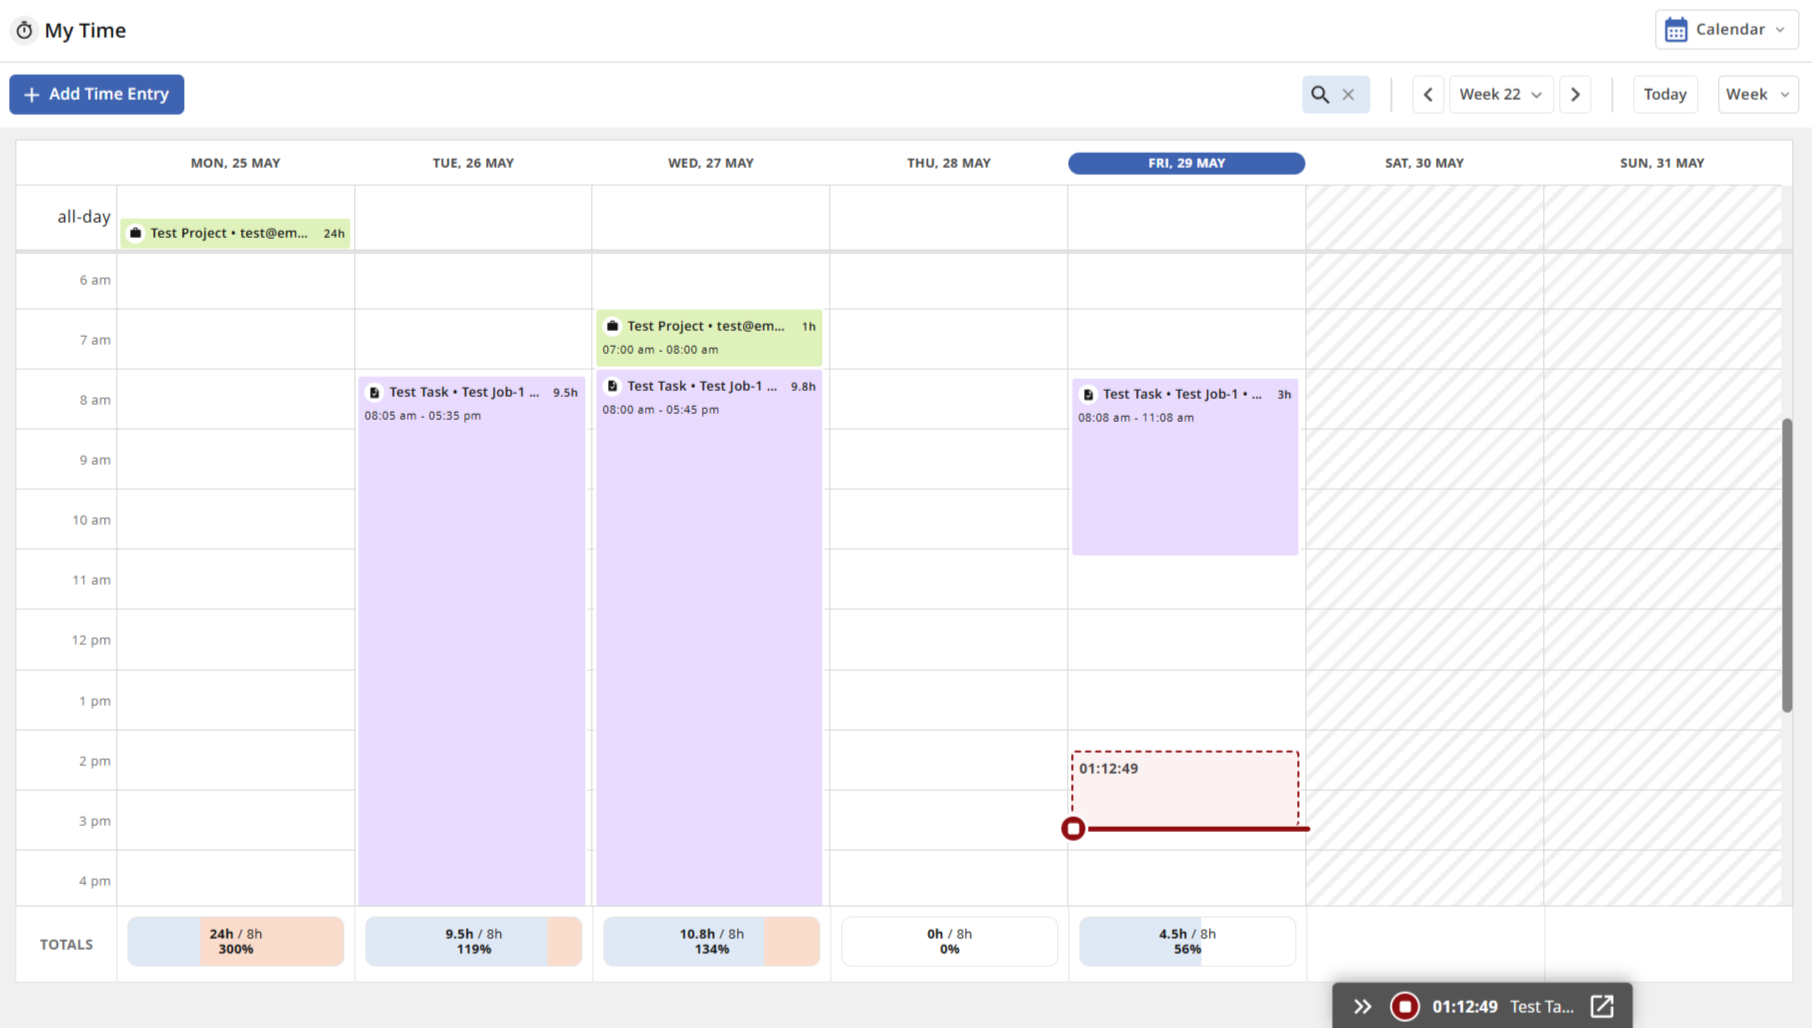
An image displaying the Calendar View — Week View
.png)
An image displaying the Calendar View — Month View
The table below provides a quick overview of the calendar view:
Action | Visual Guide |
|
|
|
|
|
|
|
|
|
|
|
|
| Week View:
Month View:
|
| Week View:
Month View:
|
|
|
|
|
| Before 30 minutes: After 30 minutes: |
|
|
| Running timer inside cell:
Running timer inside pop-up:
|
Note:
| Working Hours Configured:
Working Hours Not Configured:
Multiple-day entry on week view:
|
Note: The total target displayed in the Totals row is based on the Working Hours configured in the user's profile. | Working Hours Configured:
Working Hours Not Configured:
|
|
|
Note: Uncategorised time entries are not displayed on the Timesheet view |
|
.png)
.png)
.png)
.png)
.png)
.png)
.png)
.png)
.png)
.png)
.png)
.png)
.png)
.png)
.png)
.png)
.png)
.png)
.png)
.png)
.png)
.png)
.png)
.png)
.png)
.png)
.png)
Logging time in Calendar View
Important: When entering a duration, you can use the following format:
m,h,d, orwto represent minutes, hours, days, or weeks respectively. For example,2dwill be saved as24h.
The table below provides an overview of how time can be added in Calendar View - week and month.
Location | Description | Visual Guide |
|---|---|---|
Calendar View(Week) — via toolbar | In the Calendar View (Week mode), you can add a time entry by clicking the + Add Time Entry button in the toolbar, then selecting a Project/Task/Job within the form. |
|
Calendar View (Week) — via time grid | In the Calendar View (Week mode), you can add a time entry by:
Note:
|
|
Calendar View(Month) — via toolbar | In the Calendar View (Month mode), you can add a time entry by selecting the + Add Time Entry button in the toolbar, then selecting a Project/Task/Job within the form. |
|
Calendar View(Month) — via time grid | In the Calendar View (Month mode), you can add a time entry by:
Note:
|
|
.png)
.png)
.png)
.png)
Using the Timer in Calendar View
The Timer allows you to record time in real-time directly from the Calendar View. When a timer is running, a floating timer is displayed at the bottom of the screen showing the elapsed time and the associated entry.
The table below provides an overview of the timer actions available in the Calendar View month and week.
Location | Description | Visual Guide |
|---|---|---|
Calendar View(Week) — Timer | In the Calendar View (Week mode), you can start the timer by:
|
|
Calendar View(Month) — Timer | In the Calendar View (Month mode), the timer can be identified by:
|
|
.png)
.png)
.png)
.png)
.png)
"Show Assigned to Me" Items in Calendar View
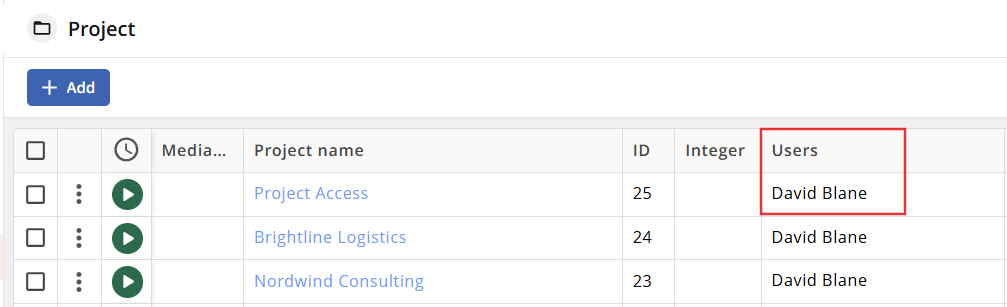
To facilitate the time logging experience, users can use the option Show Assigned to Me to view items assigned to them. By toggling this option ON, all items relevant to the user are displayed in a panel alongside their calendar, enabling quick time logging via drag-and-drop. When disabled, the panel is hidden.
Configuring the Assignee Field
Before users can filter by assigned items in the Calendar view, an administrator must map the appropriate Assignee fields for the Project, Job, and Task modules.
Navigate to Time Tracking App settings under Apps Configuration.
Select the Project, Job, or Task tab.
In the Optional section, locate the respective Assignee dropdown field.
Select the custom field used to track assignees for that module.
.png)
Note: Only User Module link fields of type Select Box and Multi Select Field are supported for the Assignee field mapping.
Other field types—such as User Field Content, Radio Buttons, Checkboxes, and Status Field—are not supported.
Once the configuration is complete, ensure that Projects, Jobs, or Tasks are actively assigned to specific users within their respective modules.
Displaying Assigned Items in Calendar View
To show assigned items on your calendar (in either Week or Month view):
Navigate to My Time and select the Calendar view.
Click the Ellipsis icon in the top-right controls area.
Turn on the Show Assigned to Me toggle switch.
How it Works
Toggle Enabled (ON): Opens the Items Assigned to Me sidebar on the right side of the calendar interface.
All items in the mapped modules assigned to the logged-in user are populated in this list
Users can drag and drop items directly from the sidebar onto the calendar grid to create and save time entries for specific time slots or days.
.png)
.png)
If no items are assigned to the user, the panel displays "No items found".
.png)
Toggle Disabled (OFF): Hides the Items Assigned to Me sidebar completely, displaying only existing calendar entries and time logs.
.png)
Work Log Description in Calendar View
The Work Log Description field lets users add a short note to a time entry, giving extra context on the work carried out. In Calendar View (both Month and Week views), clicking an item displays this description in a tooltip, without needing to open the item itself. If further detail is required, the View Work Log icon takes the user directly to the item.
.png)
If no description has been recorded, only the item's name and the View Work Log icon are displayed in the tooltip.
.png)
Configuring the Work Log Description Field
The Work Log Description field is configured once for the Time Tracking App and applies across both Timesheet View and Calendar View.
Navigate to Time Tracking App settings under Apps Configuration.
Select the Work Log tab.
In the Optional section, locate the Work Log Description dropdown field.
Select the custom field used to store descriptions for time entries.
.png)
Once configured, the description will appear in a tooltip when clicking any calendar item with a recorded description, in either Month or Week view, letting users preview its content without leaving the current view.
Note: Only fields of type Text Field and Text Box (with content type Text) are supported for the Work Log Description field mapping.
Other field types—such as Decimal numeral, Integer, Select Box, and Date—are not supported.