Understanding the Timesheet
After clicking the icon, you will be taken to the timesheet, allowing you to manage your time.
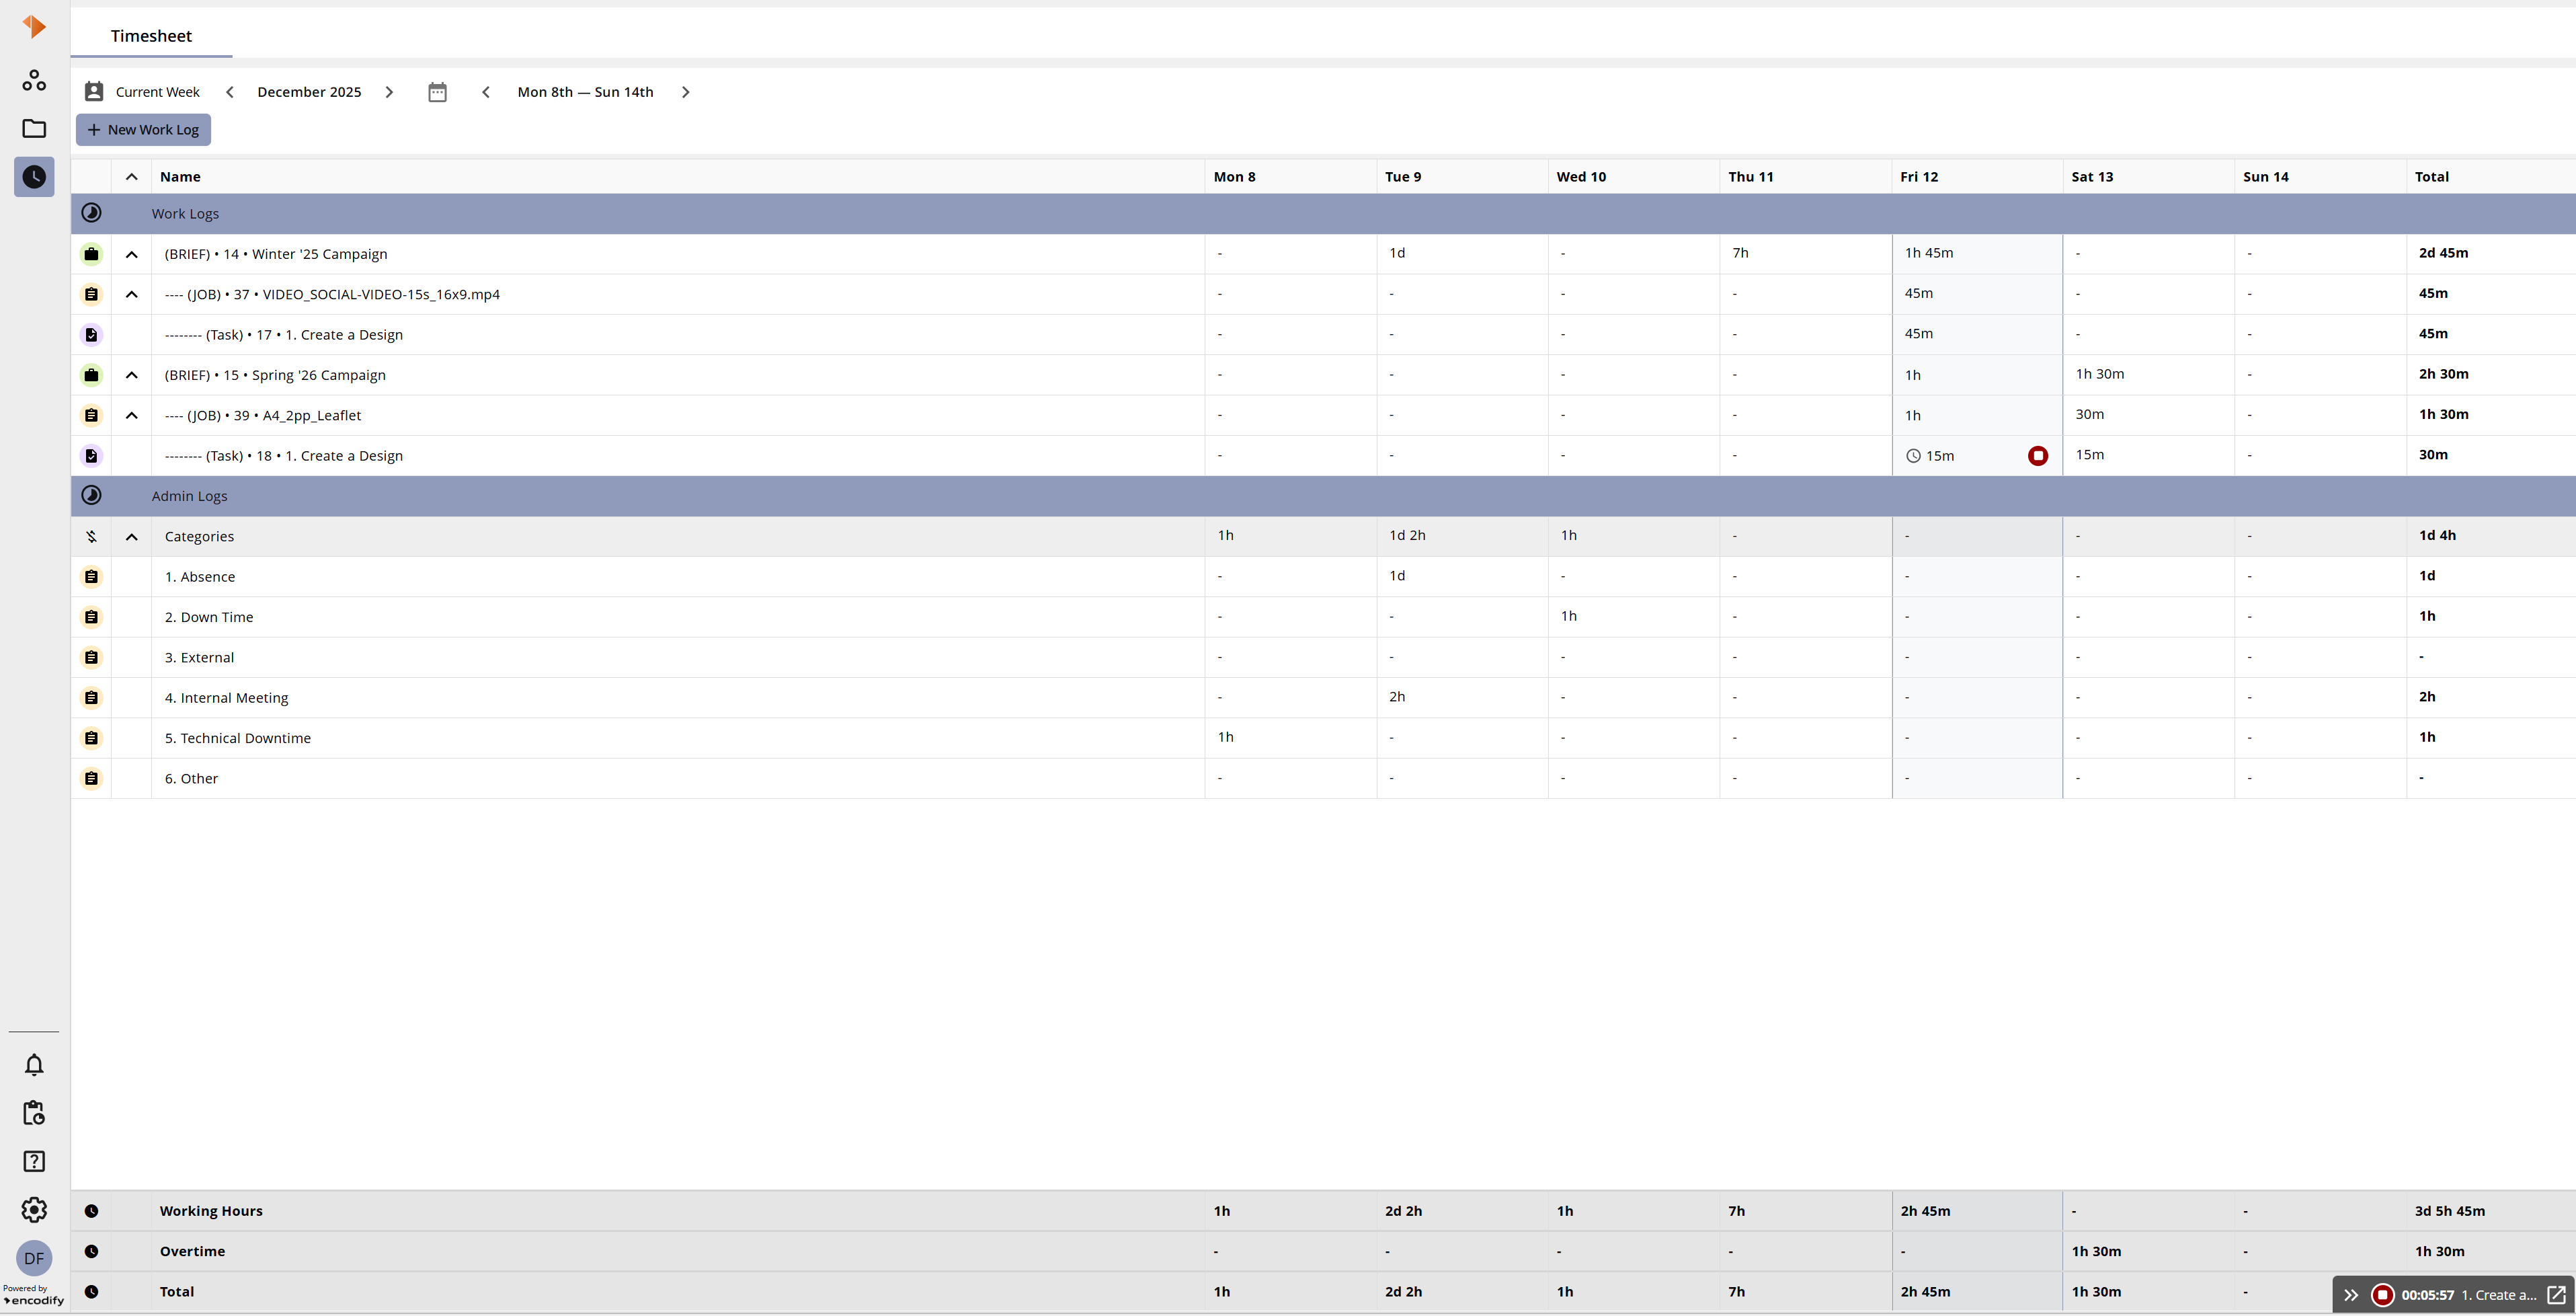
An image displaying Hours App Timesheet
The table below provides a quick overview of the timesheet:
Action | Visual Guide |
|
|
|
|
|
|
|
|
|
|
|
|
|
|
|
|
|
|
|
|
|
|
|
|

.png)
.png)
.png)
Logging time against the Project
Important: When entering a duration, you can use the following format:
m,h,d, orwto represent minutes, hours, days, or weeks respectively. For example,2dwill be saved as24h.
When adding time entries at the project level, you must complete the fields specified in the app configuration: Project, Start Date, and Duration.
The table below provides an overview of the different locations where time can be added at the project level.
Location | Description | Visual Guide |
|---|---|---|
Hours App | In the Hours app, you can add a new work log entry from two different locations:
|
|
Form View | In Form View, you can add a new work log entry from two different locations:
|
|
.png)
.png)
.png)
Logging time against the Job
Important: When entering a duration, you can use the following format:
m,h,d, orwto represent minutes, hours, days, or weeks respectively. For example,2dwill be saved as24h.
When adding time entries at the job level, you must complete the fields specified in the app configuration: Project, Job, Start Date, and Duration.
The table below provides an overview of the locations where time can be added at the job level.
Location | Description | Visual Guide |
|---|---|---|
Hours App | In the Hours app, you can add a new work log entry from two different locations:
|
|
Form View | In Form View, you can only add a new work log entry from two different locations:
|
|
.png)
.png)
Logging Time against Task (Project and Job levels supported from Version 23 onward)
Important: When entering a duration, you can use the following format:
m,h,d, orwto represent minutes, hours, days, or weeks respectively. For example,2dwill be saved as24h.
When adding time entries at the job level, you will be required to complete the fields specified in the app configuration - Project, Job, Task, Start Date, and Duration.
The table below provides an overview of where time can be added - at the Task level in versions up to 22, and at the Project, Job, and Task levels starting with version 23.
Location | Description | Visual Guide |
|---|---|---|
Hours App | In the Hours app, you can add a new work log entry from three different locations:
Once the timer has started on Timesheet, a Stop Timer button will be displayed in the timesheet. |
|
Spreadsheet View | In Spreadsheet View, you can add a new work log entry from three different locations:
|
|
Split View | In Split View, you can add a new work log entry from five different locations:
|
|
Kanban View | In Kanban View, you can add a new work log entry from three different locations:
|
|
Gallery View | In Gallery View, you can add a new work log entry from two different locations:
|
|
Timeline View | In Timeline View, you can add a new work log entry from three different locations:
|
|
Timeline 2.0 View | In Timeline 2.0 View, you can add a new work log entry from two different locations:
|
|
Form View | In Form View, you can add a new work log entry from four different locations:
|
|
.png)
.png)
.png)
.png)
.png)
.png)
.png)
.png)
.png)
.png)
Using the Timer Function
Once the timer has been initiated by clicking the  or
or ![]() button, it will be displayed by default in the bottom right order in an expanded state. From the Hours App Timer, users can perform the following actions:
button, it will be displayed by default in the bottom right order in an expanded state. From the Hours App Timer, users can perform the following actions:
Collapse the timer - Minimises the timer, showing only the Stop button and time spent.
Expand the timer - Maximises the timer to display the Stop button, time spent, task name, and Open Item icon.
Reposition the timer - Drag the timer horizontally to a preferred location — this position will be remembered for future sessions.
View time spent - Displays the total time tracked on the current task.
View the current task name - Shows the name of the task being tracked.
Open Item icon - Opens the task directly in the Item Info Sheet.
Stop icon - Stops the timer and ends time tracking for the task.
.png)
Known behaviour:
The start timer functionality will only be available for the current day
A user cannot have more than one timer running at once
When clicking Start Timer while a timer is already running, the previously started timer will be stopped, the work log will be updated with the corresponding duration, and the new timer will start automatically.
A running timer will not be stopped automatically is the user navigates away from the view, logs out the application or in the extreme case when the server is restarted. In all these case the timer needs to be stopped manually
A running timer will display “1” within the is running field within the work log module
Admin Log
An Admin Logs allows you to create a list of non-chargeable job entries, which are used to record time that does not directly contribute to billable work. These entries help provide a more complete view of how time is spent across the working week.
Typical uses for Admin Log entries include:
Absences – such as annual leave, sick leave, public holidays, or other types of authorised time off.
Meetings – including internal team meetings, one-to-ones, company updates, or other collaborative sessions that aren't chargeable to a specific project.
Personal development – such as training courses, learning sessions, research time, or skills development activities.
To create an Admin Log, you will need to create a new job for each chargeable job entry required, ensuring the checkbox for Is Admin Job is checked (see Configuring Hours App for more details)
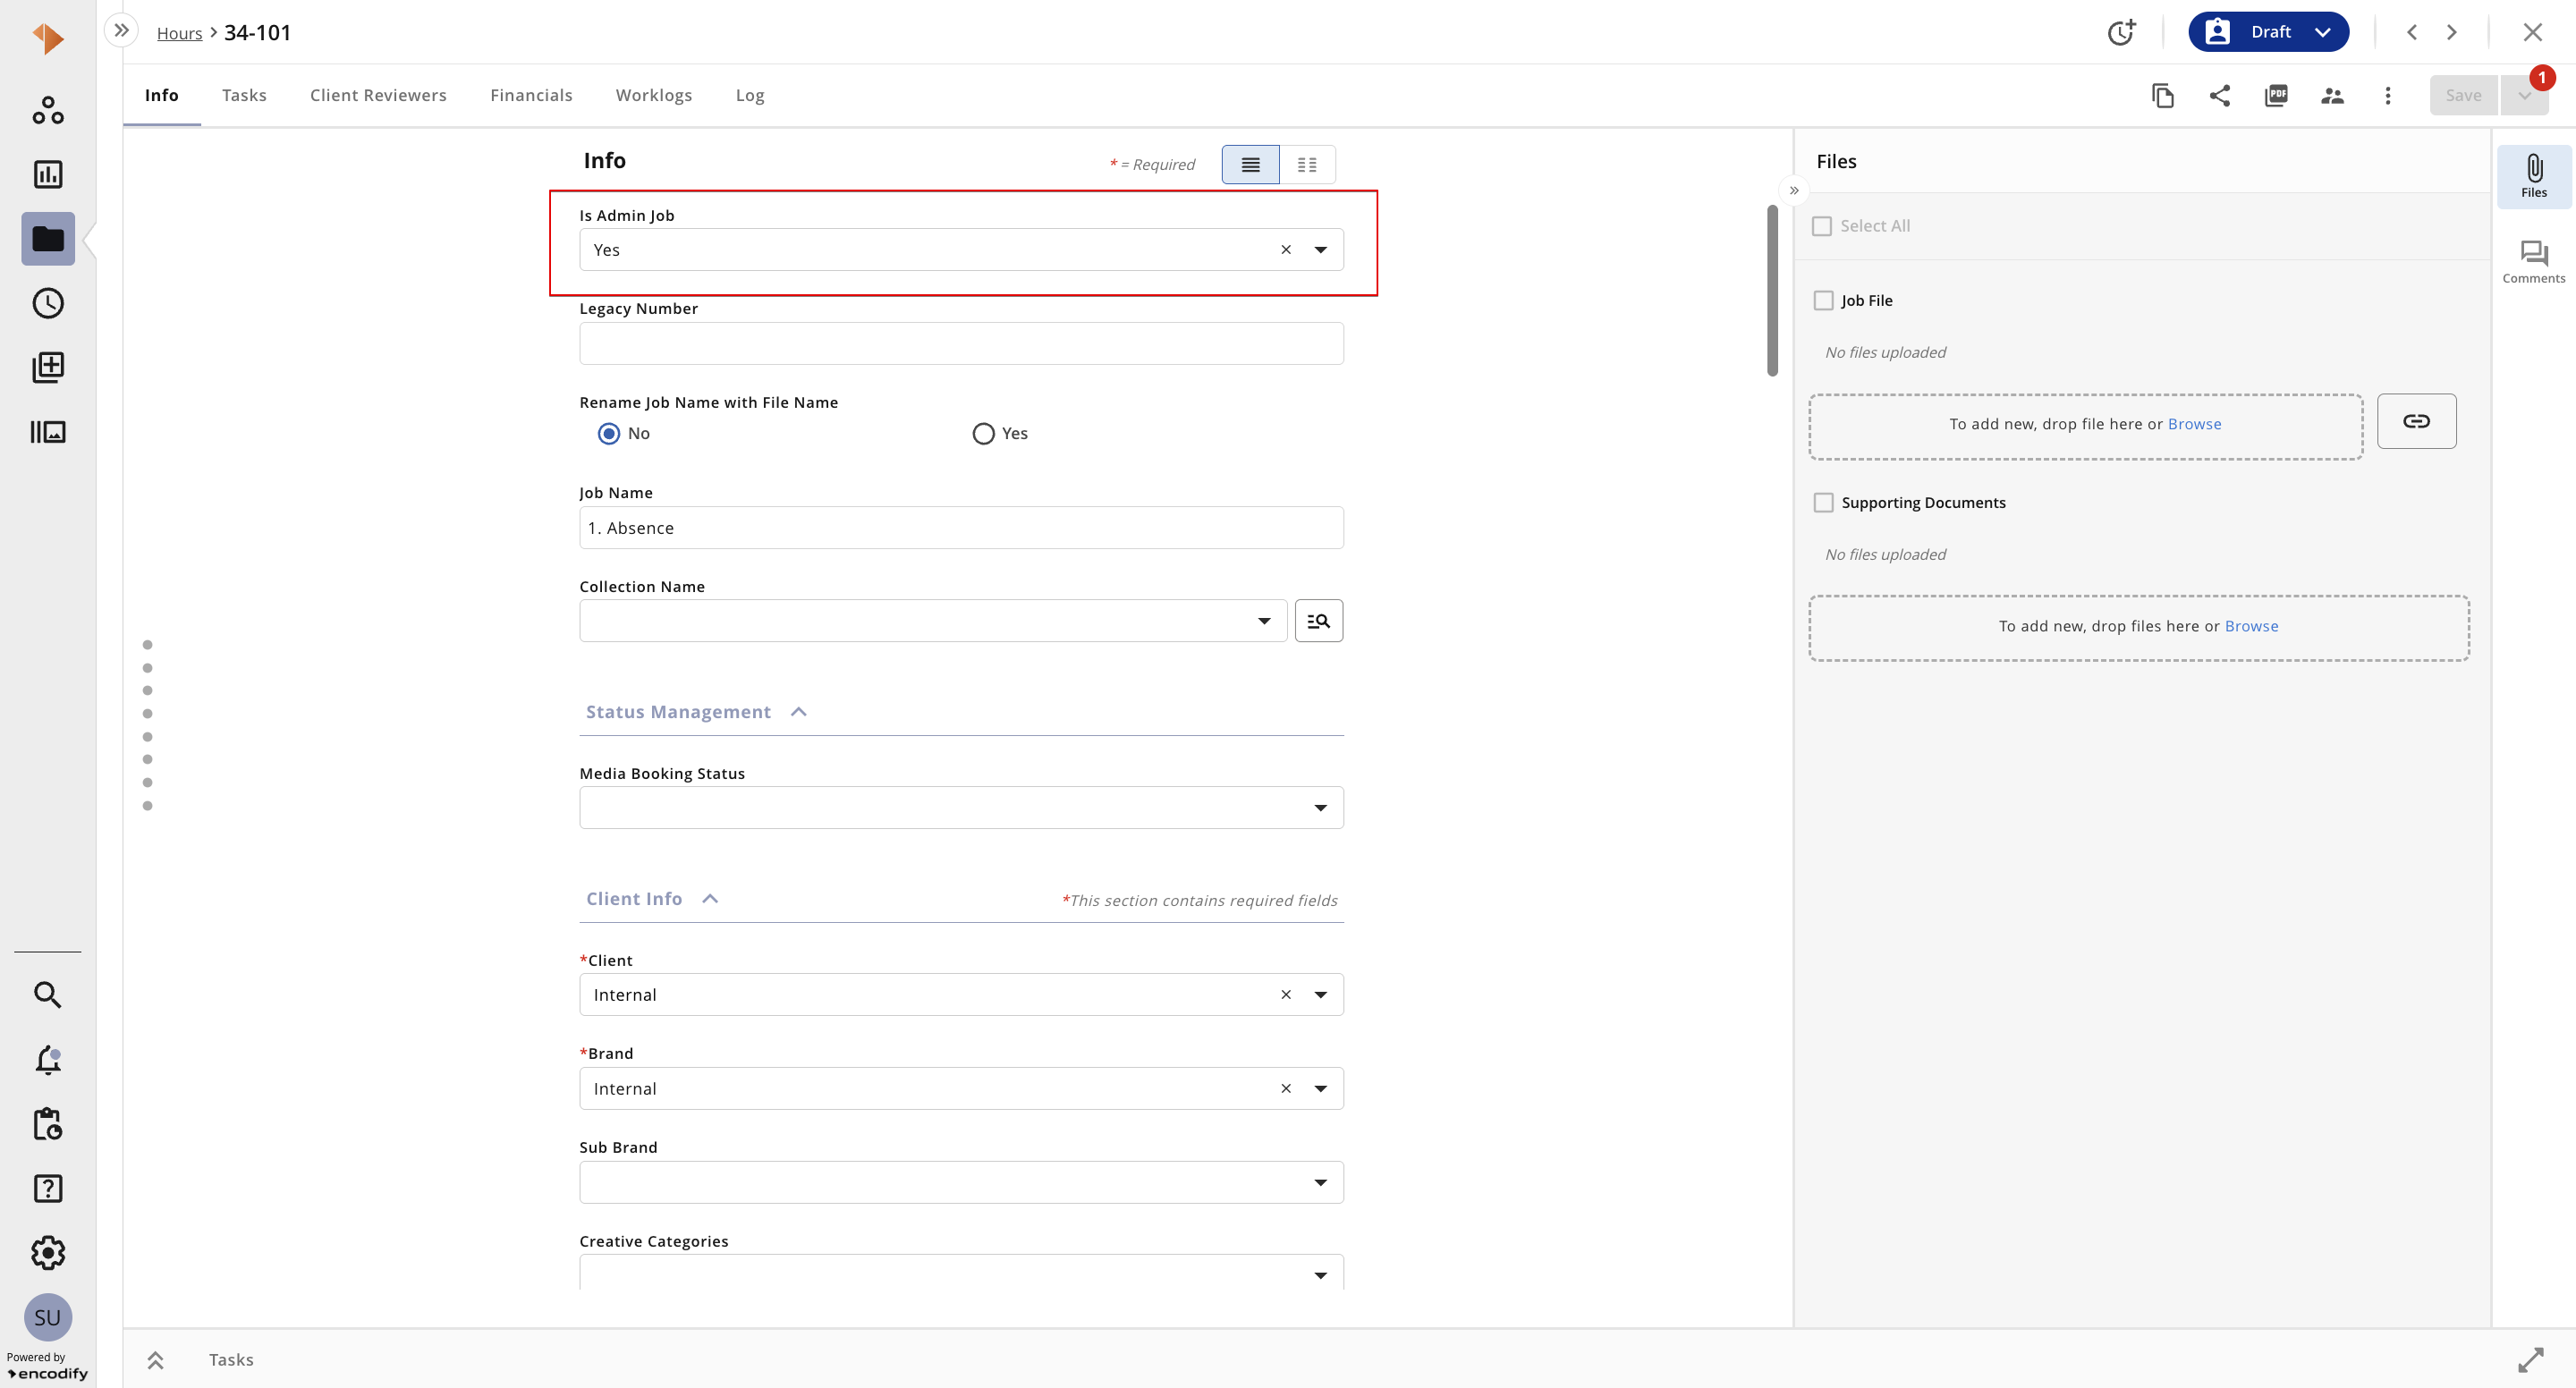
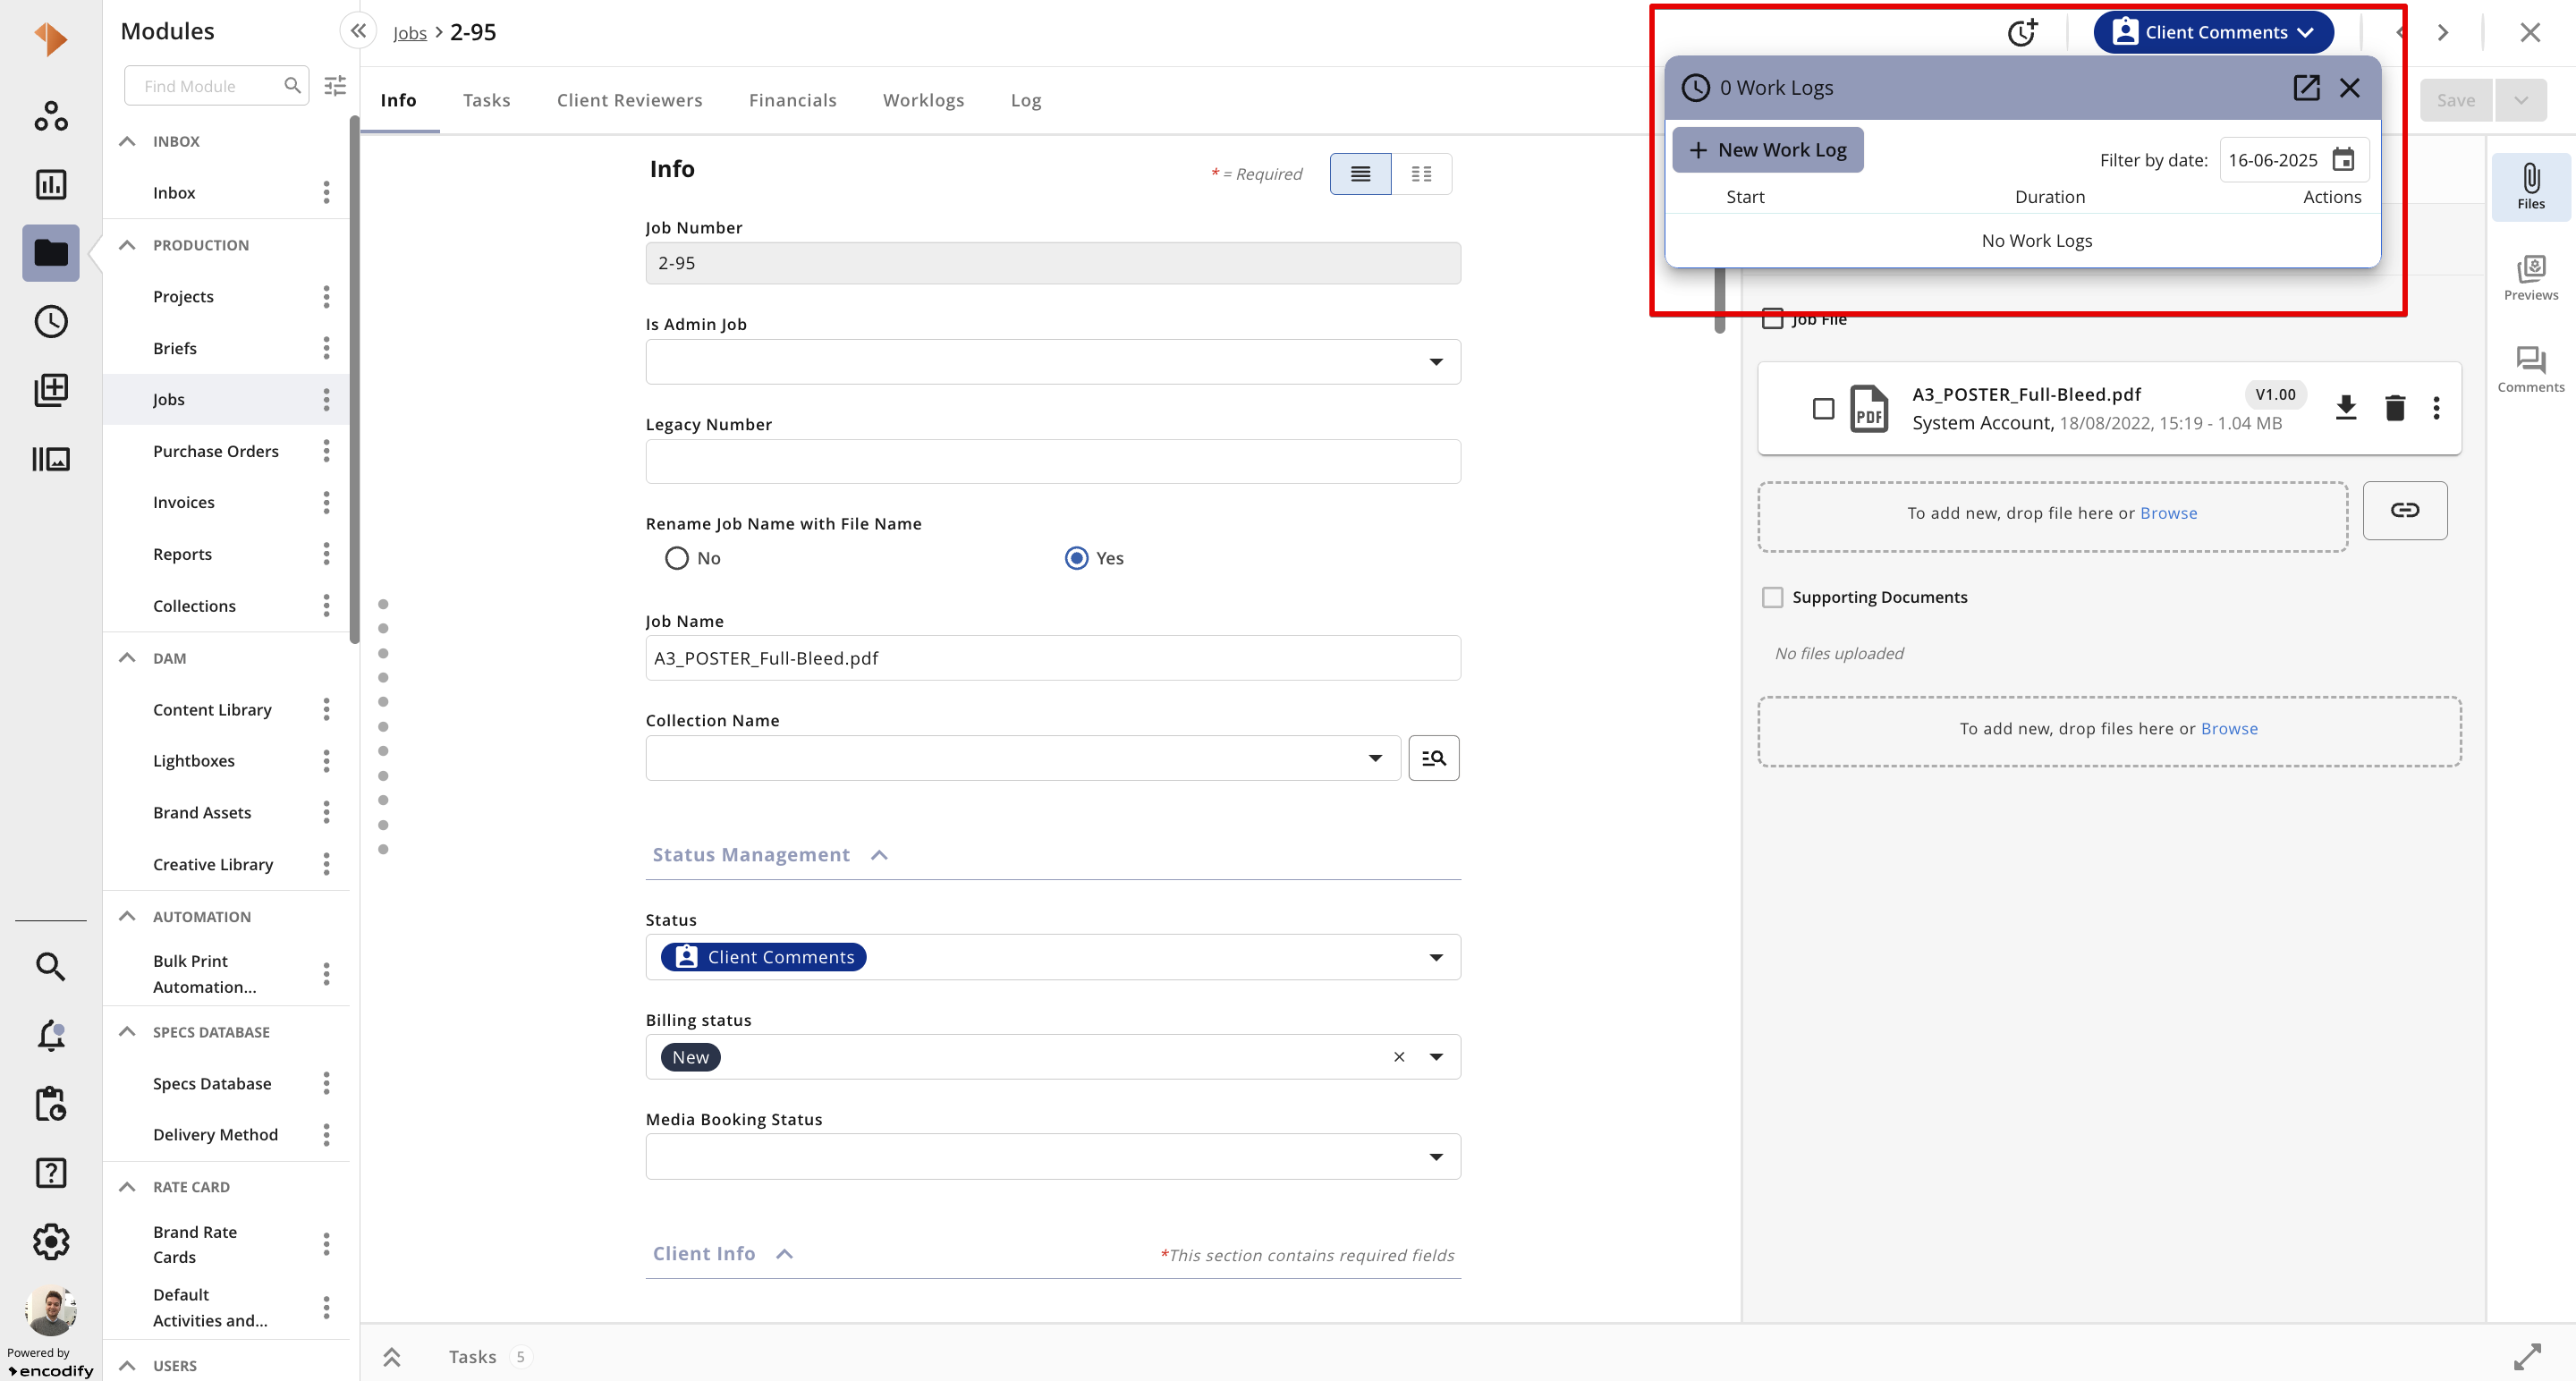
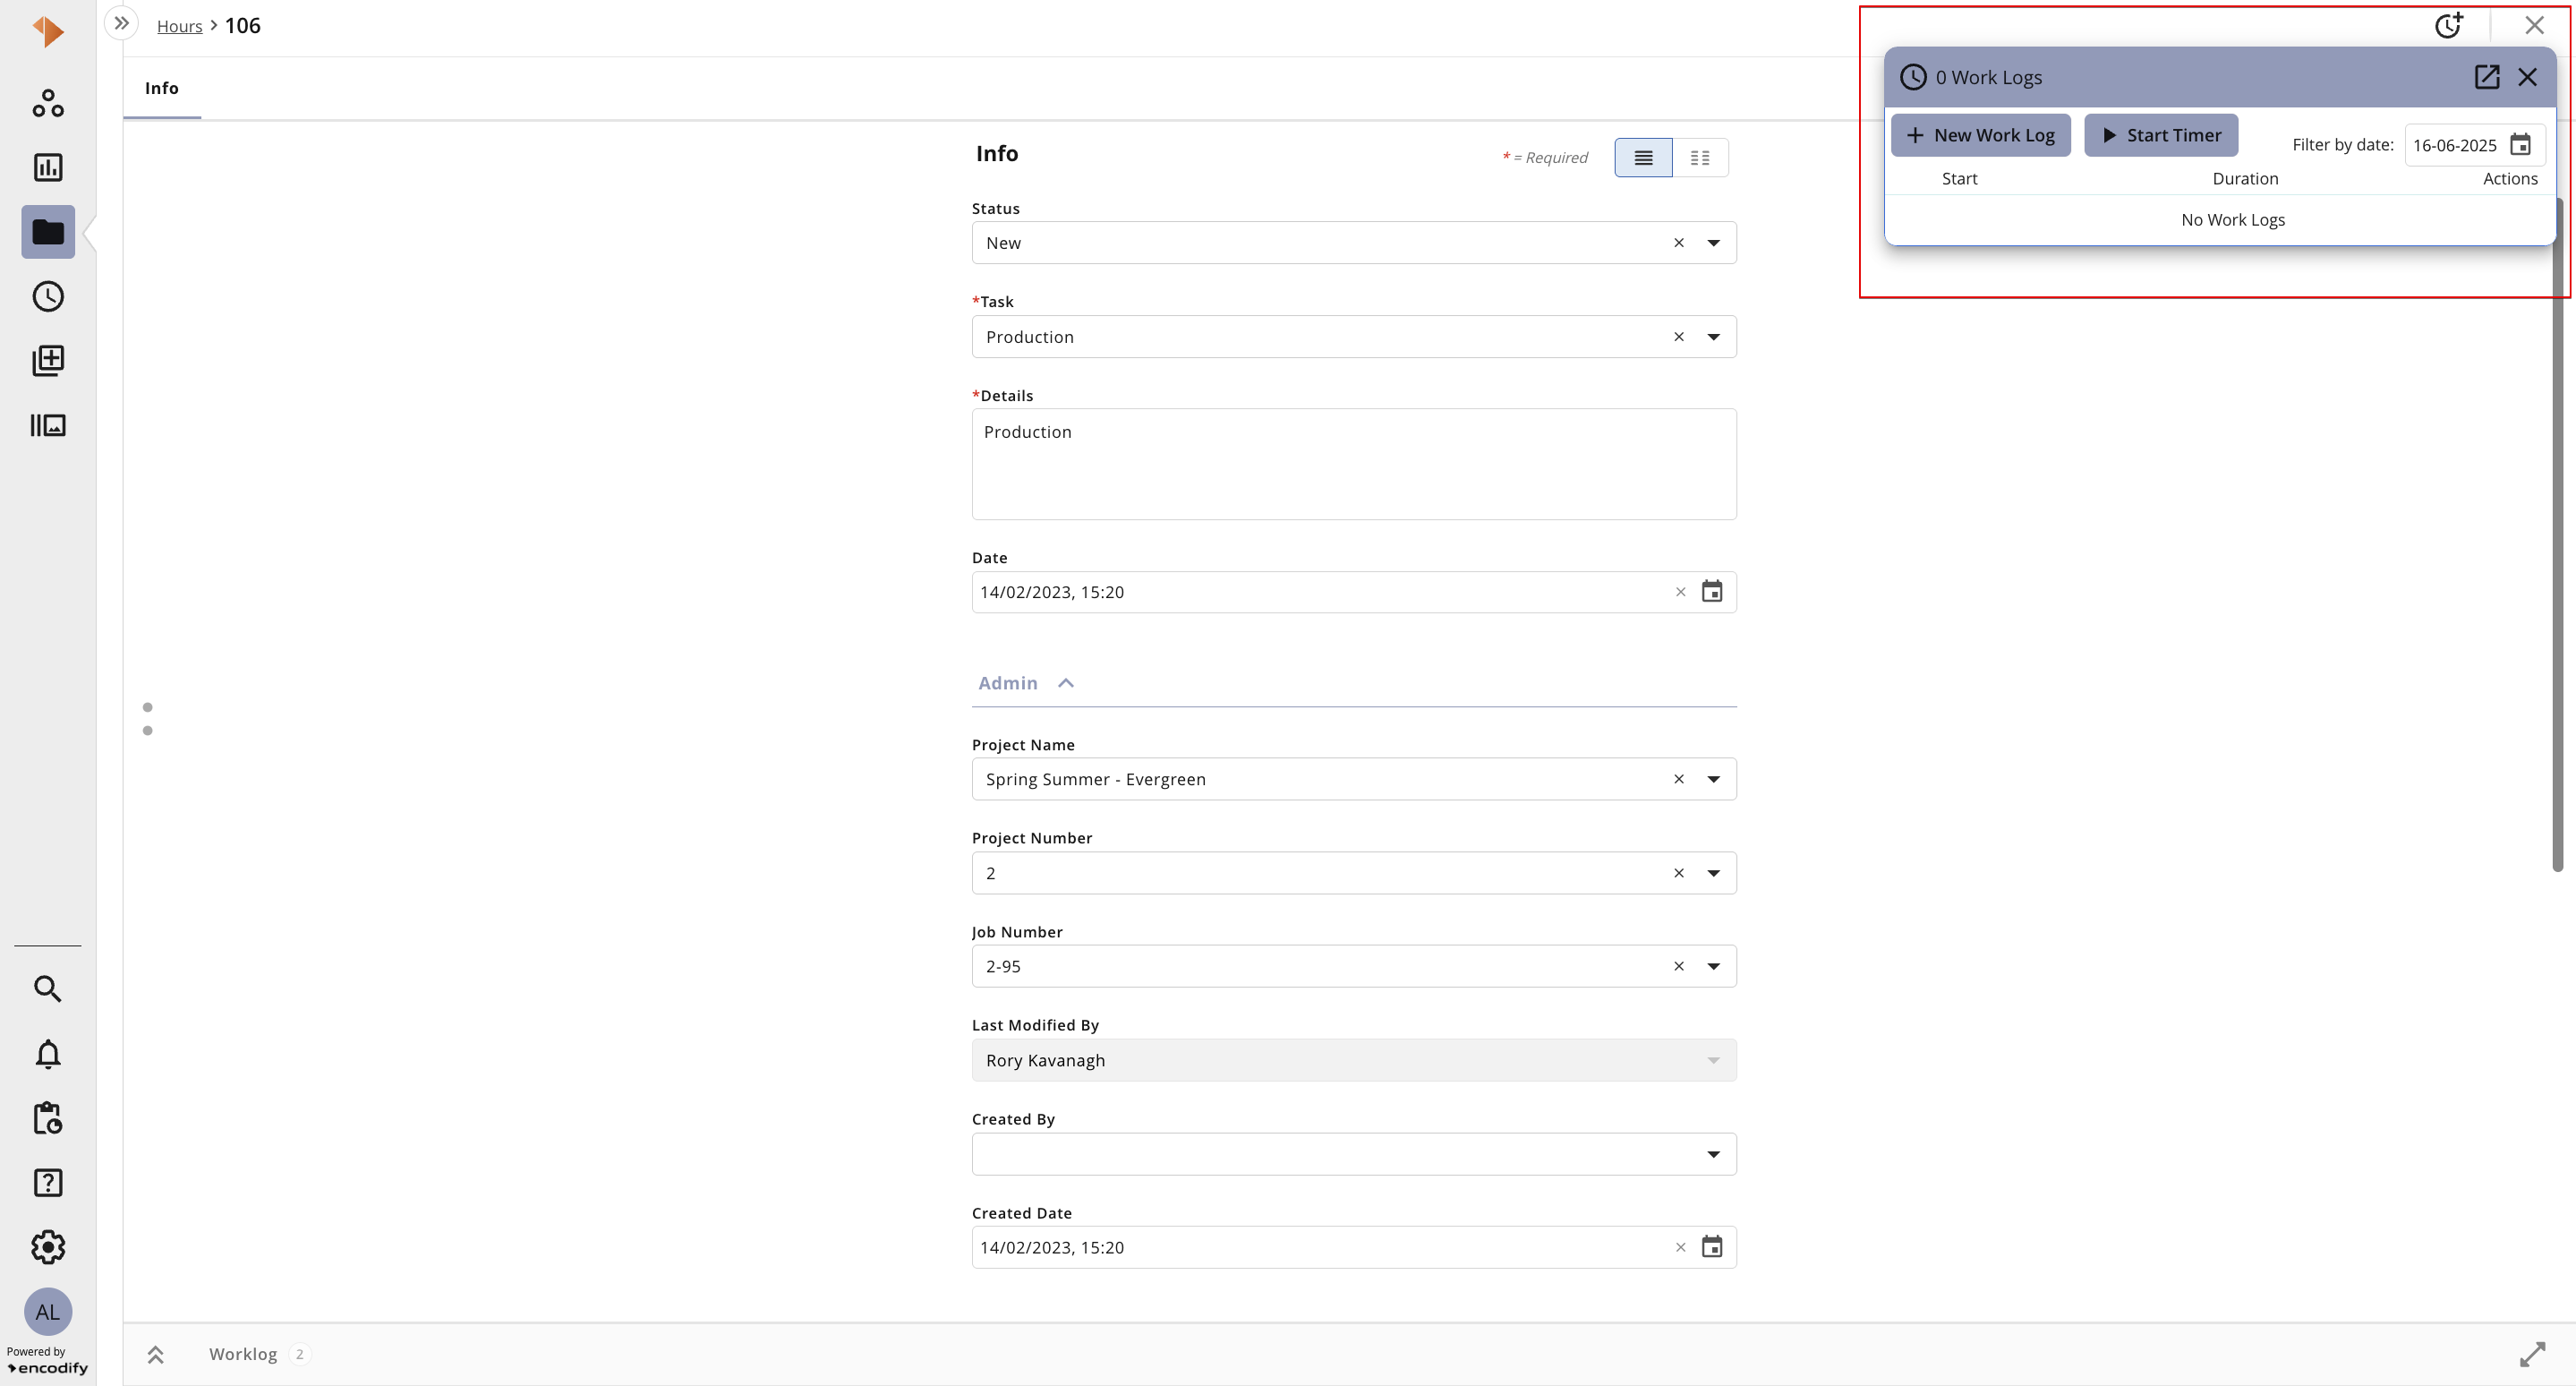
An image displaying the Item Info Sheet with an option to mark the job as ‘Is Admin Job’

An image displaying Admin Logs section in Timesheet