How to create a Wizard Form View
To create a Wizard Form, follow these steps:
Navigate to the Module View Library (see Manage Views for more details)
Locate Wizard Form and click on the card.
Click Add New Wizard Form to open the configuration wizard.
Enter a Name and, optionally, a Description.
In the People with access field, define whether you wish to All users or whether you wish to Selected Access Rights to have access to the view.
Note: Currently, users can only view one active view at a time. If they are granted access to multiple views, the system will display the first view in the list (in alphabetical order).
.png)
An image highlighting the General settings of Wizard Form View
Navigate to the New Item Form tab or click Next.
Choose which file fields should be displayed when user adds a new item by selecting them in “File Fields” field. Selected fields order can be adjusted.
Customise which fields should be displayed when a user adds a new item by dragging them from the Available Fields list to the Fields to Add Item list in Item Form section. Adjust the order of fields to suit your needs.
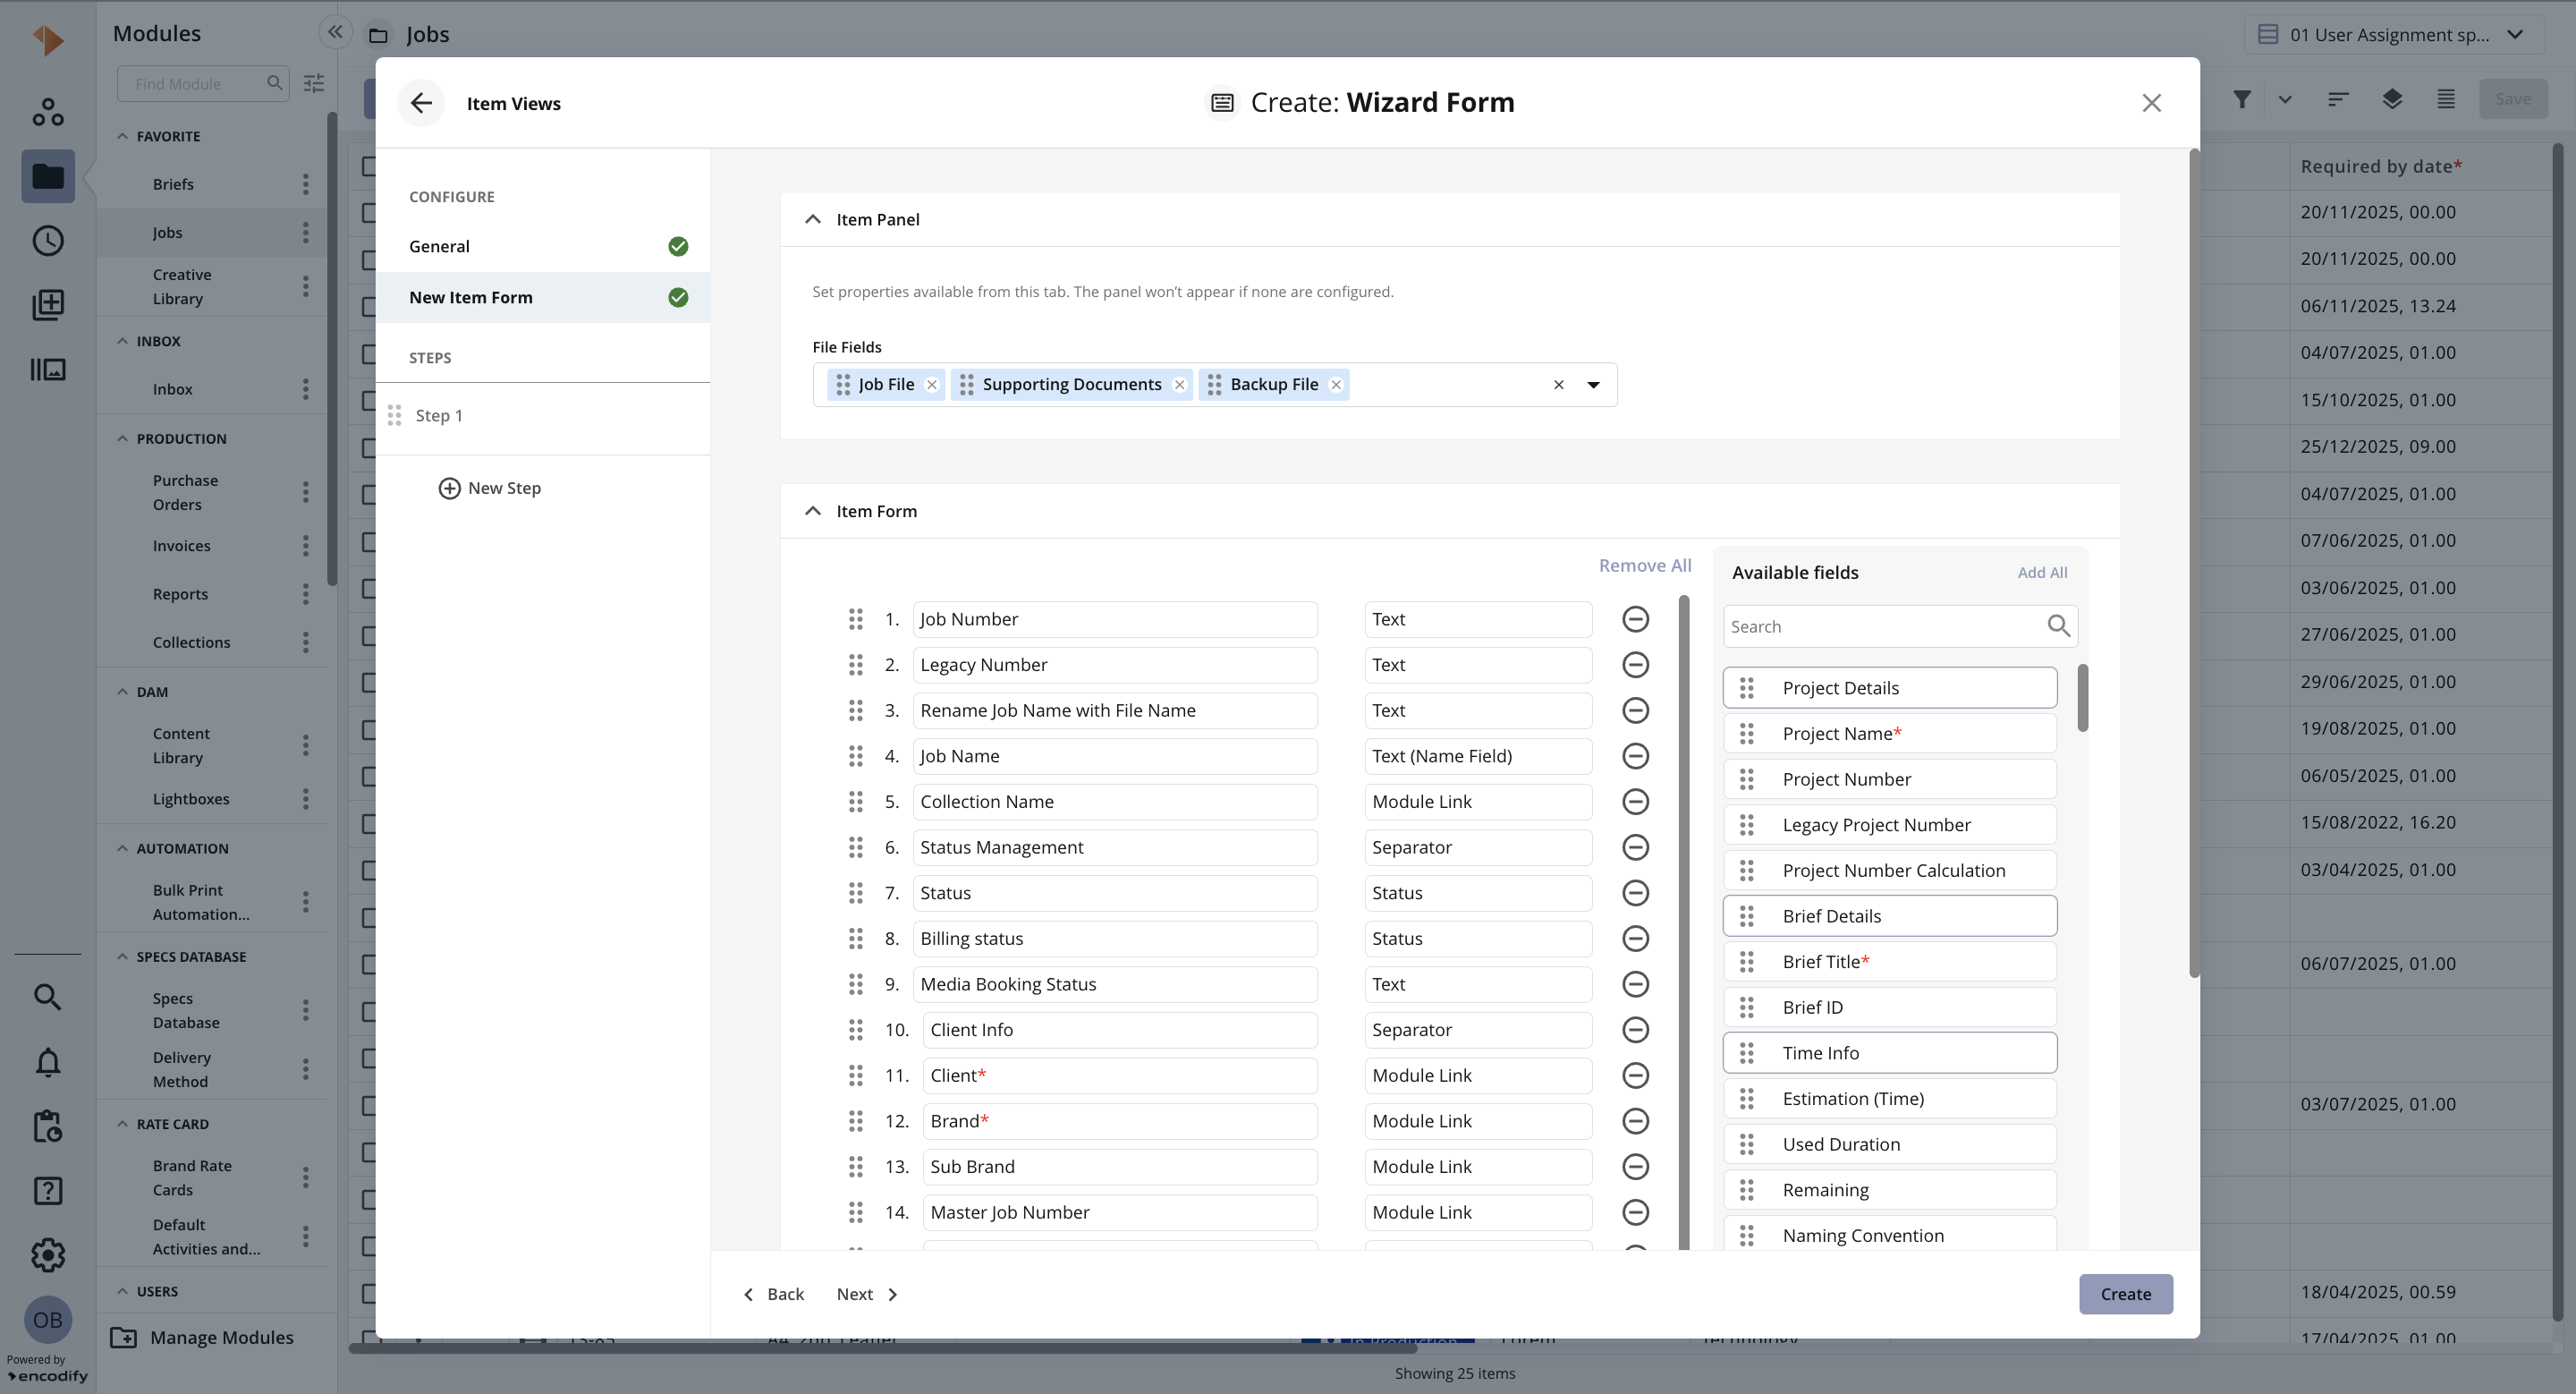
An image highlighting the New Item Form settings of Wizard Form View
Navigate to the Step 1 tab or click Next.
Enter a Name.
Choose whether to enable or disable the Workflow Button, Export PDF Button, and Save Button.
Chose Item form only content type
In the File Fields dropdown, select which file fields to be shown in tab, and adjust the display order as required.
Choose whether to enable or disable the Show Item Comments toggle.
In the Activity Logs dropdown, select which change logs you would like the view to include: Field Logs, Download Logs, Workflow Logs, Version Logs, and Sharing Logs.
In the Item Form section, drag and drop fields from the Available Fields list to the Fields to Show list, and adjust the display order as required.
.png)
An image highlighting the “Item form only” content type for Item View Step settings of Wizard Form View
Click New Step to create a second step in the form
Enter a Name.
Choose whether to enable or disable the Workflow Button, Export PDF Button, and Save Button.
Chose Inline modules only content type
In the Inline Module dropdown, select the related module.
In the Link Field dropdown, select the field that relates the two modules.
The Add Button Label will be pre-filled with "Add". You can change this to suit your business requirements.
In the Default Module View dropdown, select the default view you wish to display.
Define whether View Selection should be Static or Dynamic:
If set to Static, choose your Preferred View—either the Default View or the Last View Selected.
If set to Dynamic, you can change the module view based on metadata entered by the user. Select the Field that triggers view selection, then complete the mapping table by defining each value and its associated view.

For the final stage, repeat the New Step process to define each step of the wizard form, selecting whether to display Fields or an Inline Module as appropriate for each stage.
Click Create to confirm your settings and create the view.
Note: New Item Form as well as step with Item form only content type can’t be created with empty Item Form section