Configuring SSO with Google

Prev Next

Setting up SSO for Google


This guide provides step-by-step instructions and screenshots from the Encodify system and from the Google admin console to help you configure Google whether using SAML or OpenID.

Configuring OpenID Connect for Encodify through Google


  • First, navigate to Site Configuration → Identity Providers and Users → Identity Providers in the Encodify system.

  • To create a new provider click the button “Add New IdP

  • For the field Name ID, use only English letters and no spaces. This value will be used later as part of the URL.  

  • For Display Name for Login Page, use a name that you would like users to see on the login page as a label for the login button.  

  • Ensure the Authentication Method is set to OpenID Connect.  

  • The Email Domains field is optional but can be used to add a restriction based on allowed email domains for authorisation. Any user with an email address that belongs to specified domains will be able to log in. You can specify domain names separated by a comma, e.g. encode.dk, microsoft.com

  • Click Next to proceed to step 2

  • Link your IdP configuration to an existing Login URL and Login Page, or create new ones. Each IdP can be linked to only one Login URL. See Configuration of Login URL for more details.

  • Click Next to proceed to step 3

Google Admin Console

  • There are 3 sections: API Keys, OAuth 2.0 Client IDs, Service Accounts. We need the item in the second section. To proceed, select CREATE CREDENTIALS → OAuth client ID at the top.

  • For the next step specify:

    • Select Web application from Application type.

    • In the Name field, type a name for the credential. This name is only shown in the Google Cloud console.

    • Add authorized URIs related to your app:

      • Authorized JavaScript origins: domain of Encodify application (can be several). It should look like “https://mpa.dev.encode.dk”

      • Authorized redirect URIs: redirect from the identity provider page at step 3, called Callback URL. It should include the value of the Name ID field of the Identity provider. It should look like “https://mpa.dev.encode.dk/mpa/login/oauth2/code/OidGoogle”.

After specifying those parameters click CREATE.

  • After saving, you can copy the Client ID and Client secret from the dialog titled "OAuth client created" by using the "copy" icon next to each section.

Finalise IdP Configuration

Google_2.png

  • Next 2 pages, access rights mapping and user groups mappings are not supported when the IdP provider is Google, because it is not possible to expose extra attributes in tokens from Google, only standard fields, like name, email, etc.

  • Click Next and Next again to proceed to step 5

  • The next step is Default User Properties which allows specific params like Access Rights and some fixed attribute values, like in my example Division is set to Managers for users, which will be set for the new user on login with auto-provisioning.

  • Click Next to proceed to step 6

  • This step allows setting default user groups for users, which will be set for the new user on login with auto-provisioning.

  • Click Next to proceed to the last step

  • The last step of the wizard allows specifying a Welcome Email and “First Login” Message for new users. If those are enabled, a user who logs in to the Encodify system first time will receive the email and will see the modal window with welcome text on entering the site using current IdP authentication.

  • Click Save IdP to finalise the IdP configuration

  • After saving new Identity provider should be present in the list of Identity Providers

Logging into Encodify using SSO

  • If the new identity provider is the only configured authentication method for the login URL, an automatic authentication attempt will be made upon entering the URL.

  • When other providers or "Internal" are also configured, the login URL will display a button for logging in via the new identity provider (e.g., "Sign in with Google SSO").

Configuring SAML for Encodify through Google


Overview

Setting up SAML SSO for Encodify using Google as an Identity Provider (IdP) involves configuring both Google and Encodify IDP to communicate securely and authenticate users using SAML messages.

Configuration includes 2 main steps:

  • Configuration of Custom SAML App in Google Workspace

  • Configuration of the Identity provider in Encodify

Configure Custom SAML App in Google Workspace

Note!

Configuration of the SAML App in Google workspace requires access to the Admin Console.

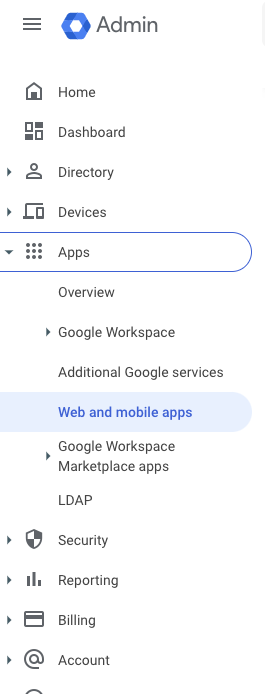
  • Sign-in to Google Admin Console.

  • Go to Menu > Apps > Web and mobile apps.

Screenshot 2024-01-17 at 11.30.29.png

  • Click Add App > Add custom SAML app.

Screenshot 2024-01-17 at 14.15.50.png

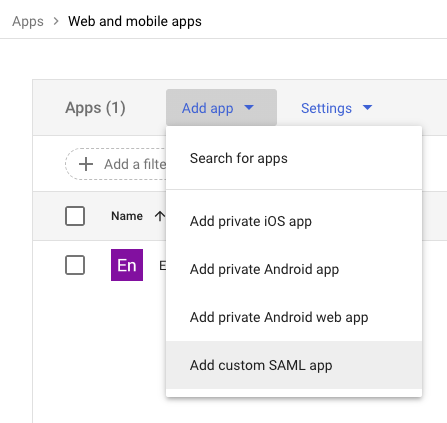
  • Enter a name for the SAML app and click Continue.

  • Click Continue on the next step where Google SAML attributes are displayed.

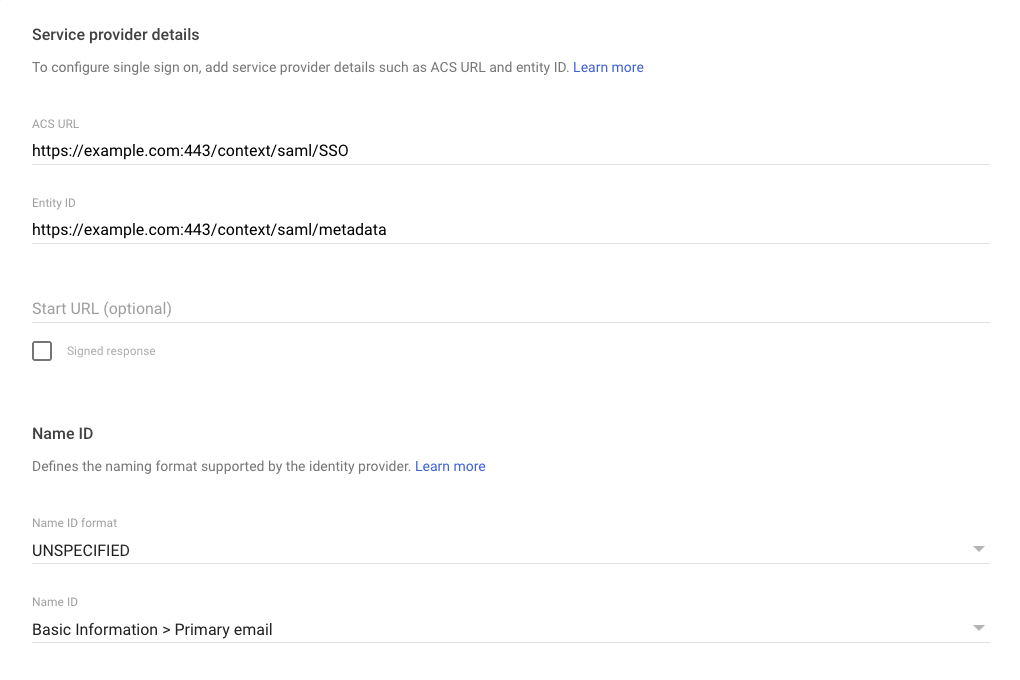
  • Enter the following settings on the next step. Both values can also be found by downloading the Encodify SAML metadata document that is available under the following URL in Encodify: https://worker/context:443/saml/metadata. Note, that this URL can also be found on Step 3 of the SAML IDP configuration wizard page in Encodify.  

  • Leave the default values for the Name ID format and Name ID fields > Click Continue.

Screenshot 2024-01-17 at 14.17.47.png

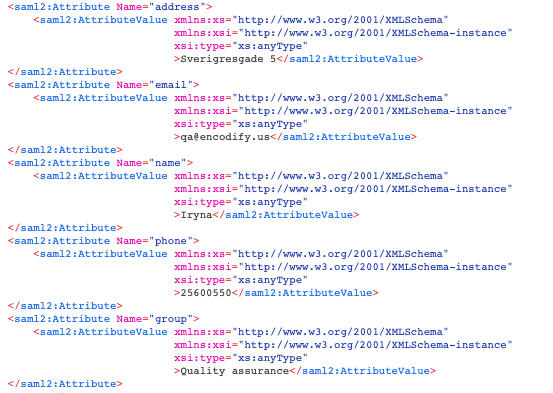
  • On the last configuration step it is possible to add mappings of the Google directory  and App attributes. Attributes mapped here will be present in SAML metadata that will be used for authentication under SSO. Note, that it is required to map user email attribute which is the primary and unique user identifier in Encodify.

Screenshot 2024-01-17 at 14.21.46.png

Screenshot 2024-01-17 at 14.21.11.png

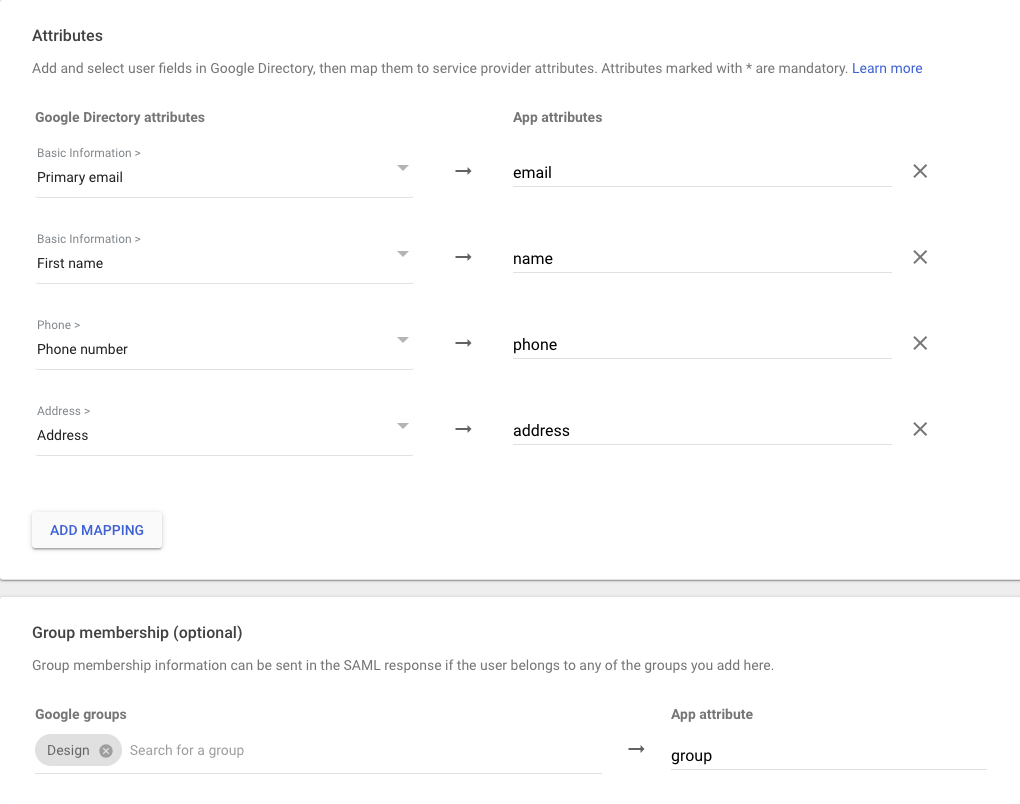
  • Click Finish. After saving, new app will appear in the list of Webapp and mobile Apps.

Configure Identity Provider in Encodify

  • After SAML app has been created and configured in Google, corresponding SAML IDP needs to be created and configured in Encodify.

  • Follow the configuration wizard setps to configure the Identity Provider.

  • Steps 1-2:

    • Go to Site Configuration > Identity Providers and User > Identity Providers and follow the configuration steps described here until Step 3: Details

  • Step 3:

    • There is no public link to Metadata xml file provided by Google, therefore it will be needed to download the metadata XML file and make it publicly available.

    • File can be downloaded from Google Admin console > Apps > Web and mobile apps > click your previously created app > click “Download metadata”.  

    • After making file publicly available, enter the link URL in the Federation Metadata field.

    • In the External User ID Attribute field, enter the app attribute representing user’s email (app attribute configured in Attributes mapping in Google).

    • In the Attributes mapping section, map additional Google attributes to the User fields in Encodify, if needed.

    • Click Next when done.

Screenshot 2024-01-17 at 15.25.27.png

  • Step 4

    • In case access rights for the auto-provisioned users need to be set based on user attributes in Google, follow this guide for instructions.

  • Step 5

    • In case user groups for the auto-provisioned users need to be set based on user attributes in Google, follow this guide for instructions.

  • Step 6 - 7

    • Follow this guide in case default Encodify user properties need to be configured for the auto-provisioned users.

  • Step 8

    • Follow this guide if you need to configure welcome email and login message.

  • After IDP is saved, the corresponding SSO login button will be displayed on the log in page. This will allow users to get authenticated using their google workspace login credentials.