Configuring SAML for Encodify through Okta
Please, note that all configurations in OKTA should be done in Classic UI
Receiving the Federation Metadata
Account and Application should be created in order to be able to recreate following instructions. Please use "How to..." instructions represented below in case if needed.
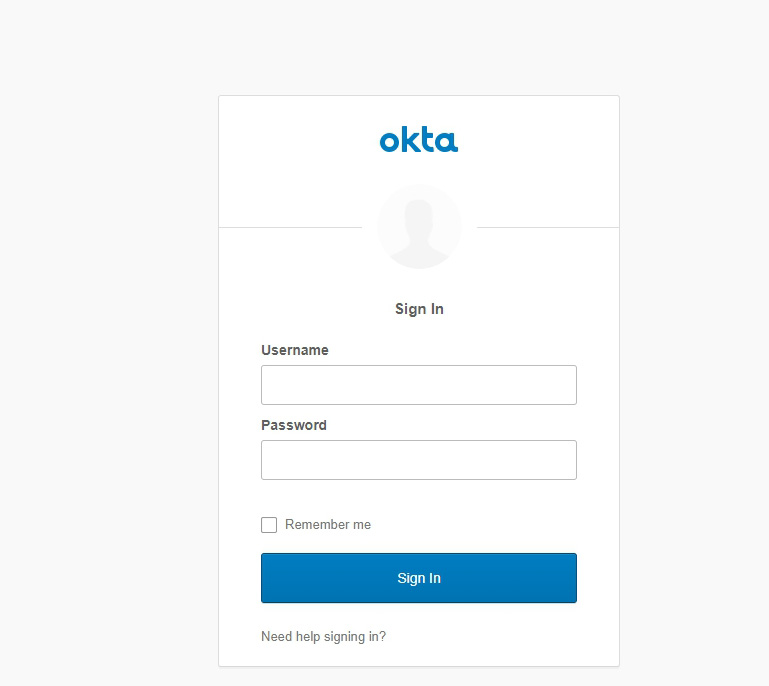
Sign in to your Okta portal page using the Your Okta domain as URL. (Note: Domain was generated after account creation and was sent to you in activation email)
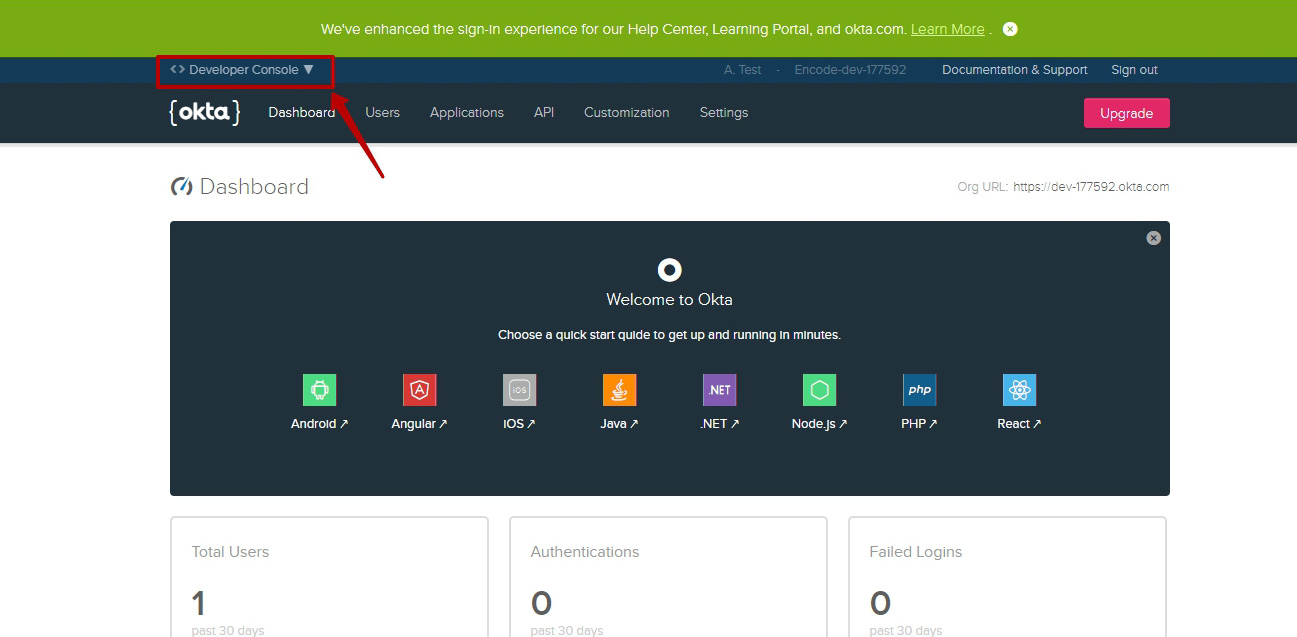
Click on "Admin" button
Switch to Classic UI
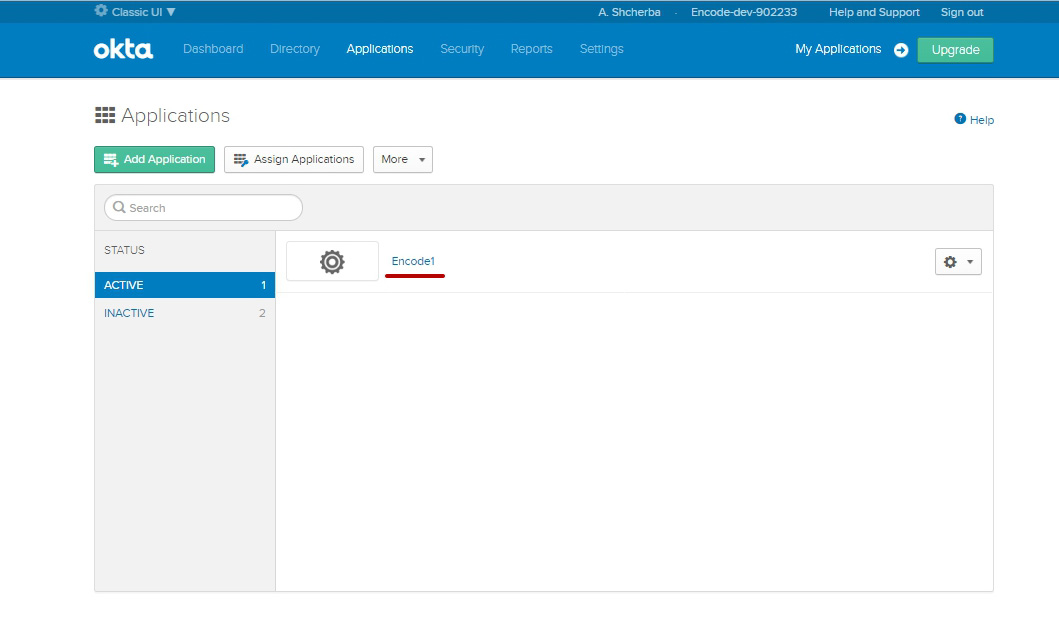
Click on "Applications" tab > Select "Applications" option
Go into selected application
Switch to "Sign on" tab
Click on "Identity Provider metadata" link
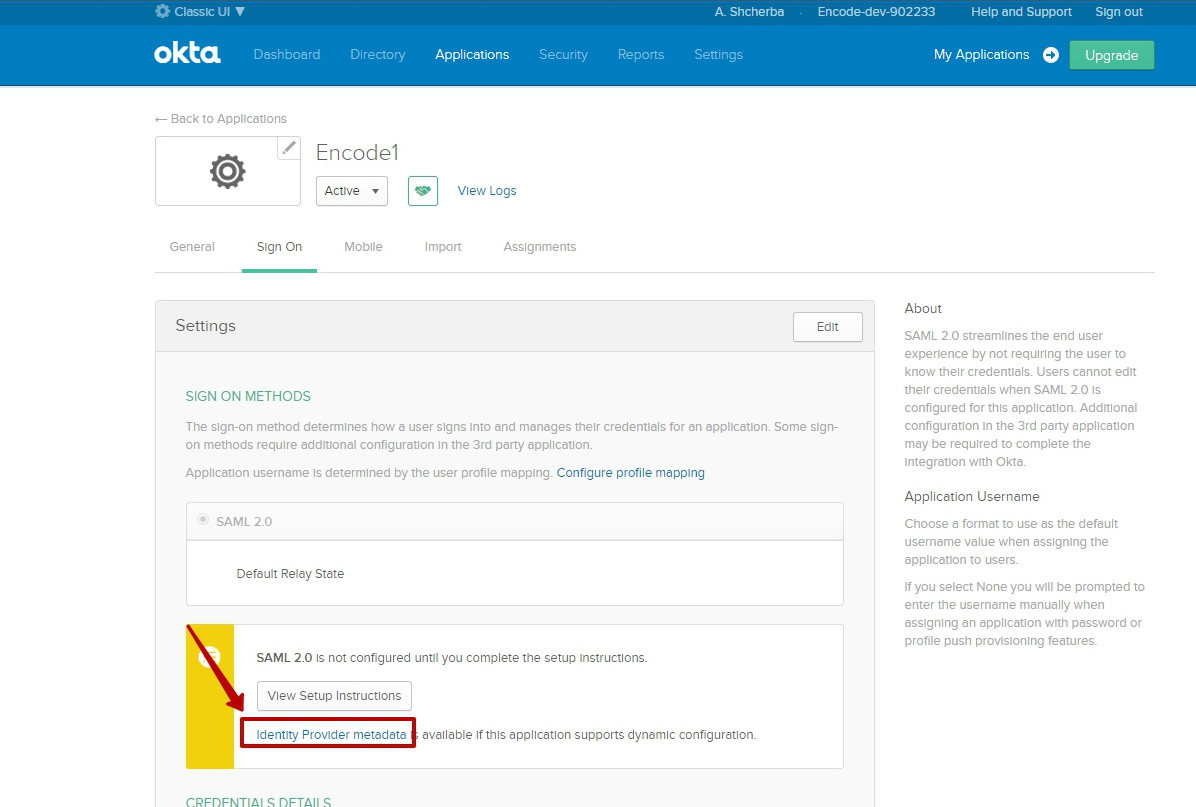
Copy URL
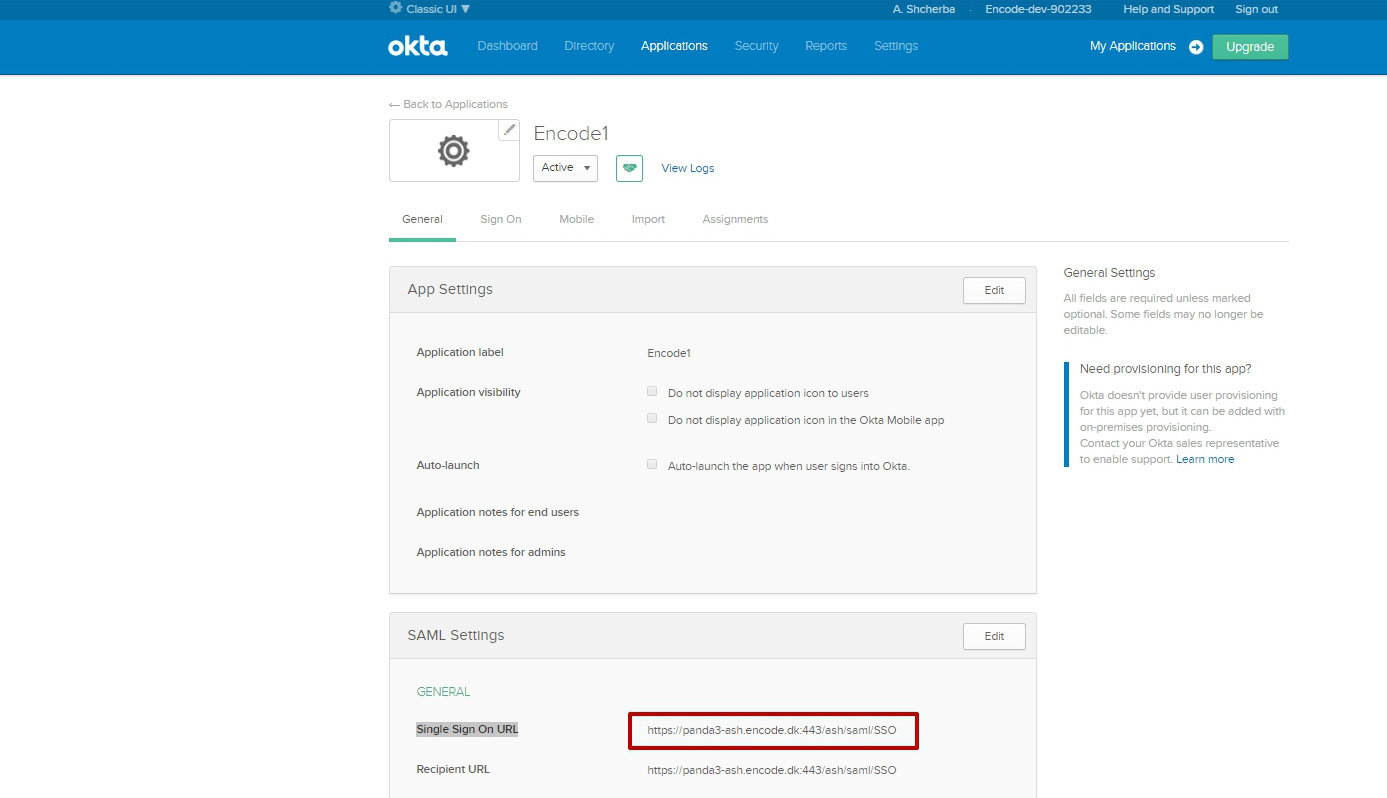
Receiving the Reply URL
Go into selected application in Classic UI
Switch to "General" tab
Copy link entered into "Single Sign On URL" field in SAML Settings
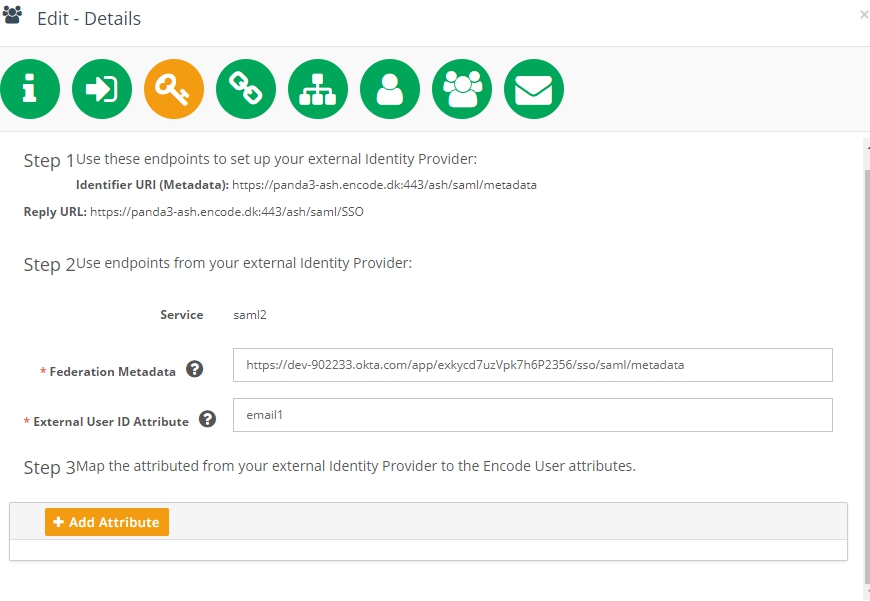
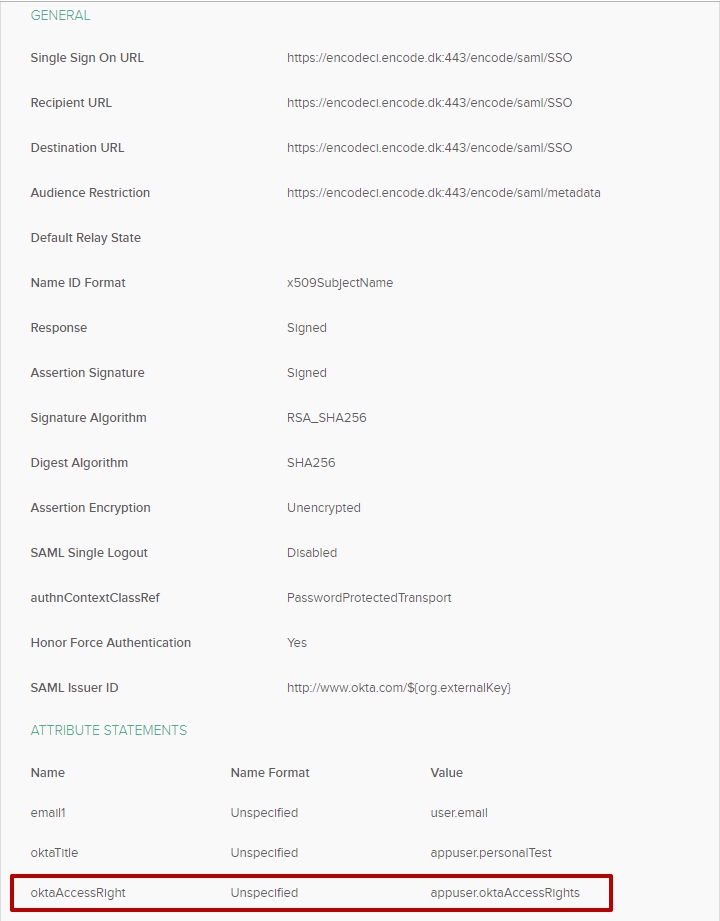
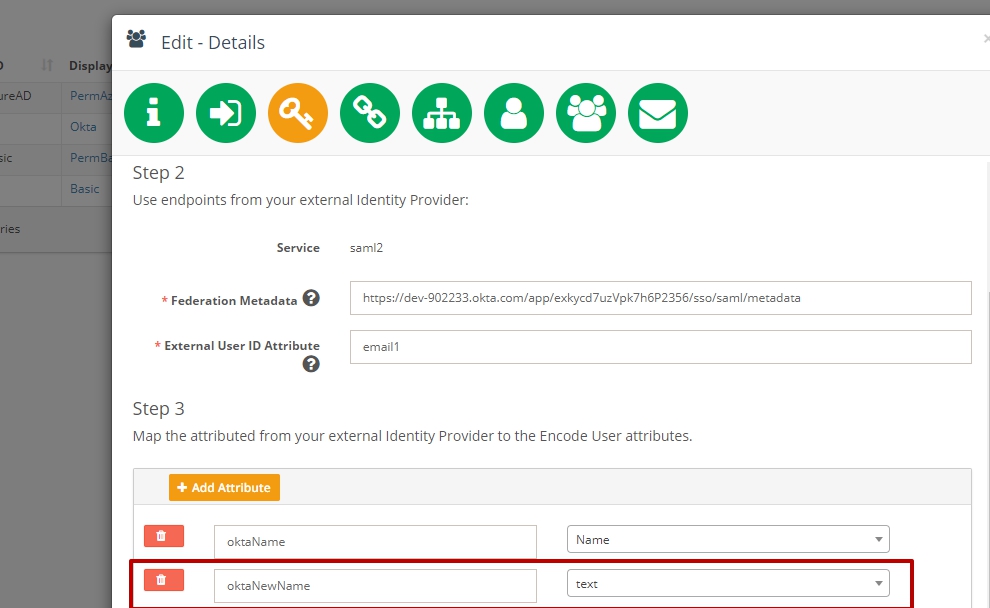
Receiving the External User ID Attribute
Go into selected application in Classic UI
Switch to "General" tab
Edit SAML Settings > Go to "Configure SAML" step
In "ATTRIBUTE STATEMENTS (OPTIONAL)" section click on "Add Another" button
Enter any name
Enter value: user.email
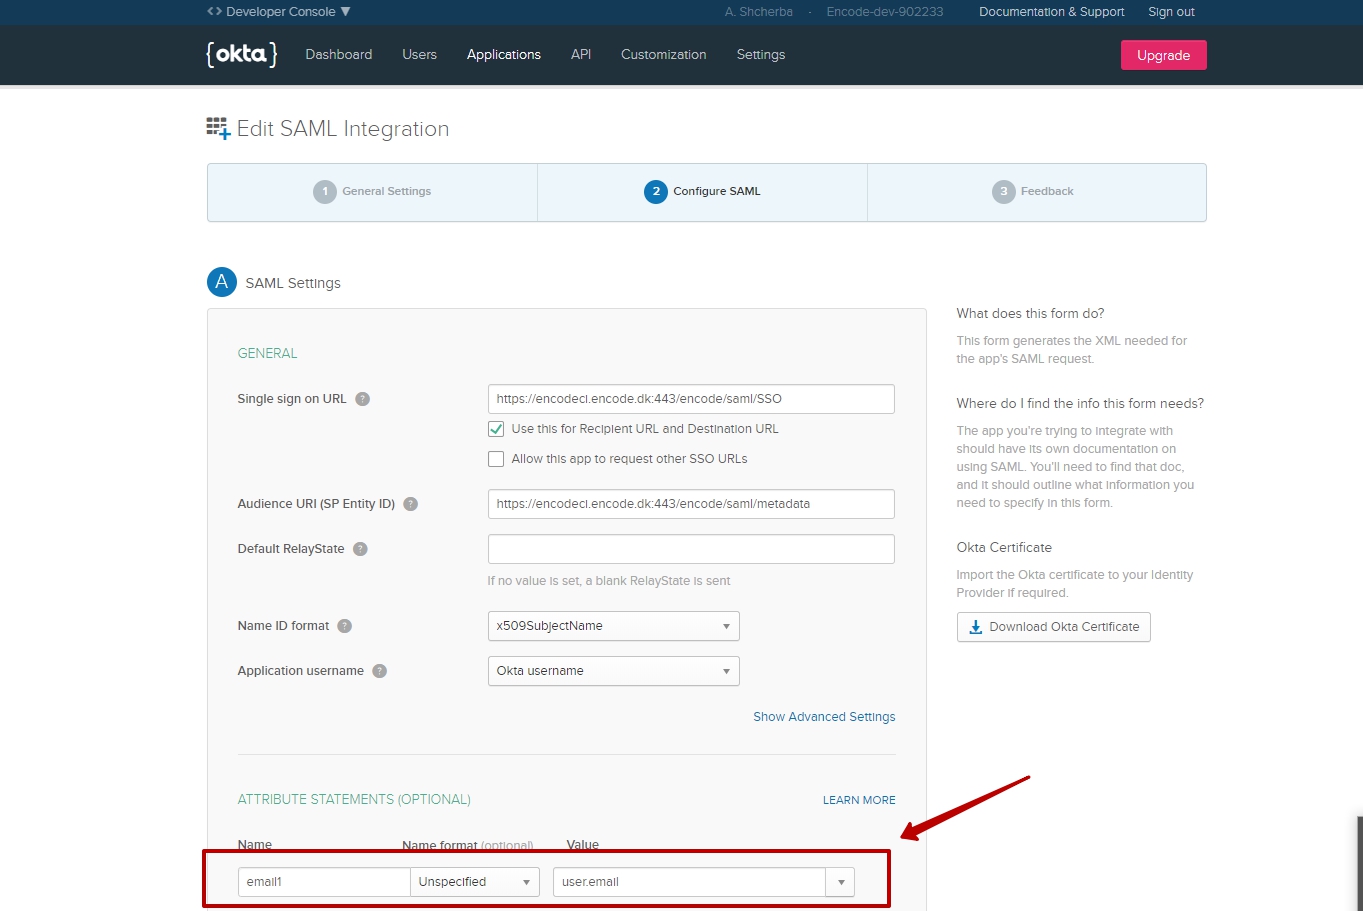
Proceed to the next page > Save changes
Copy the name of created attribute
Enter it as "External User ID Attribute" on the third step of IdP creation
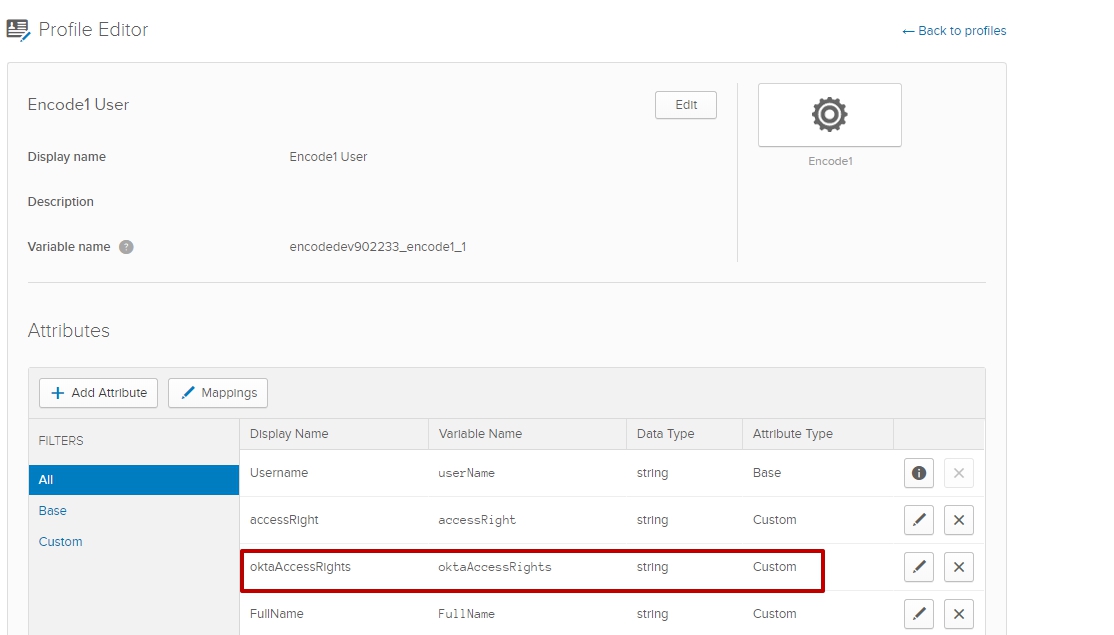
How to perform access right mapping
Create attributes with correspondent name in OKTA (Use article "How to add/manage attributes in OKTA" for more information)
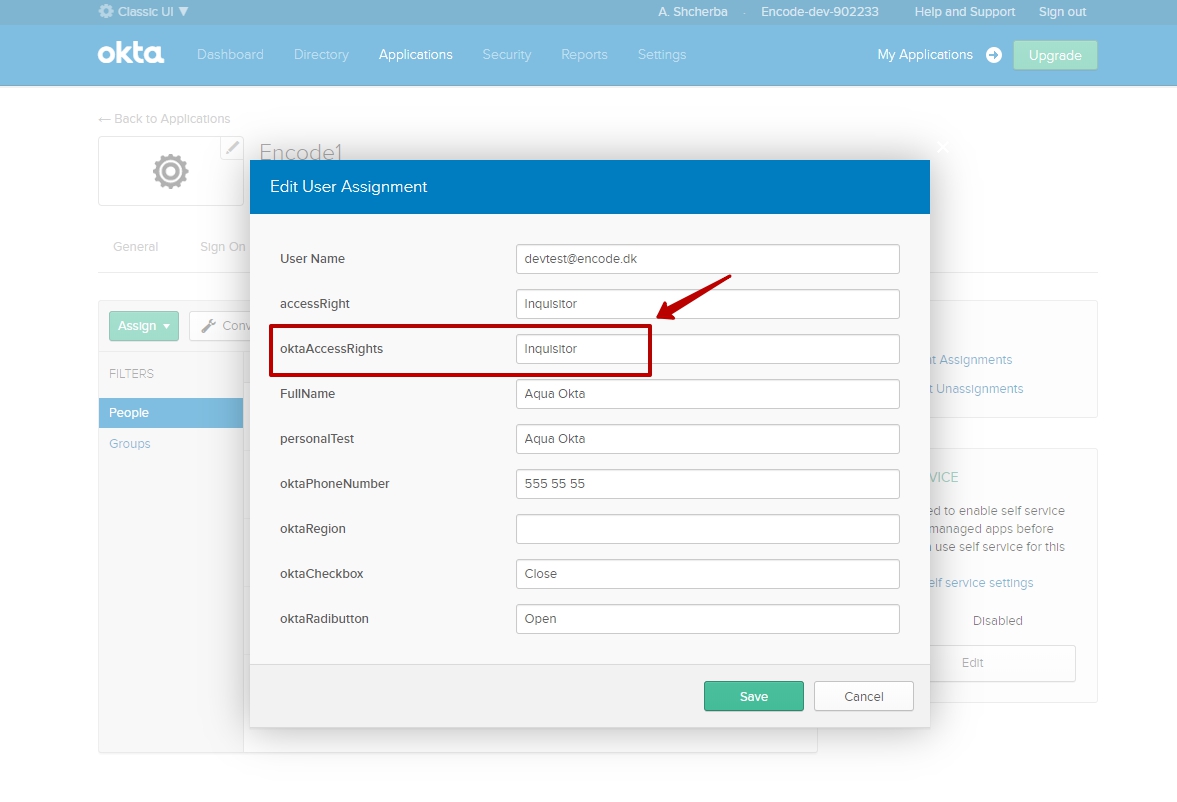
Open selected Application > Go to Assignments tab
Open Edit page of the selected person from the "People" list
Enter value into the attribute field > Save changes
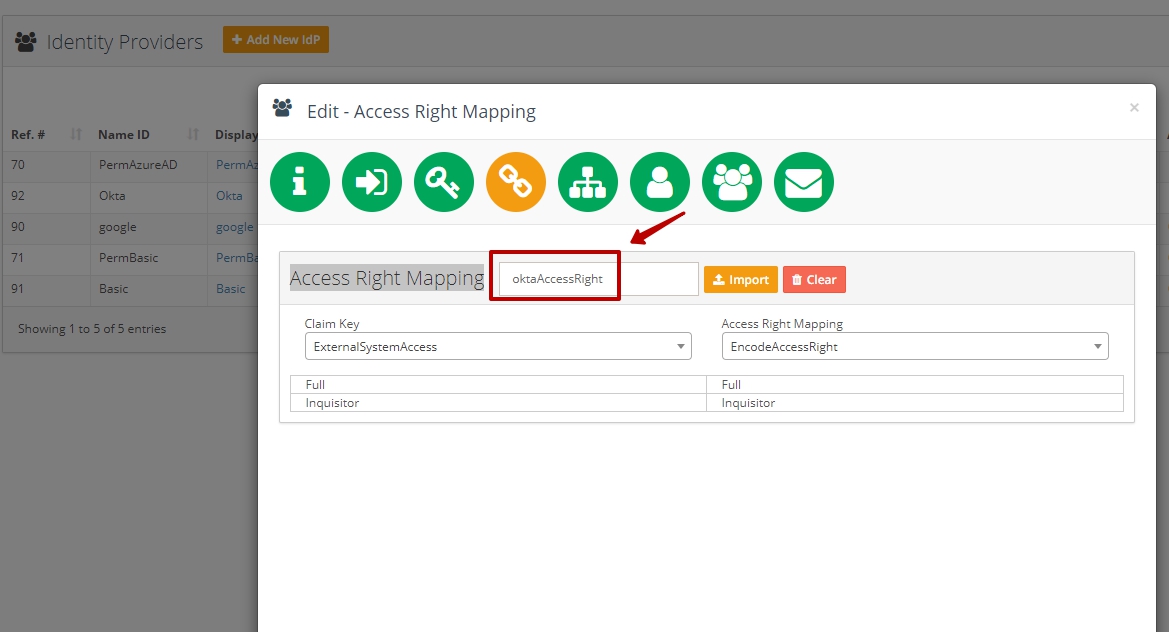
Generate XML file for access right mapping
Go to the "Access Right Mapping" step of IdP SAML configuration wizard
Enter attributes name into the "Access Right Mapping" field
Import previously generated file > Select correspondent values from Claim Key and Access Right Mapping drop downs
How to perform User Groups Mapping
In Okta: Create a group and assign it to the selected person and add created group to the list of attributes (Use article "How to create/manage groups in OKTA" for more information)
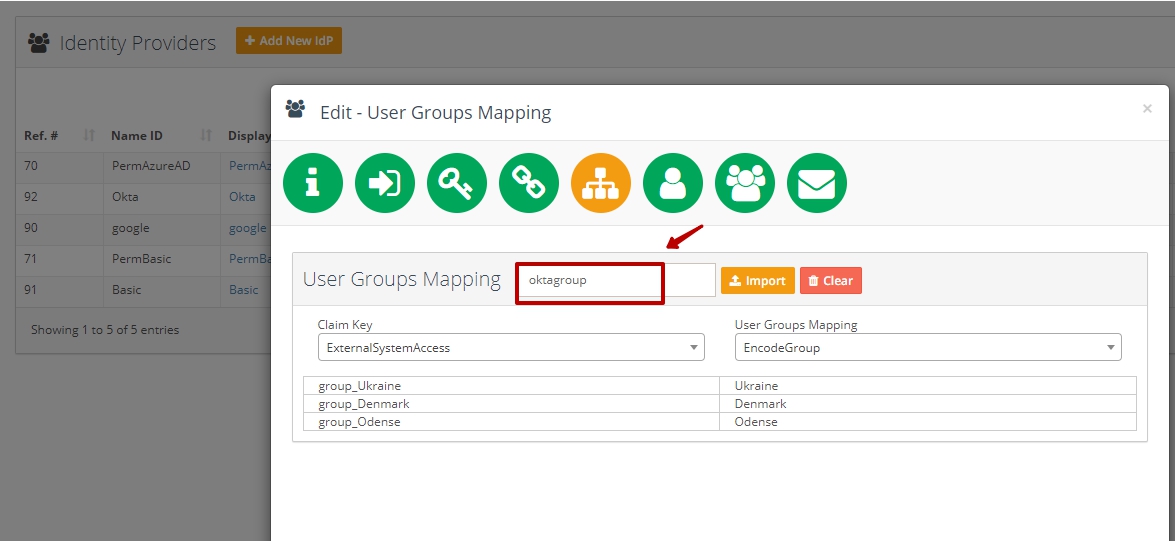
Generate XML file for user groups mapping
Go to the "User Groups Mapping" step of IdP SAML configuration wizard
Enter attributes name into the "User Groups Mapping" field
Import previously generated file > Select correspondent values from Claim Key and Access Right Mapping drop downs
How to map the attributes from OKTA to the Encodify User attributes
CASE 1: mapping of original attributes from the User Profile in OKTA
Go to OKTA > Switch to Classic UI > Open created application
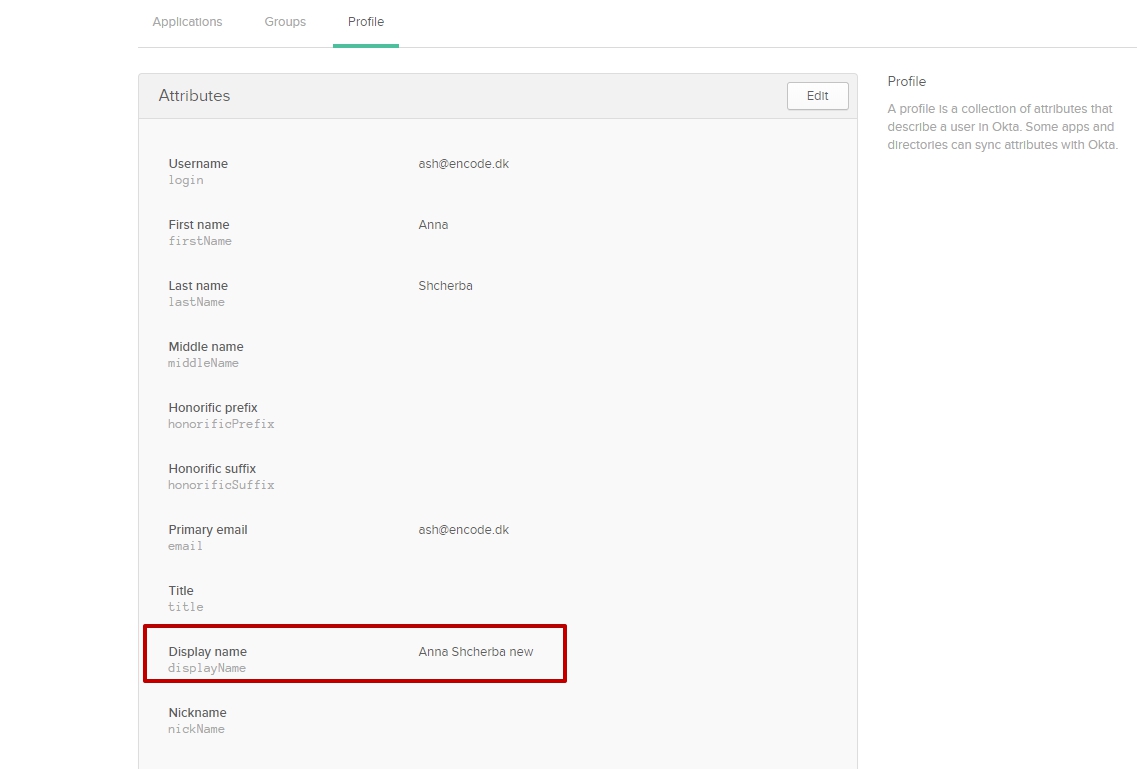
Open profile of created person: Directory > People > Click on Name >Profile tab
Fill in attribute that need to be mapped
Go to the Applications > General tab > Create new attribute
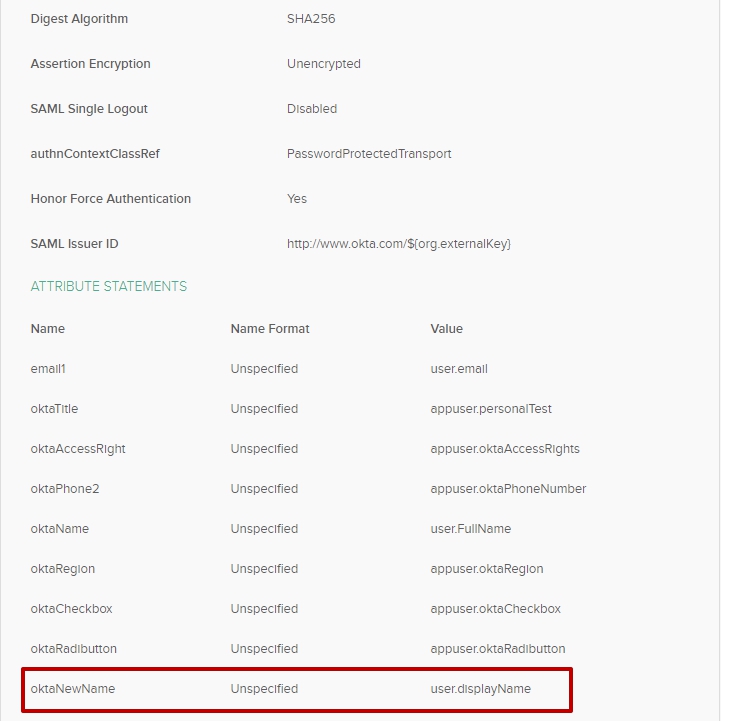
Go to the Encodify system > Open IdP configuration widget > Add new attribute
CASE 2: mapping of custom attributes from OKTA
Create new attributes in OKTA using steps from article "How to add/manage attributes in OKTA"
Go to the Encodify system > Open IdP configuration widget > Add new attribute
How to create an account in OKTA
Click on "CREATE FREE ACCOUNT" button > Fill in the form > Click on "GET STARTED" button
Activate your account using the link in received email message
Fill in the form
Save changes
How to add new project application in OKTA
Switch to the Classic UI
Go to Applications tab
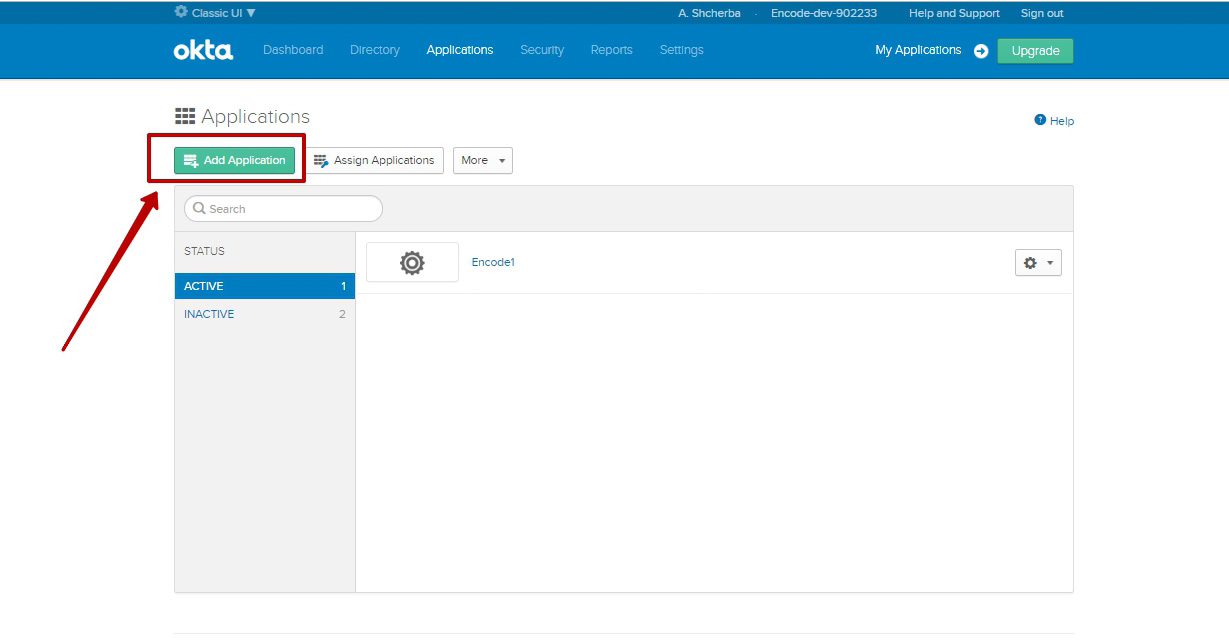
Click on “Add Application” button
Click on “Create new App”> Choose Web platform + SAML 2.0 > Create
Enter value into “App name” field > Proceed to the “Configure SAML“ step
Use data from the screenshot below as a sample > Fill in data on the form
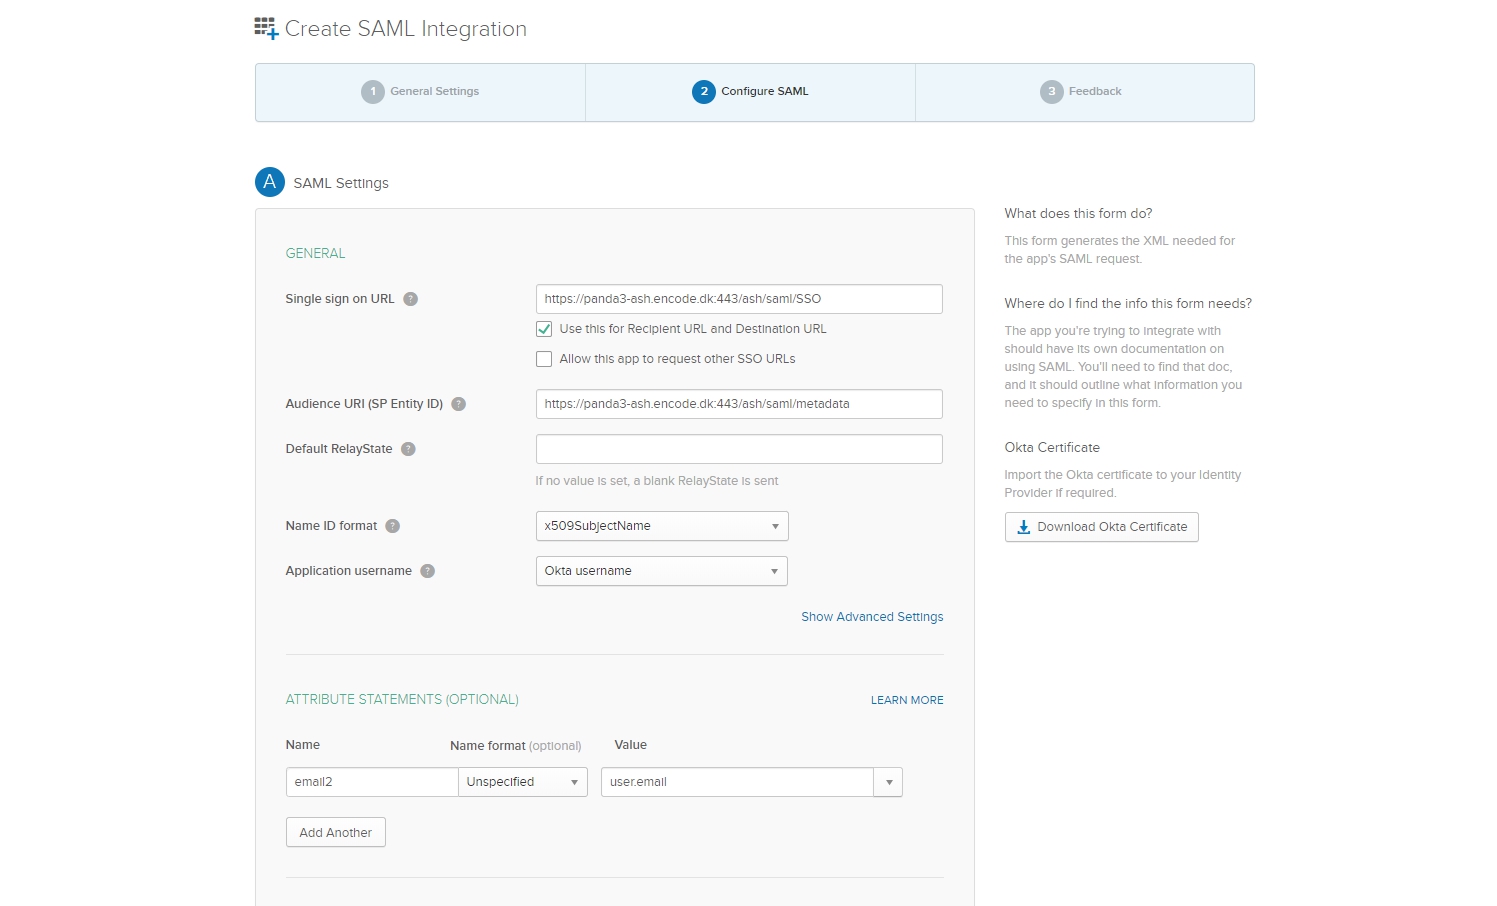
Proceed to the next screen
Select “I'm a software vendor. I'd like to integrate my app with Okta“ radio button
Click on “Finish” button
How to create personal accounts in OKTA
Click on "Directory" tab (use Classic UI) > Select "People" sub tab
Click on “Add Person” button
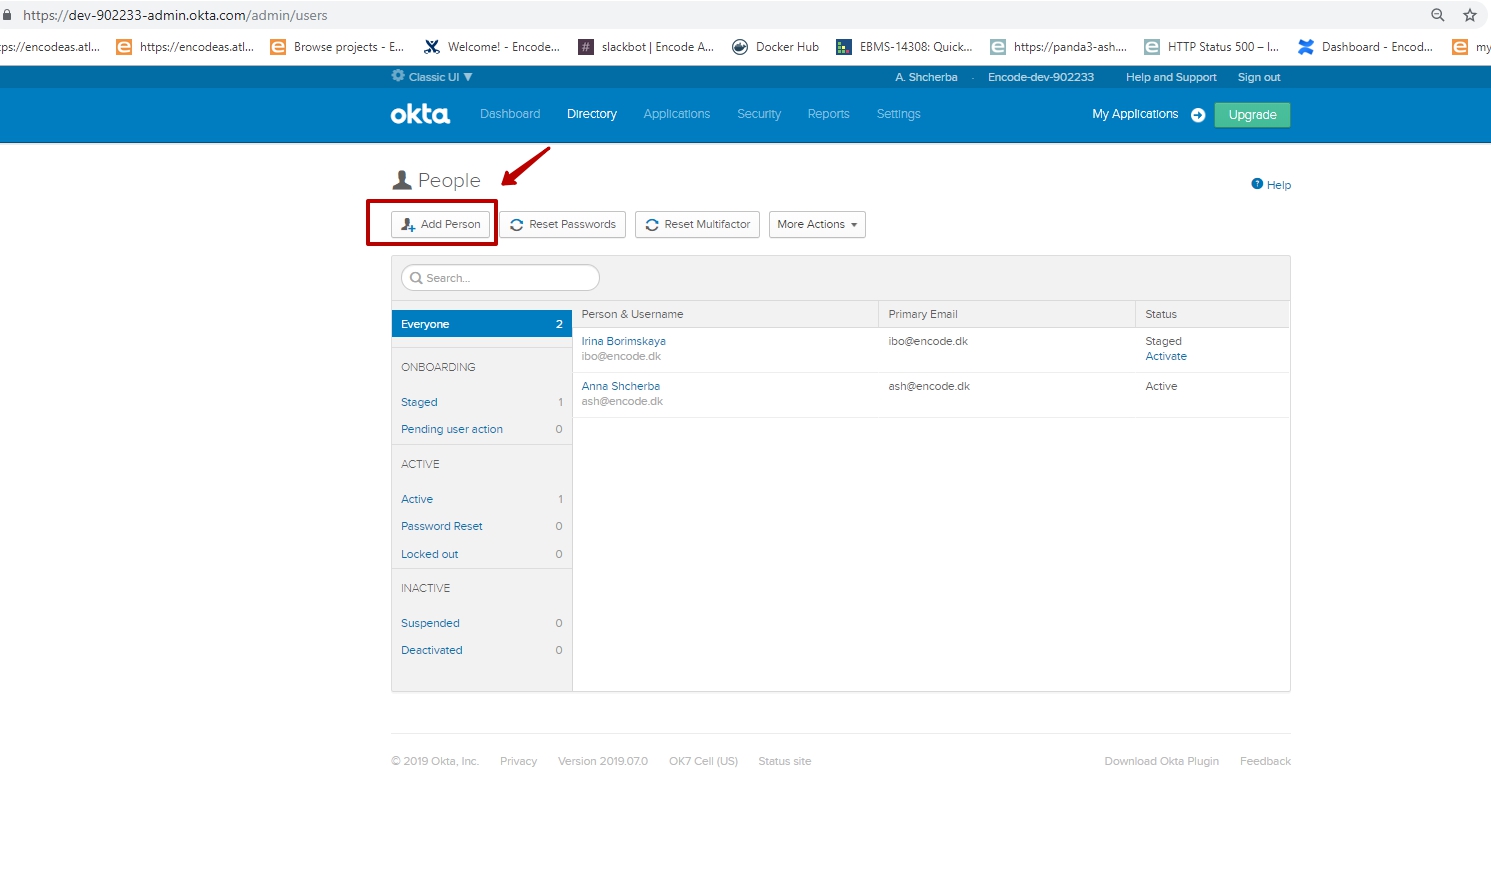
Fill in required fields
Click on “Save” button
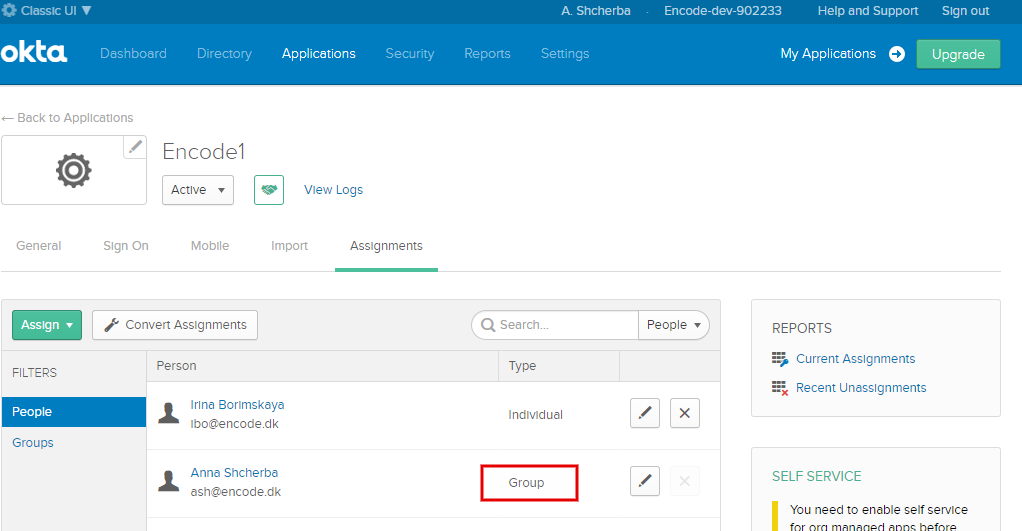
How to assign people to the corresponding application in OKTA
Switch to "Applications” tab (use Classic UI)
Switch to “Assignment” sub tab
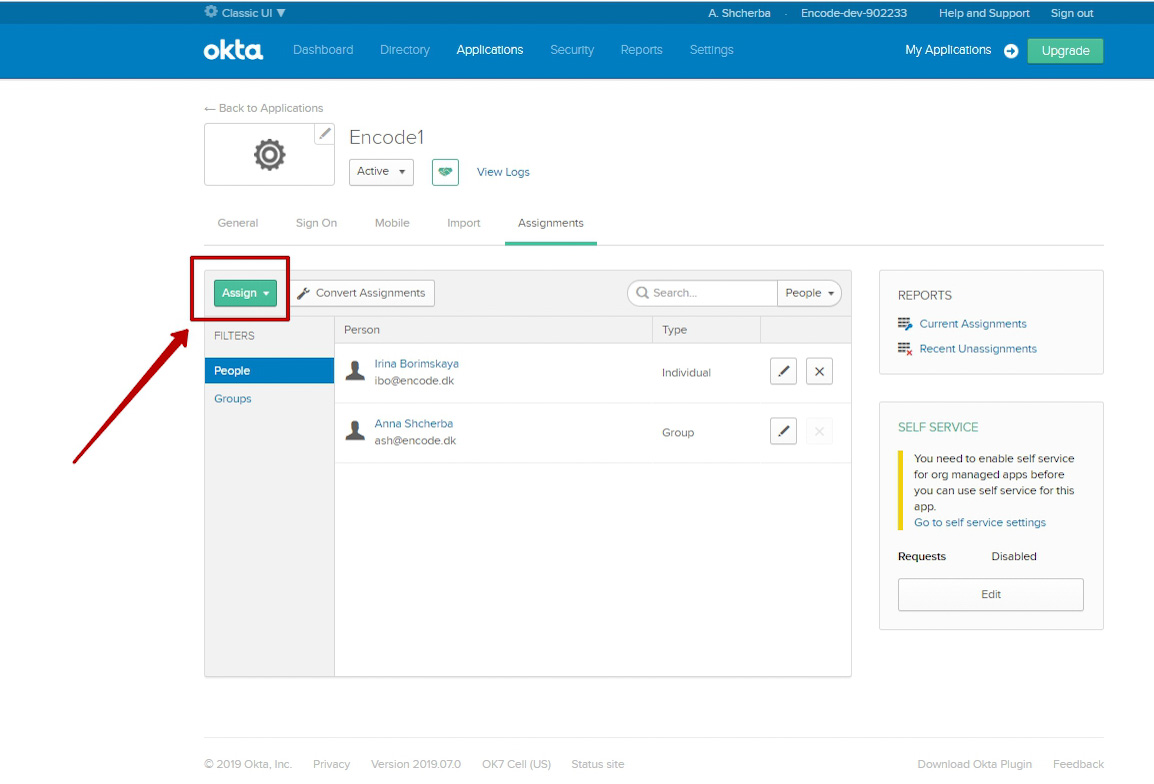
Click on “Assign” button > Click on “Assign to People” option
Select users from the list
Click on “Done” button
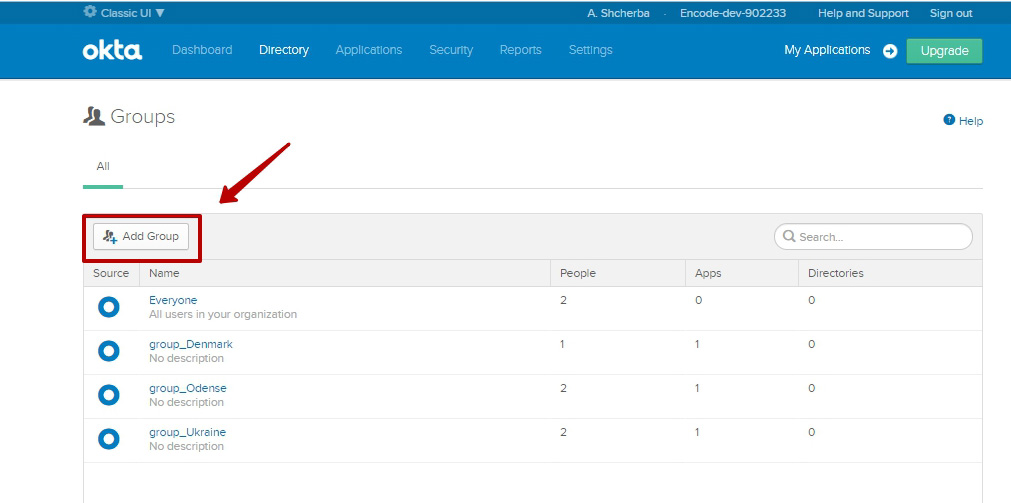
How to create/manage groups in OKTA
Create group:
Click on "Directory" tab (use Classic UI) > Select "Groups" option
Click on Add Group button > Enter group name that starts with “group” > Save changes
Assign people to the group:
Click on the name of created group
Click on “Manage People” button
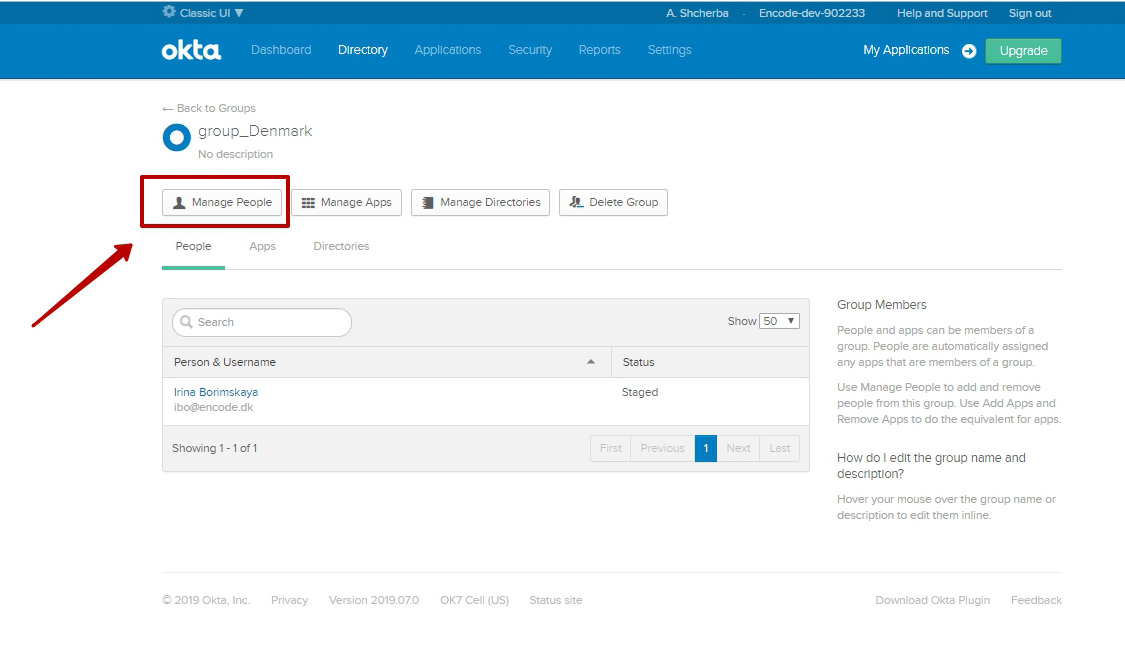
Select people that need to be added to the group > Save changes
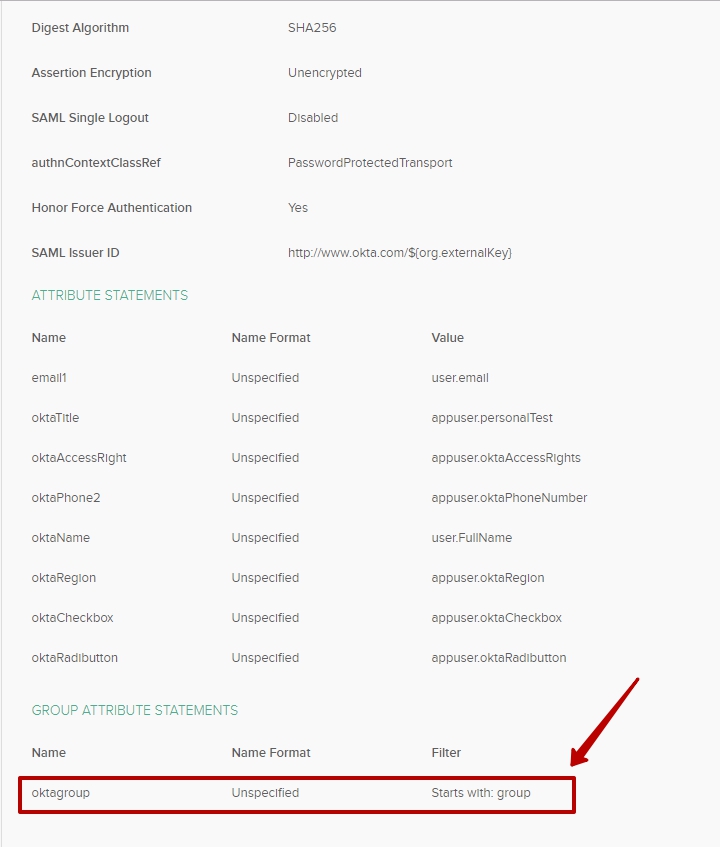
Add created groups to the list of attributes:
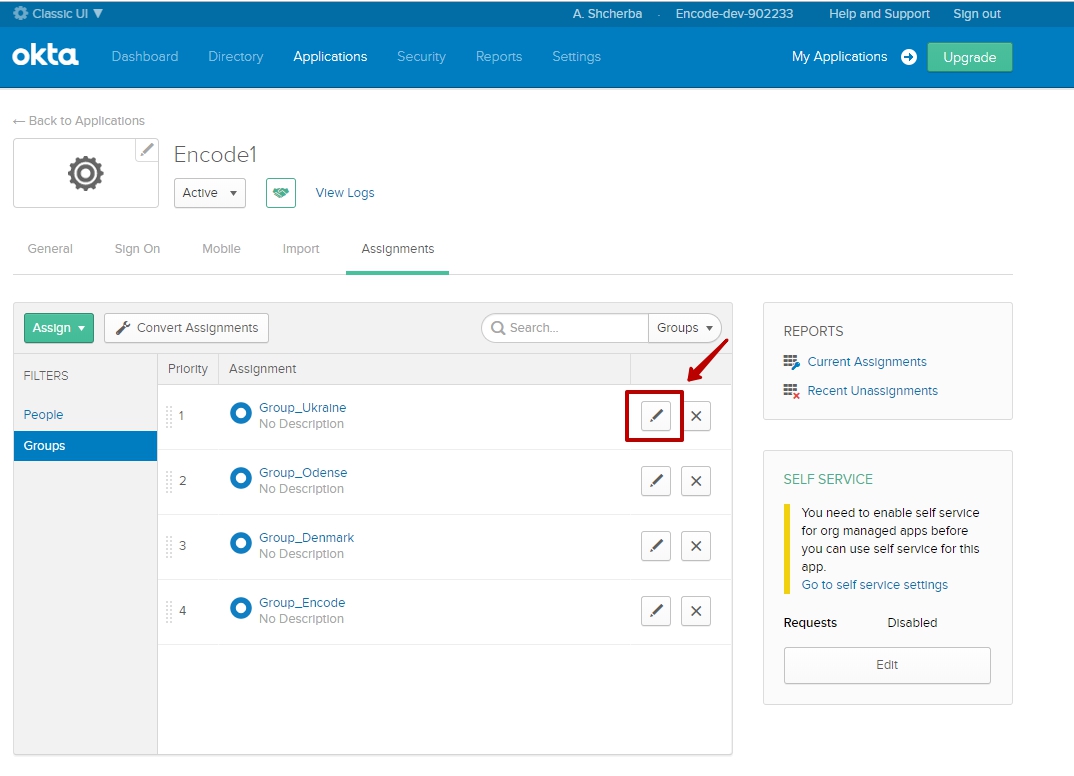
Switch to "Applications” tab > Enter into selected application
Switch to the "General" tab > Edit SAML Settings
Add group attribute to the GROUP ATTRIBUTE STATEMENTS > in Filter select Starts with “group”
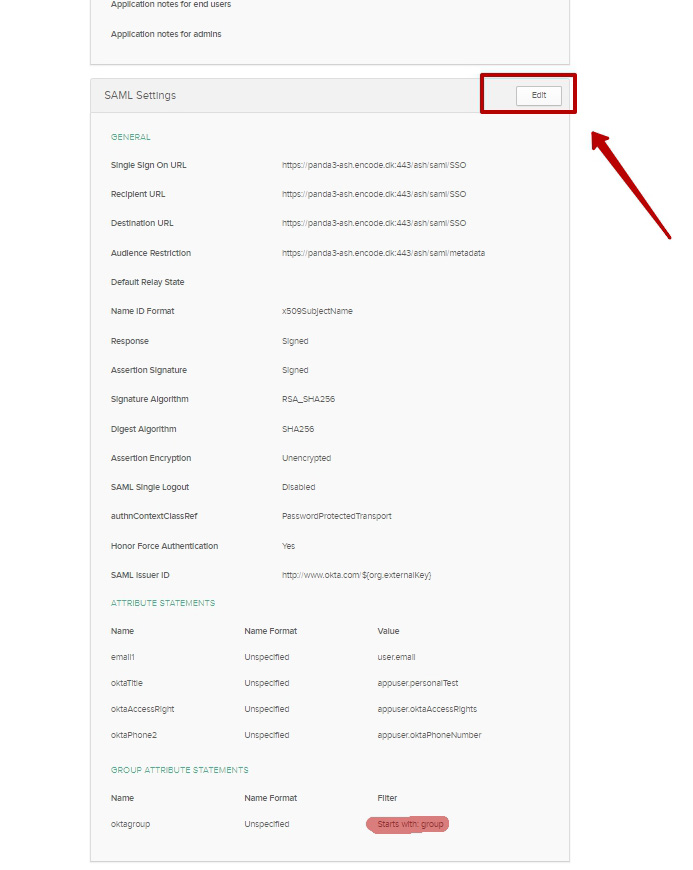
Save changes
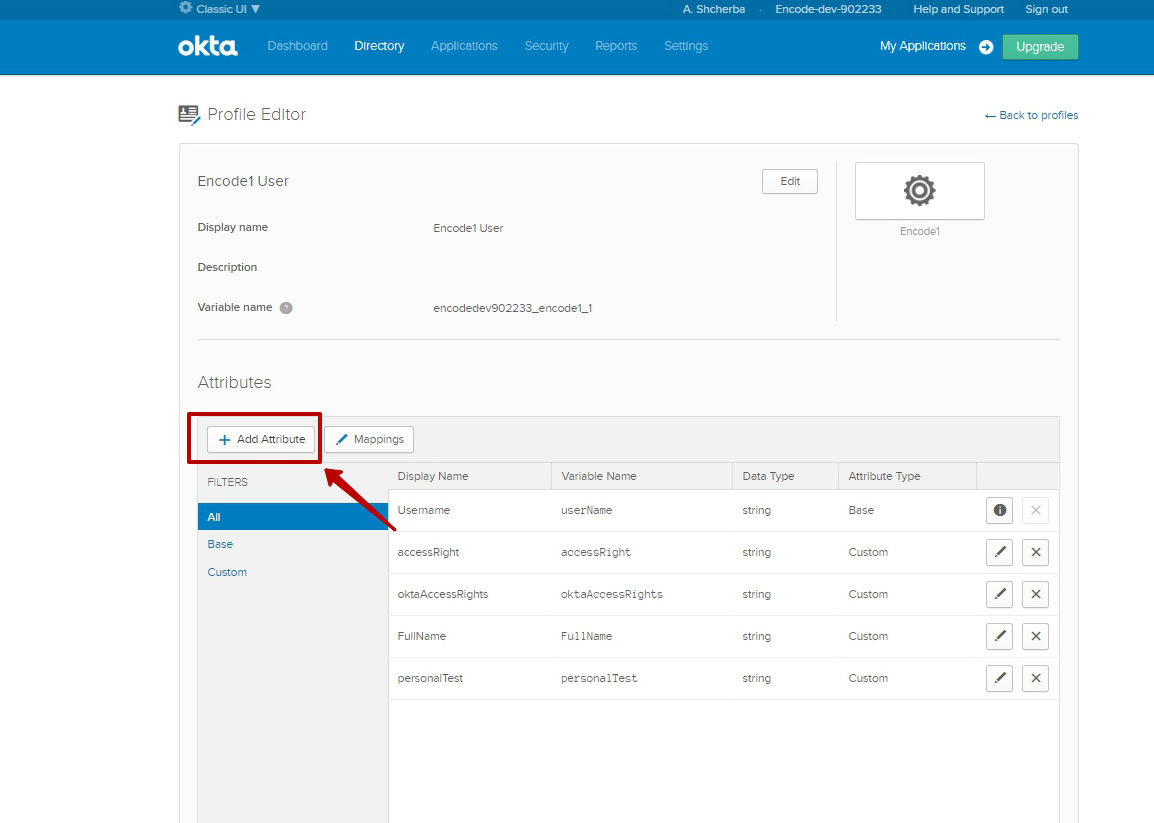
How to add/manage attributes in OKTA
Click on “Directory” tab (use Classic UI) > Select "Profile Editor" option
Click on "Edit" button near the selected profile > Add attribute
Go to “Applications” tab > Enter into selected Application
Switch to "General" sub tab > Edit SAML Settings > Add attribute(s)

How to create people with Individual type by default (in OKTA)

Create Groups and assign them to specific applications (use article "How to create/manage groups in OKTA" for more information)
Create person (use article "How to create personal accounts in OKTA" for more information)
Assign person to the application (use article "How to assign people to the corresponding application in OKTA" for more information)
Only after that assign person to different Groups
How to create people with Group type by default (in OKTA)
Create Groups and assign them to specific applications (use article "How to create/manage groups in OKTA" for more information)
Create person (use article "How to create personal accounts in OKTA" for more information)
Assign person to the Group (use article "How to create/manage groups in OKTA" for more information)
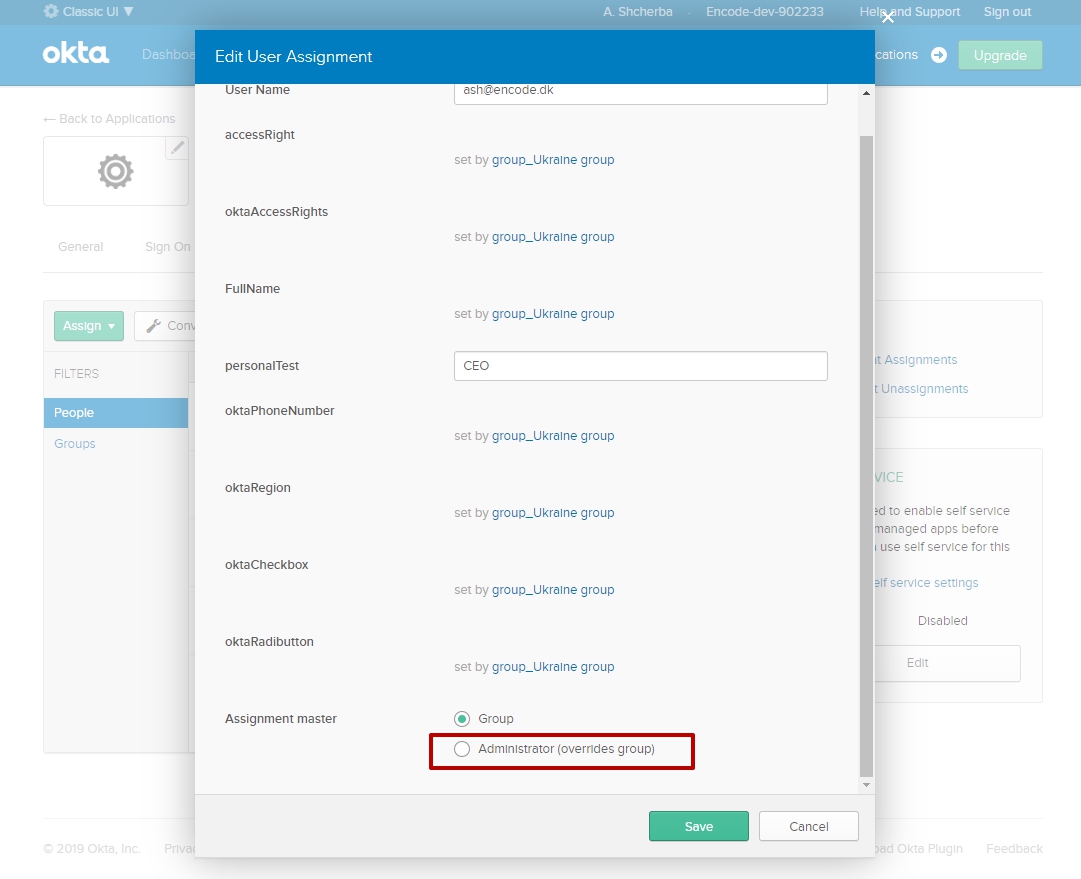
As result, person automatically becomes assign to the same application as it group AND person have an Group type by default.
It means that User will inherit all personal information from the Group profile that he belongs to. And all user data need to be entered on Edit Group page
To change user type:
Open Edit page of the user (Applications > selected application > Assignments) > Select radio button "Administrator (overrides group)" from "Assignment master" field