Overview
This guide provides step-by-step instructions on how to configure Okta Single Sign-On (SSO) for Encodify using OpenID Connect (OIDC).
Configuring OpenID Connect for Encodify via Okta
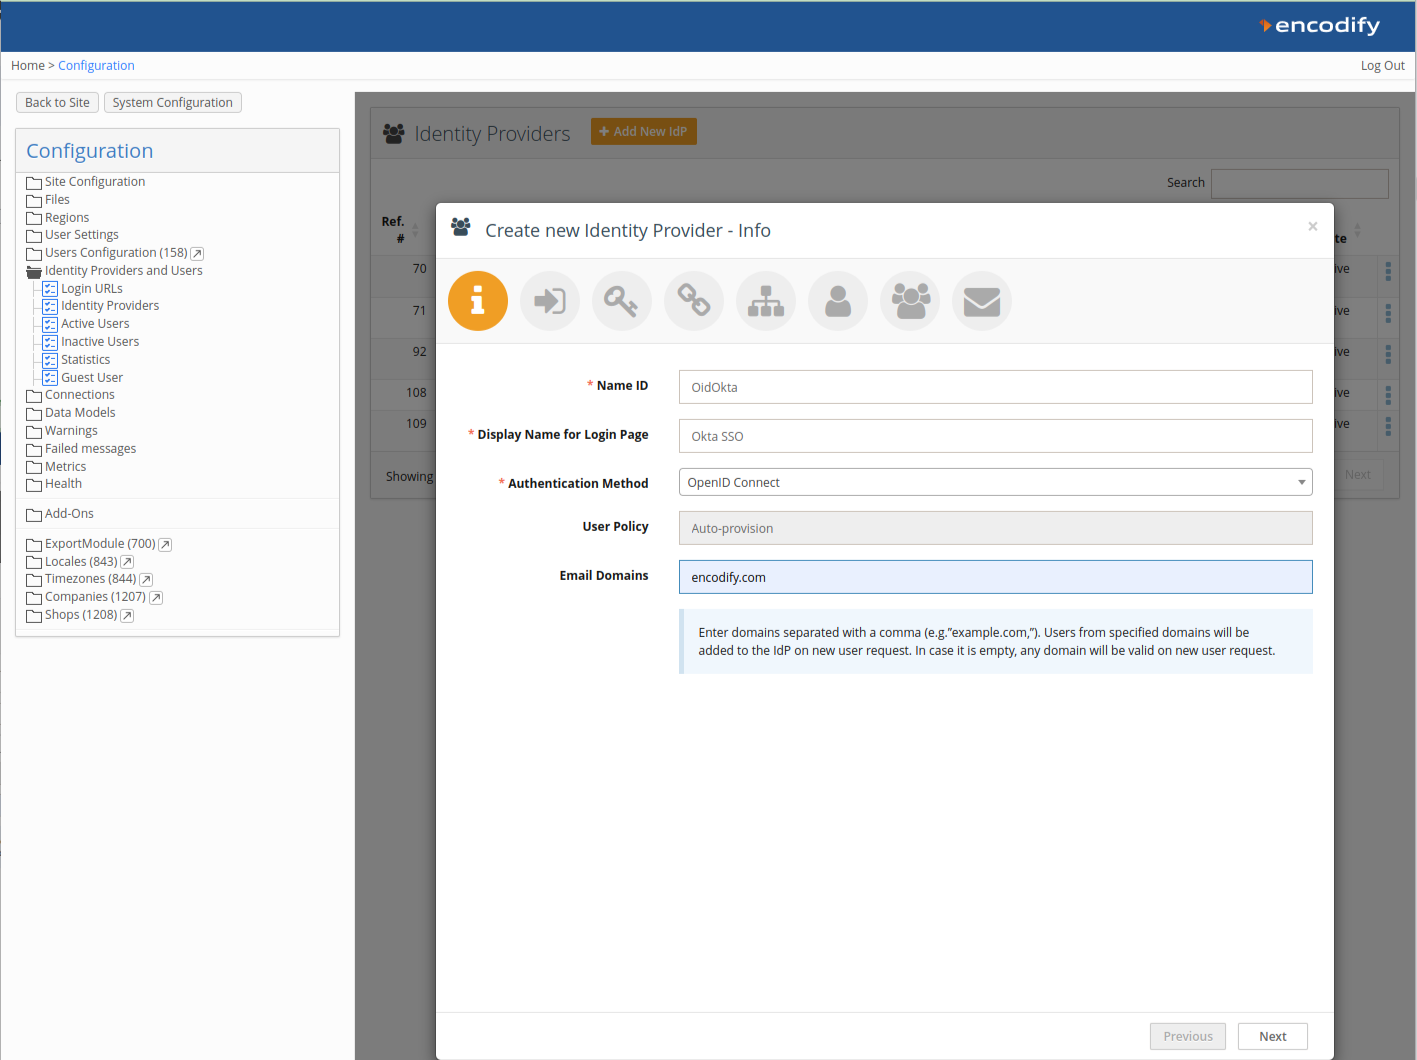
Step 1: Identity Provider (IdP) Configuration in Encodify
Navigate to: Site Configuration → Identity Providers and Users → Identity Providers.
Click Add New IdP.
Fill in the fields:
Name ID: Use English letters only, no spaces. This becomes part of the URL.
Display Name for Login Page: This will appear on the login button.
Authentication Method: Select OpenID Connect.
Email Domains (optional): Restrict logins to certain domains (e.g.
encodify.com, microsoft.com).
Click Next.
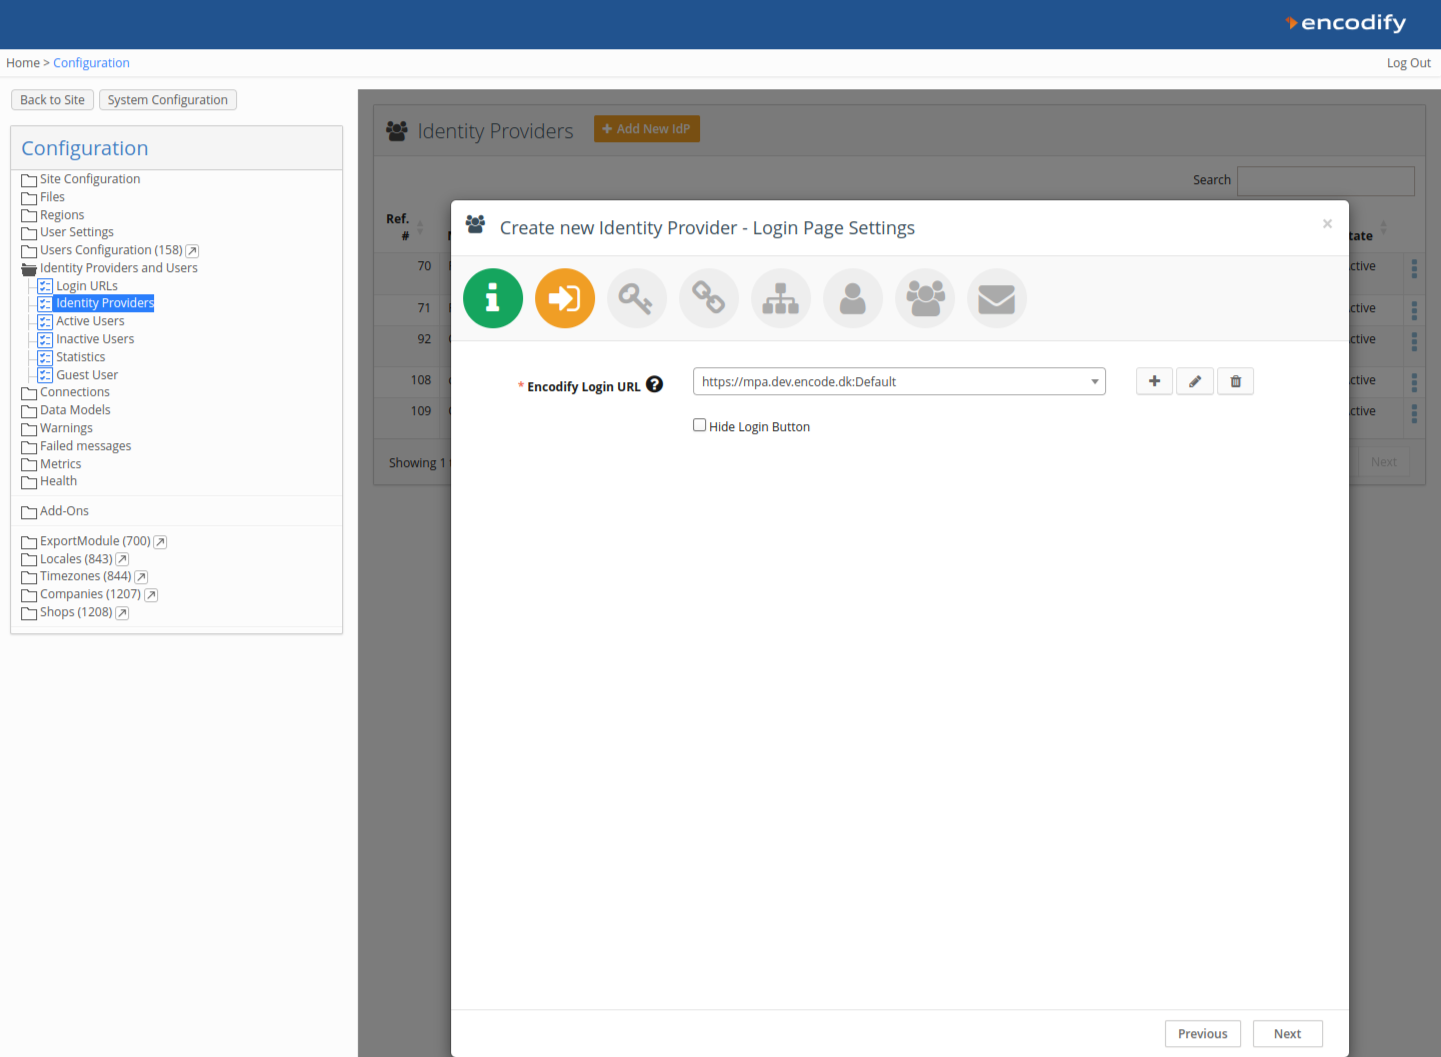
Step 2: Link to a Login URL
Link your IdP configuration to an existing Login URL and Login Page, or create new ones.
Each IdP can be linked to one Login URL.
Click Next.
Step 3: Obtain Callback URL from Encodify
Copy the Callback URL shown in Identity provider configuration in Encodify.
https://url/login/oauth2/code/OidOkta.
Step 4: Create OAuth Credentials in Okta
Log in to your Okta Admin Console (e.g.
https://integrator-xxxxxxx-admin.okta.com).Go to Applications → Applications.
Click Create App Integration.
Select:
Sign-in method: OIDC - OpenID Connect
Application type: Web Application
Click Next.
Complete the fields:
App Integration Name: Enter a recognisable name.
Sign-in redirect URIs: Paste the Callback URL from Encodify.
Sign-out redirect URIs: Leave blank.
Assignments: Choose appropriate access. This guide assumes no group restriction.
Click Save.
Copy:
Client ID from Client Credentials
Client Secret from Client Secrets
Authorization server details will be fetch automatically in Encodify IDP configuration after entering OpenID Connect Config URL:
https://integrator-xxxxxxx-admin.okta.com/oauth2/default/.well-known/openid-configuration
Step 5
After App has been created, App permissions need to be configured in OKTA to allow authentication.
In OKTA admin console, go to Security > API > Authorization Servers > default
Click edit > switch to the Access Policies.
Click Add New Access Policy > enter Name, Description > Save.
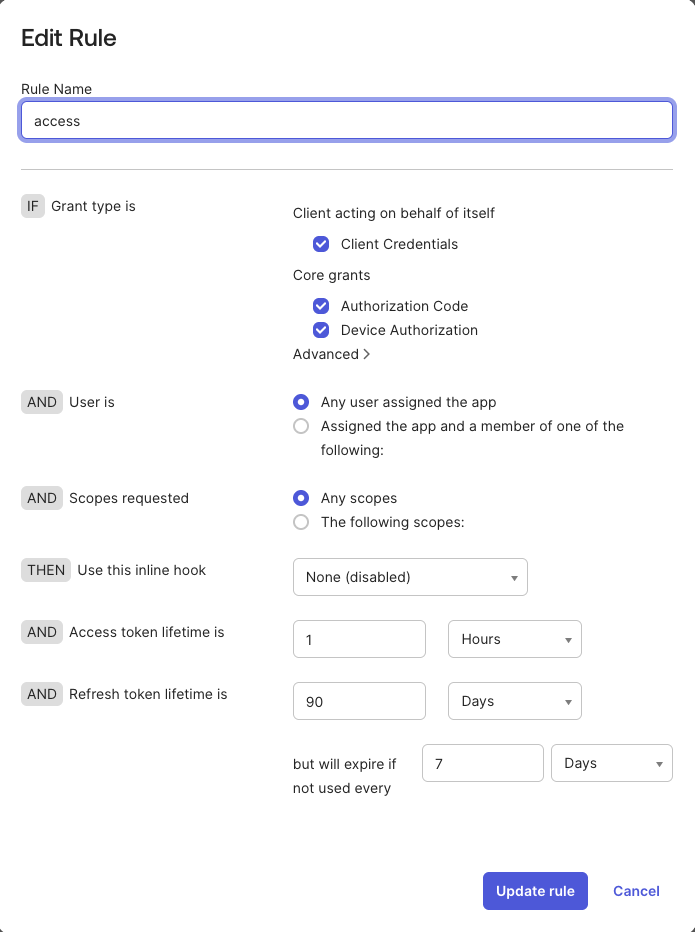
Add rule to the created policy with the settings as in the screen below > click Create Rule.
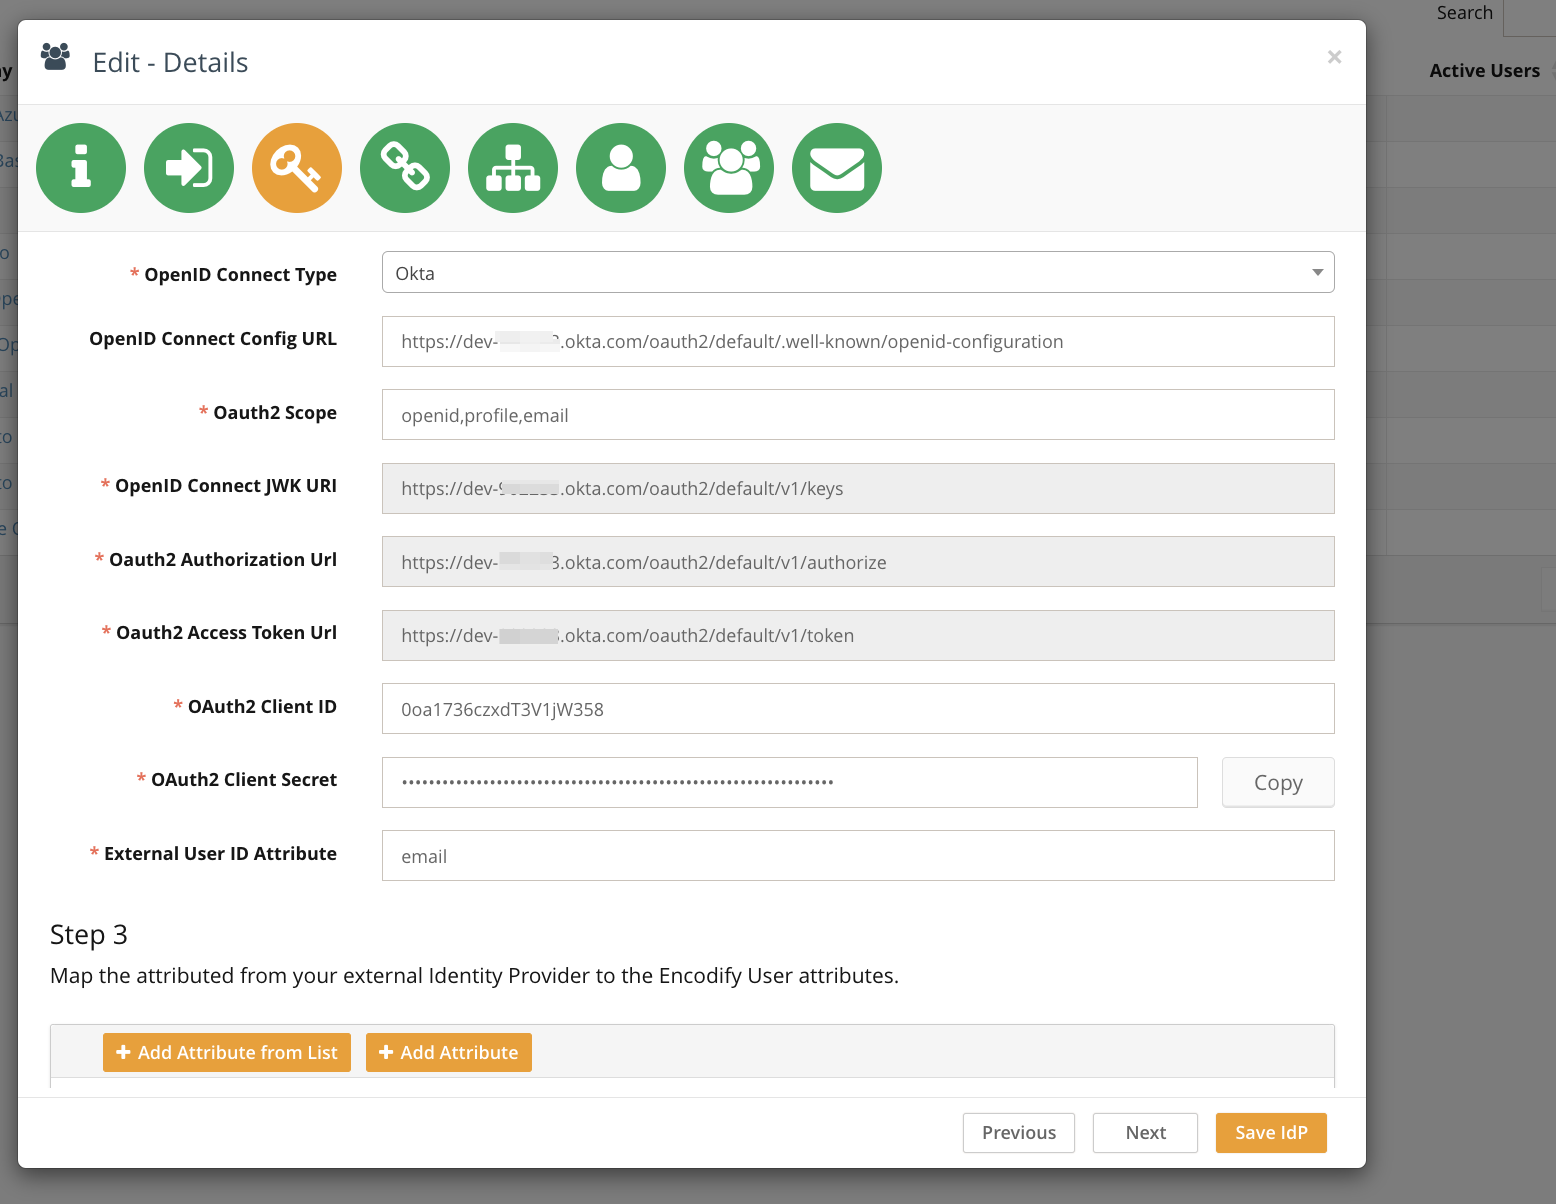
Step 6: Finalise IdP Configuration in Encodify
In Encodify (Step 3 of IdP setup):
OpenID Connect Type: Select "Okta"
Client ID: Paste from Okta
Client Secret: Paste from Okta
Scope:
openid, profile, emailExternal User ID Attribute:
emailMapped Attributes:
name → Name,email → Email
Click Next.
Step 7: Attribute and Group Mapping (Optional)
You can optionally map token claims from Okta to:
Encodify Access Rights
User Groups
If you're not mapping from token attributes, continue with default settings.
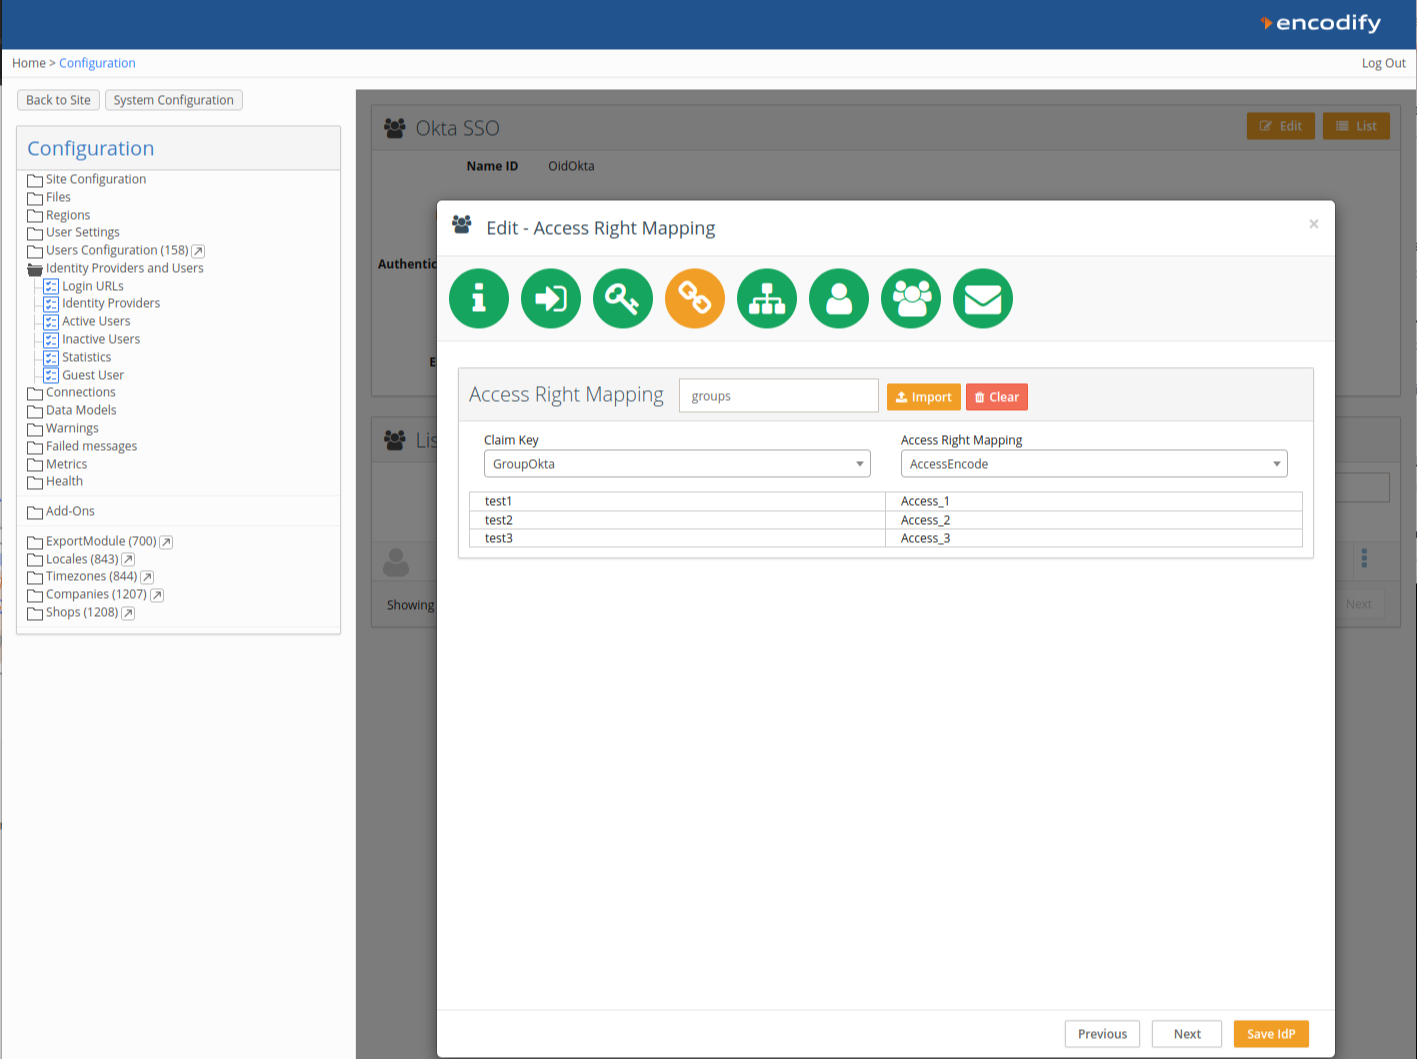
An image highlighting Access Right Mapping
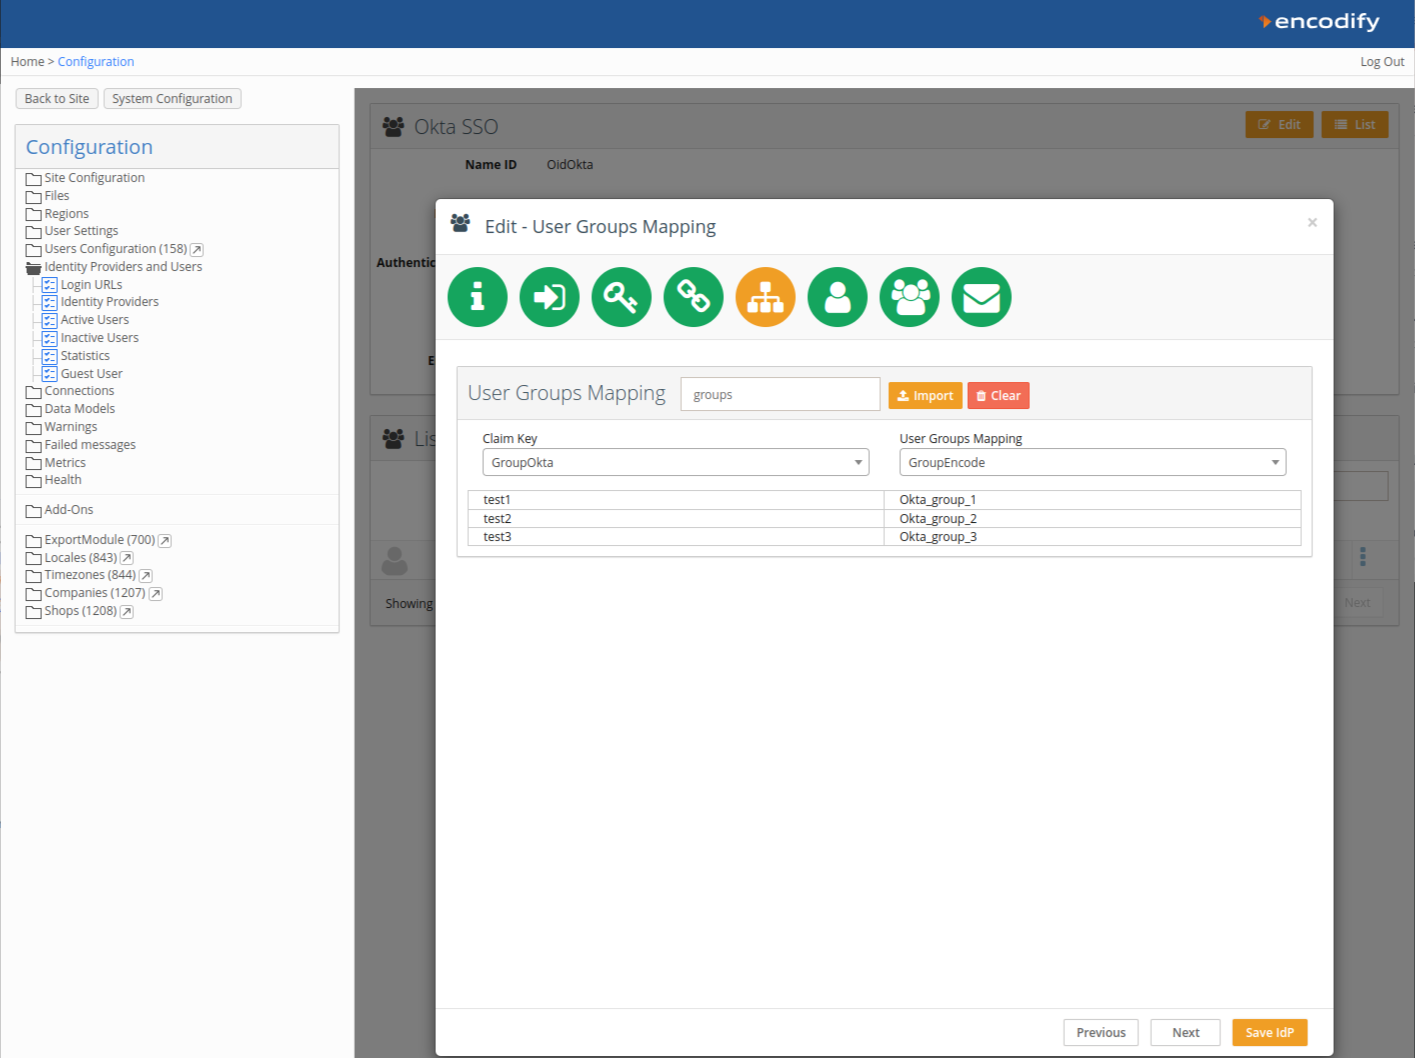
An image highlighting User Group Mapping
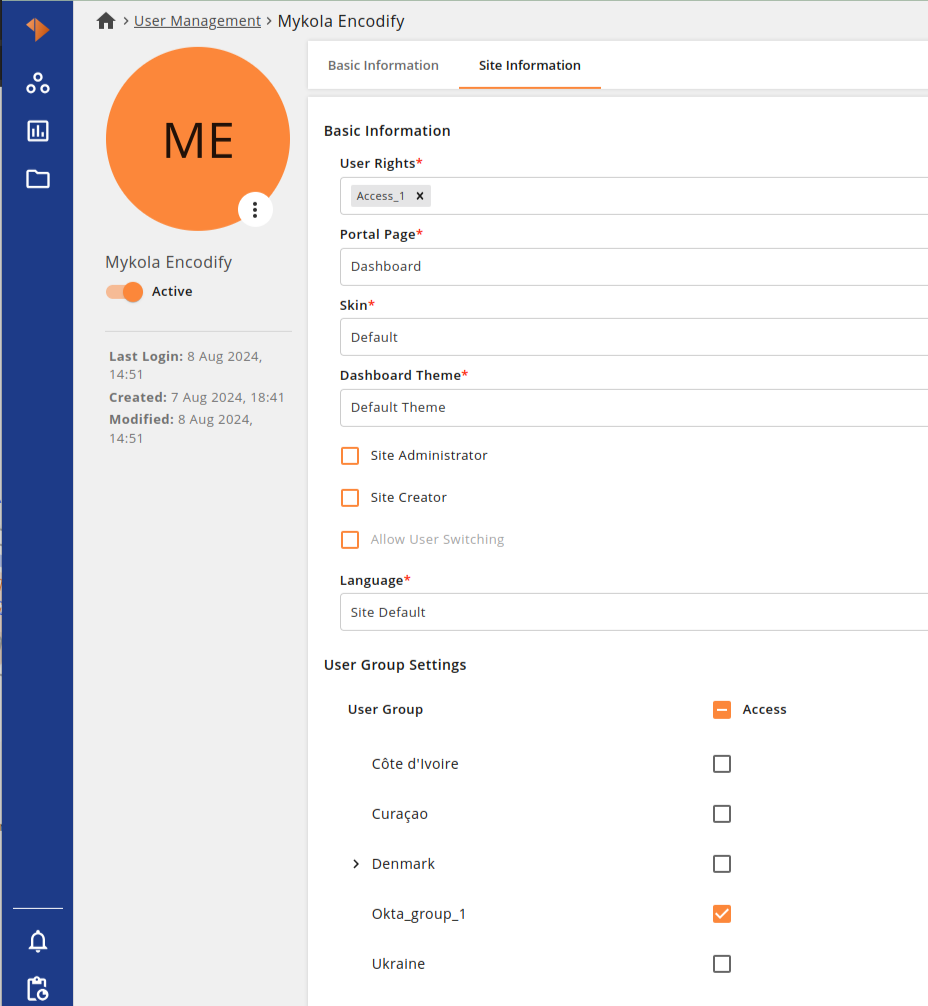
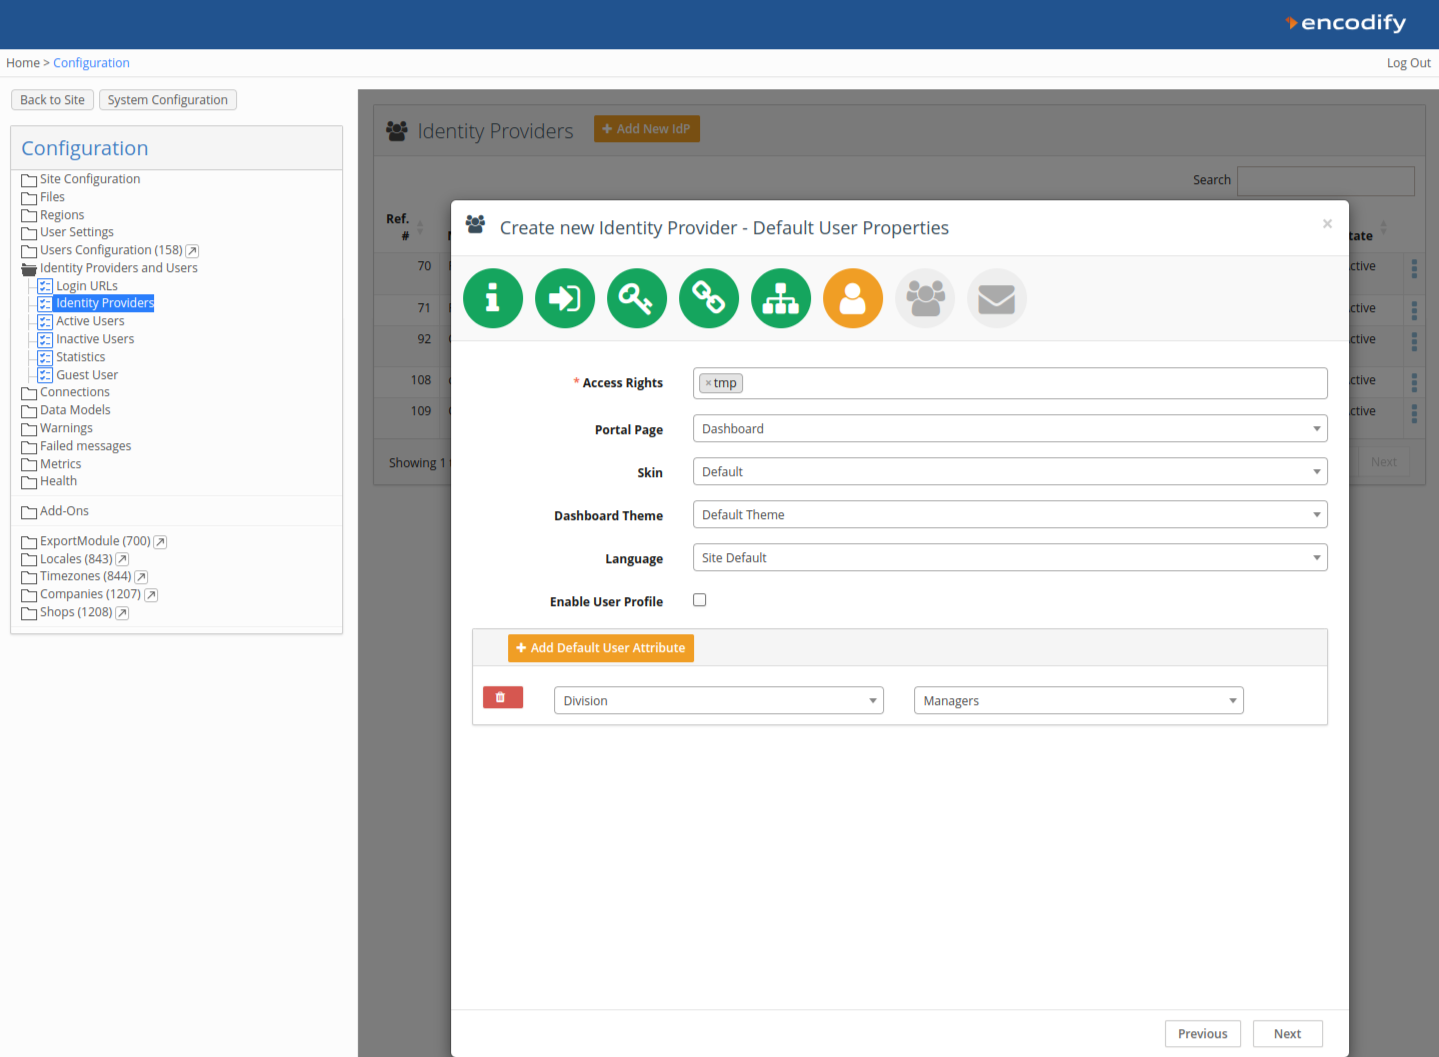
Step 8: Default User Groups
Define default groups to assign on first login.
Click Next.
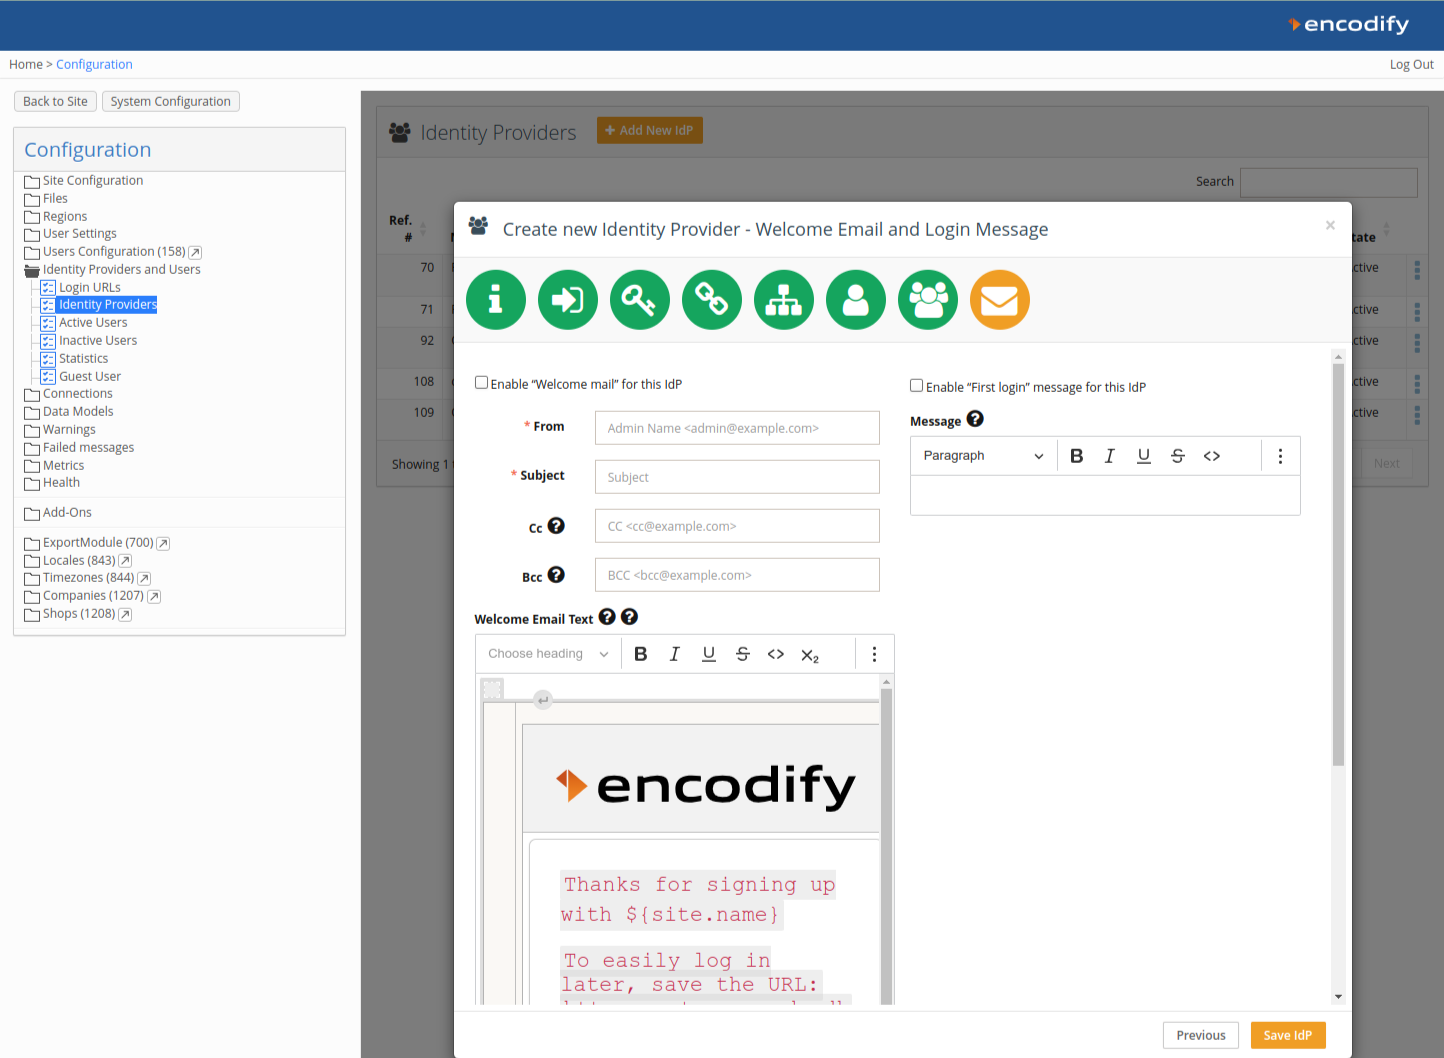
Step 9: Welcome Message & First Login Email
Optionally enable a Welcome Email and First Login Message.
Click Save IdP to complete the setup.
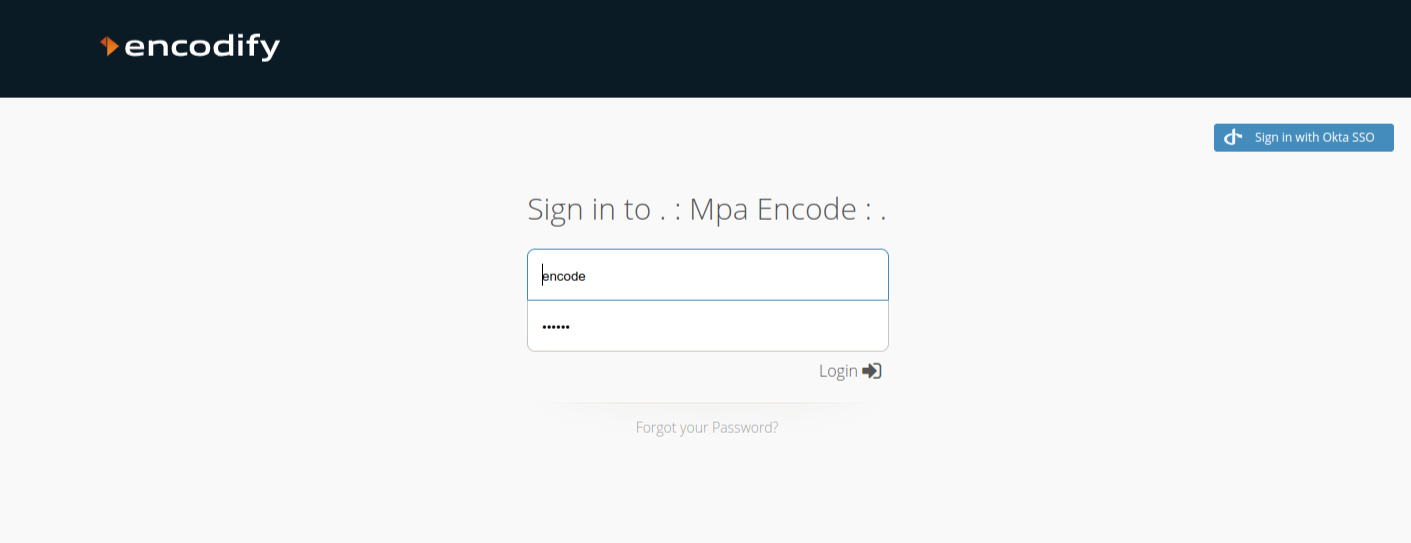
Logging In via Okta SSO
If Okta is the only authentication method linked to the Login URL, users will be redirected automatically. If multiple methods exist, users will see a button (e.g. Sign in with Okta SSO). Upon first login, users will be auto-provisioned in Encodify with configured roles and attributes.