Overview
This article provides step-by-step guidance on how to configure Microsoft Active Directory Federation Services (AD FS) and Amazon Cognito for Encodify using OpenID Connect (OIDC).
Configuring OpenID Connect for Encodify through Amazon Cognito
Step 1: Start IdP Configuration in Encodify
Navigate to: Site Configuration → Identity Providers and Users → Identity Providers.
Click Add New IdP.
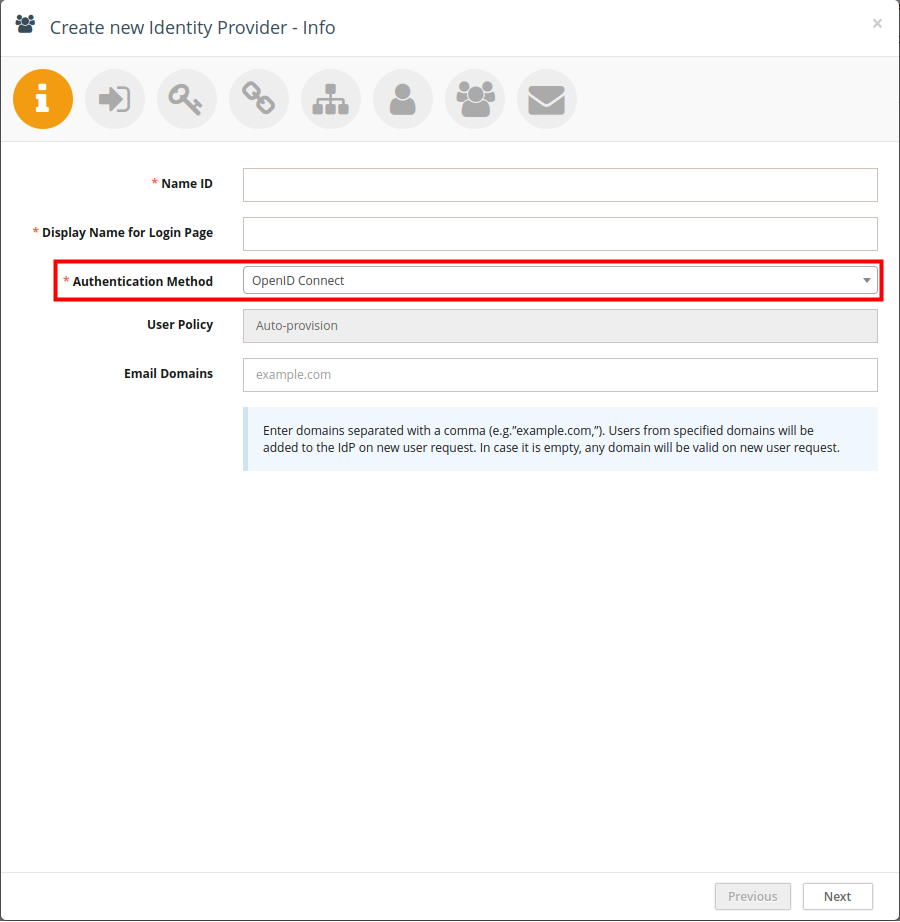
Fill in the fields as follows:
Name ID: Use only English letters without spaces. This will be part of the URL.
Display Name for Login Page: This will be shown on the login button.
Authentication Method: Select OpenID Connect.
Email Domains (optional): Specify allowed domains (e.g.
encode.dk, microsoft.com).
Click Next to proceed to Step 2.
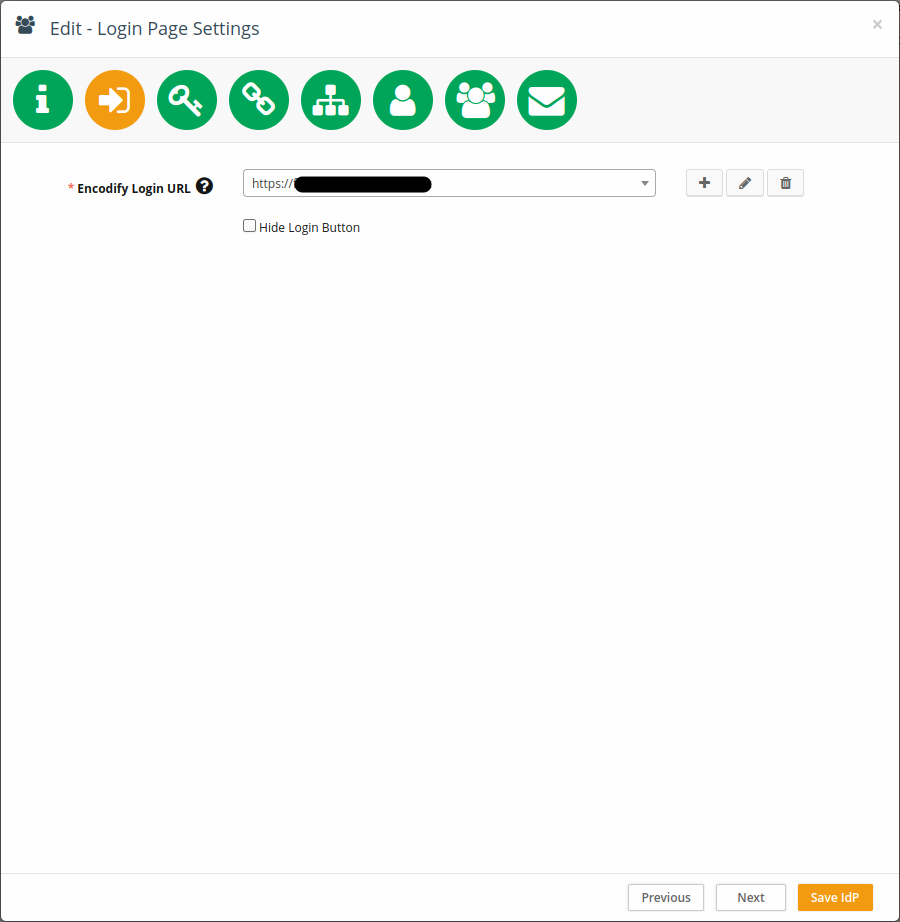
Step 2: Link to a Login URL
Link your IdP configuration to an existing Login URL and Login Page, or create new ones.
Each IdP can be linked to only one Login URL.
Click Next to proceed to Step 3.
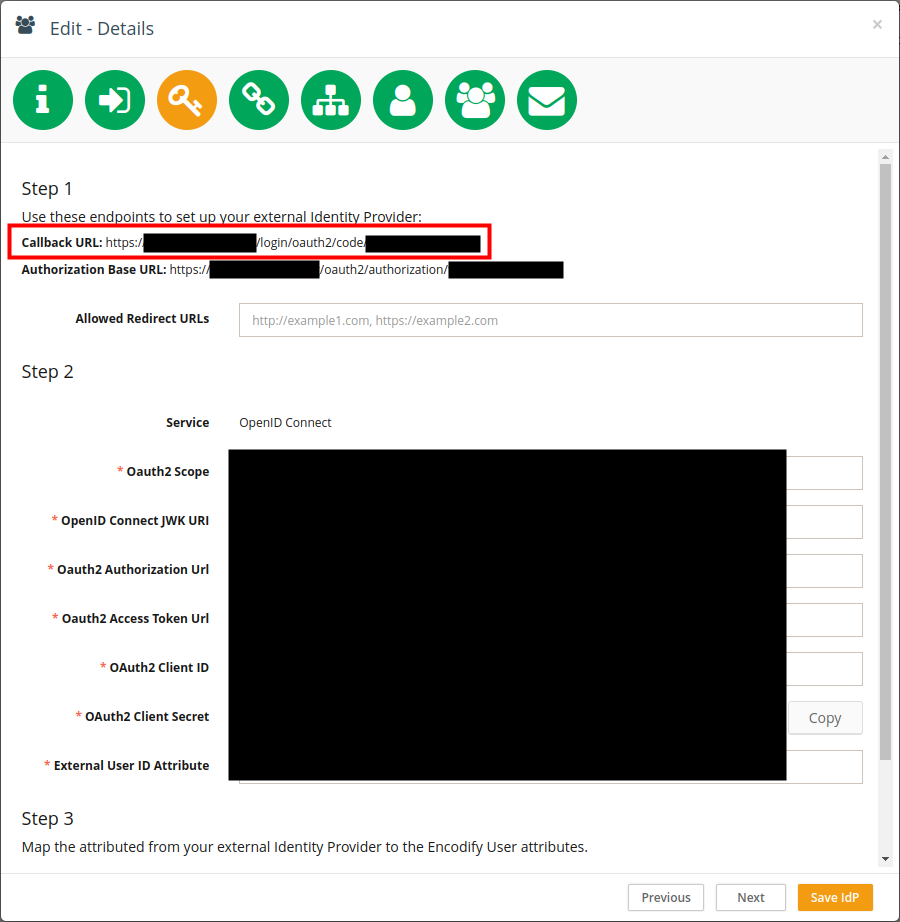
Step 3: Copy Callback URL
Copy the Callback URL provided on this page. You'll use it when setting up within Amazon Cognito Console
Step 4: Create OAuth Credentials in Amazon Cognito Console
Create or Use a User Pool
Open the Amazon Cognito service in AWS Console.
Navigate to User Pools.
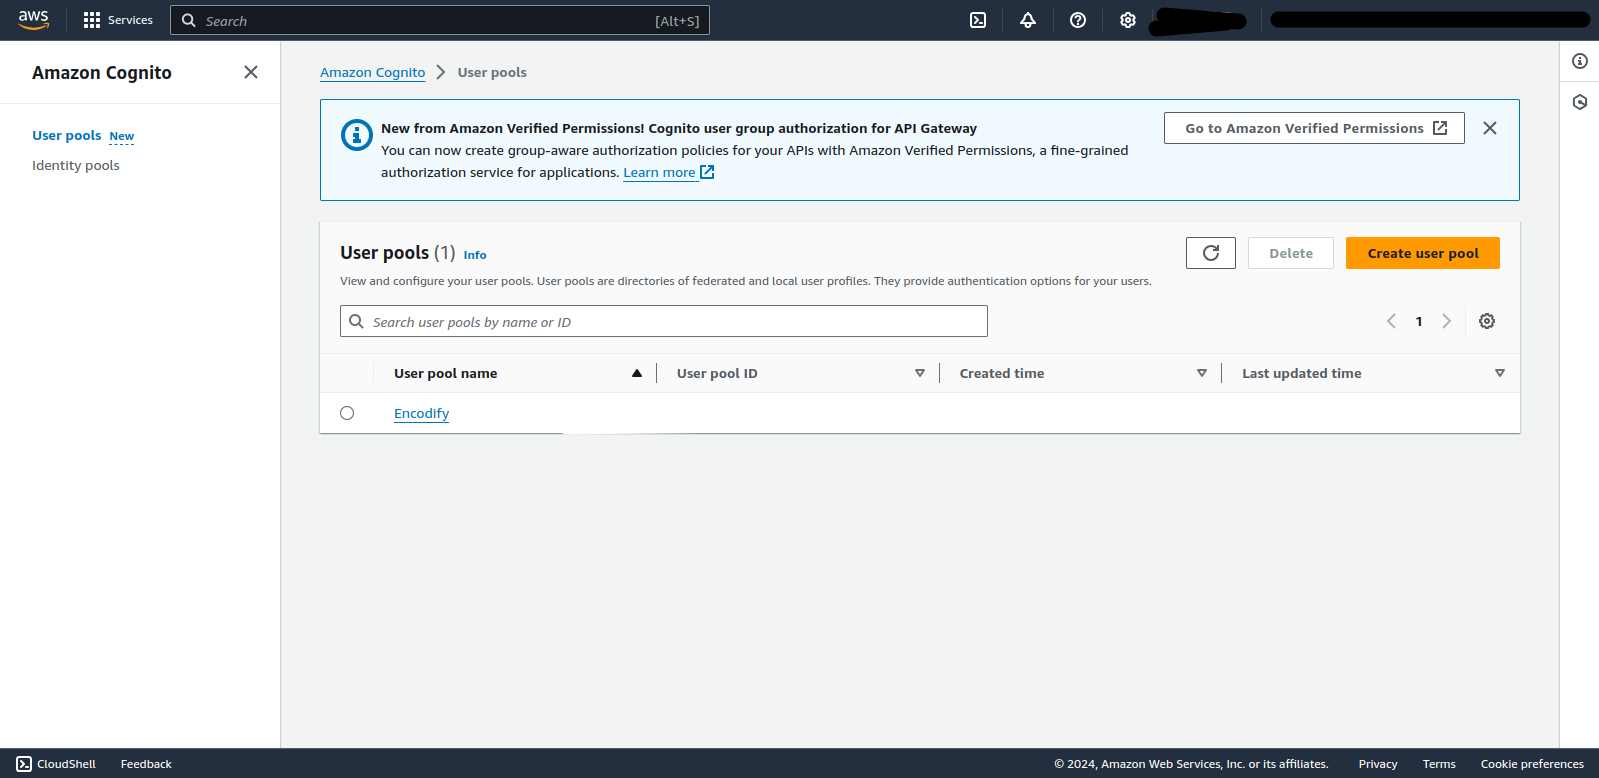
Choose to create a new User Pool or select an existing one.
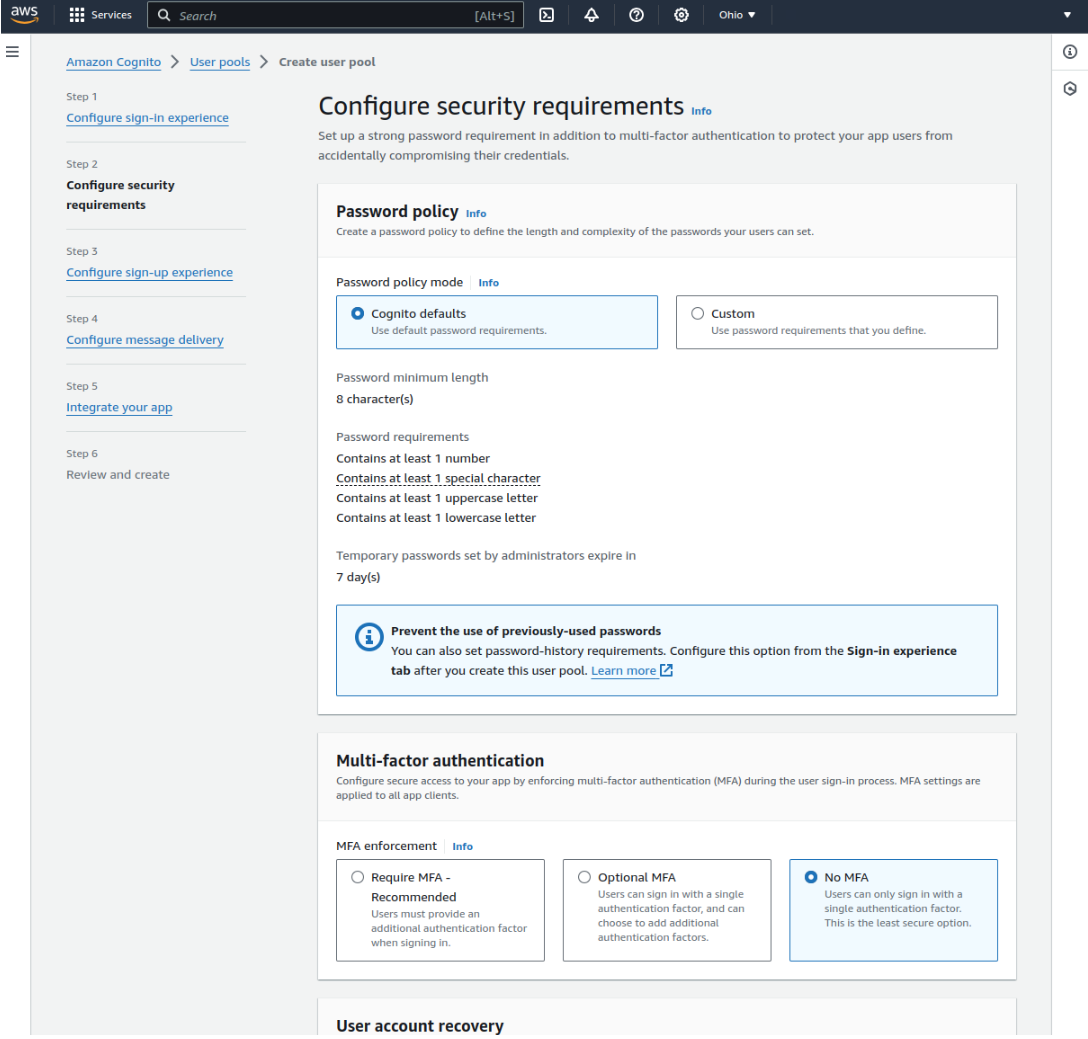
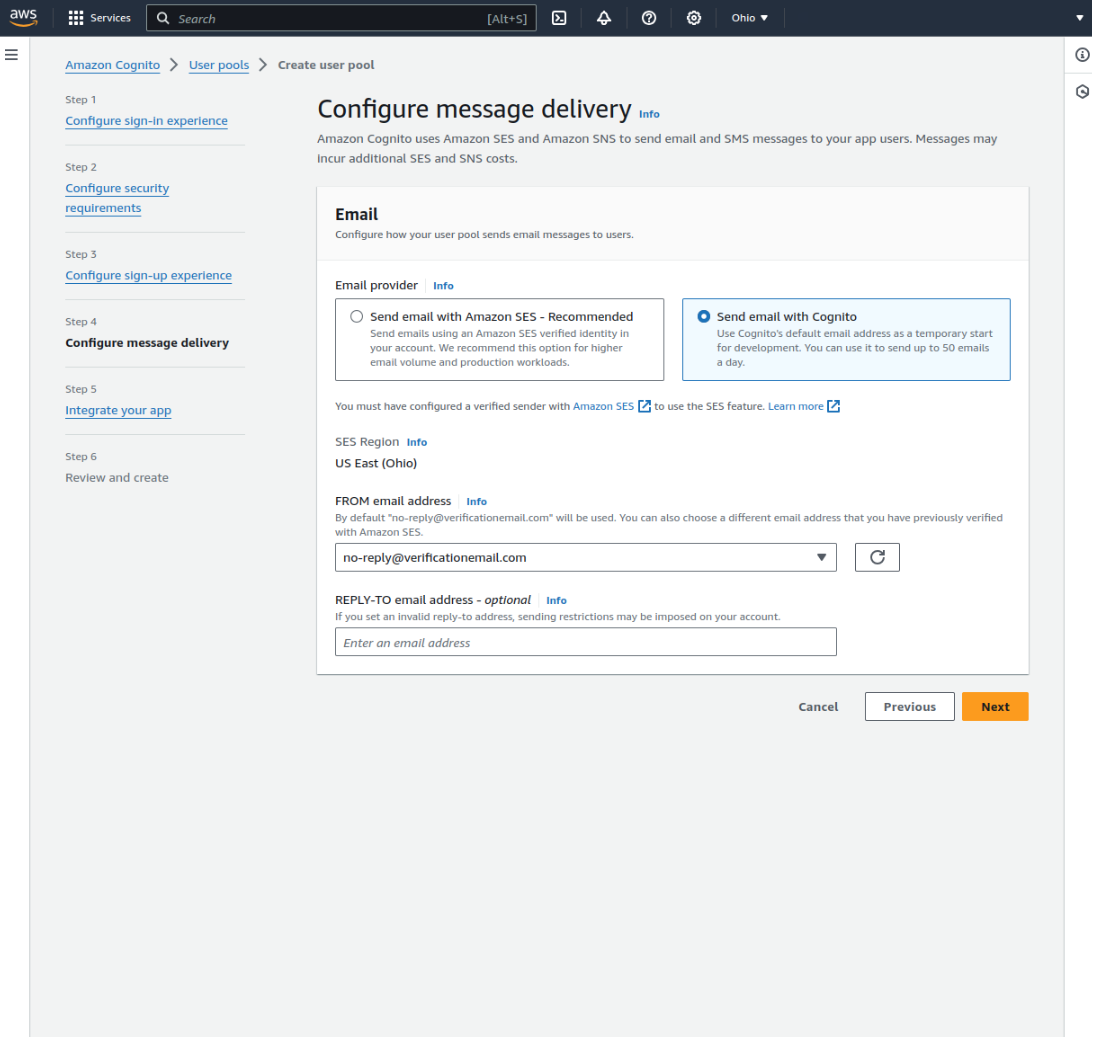
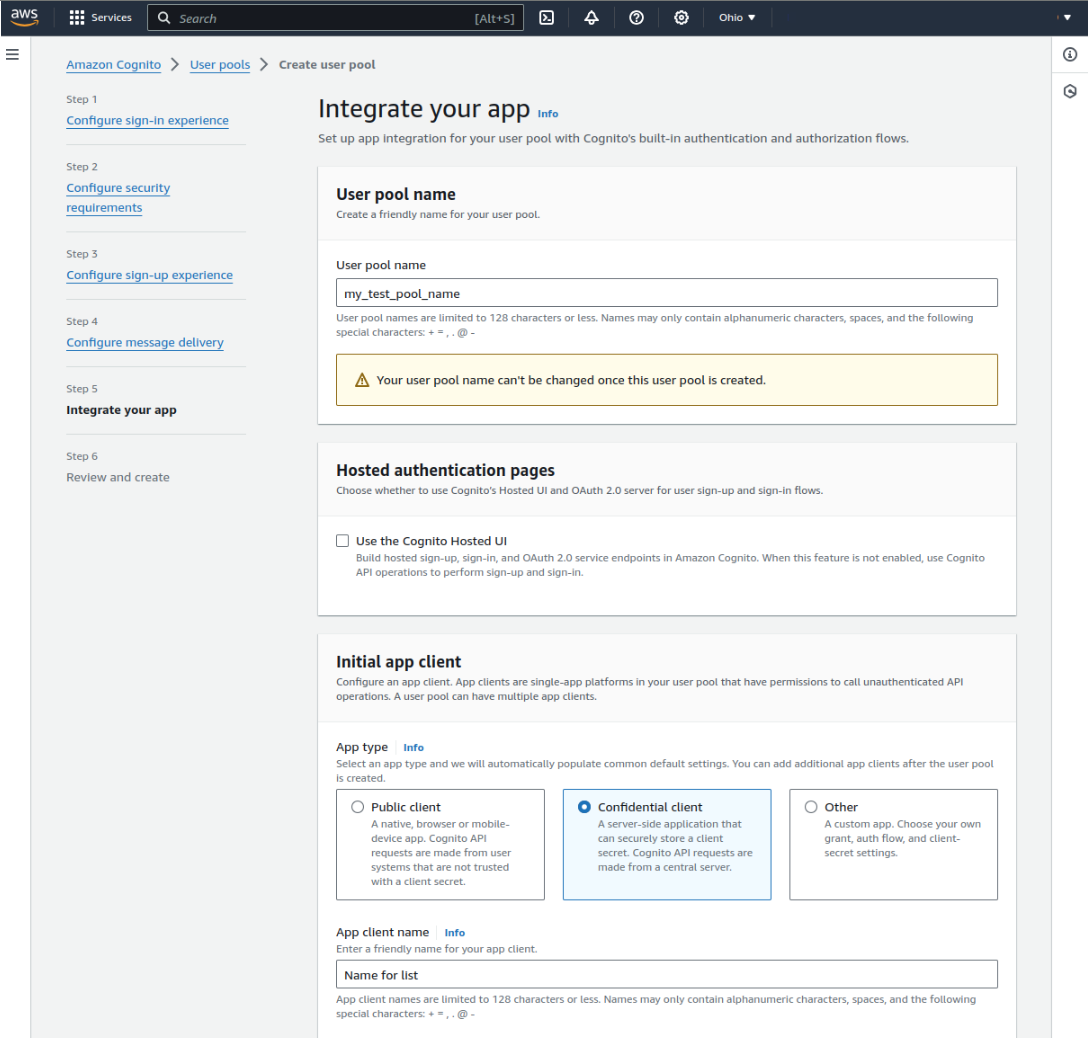
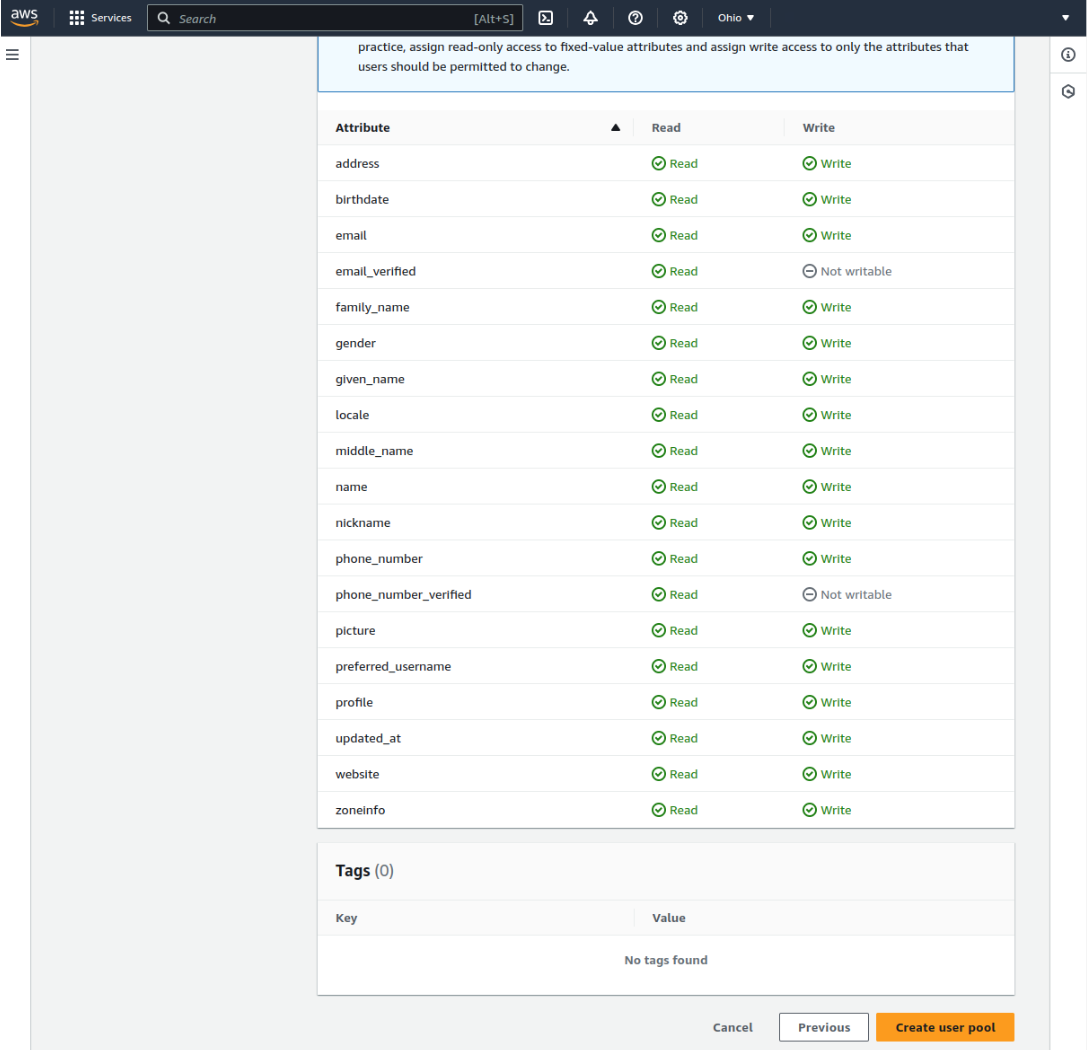
Follow the setup wizard:
User pool name: Provide a name.
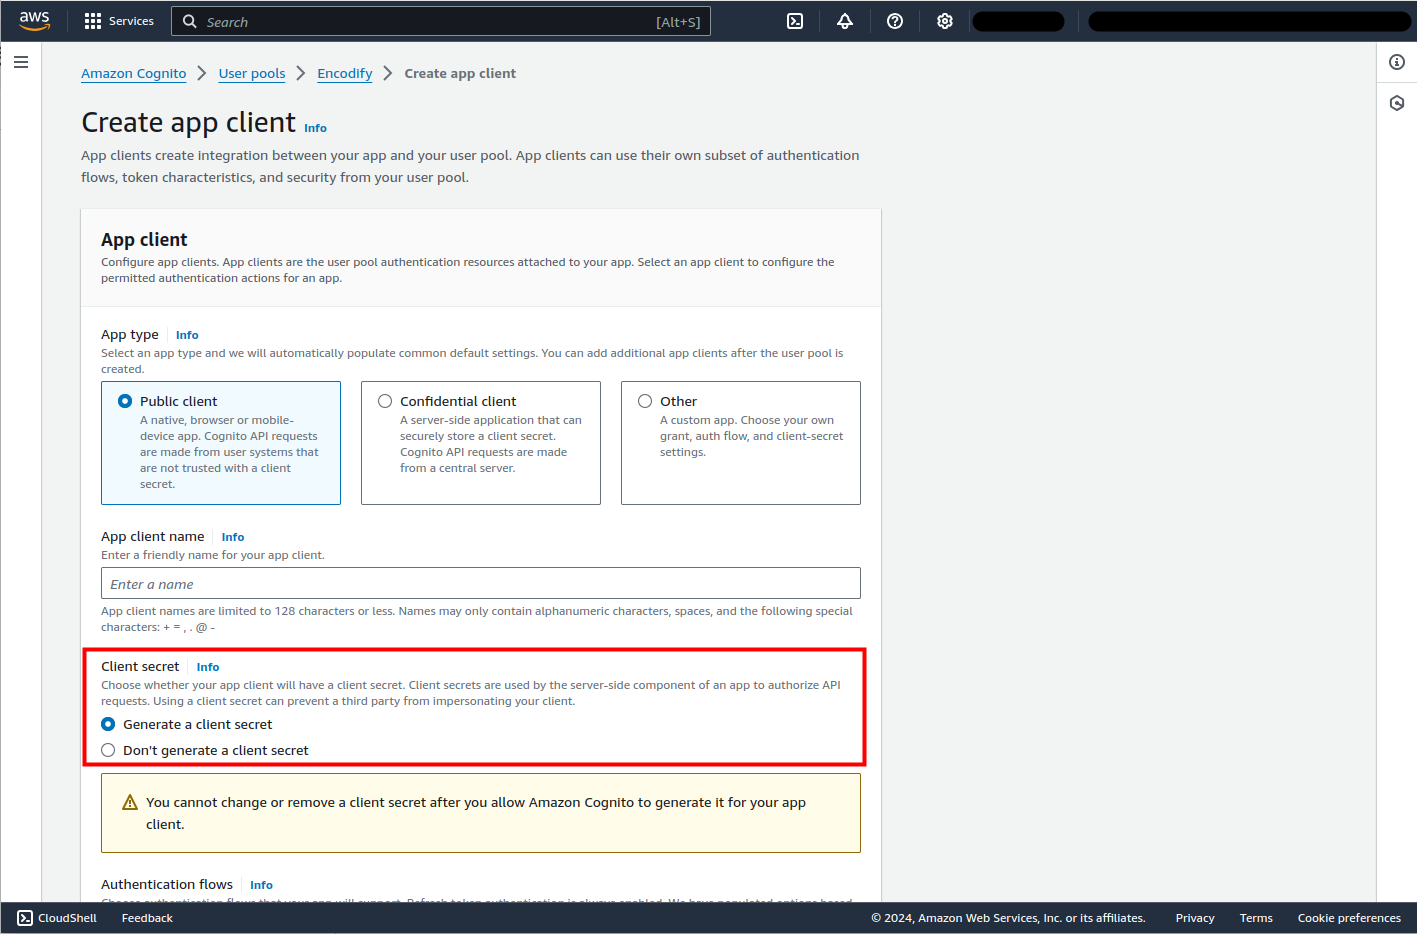
Initial app client: Select Confidential client.
App client name: Choose a recognisable name.
Generate Client Secret: Ensure this is enabled.
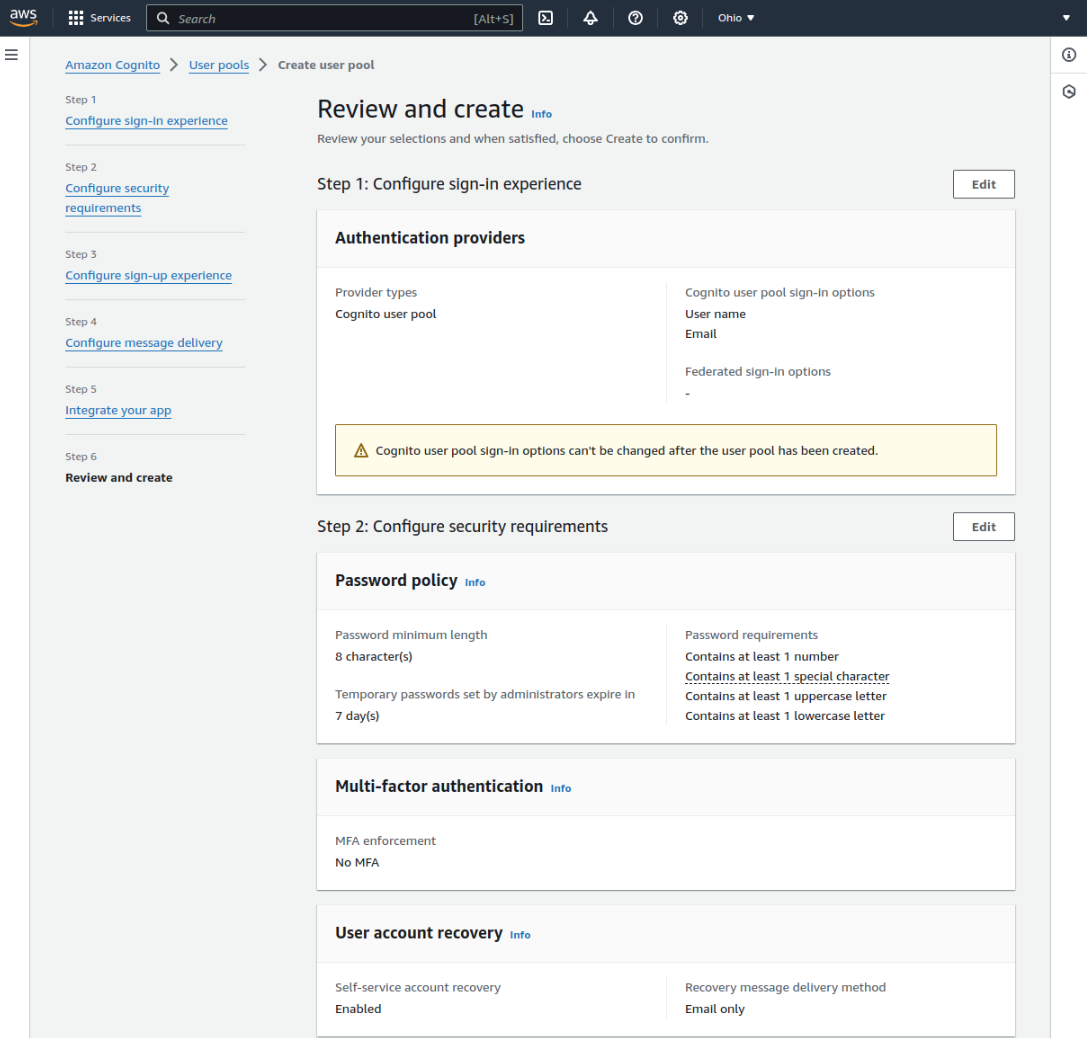
Complete the wizard and click Create user pool.

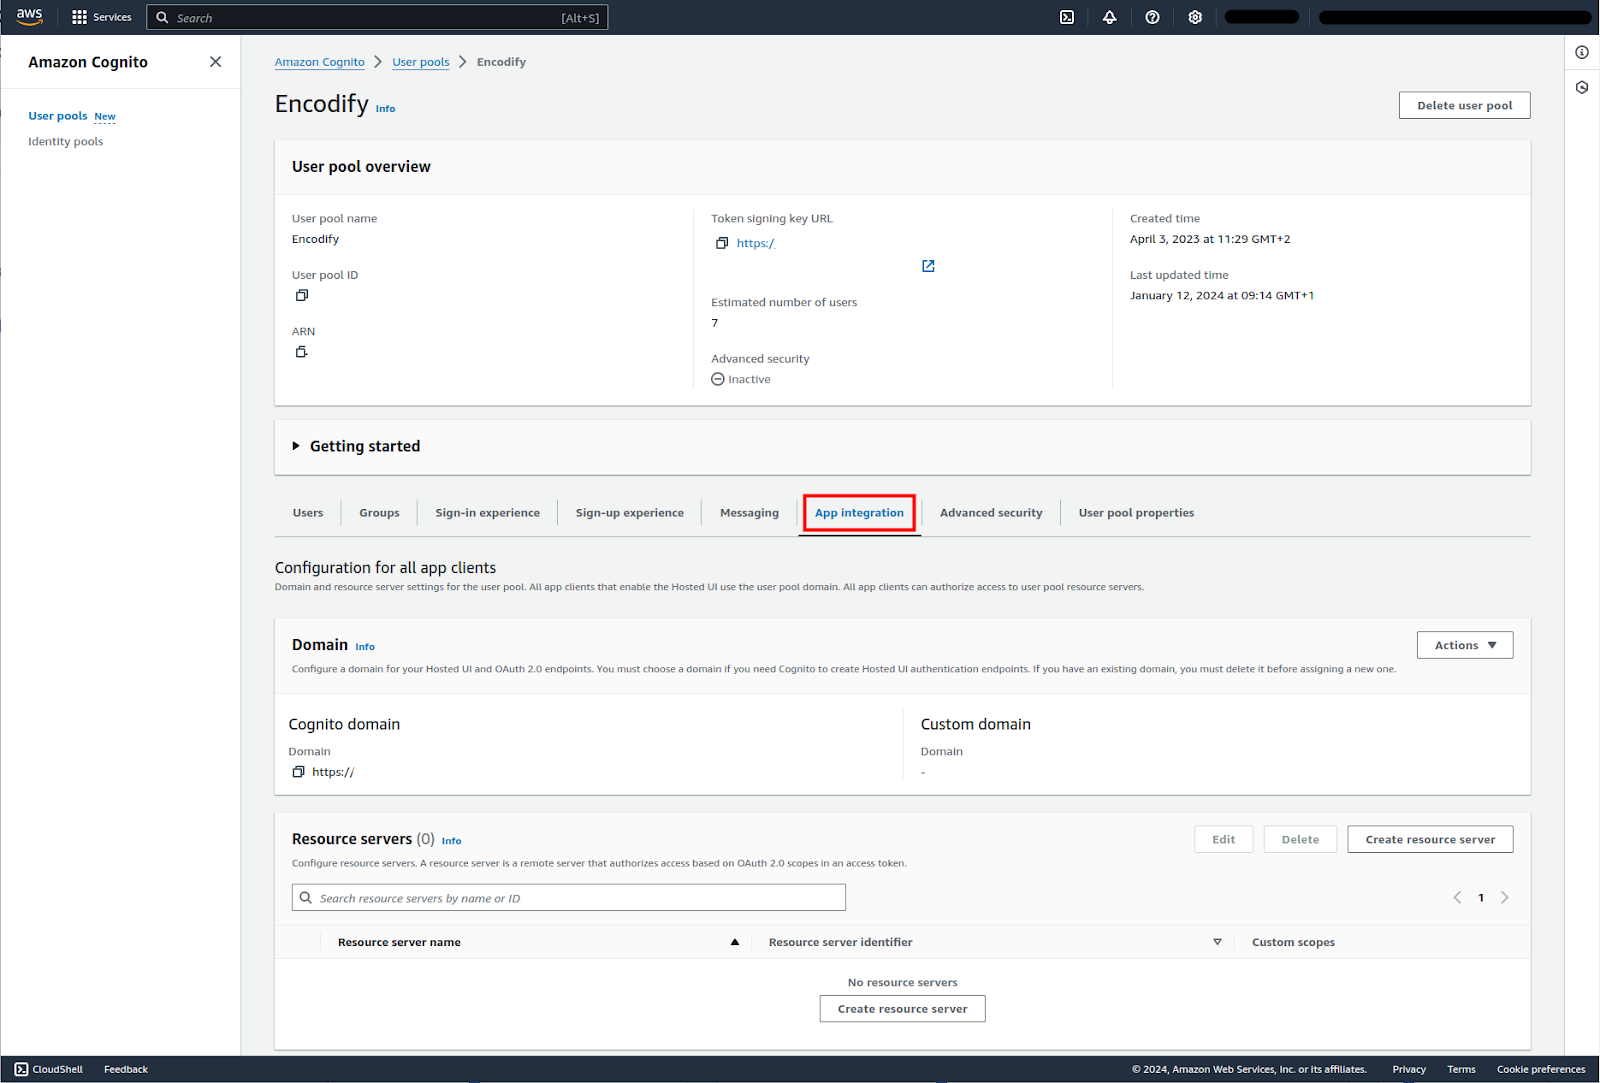
Configure App Integration
Go to the App integration tab.
Scroll down to App clients and analytics.
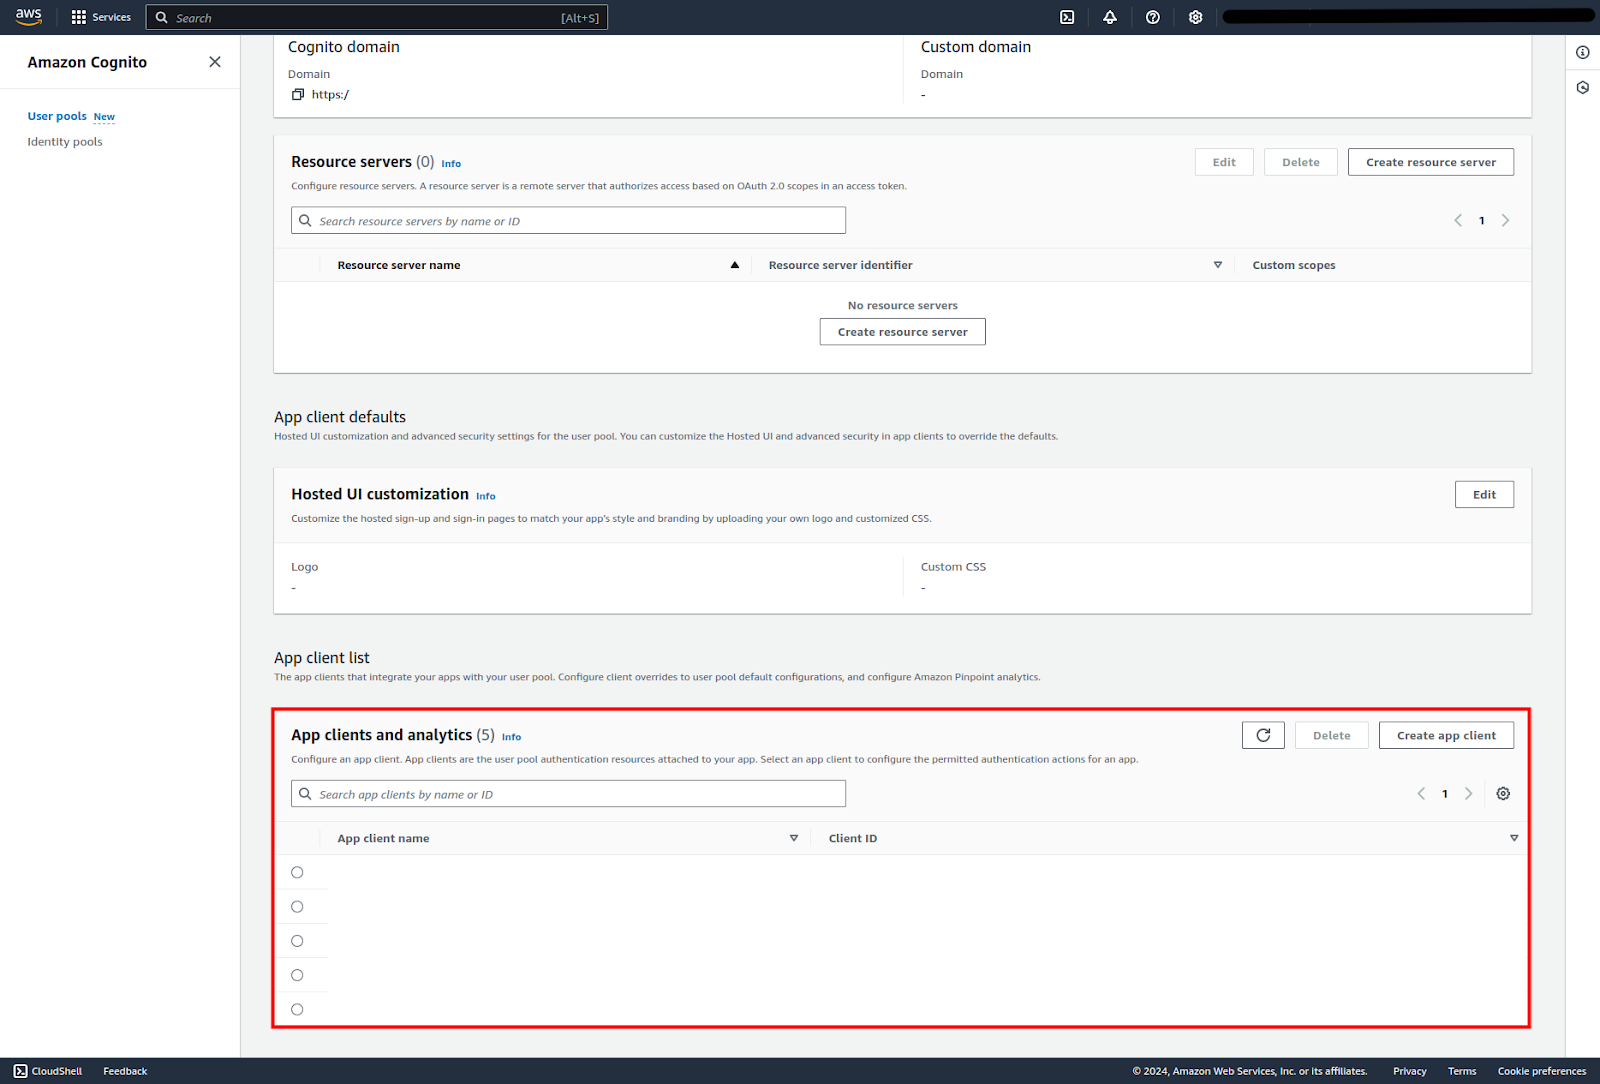
Edit or create an app client. If you are creating a new App please don’t forget to generate “Client Secret” this is needed as part of Encodify configuration in “OAuth2 Client ID” and “OAuth2 Client Secret”.
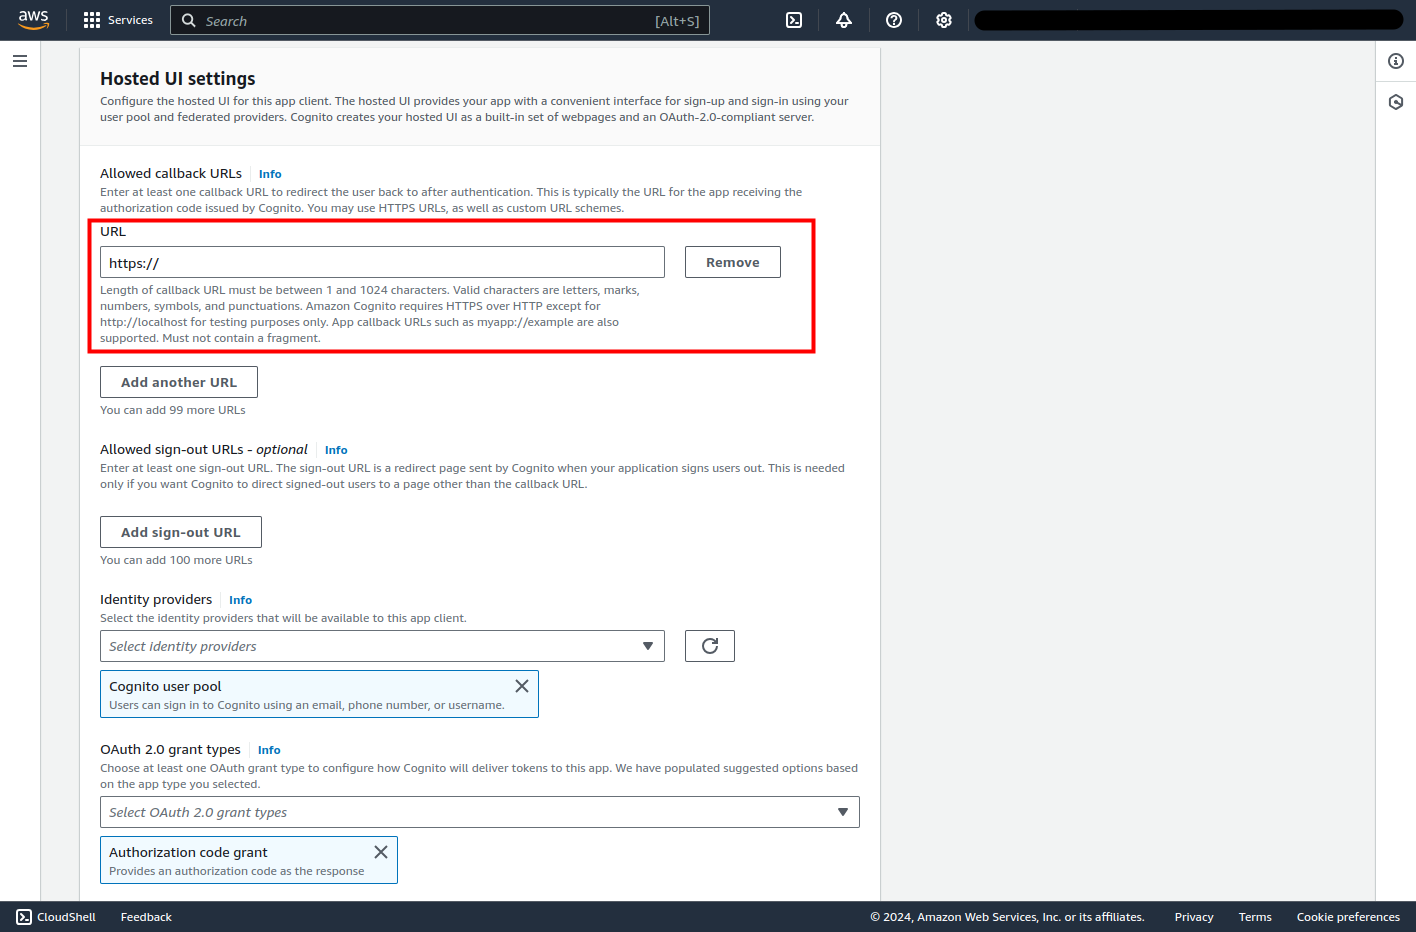
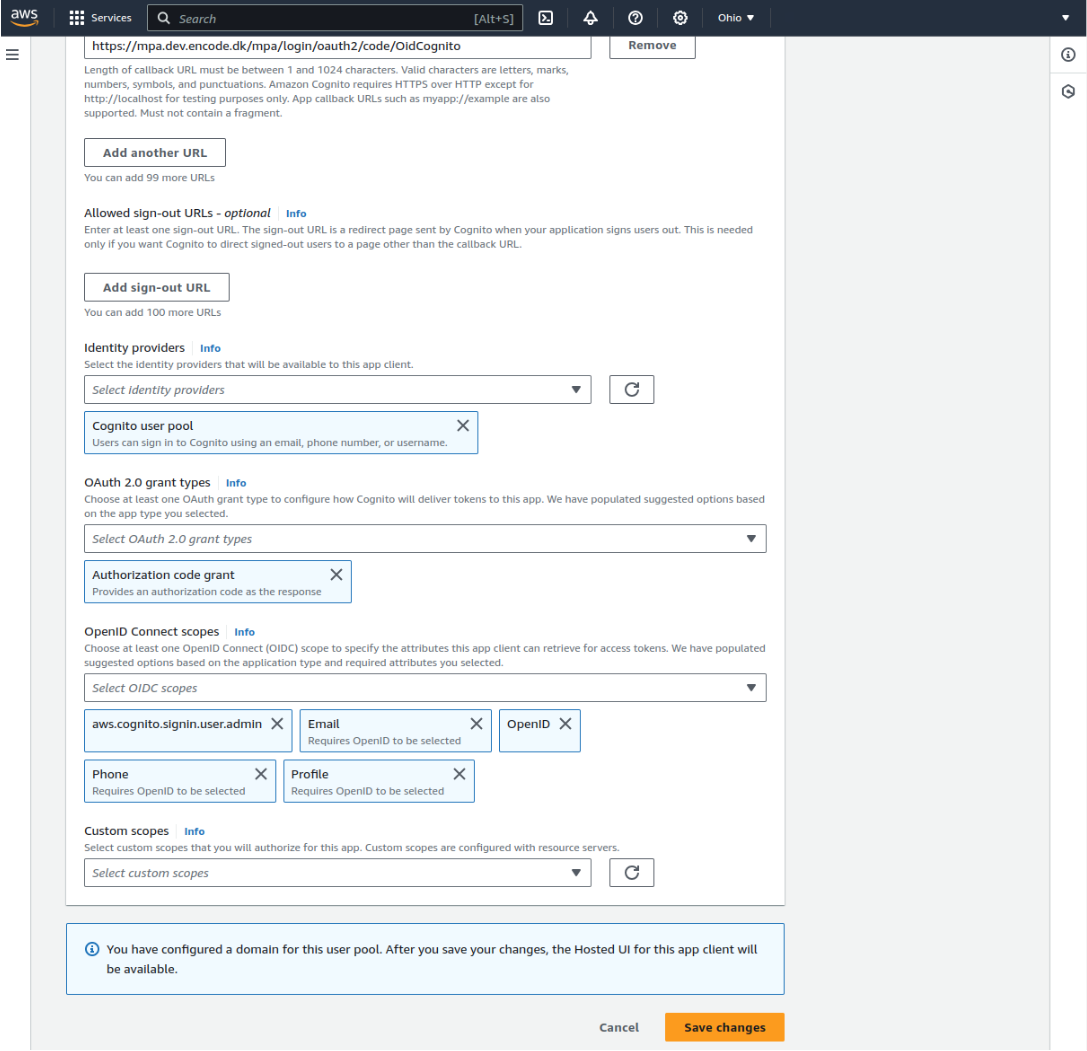
Under Hosted UI settings add the Callback URL from Encodify.
Save your changes.
Retrieve OpenID Metadata
From the Pool Info page, copy your User Pool ID and AWS region.
Construct your OpenID Configuration URL:
Format:
https://cognito-idp.<region>.amazonaws.com/<userPoolId>/.well-known/openid-configuration

Step 5: Complete IdP Configuration in Encodify
In Step 3 of the Encodify IdP setup, enter your OpenID Connect Config URL (from Step 6).
Encodify will auto-fetch the following:
OpenID Connect JWK URI
OAuth2 Authorization URL
OAuth2 Access Token URL
Fill in the remaining fields manually:
Field | Value |
|---|---|
OAuth2 Client ID | From Cognito App Client |
OAuth2 Client Secret | From Cognito App Client (if secret generated) |
OAuth2 Scope |
|
External User ID Attribute |
|
Click Next to proceed to further steps (e.g., access rights, default groups, etc.) as needed.
Note: Cognito does not support mapping of custom user claims beyond standard ones (e.g. name, email).
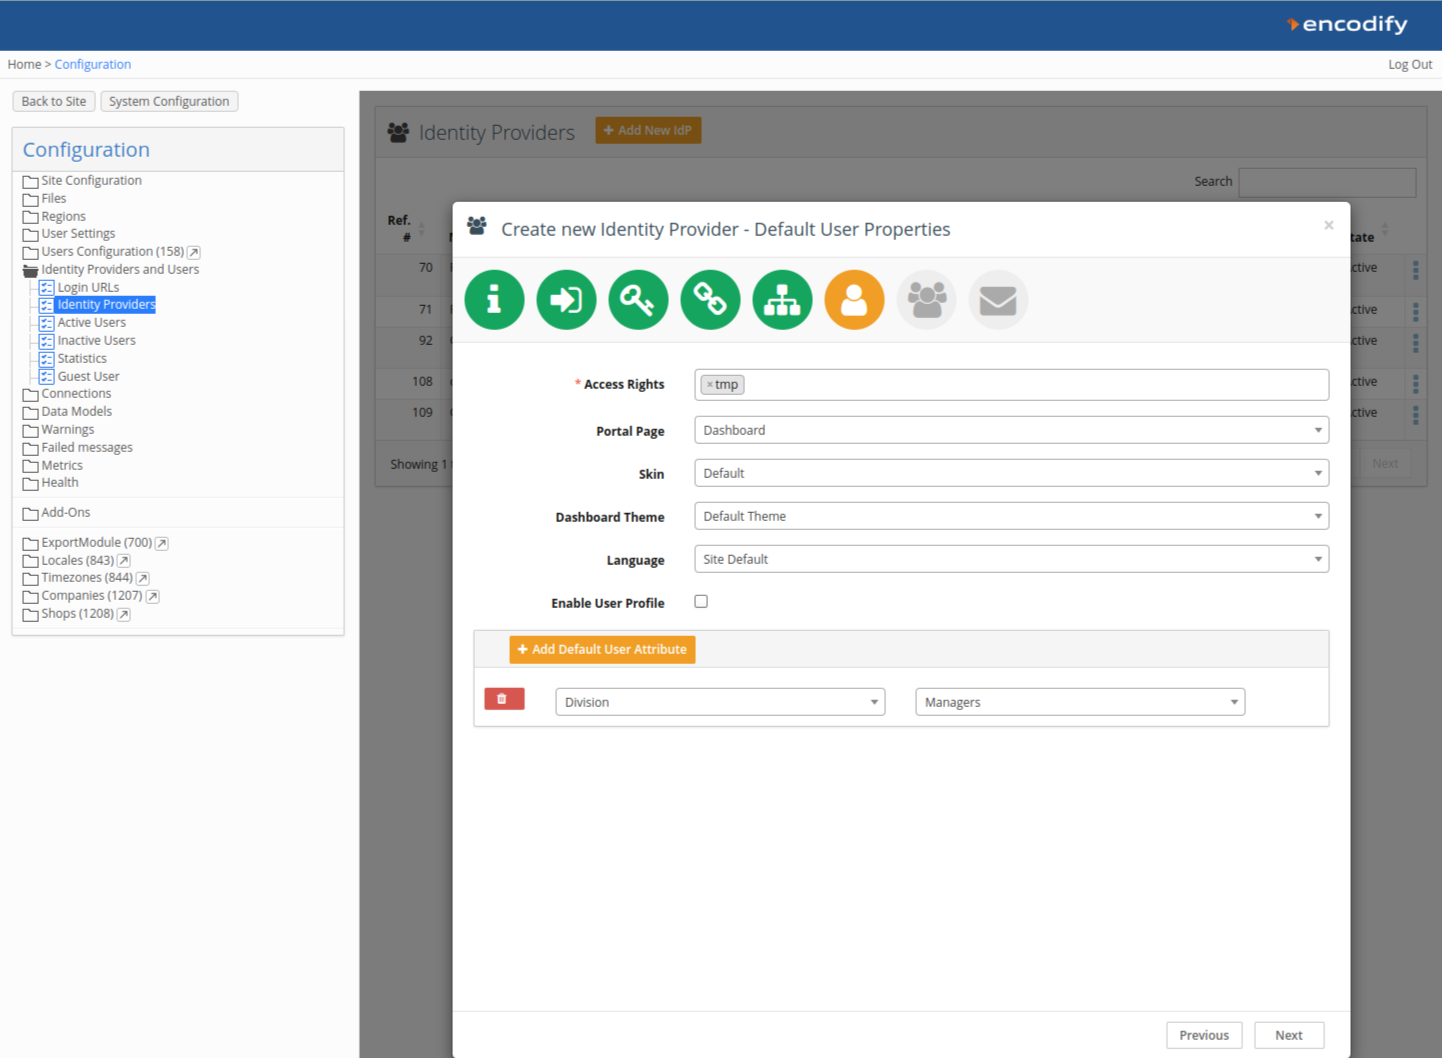
Step 6: Default User Groups
Define default groups to assign on first login.
Click Next.
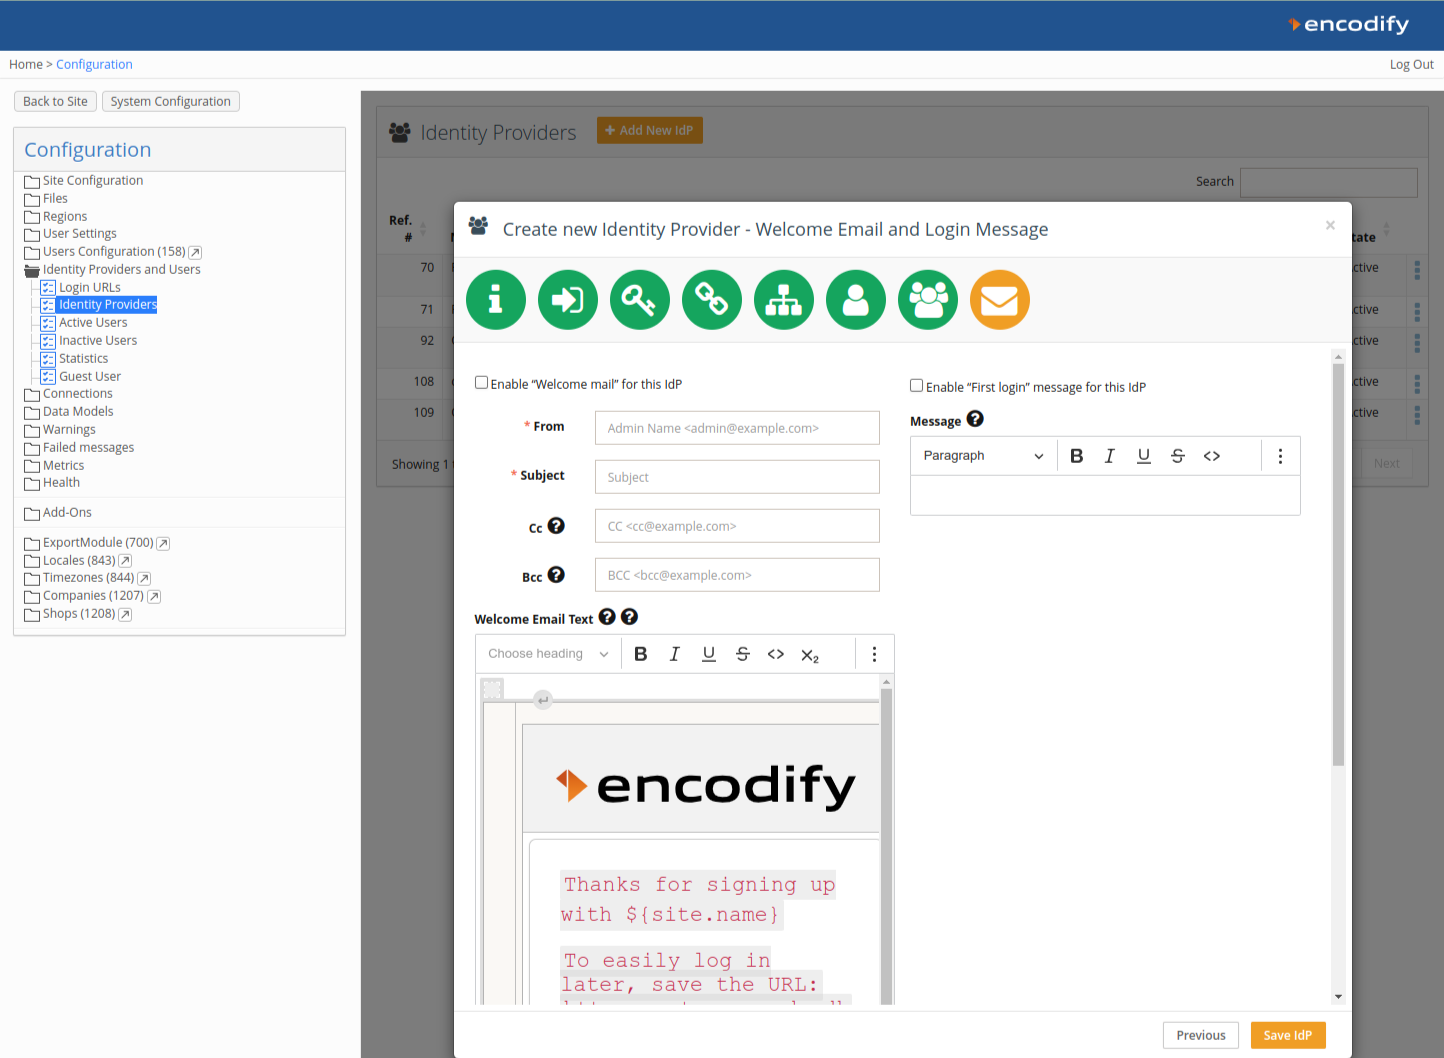
Step 7: Welcome Message & First Login Email
Optionally enable a Welcome Email and First Login Message.
Click Save IdP to complete the setup.
Logging In via Amazon Cognito OIDC
If Cognito is the only method linked to the Login URL, users are redirected directly. If multiple methods exist, users will see a button (e.g. Sign in with Cognito). Upon first login, users will be auto-provisioned in Encodify with configured roles and attributes.