Location: Modules > Manage Modules
How to Manage Modules?
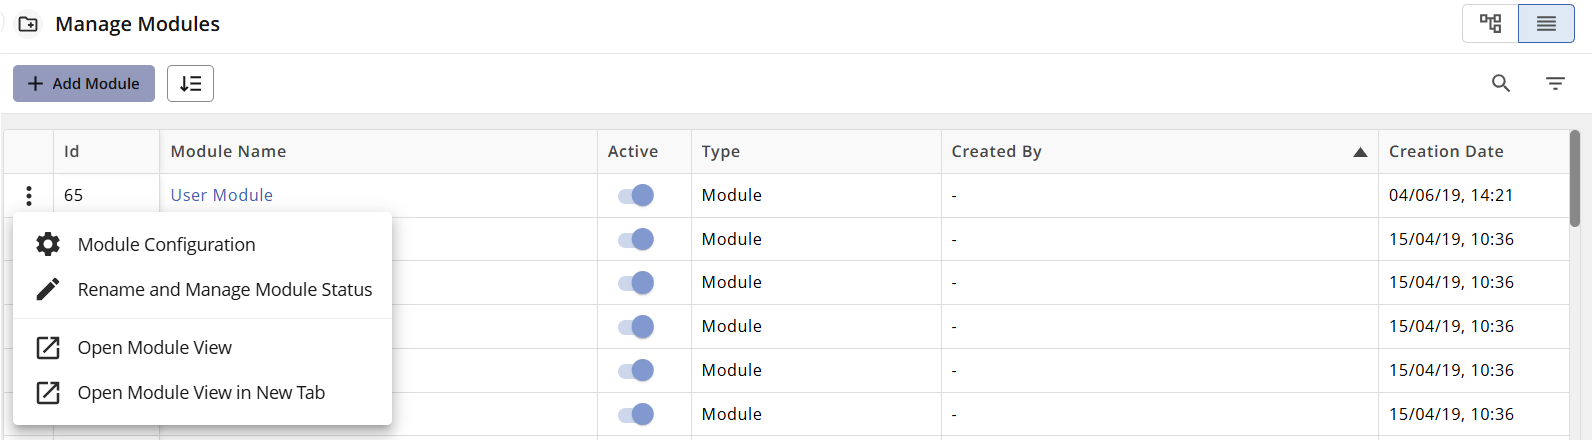
The Manage Modules page is available to site and system administrators as well as regular users. It provides a detailed overview of all modules for admin users, while standard users can view all active modules for which they have Read and Configure access, ensuring full visibility and easy navigation.
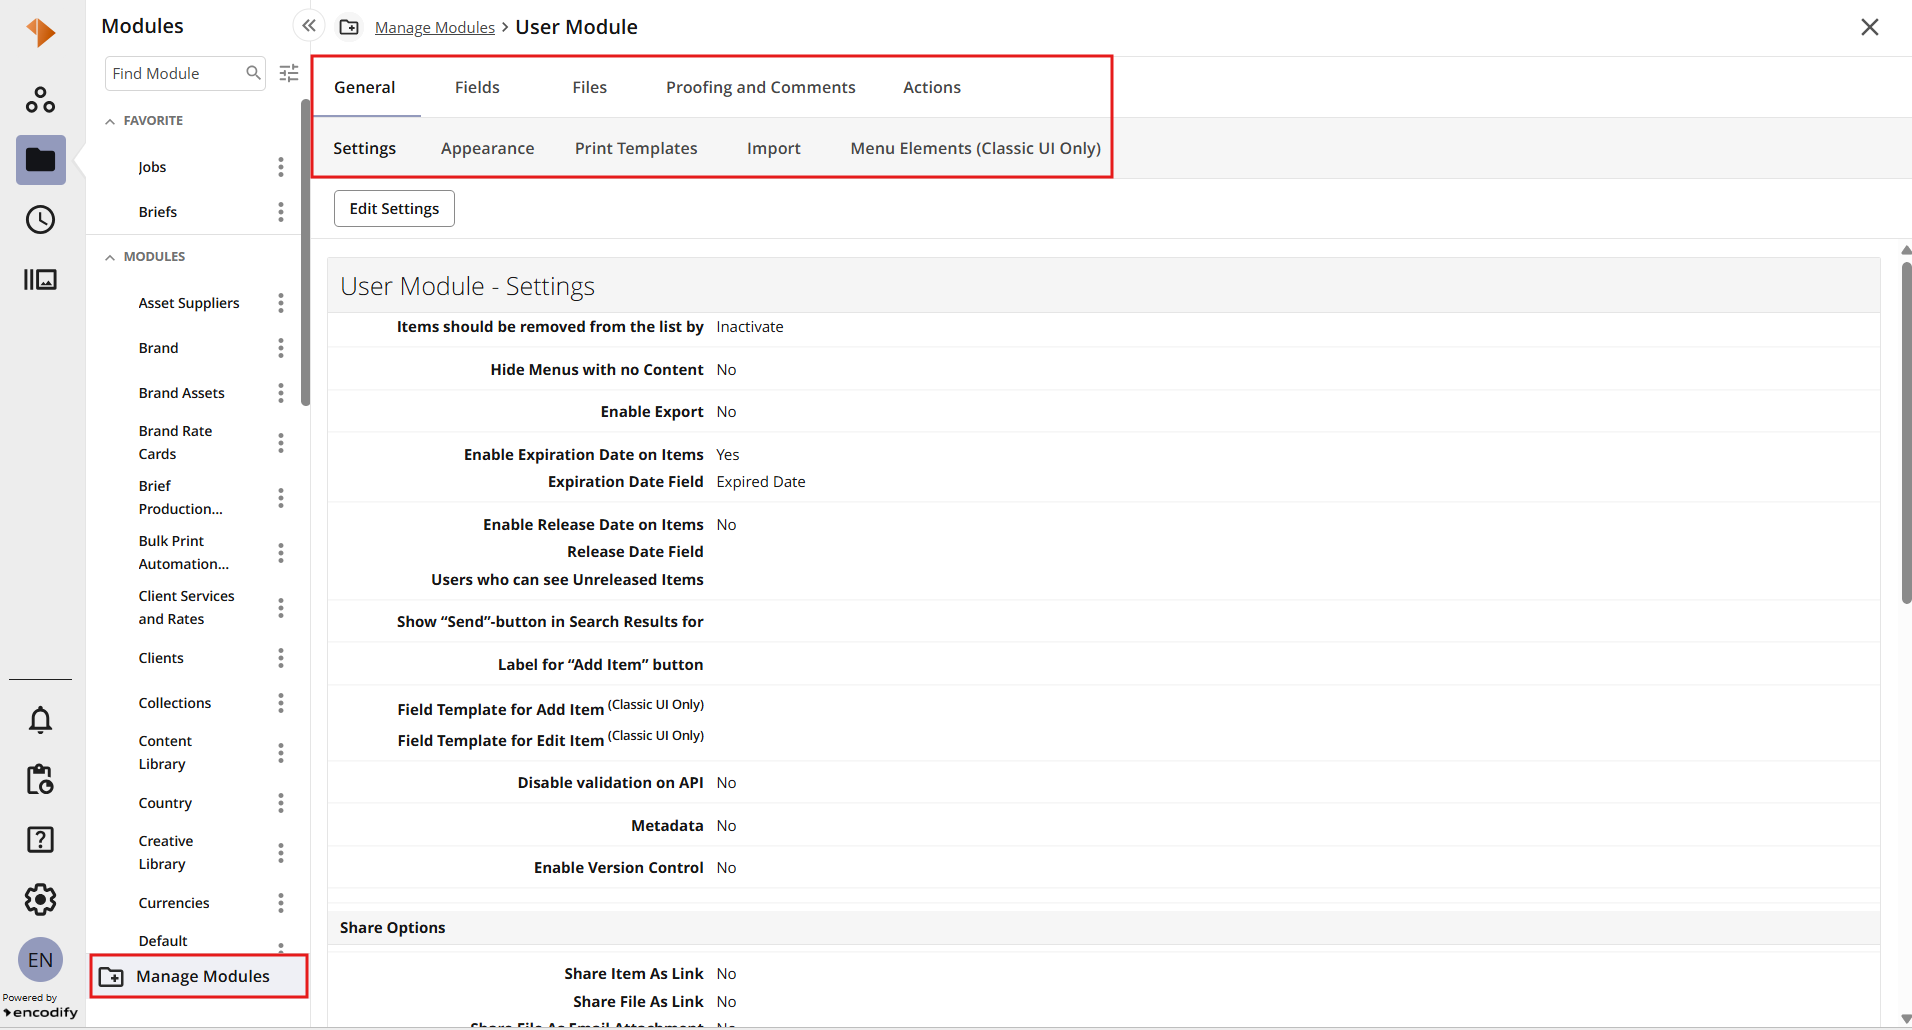
You can open the page from the side navigation by selecting Manage Modules.
How to Change Module Sort Order
The order in which modules appear in the Manage Modules list is controlled by a sort number. The module with the smallest number appears at the top of the list, and the module with the largest number appears last.
To change the order, click the Change Sort Order button in the Manage Modules header. This opens the Change Module Sort Order modal, where you can renumber the modules (for example, 10-100). To save your changes, first click the Re-number button and then click OK.
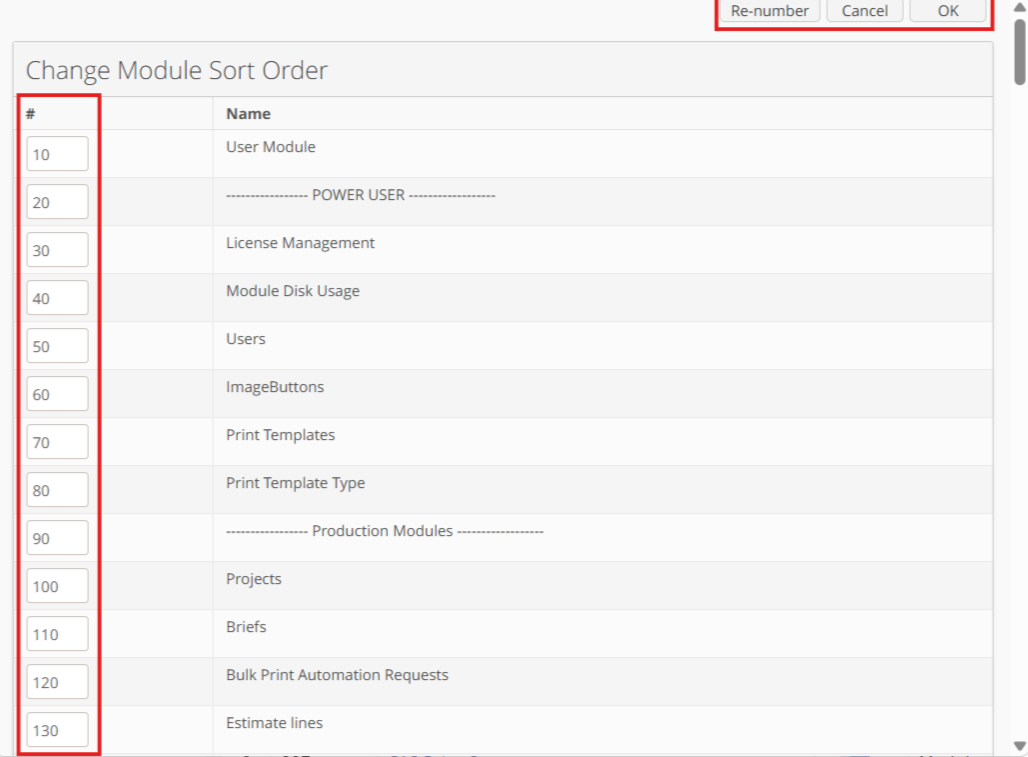
Note: The module sort order number is not the same as the module ID. The module ID is a unique identifier for each module and cannot be changed. The sort order number only dictates the order in which the module appears in the Manage Modules list.
How to Add a New Module?
This section explains how to create a regular module. To configure an AdBuilder or Briefing System module, see the articles Create Briefing System module and Configuring the AdBuilder module.
In the Manage Modules view, click the + Add Module button. This will open the Create Module modal.
Select Module as the type.
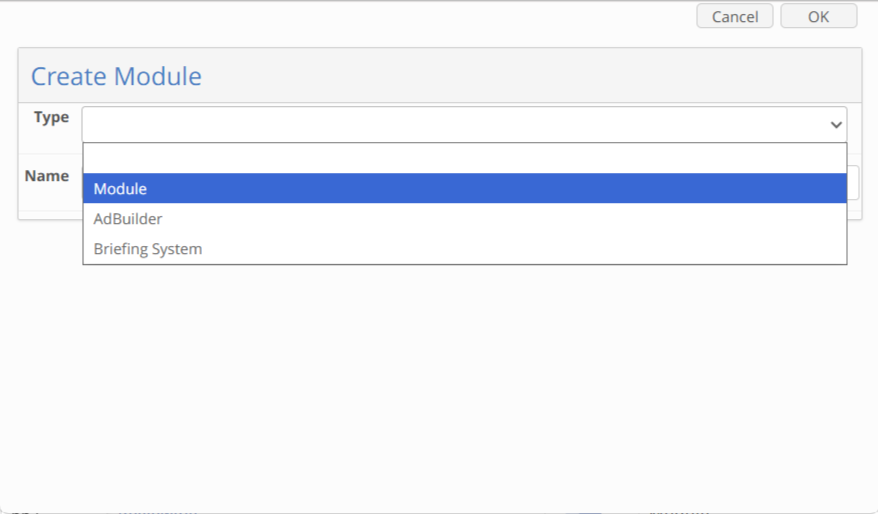
Name the module and
Select Template from the pre-existing options:
With Preconfigured Media Settings and Audit Fields
With Preconfigured Media Settings and without Audit Fields
Without Media Settings and with Audit Fields
Without Preconfigured File Area Settings and Audit Fields
With Preconfigured File Area Settings and without Audit Fields
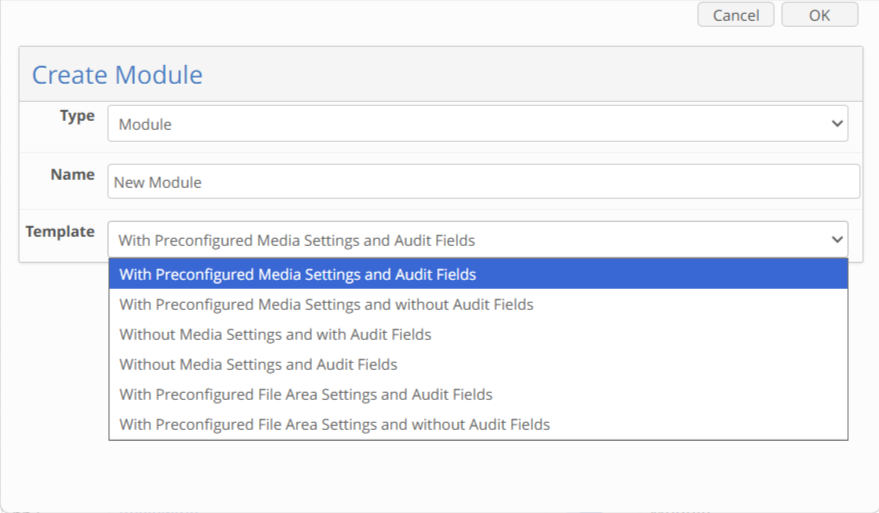
Click OK to complete the module creation.
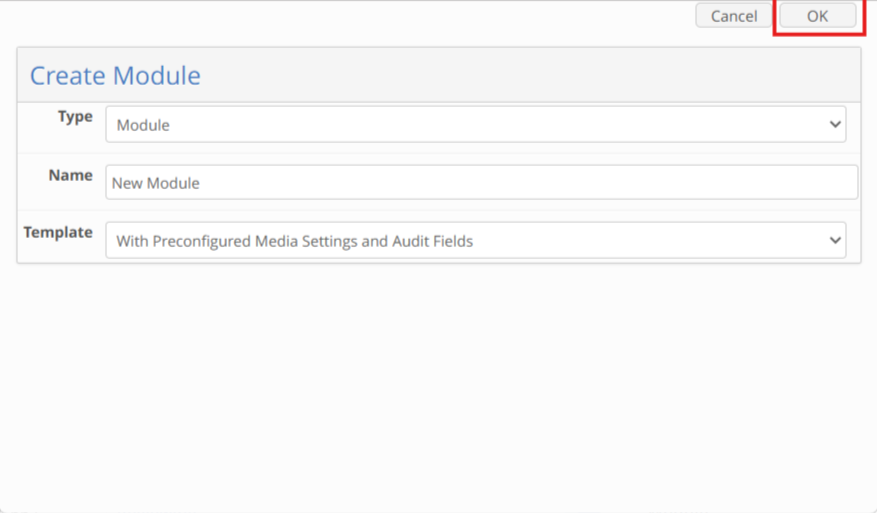
This completes the module creation for the regular module type, and the module is now visible in the Manage Modules list.
Available Actions for Administrators
Module Configuration - Opens the module configuration area where you can manage all module-related settings. This includes tabs such as Settings, Appearance, Field Definitions, Media File Holders, Proofing, Comments, Actions, and more.
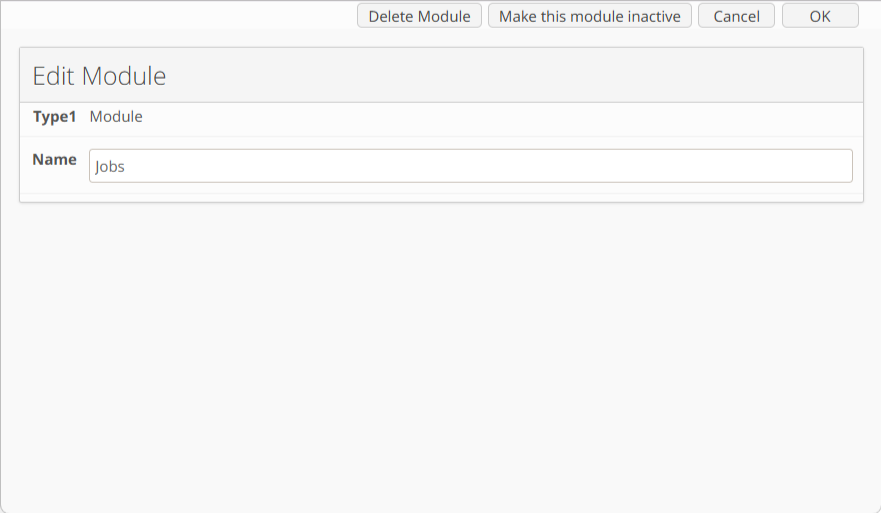
Rename and Manage Module Status - Opens a modal where the user can rename the module, make the module inactive, or delete it.
Additionally, from the management panel, users can:
View Module details – including Module Name, Status, Type, Created By, Creation Date and Module ID.
Search Modules – by module name.
Filter Modules – by type and status. By default, the list displays all module types with the status Active.
Sort Modules – sorting is available for each column; the default is ascending by module name.
Open Modules – in the current tab or in a new tab.
Note: Functionality is hidden for modules that contain only system settings and no user-facing data fields (Briefing System and AdBuilder modules).
This functionality ensures administrators maintain full visibility and control, enabling them to quickly find, access, and manage Modules across the system.
Keyboard Navigation & Shortcuts
To speed up your workflow when configuring system modules, you can use built-in keyboard shortcuts to search, navigate, and add new elements without relying entirely on your mouse.
Available Shortcuts
You can use the following shortcuts while navigating the Manage Modules area:
Action | Shortcut Key | Context / Details |
Open Search |
| Focuses directly on the search input field so you can start typing immediately. |
Open First Module |
| Opens the top/first module in the list while actively searching. |
Add Module |
| Triggers the main Add Module action from the modules list view. |
Add Item in Config |
| Triggers the first available Add {label} action (e.g., Add Field) inside a module configuration page. |
Go Back |
| Exits the current configuration page and returns to the main Manage Modules list. |
Discovering Shortcuts in the UI
Shortcut key hints are displayed directly inside action tooltips across the interface. Hover over supported buttons to view their corresponding key binding:
Example tooltip format:
Add Field (A)
Known Limitations
These keyboard shortcuts will be ineffective if your cursor is currently positioned on top of a configuration modal (when opened), instead of the main page. To restore keyboard functionality, click anywhere on the main application background.