Bulk Copy Overview
The Time Tracking (formerly known as Hours App) is a dedicated extension designed for seamless time tracking and management. It operates through six core modules: projects, jobs, tasks, work logs, users and teams, ensuring precise and organised time entry. However, the app is flexible and can be reused within any configuration to fit your specific time management needs.
Configuring the Project Module
Before configuring the app, you will need to create several modules. Follow these steps to create a project-level module:
Navigate to Site Configuration → Site Configuration → Modules.
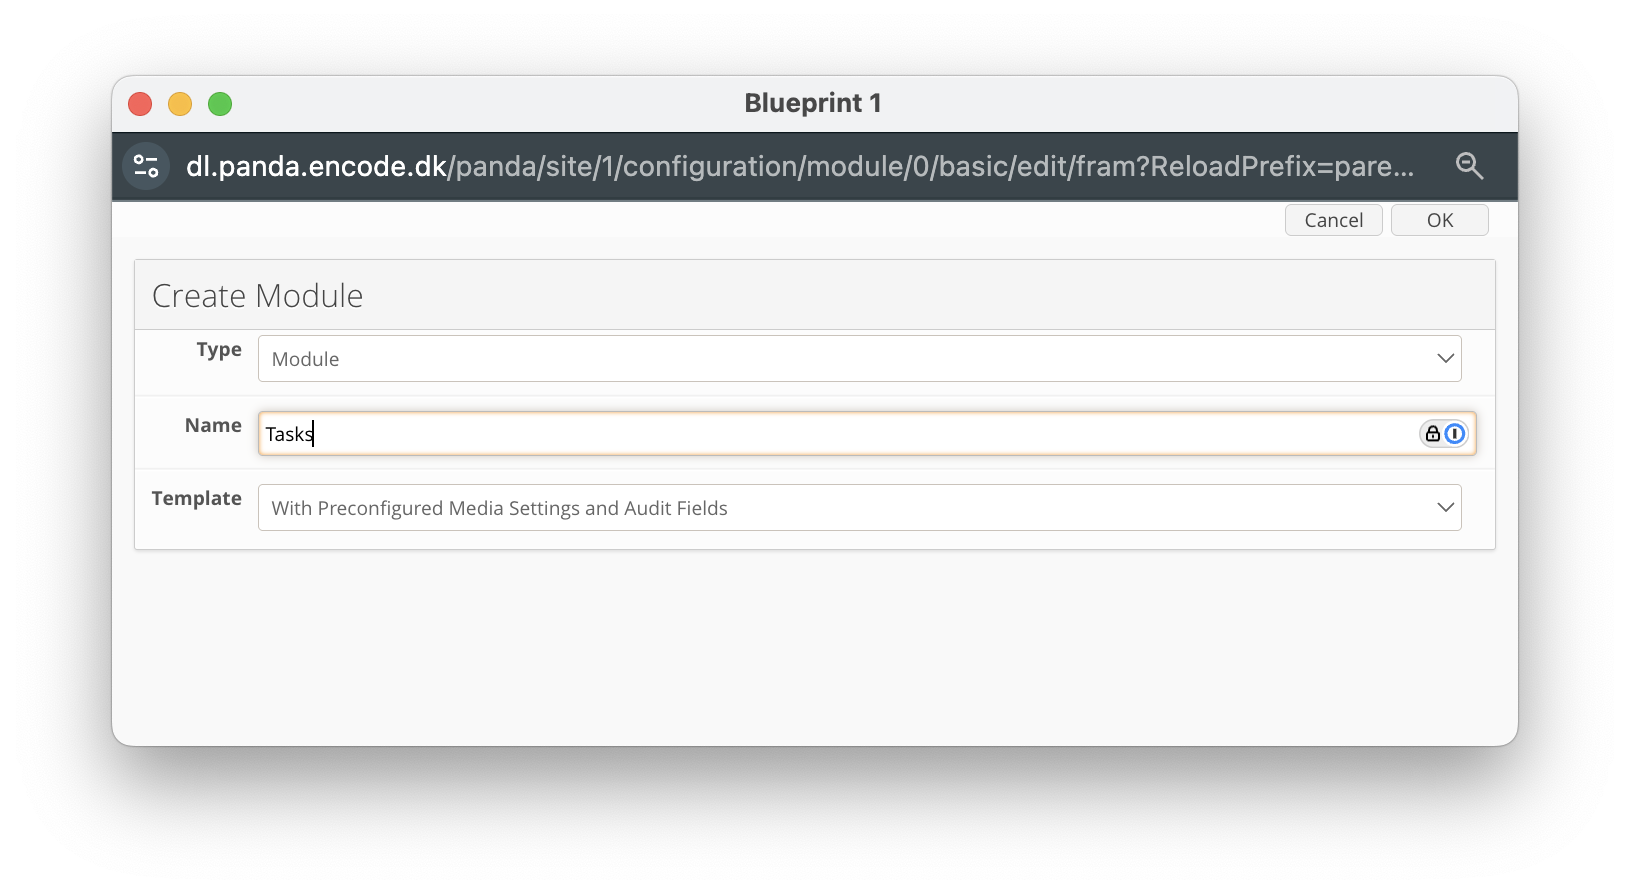
Click Create Module.
Set the Type to Module.
Specify a Name for the module (e.g., Briefs).
Select a Template (e.g., With Preconfigured Media Settings and Audit Fields).
Click OK to confirm the module creation.

An image highlighting the creation of a project-level module named ‘Briefs’
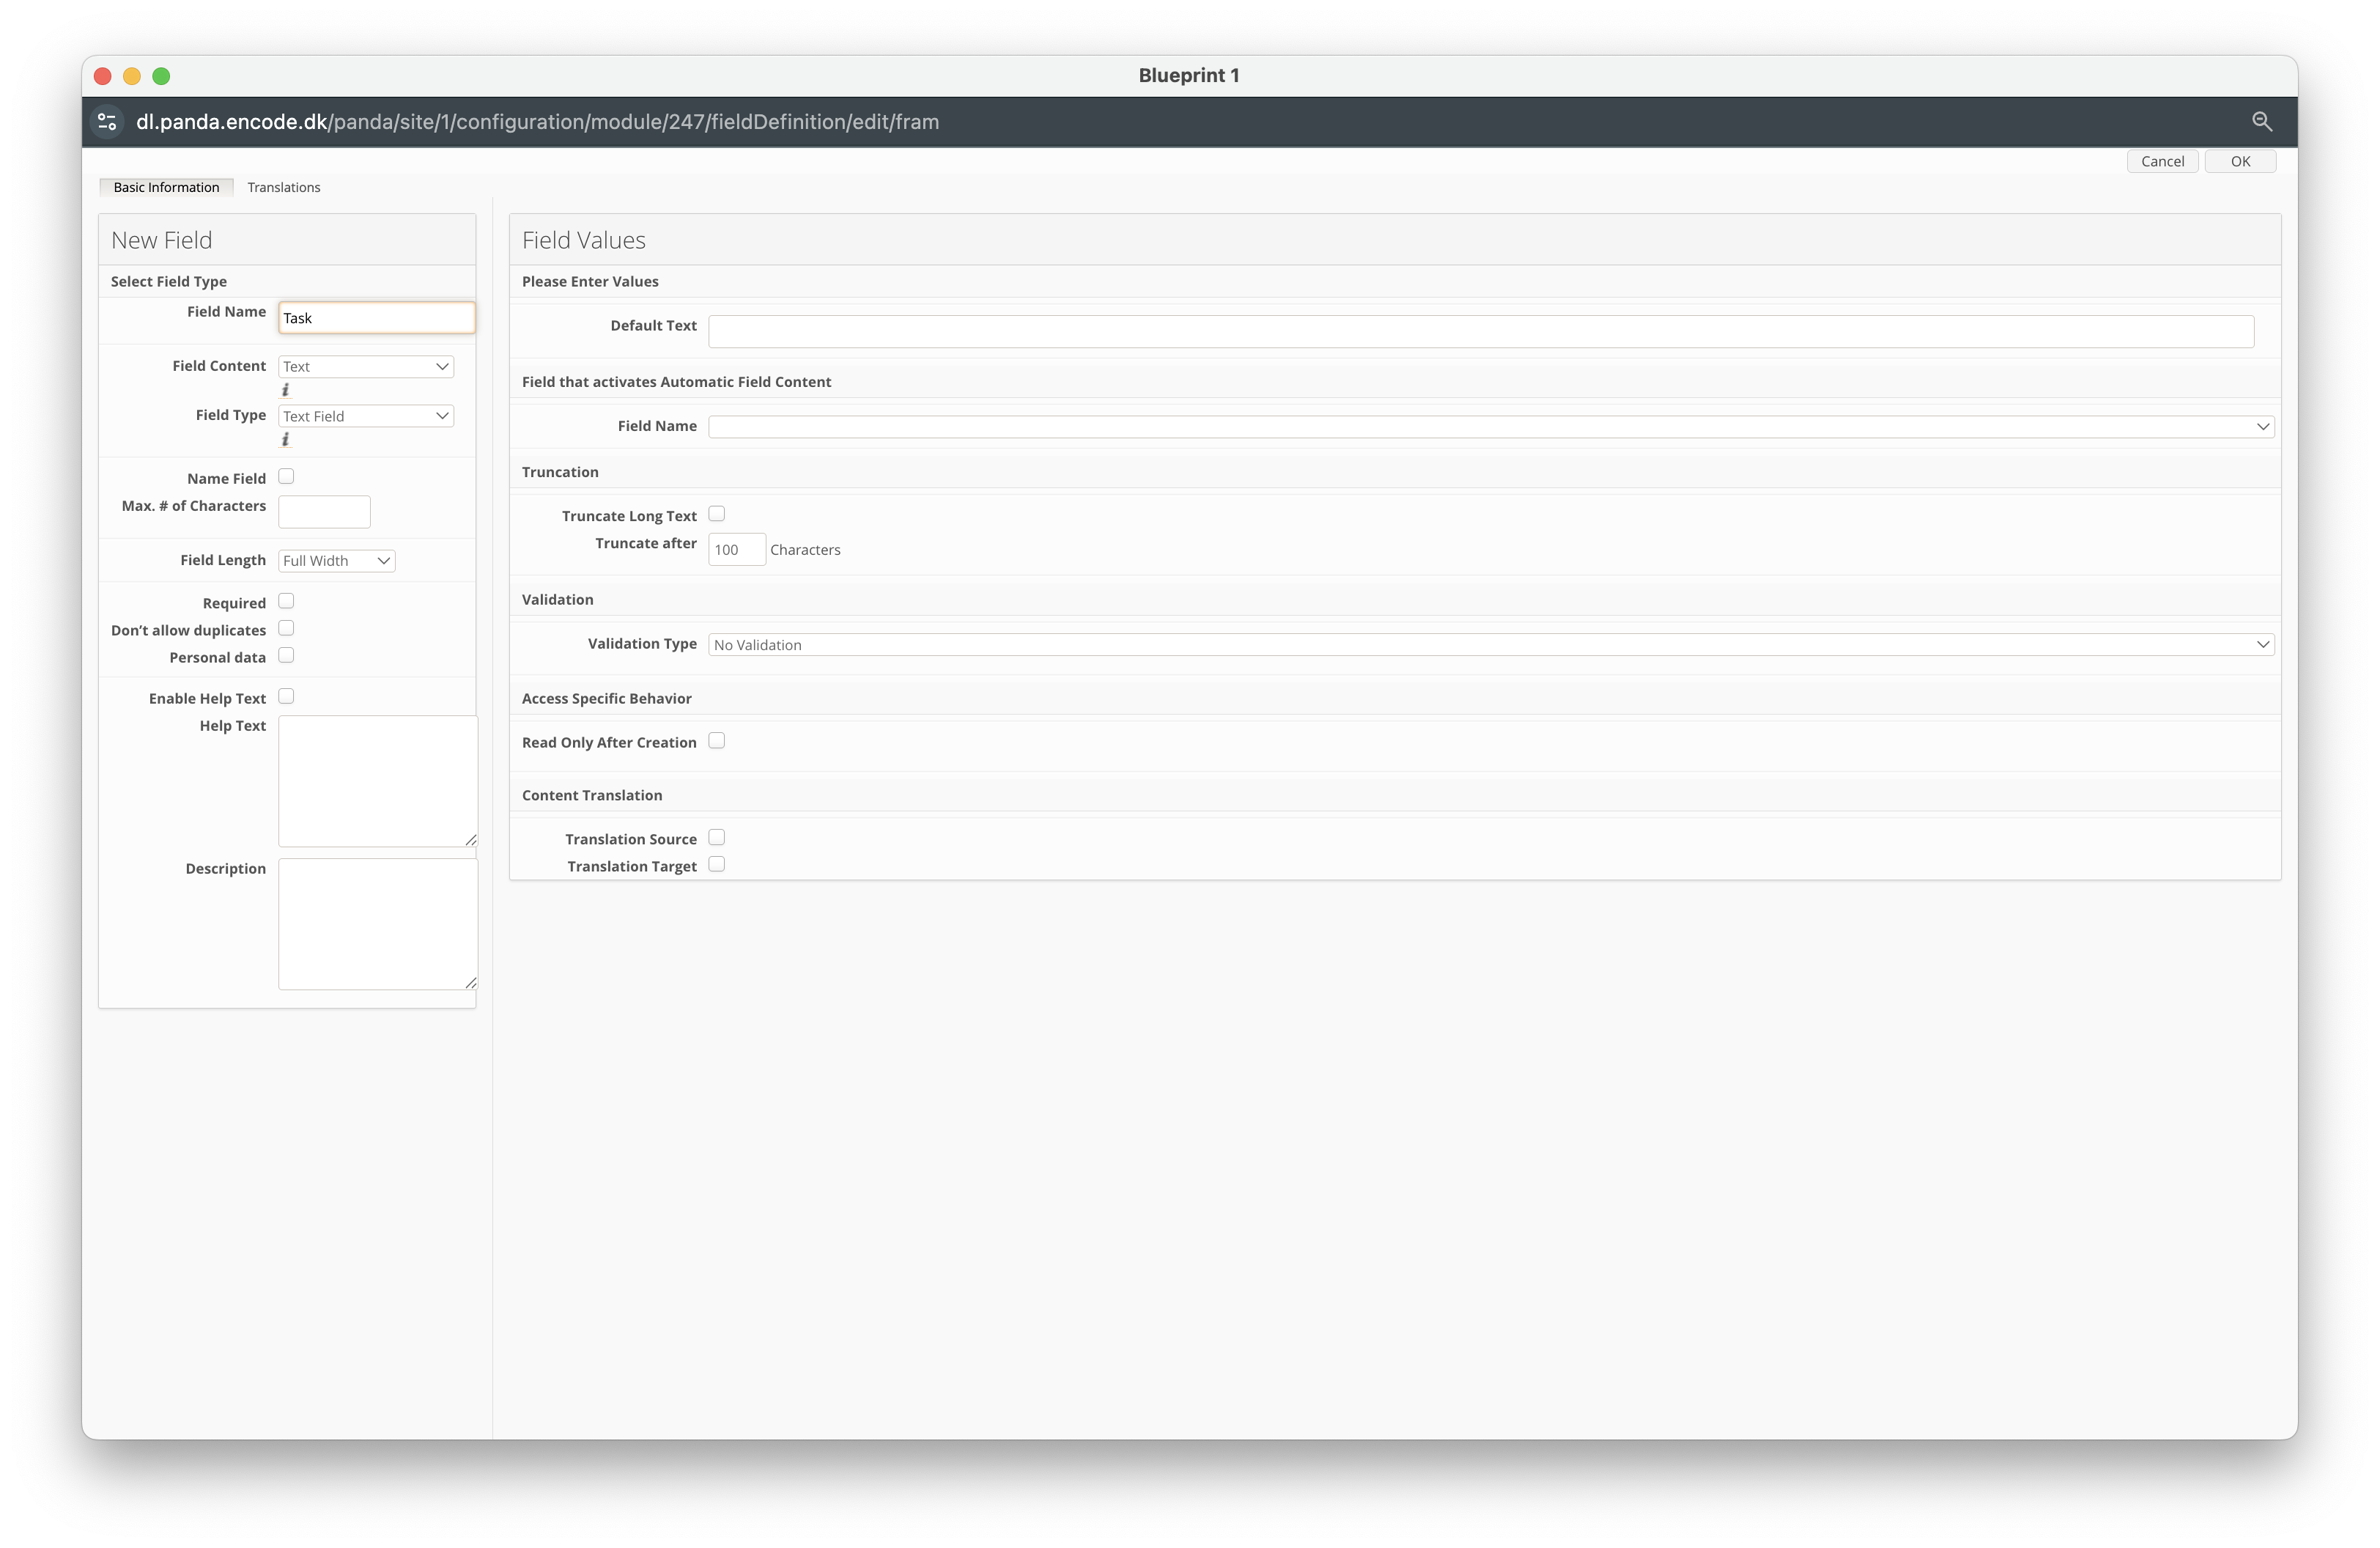
Navigate to Site Configuration → {Module} → Field Definition.
Click New Field.
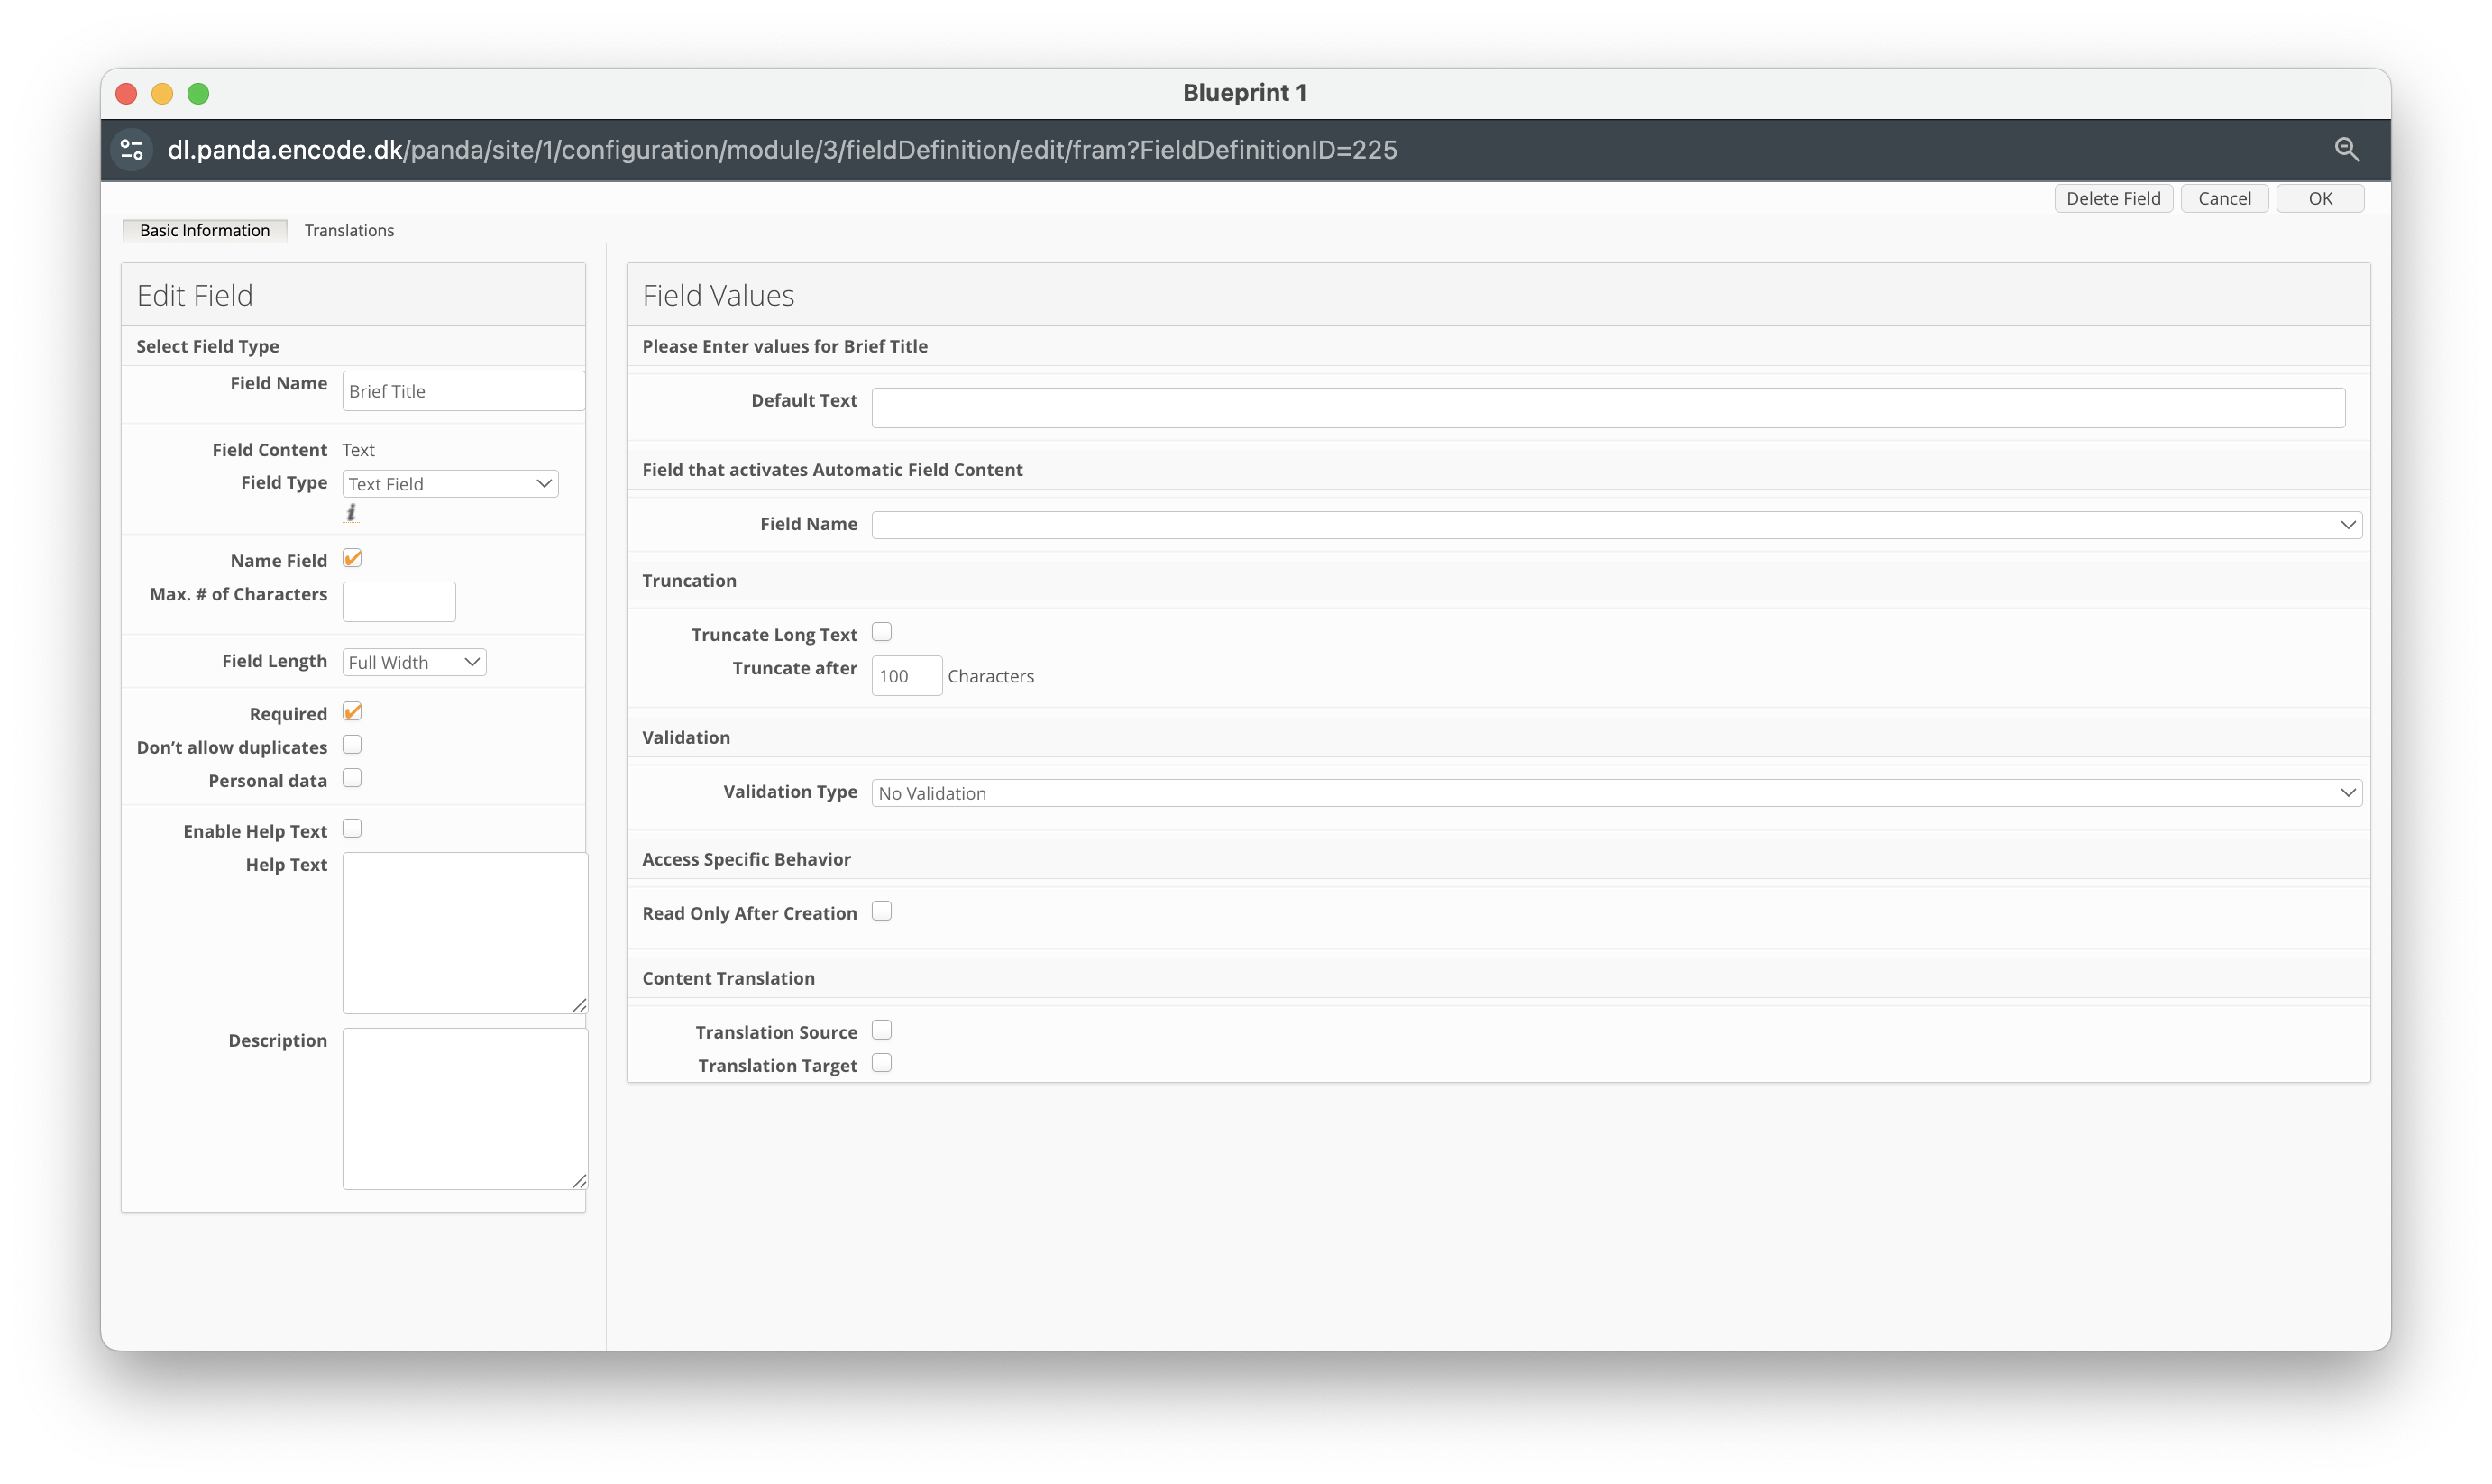
Enter a Field Name. (e.g. Brief Title)
Ensure the Field Type dropdown is set to Text Field.
Click OK to create the field.
Configuring the Jobs Module
Next, you will need to configure the Jobs module, but follow the steps below:
Navigate to Site Configuration → Site Configuration → Modules.
Click Create Module.
Set the Type to Module.
Specify a Name for the module (e.g., Jobs).
Select a Template (e.g., With Preconfigured Media Settings and Audit Fields).
Click OK to confirm the module creation.

An image highlighting the creation of Job level module
Navigate to Site Configuration → {Module} → Field Definition.
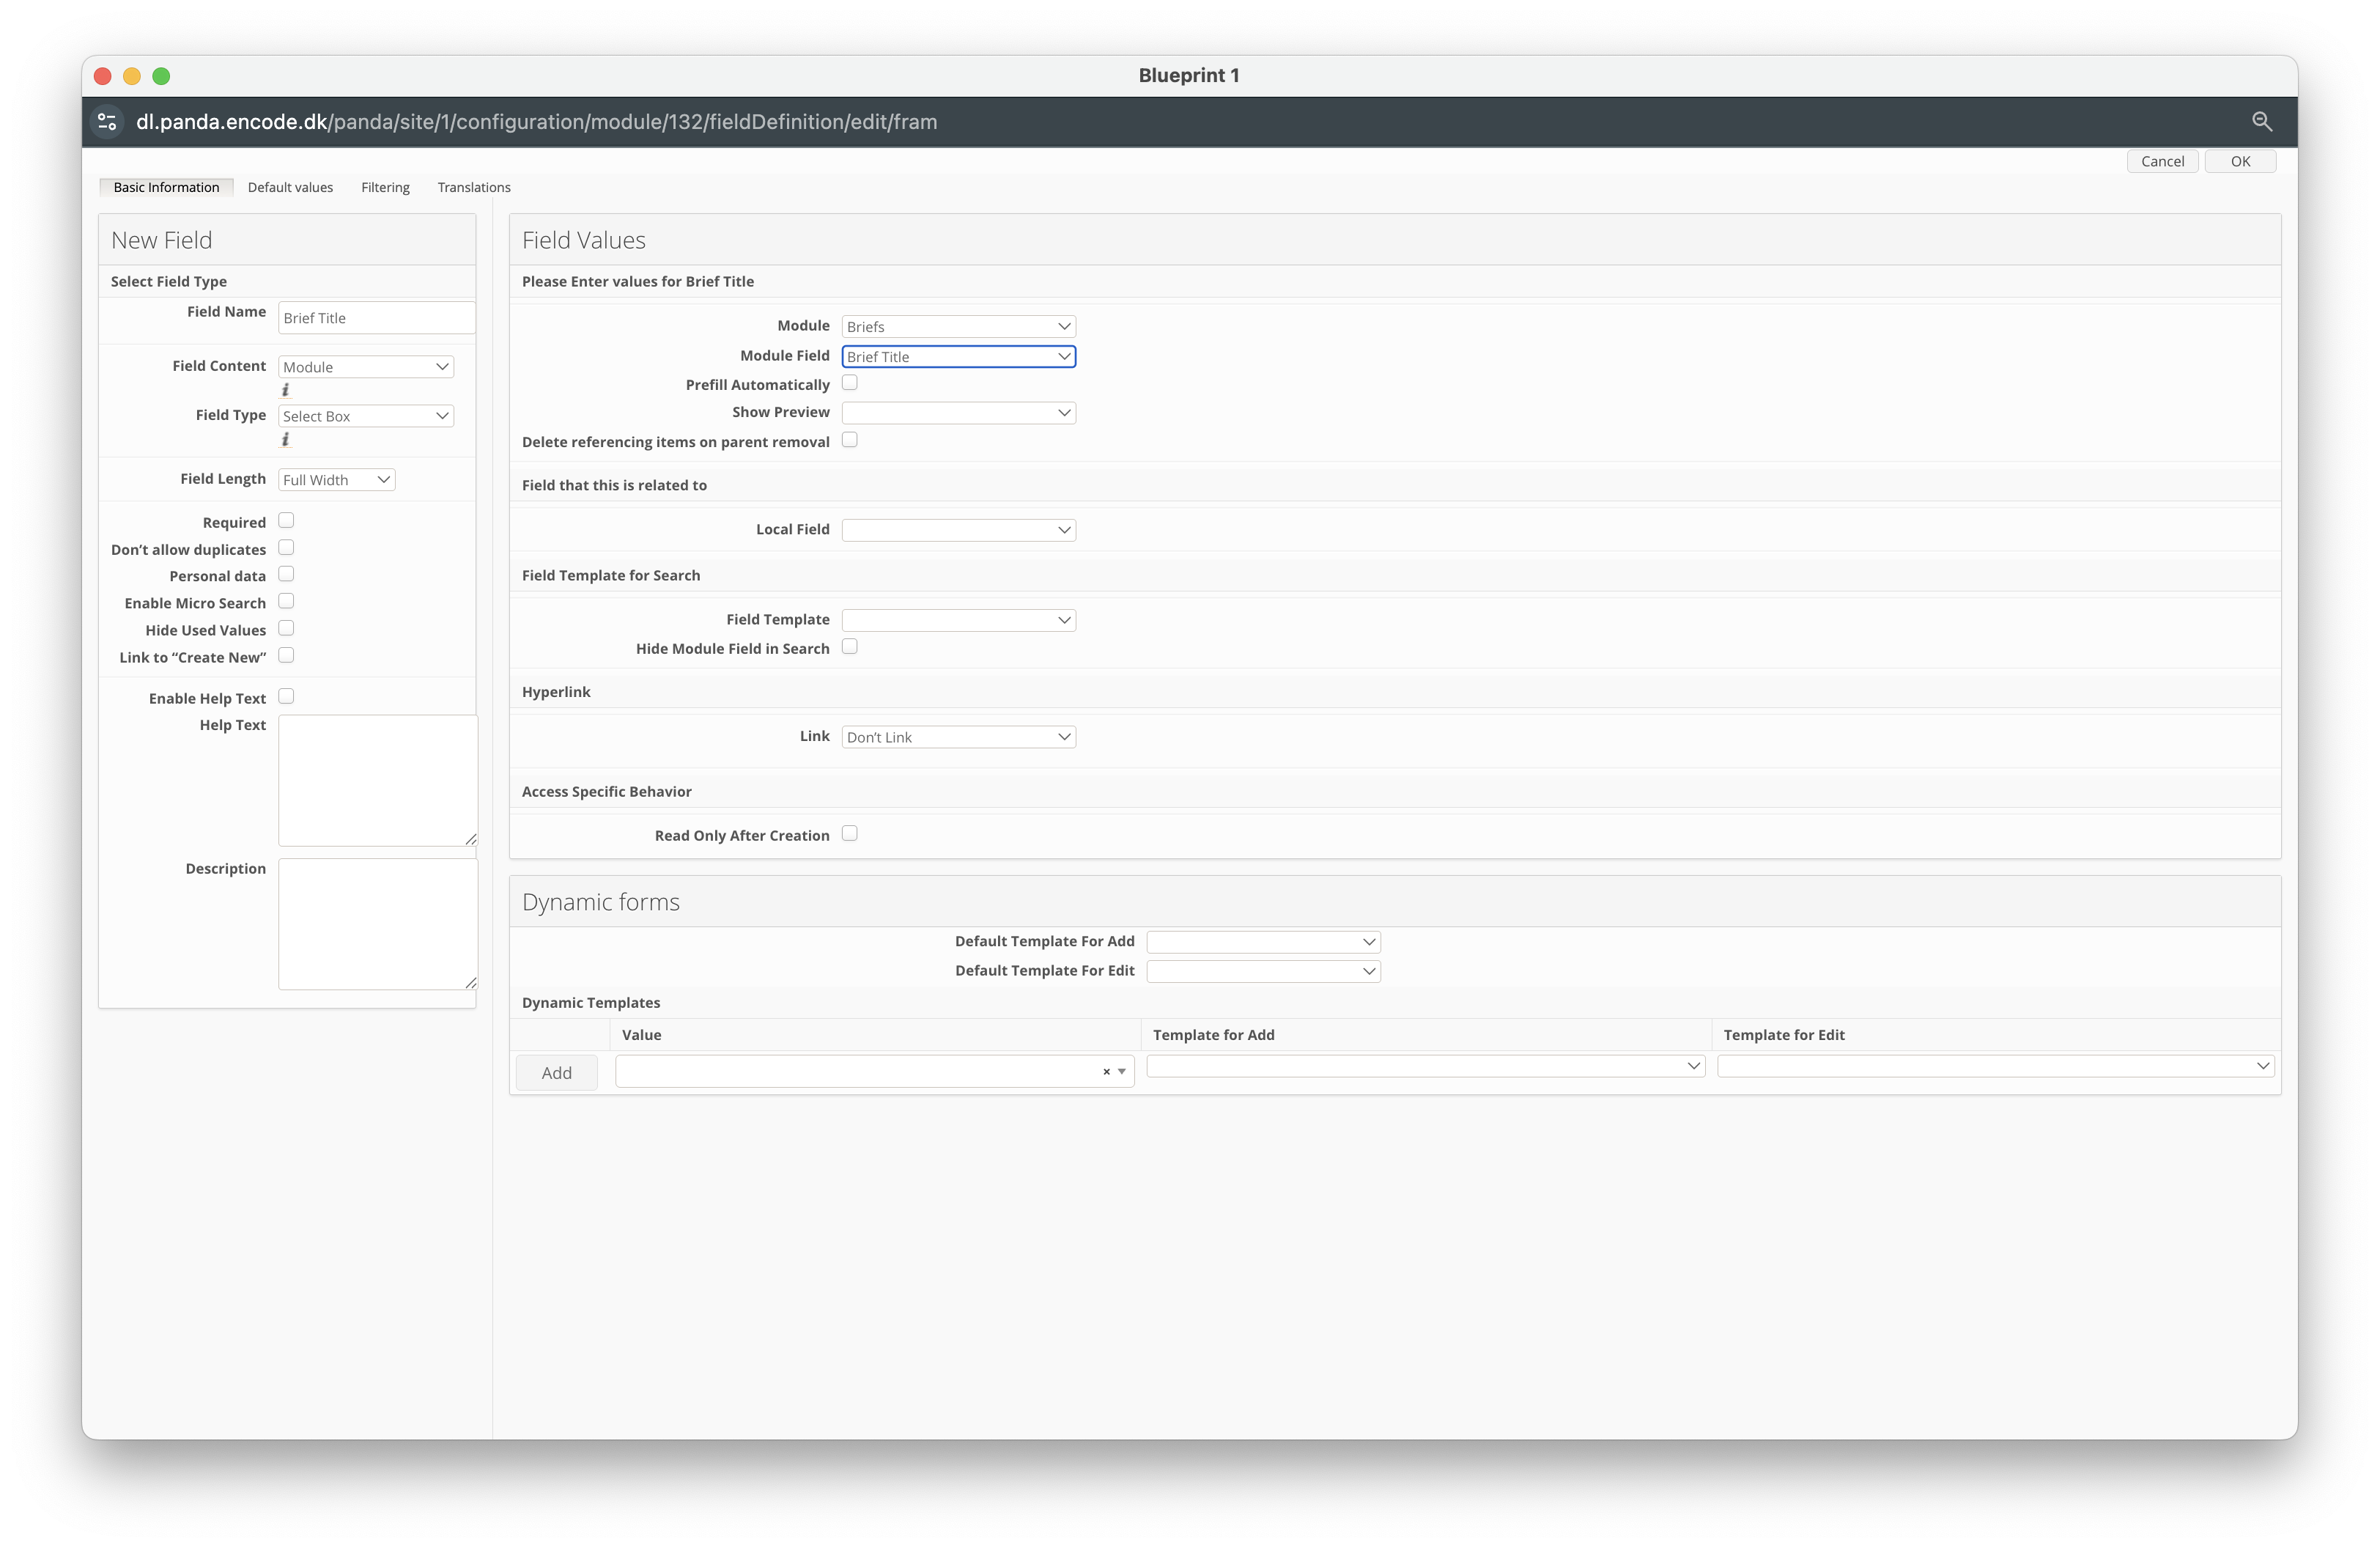
Click New Field.
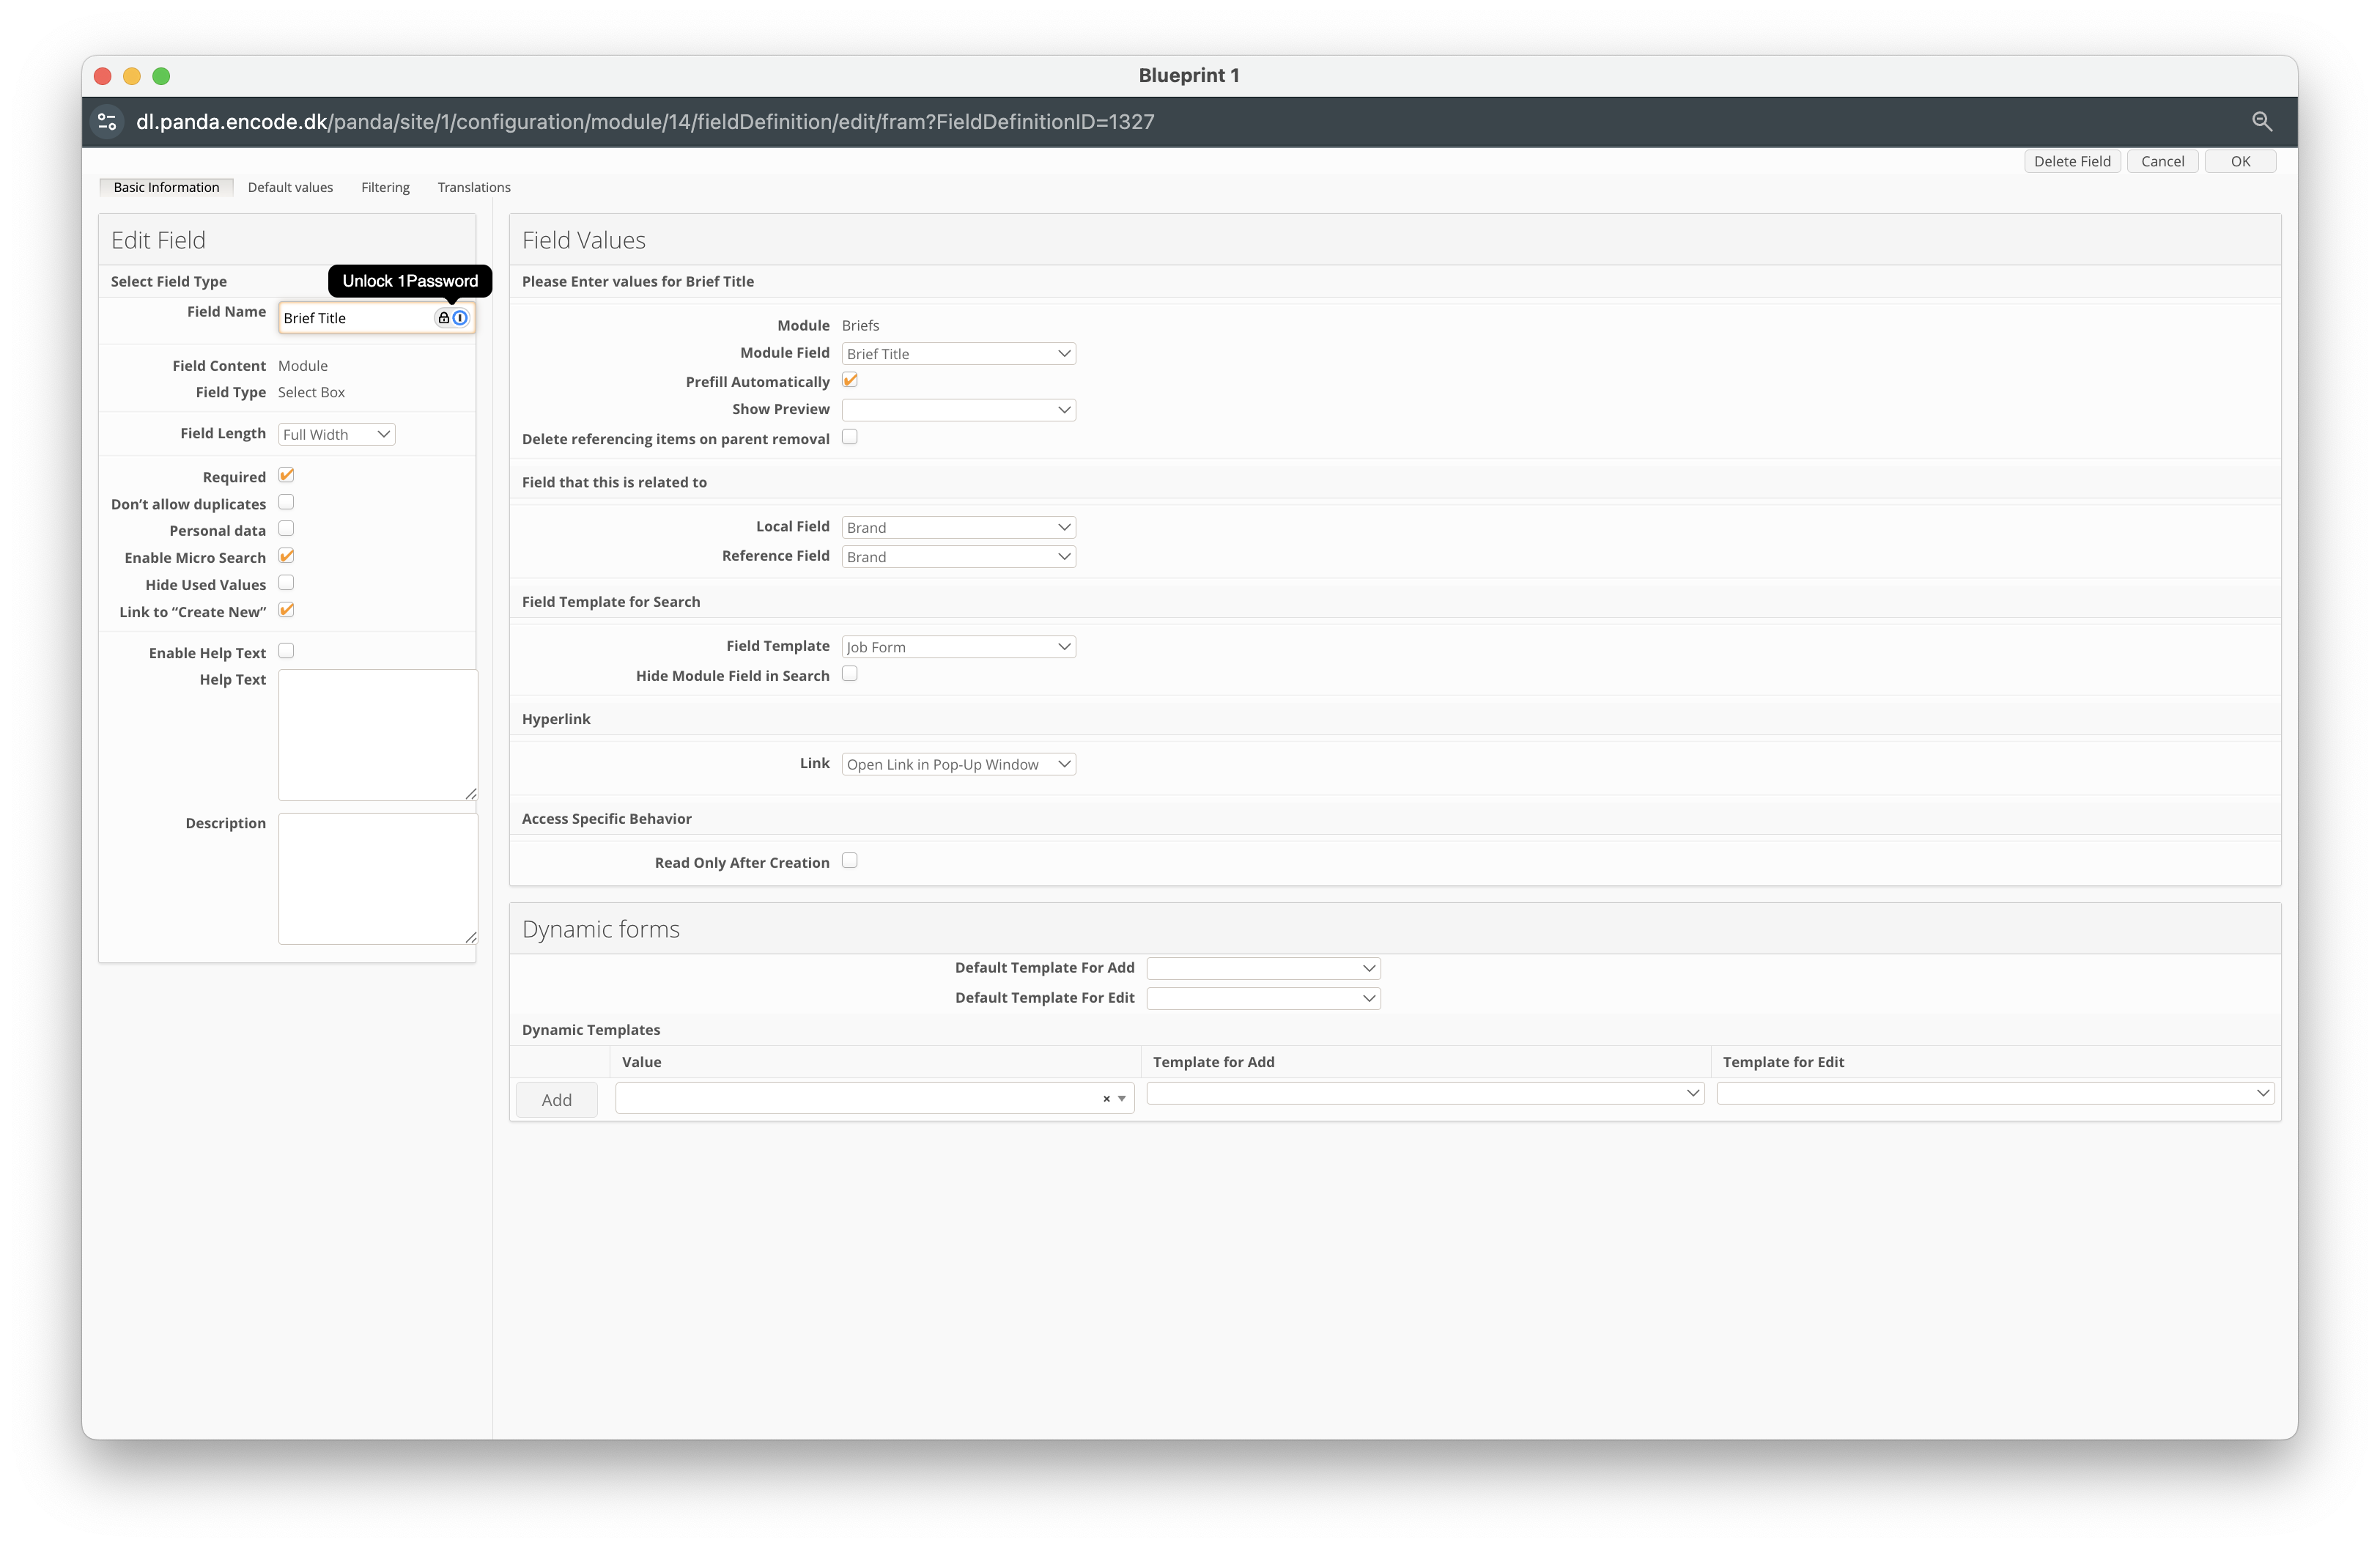
Enter a Field Name (e.g. Briefs).
Select Module from the Field Content dropdown.
In the Field Type dropdown, select Select Box.
Locate the Module field and select the Projects module previously created
Within the Module Field dropdown, select the Text Field previously created to define Brief Title.
Click OK to create the field.
Navigate to Site Configuration → {Module} → Field Definition.
Click New Field.
Enter a Field Name. (e.g. Job Name)
Ensure the Field Type dropdown is set to Text Field.
Click OK to create the field.

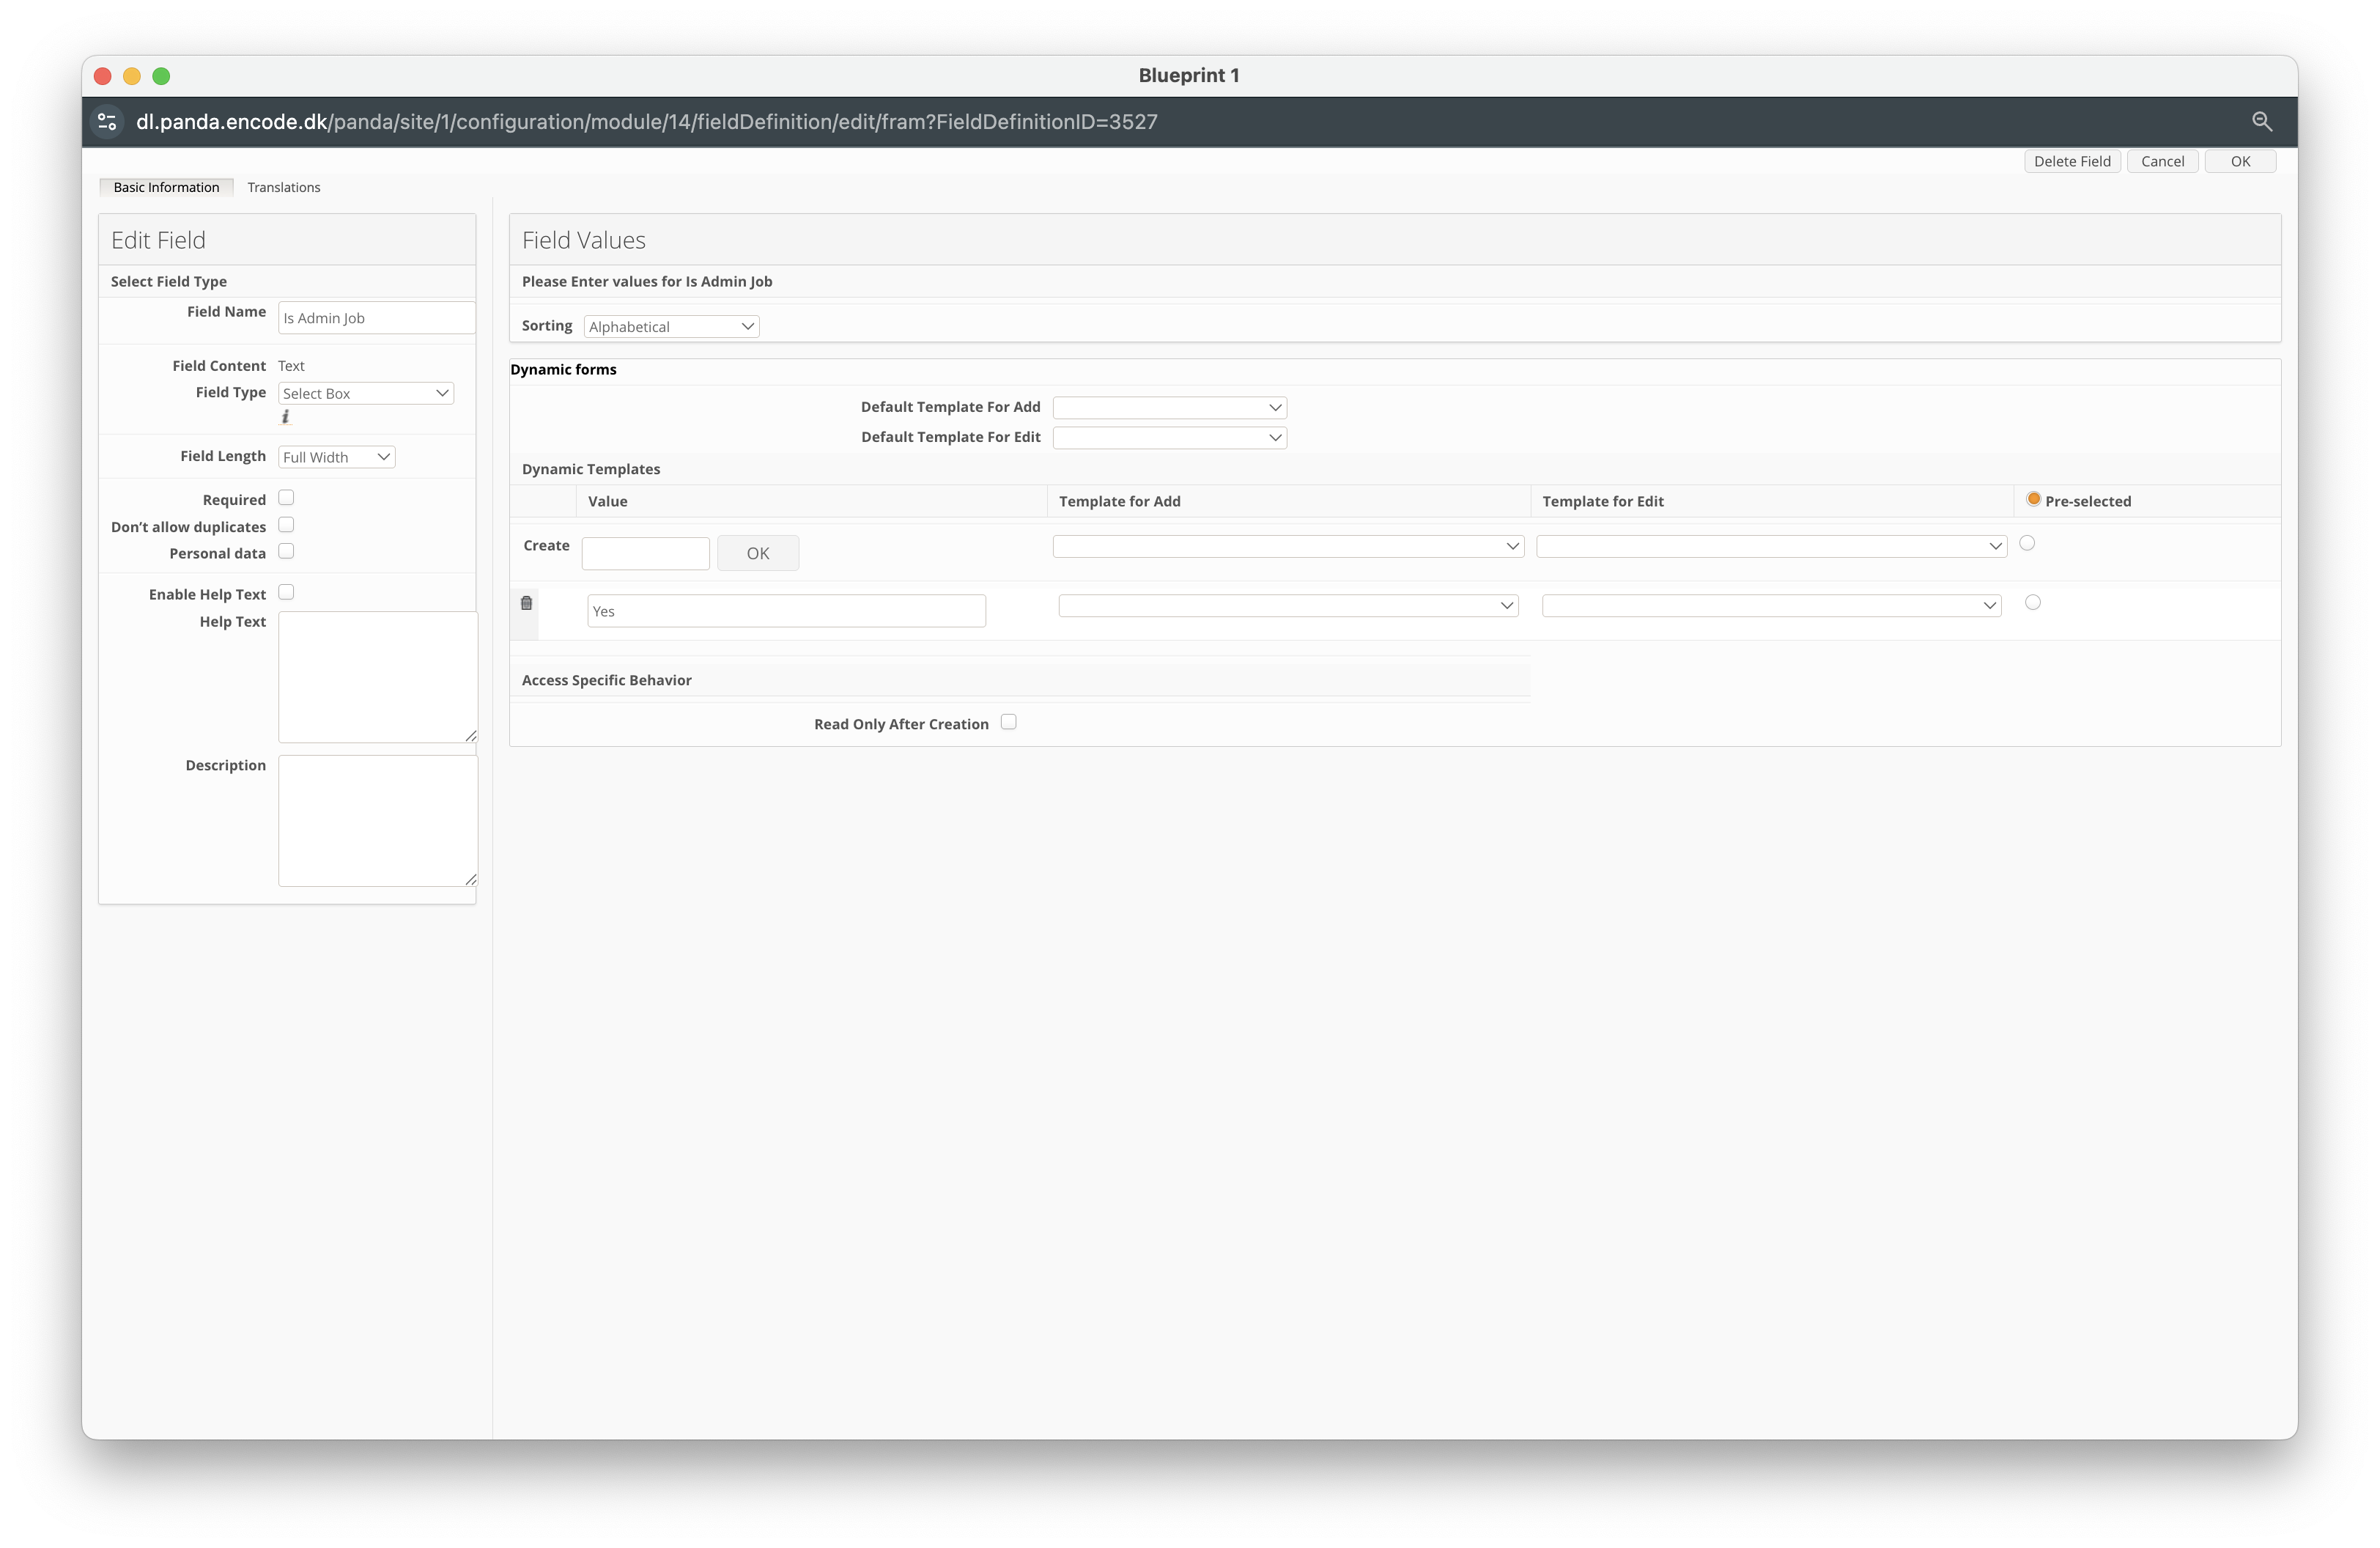
Click New Field.
Enter a Field Name. (e.g. Is Admin Job)
Ensure the Field Type dropdown is set to Select Box.
Locate Create, and add a single option labelled Yes
Click OK to create the field.
Configuring the Task Module
Next, you will need to configure the Task module, but follow the steps below:
Navigate to Site Configuration → Site Configuration → Modules.
Click Create Module.
Set the Type to Module.
Specify a Name for the module (e.g., Tasks).
Select a Template (e.g., With Preconfigured Media Settings and Audit Fields).
Click OK to confirm the module creation.
An image highlighting the creation of Task level module
Navigate to Site Configuration → {Module} → Field Definition.
Click New Field.
Enter a Field Name. (e.g. Task Name)
Ensure the Field Type dropdown is set to Text Field.
Click OK to create the field.
Click New Field.
Enter a Field Name (e.g. Briefs).
Select Module from the Field Content dropdown.
In the Field Type dropdown, select Select Box.
Locate the Module field and select the Projects module previously created
Within the Module Field dropdown, select the Text Field previously created to define Brief Title
Click OK to create the field.
Click New Field.
Enter a Field Name (e.g. Jobs).
Select Module from the Field Content dropdown.
In the Field Type dropdown, select Select Box.
Locate the Module field and select the Jobs module previously created
Within the Module Field dropdown, select the Text Field previously created to define Job Name.
Click OK to create the field.
.png)
Configuring the Worklog Module
Next, you will need to configure the Worklog module by following the steps below:
Navigate to Site Configuration → Site Configuration → Modules.
Click Create Module.
Set the Type to Module.
Specify a Name for the module (e.g., Tasks).
Select a Template (e.g., With Preconfigured Media Settings and Audit Fields).
Click OK to confirm the module creation.
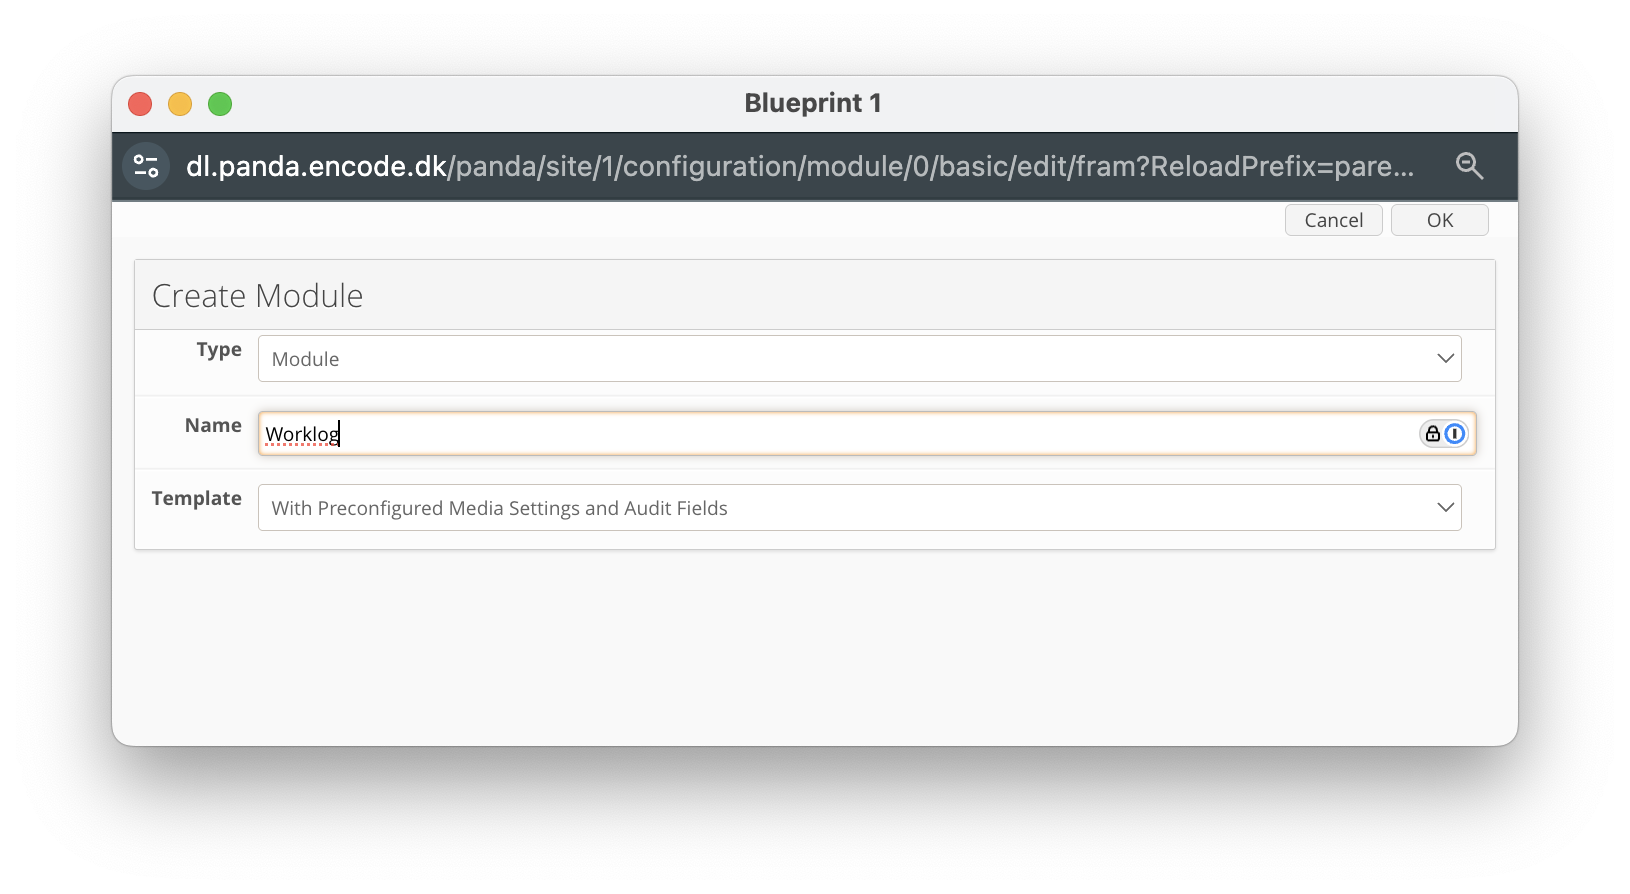
An image highlighting the creation of Worklog module
Click New Field.
Enter a Field Name (e.g. Projects).
Select Module from the Field Content dropdown.
In the Field Type dropdown, select Select Box.
Locate the Module field and select the Projects module previously created
Within the Module Field dropdown, select the Text Field previously created to define Project Name
Click OK to create the field.
.png)
Click New Field.
Enter a Field Name (e.g. Jobs).
Select Module from the Field Content dropdown.
In the Field Type dropdown, select Select Box.
Locate the Module field and select the Jobs module previously created
Within the Module Field dropdown, select the Text Field previously created to define Job Name.
Click OK to create the field.

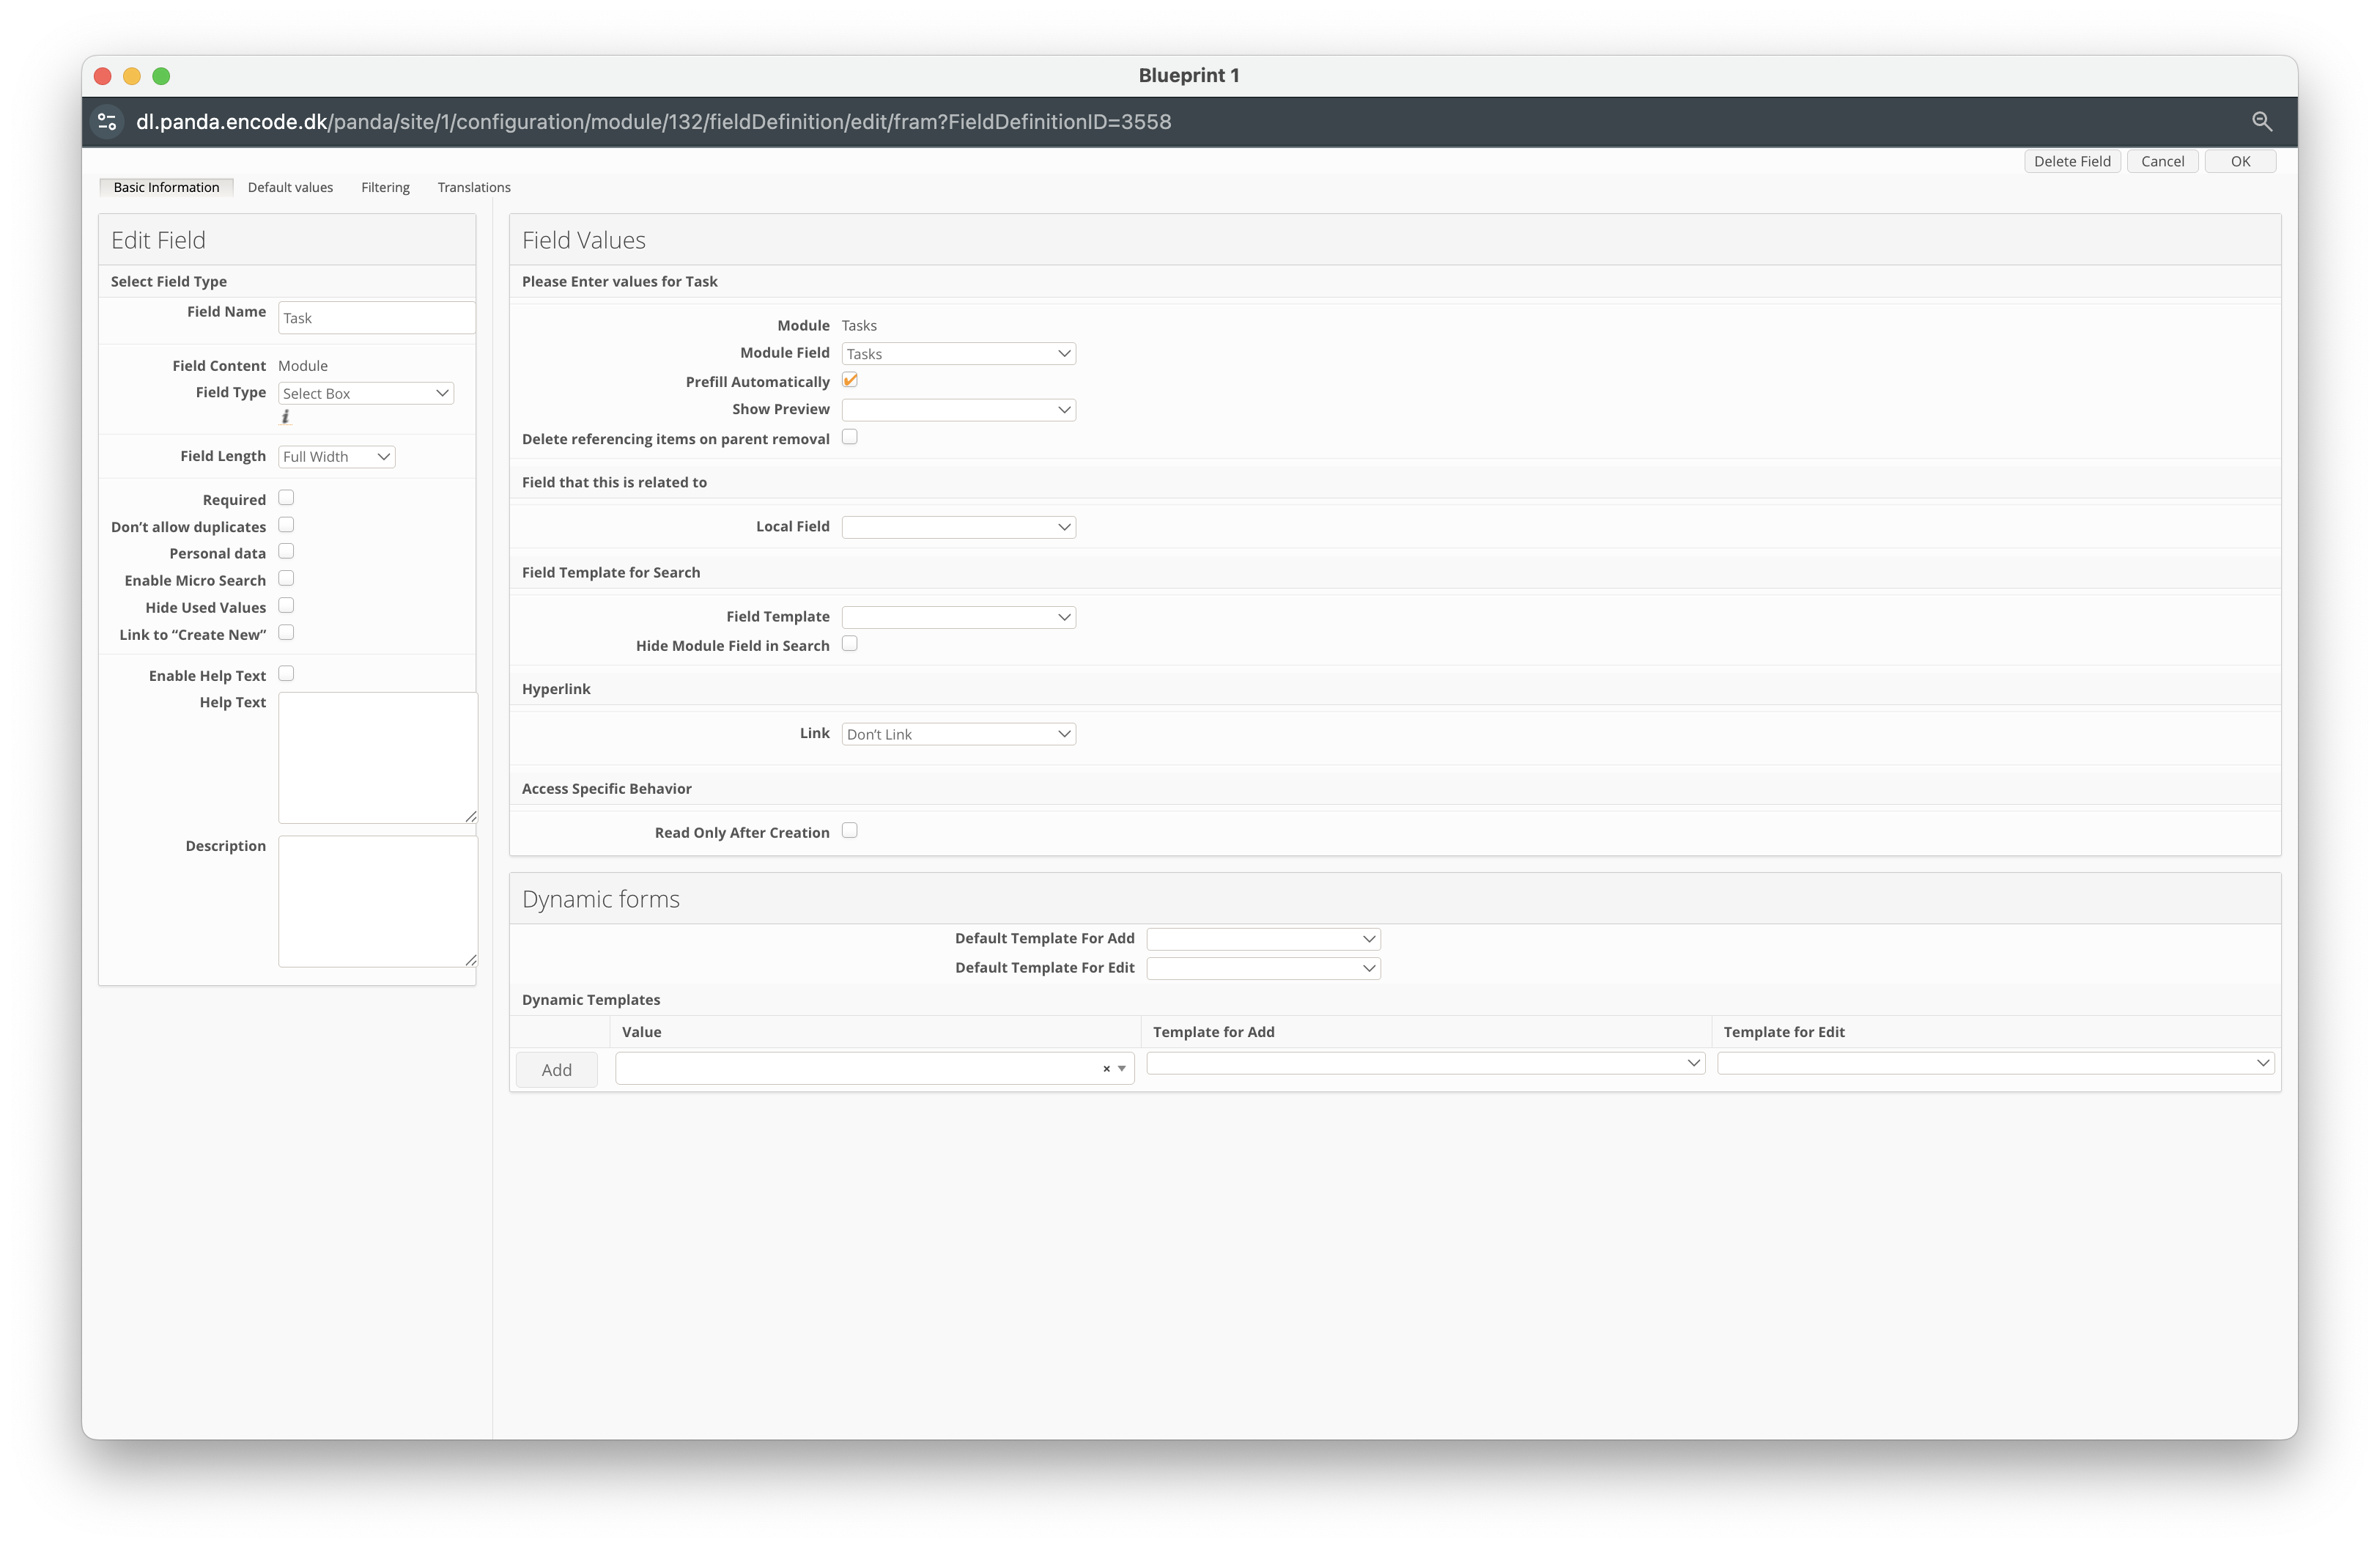
Click New Field.
Enter a Field Name (e.g. Tasks).
Select Module from the Field Content dropdown.
In the Field Type dropdown, select Select Box.
Locate the Module field and select the Tasks module previously created
Within the Module Field dropdown, select the Text Field previously created to define Tasks.
Click OK to create the field.
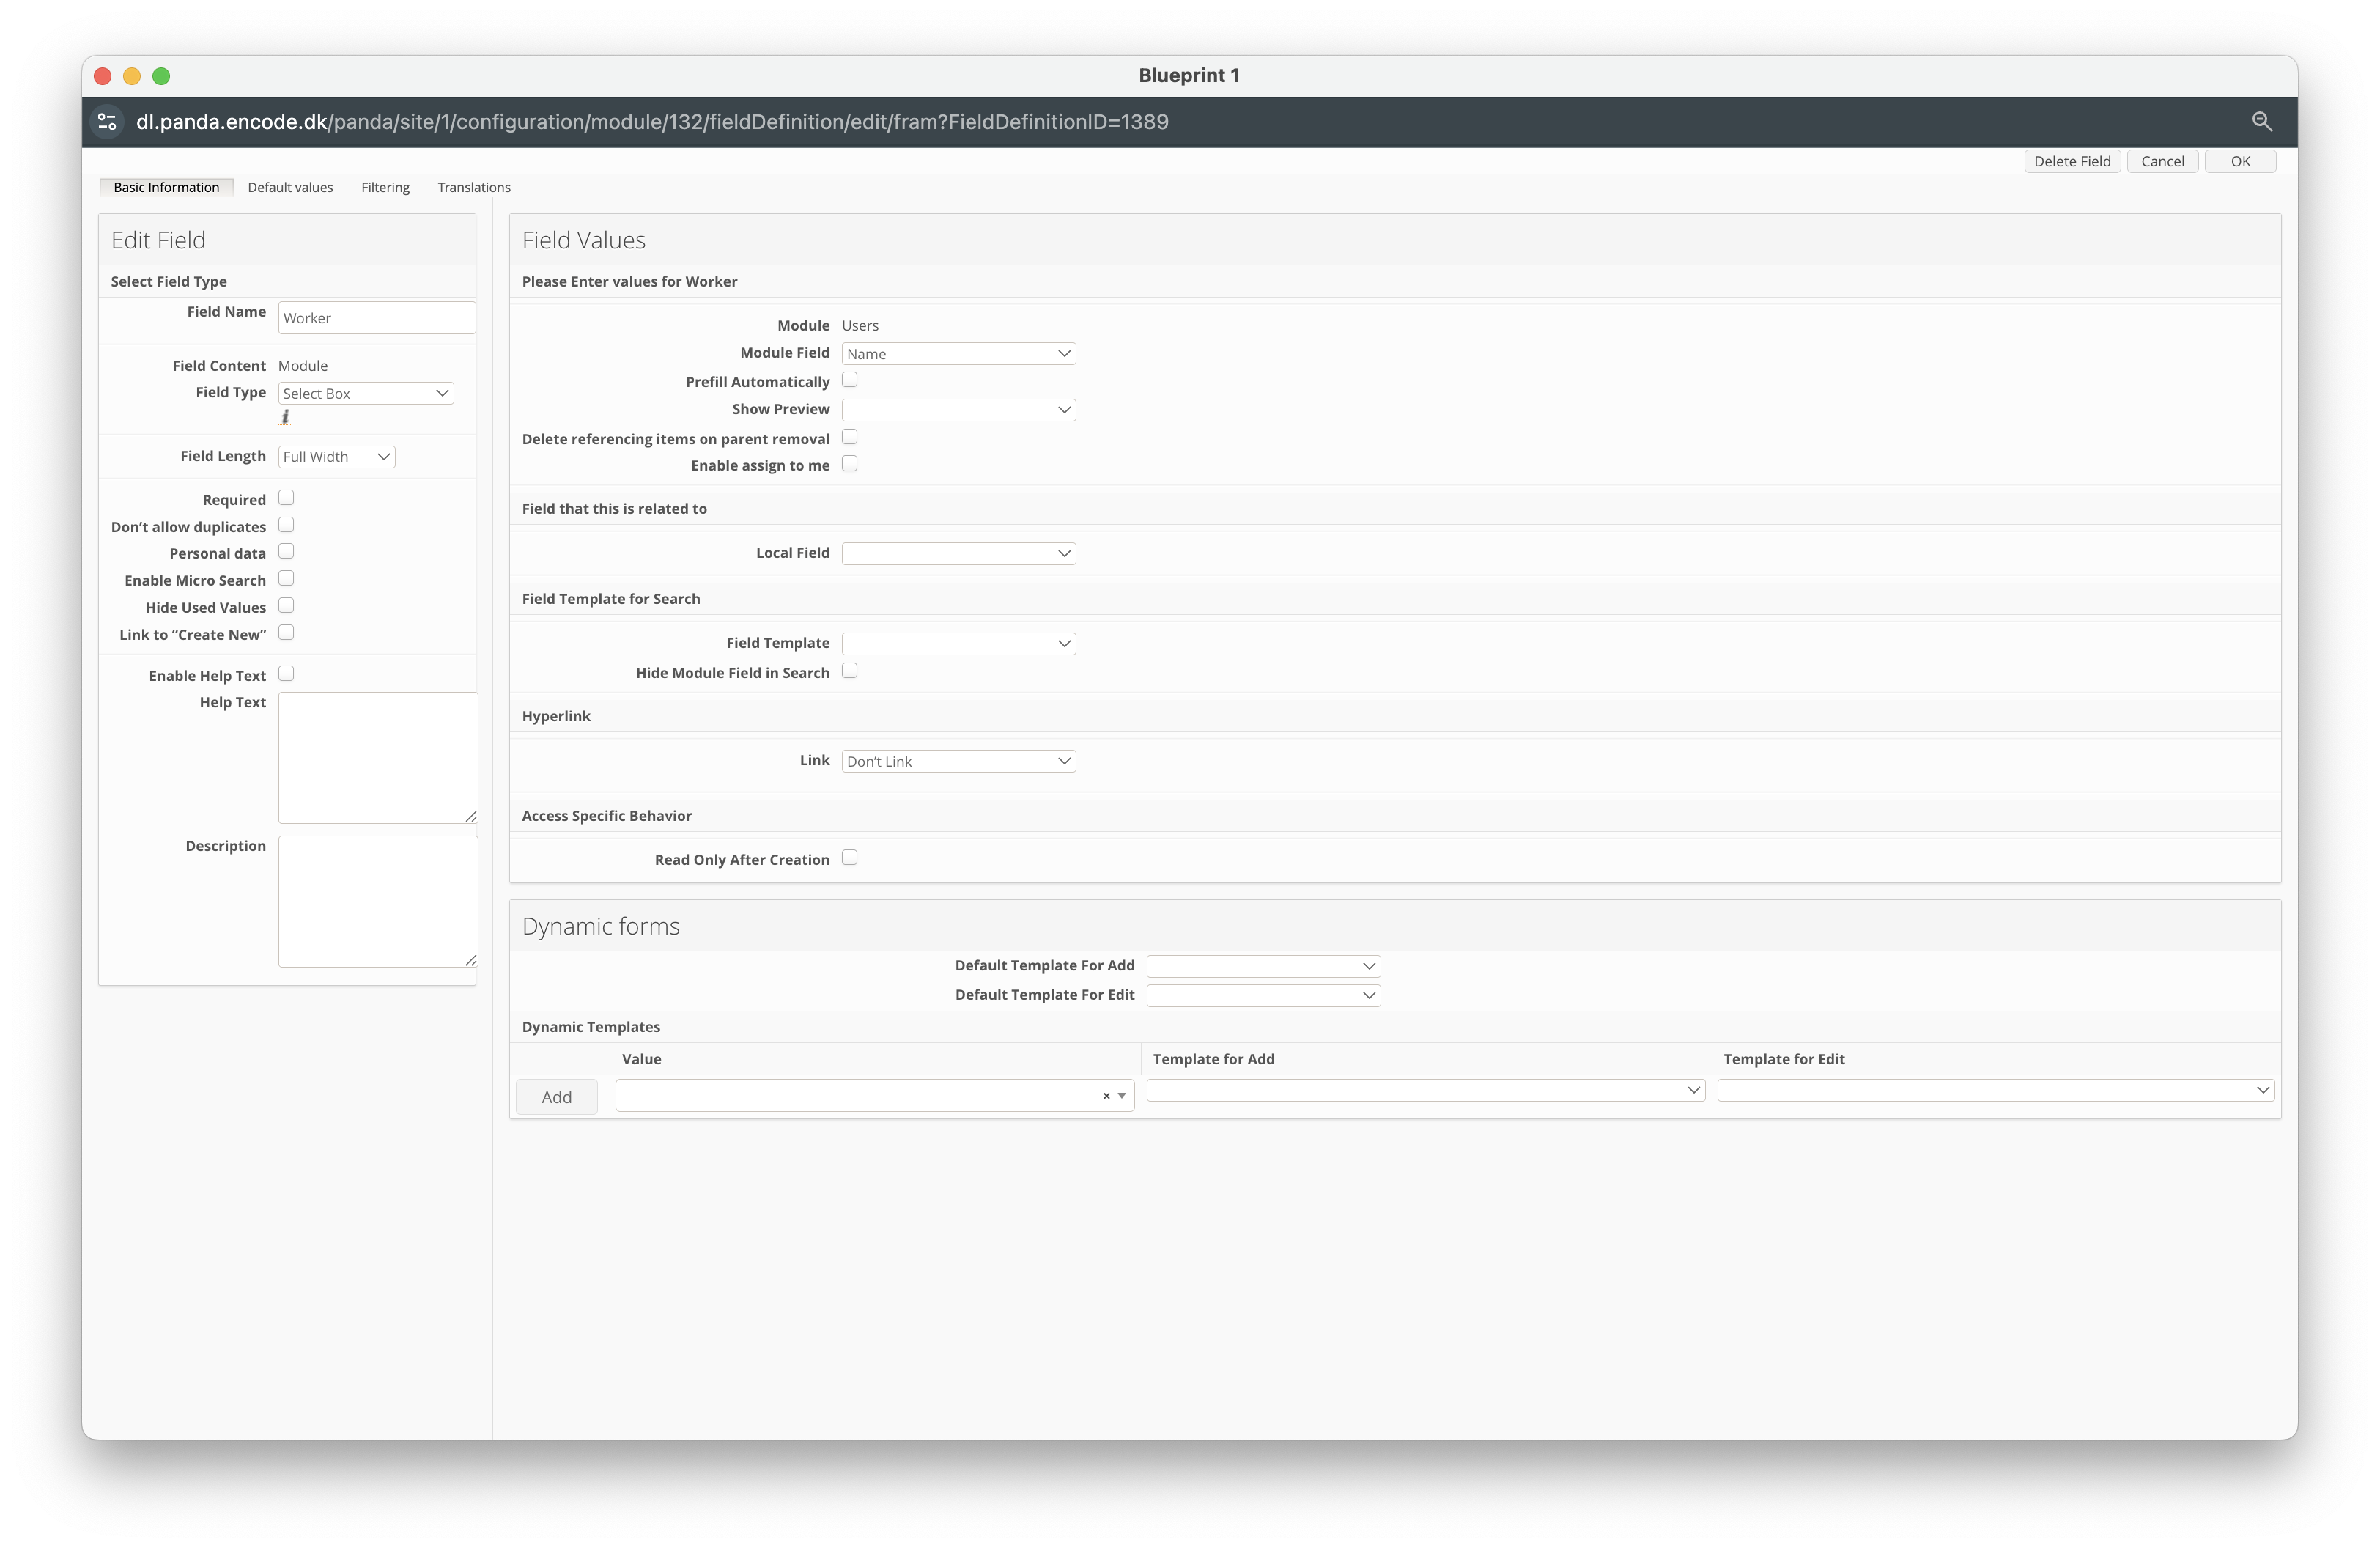
Click New Field.
Enter a Field Name (e.g. Worker).
Select Module from the Field Content dropdown.
In the Field Type dropdown, select Select Box.
Locate the Module field and select the Users module
Within the Module Field dropdown, select the Text Field previously created to define Name.
Click OK to create the field.
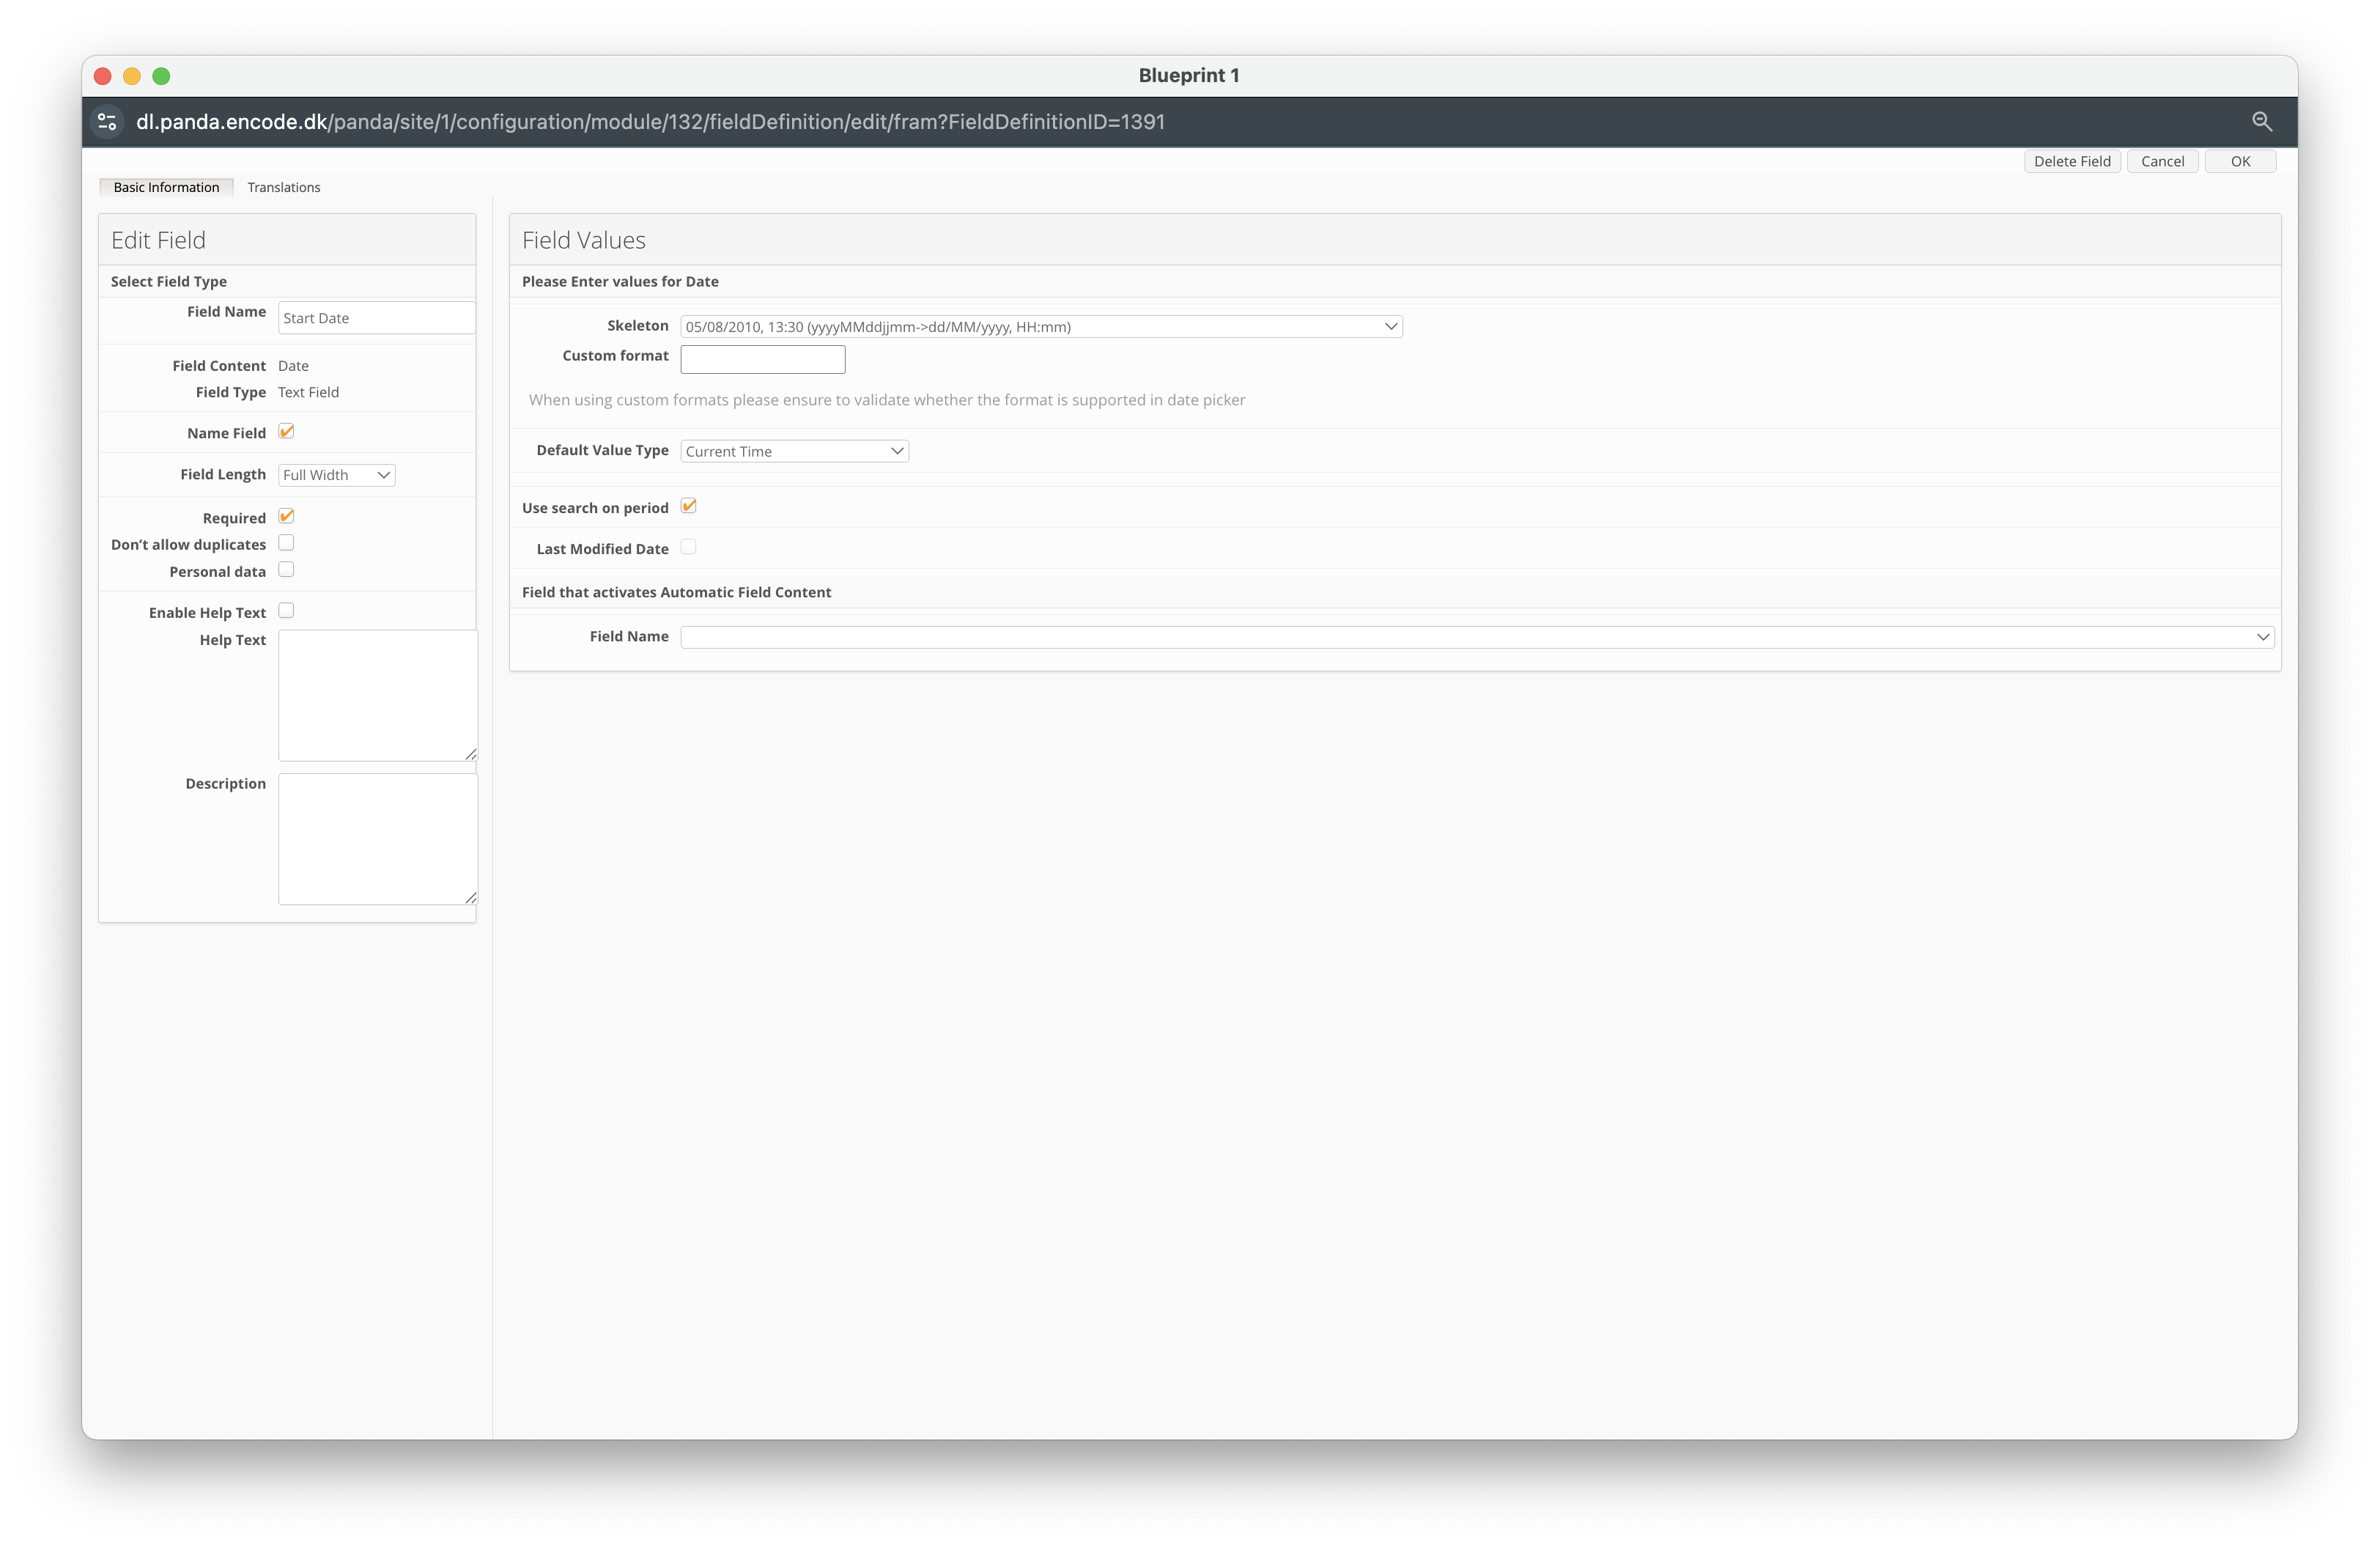
Click New Field.
Enter a Field Name (e.g. Start Date).
In the Field Content dropdown, select Date.
Locate the Skeleton field, and define the specific date format option.
Click OK to create the field.
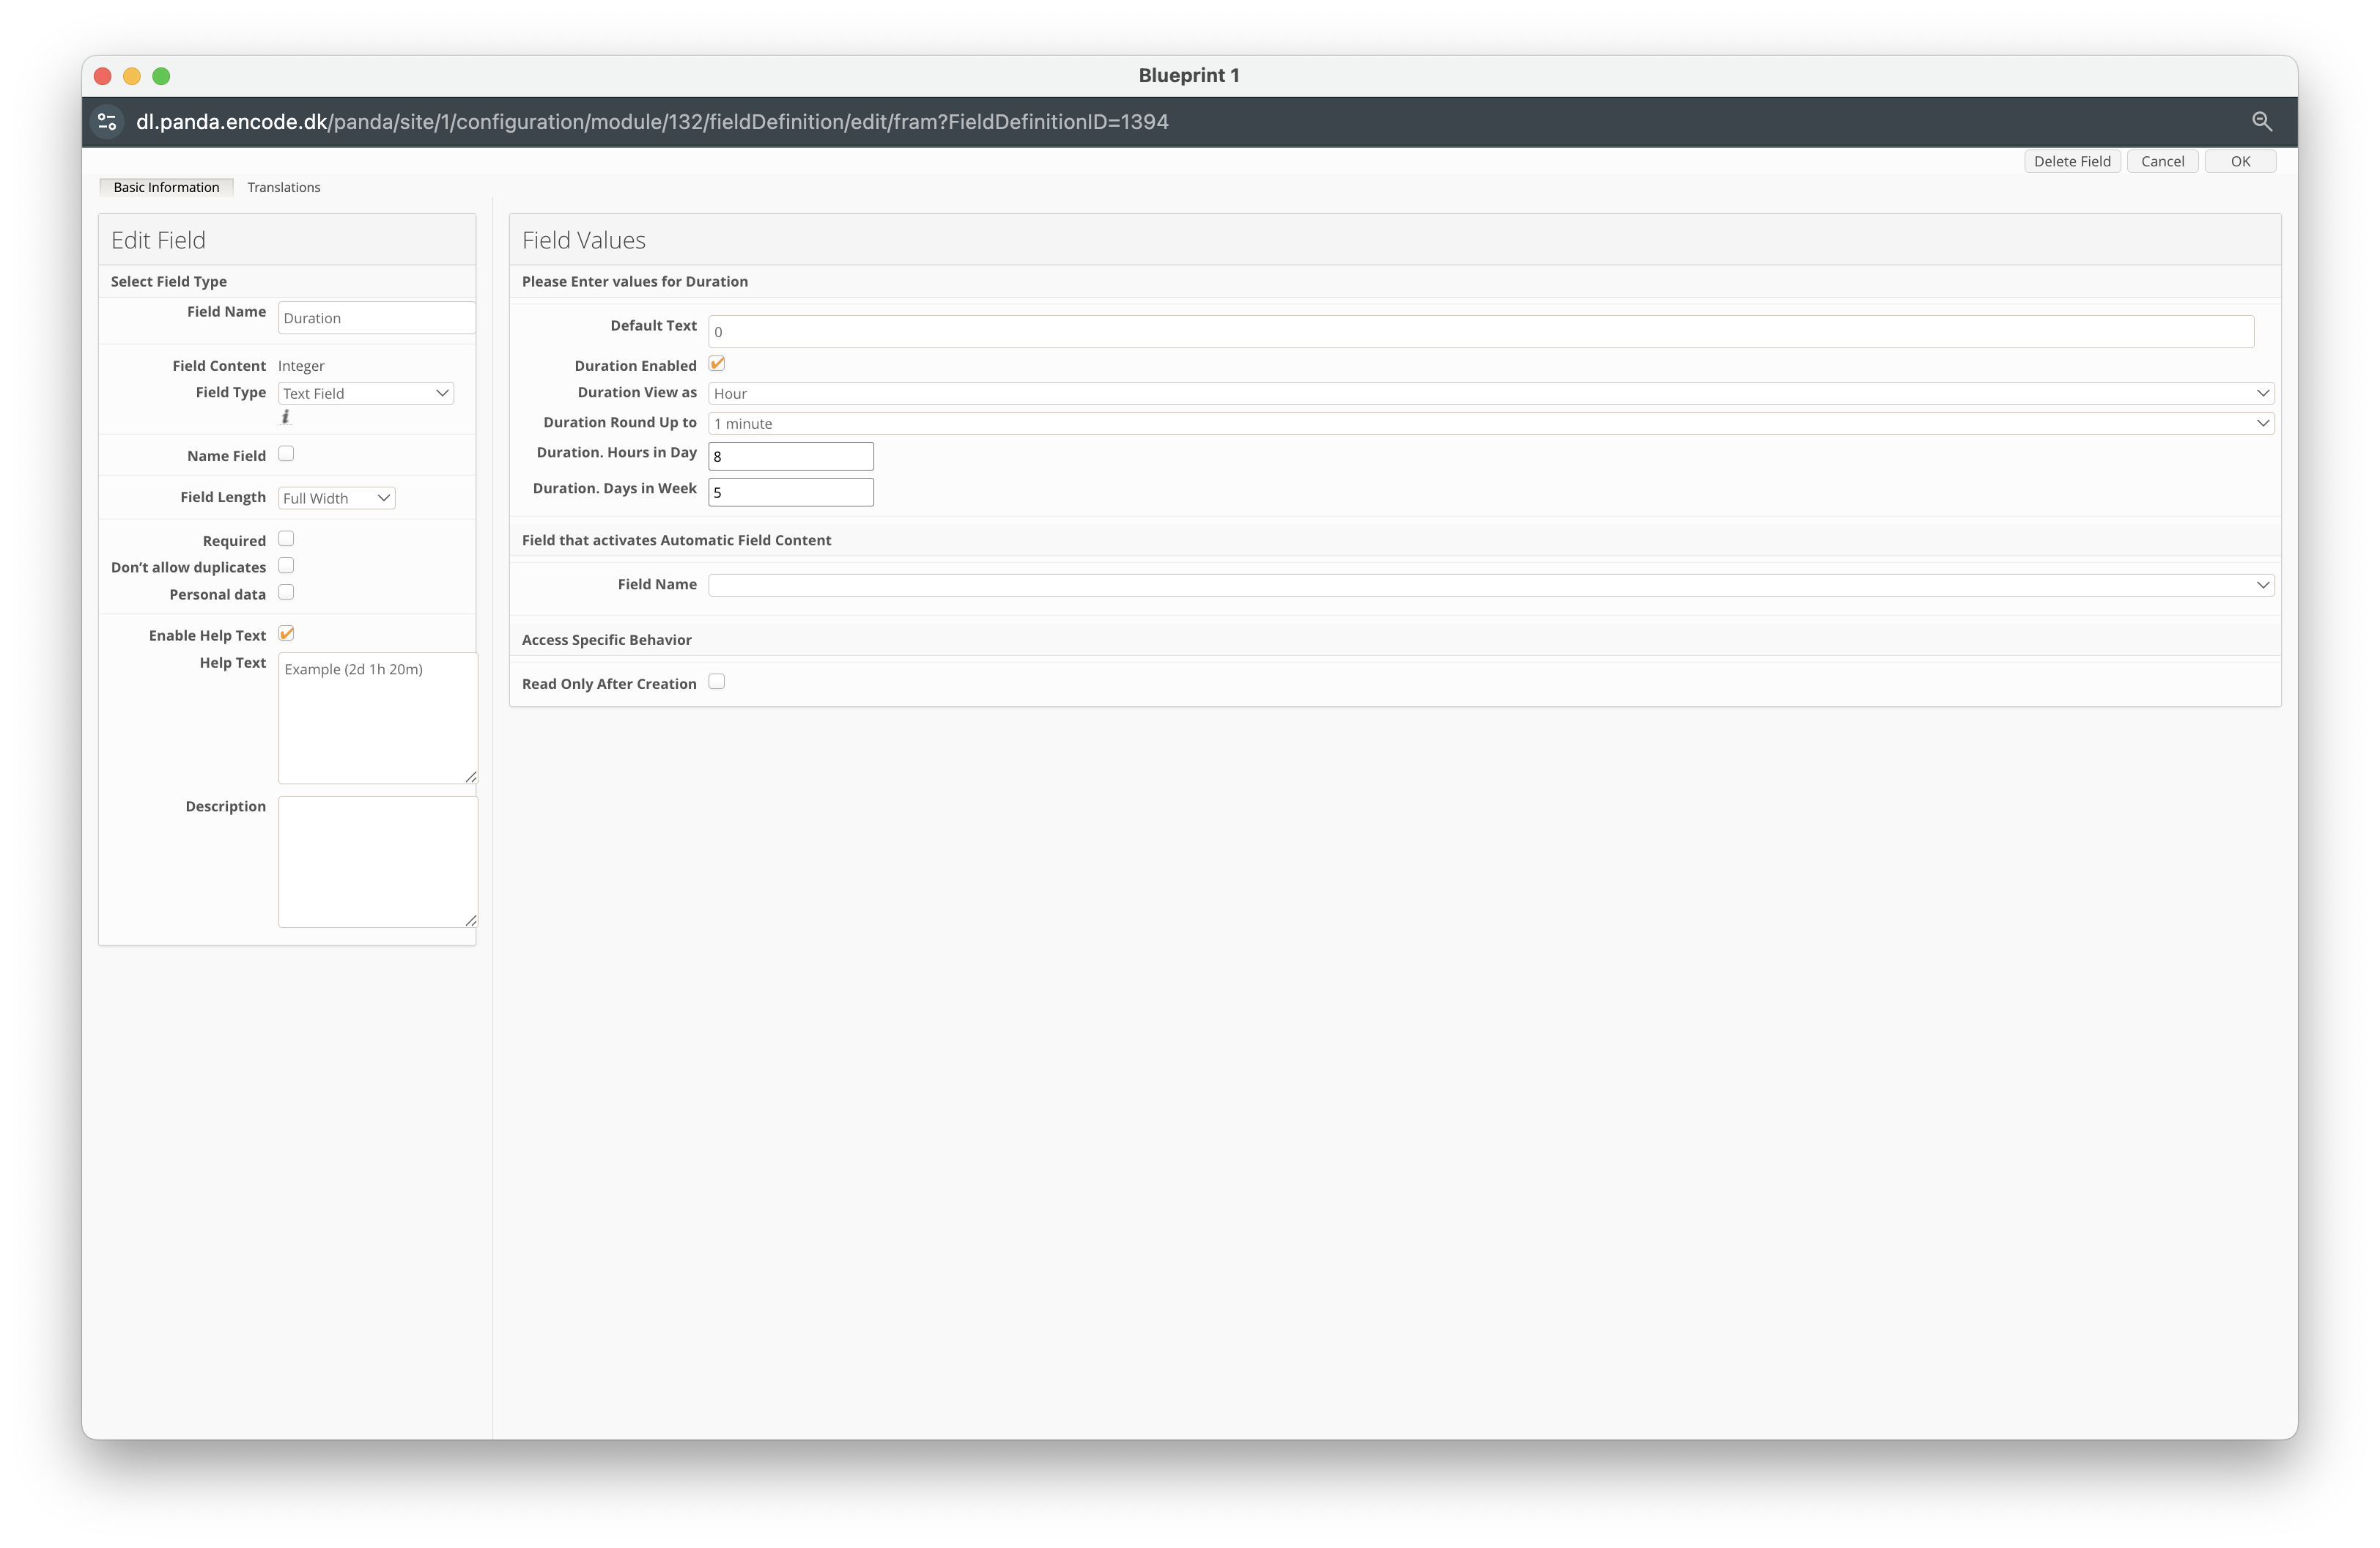
Click New Field.
Enter a Field Name (e.g. Duration).
In the Field Content dropdown, select Integer.
Locate the Duration Enabled field and ensure it is checked.
In the Duration View As dropdown, select Hour.
In the Duration Round Up To dropdown, choose the desired rounding behaviour.
In the Duration Hours in Day field, specify the default working hours per day.
In the Duration Days in Week field, specify the default working days per week.
Click OK to create the field.
Click New Field.
Enter a Field Name (e.g. Timer Started At)
In the Field Content dropdown, select Date.
Locate the Skeleton field, and define the specific date format option.
Click OK to create the field.

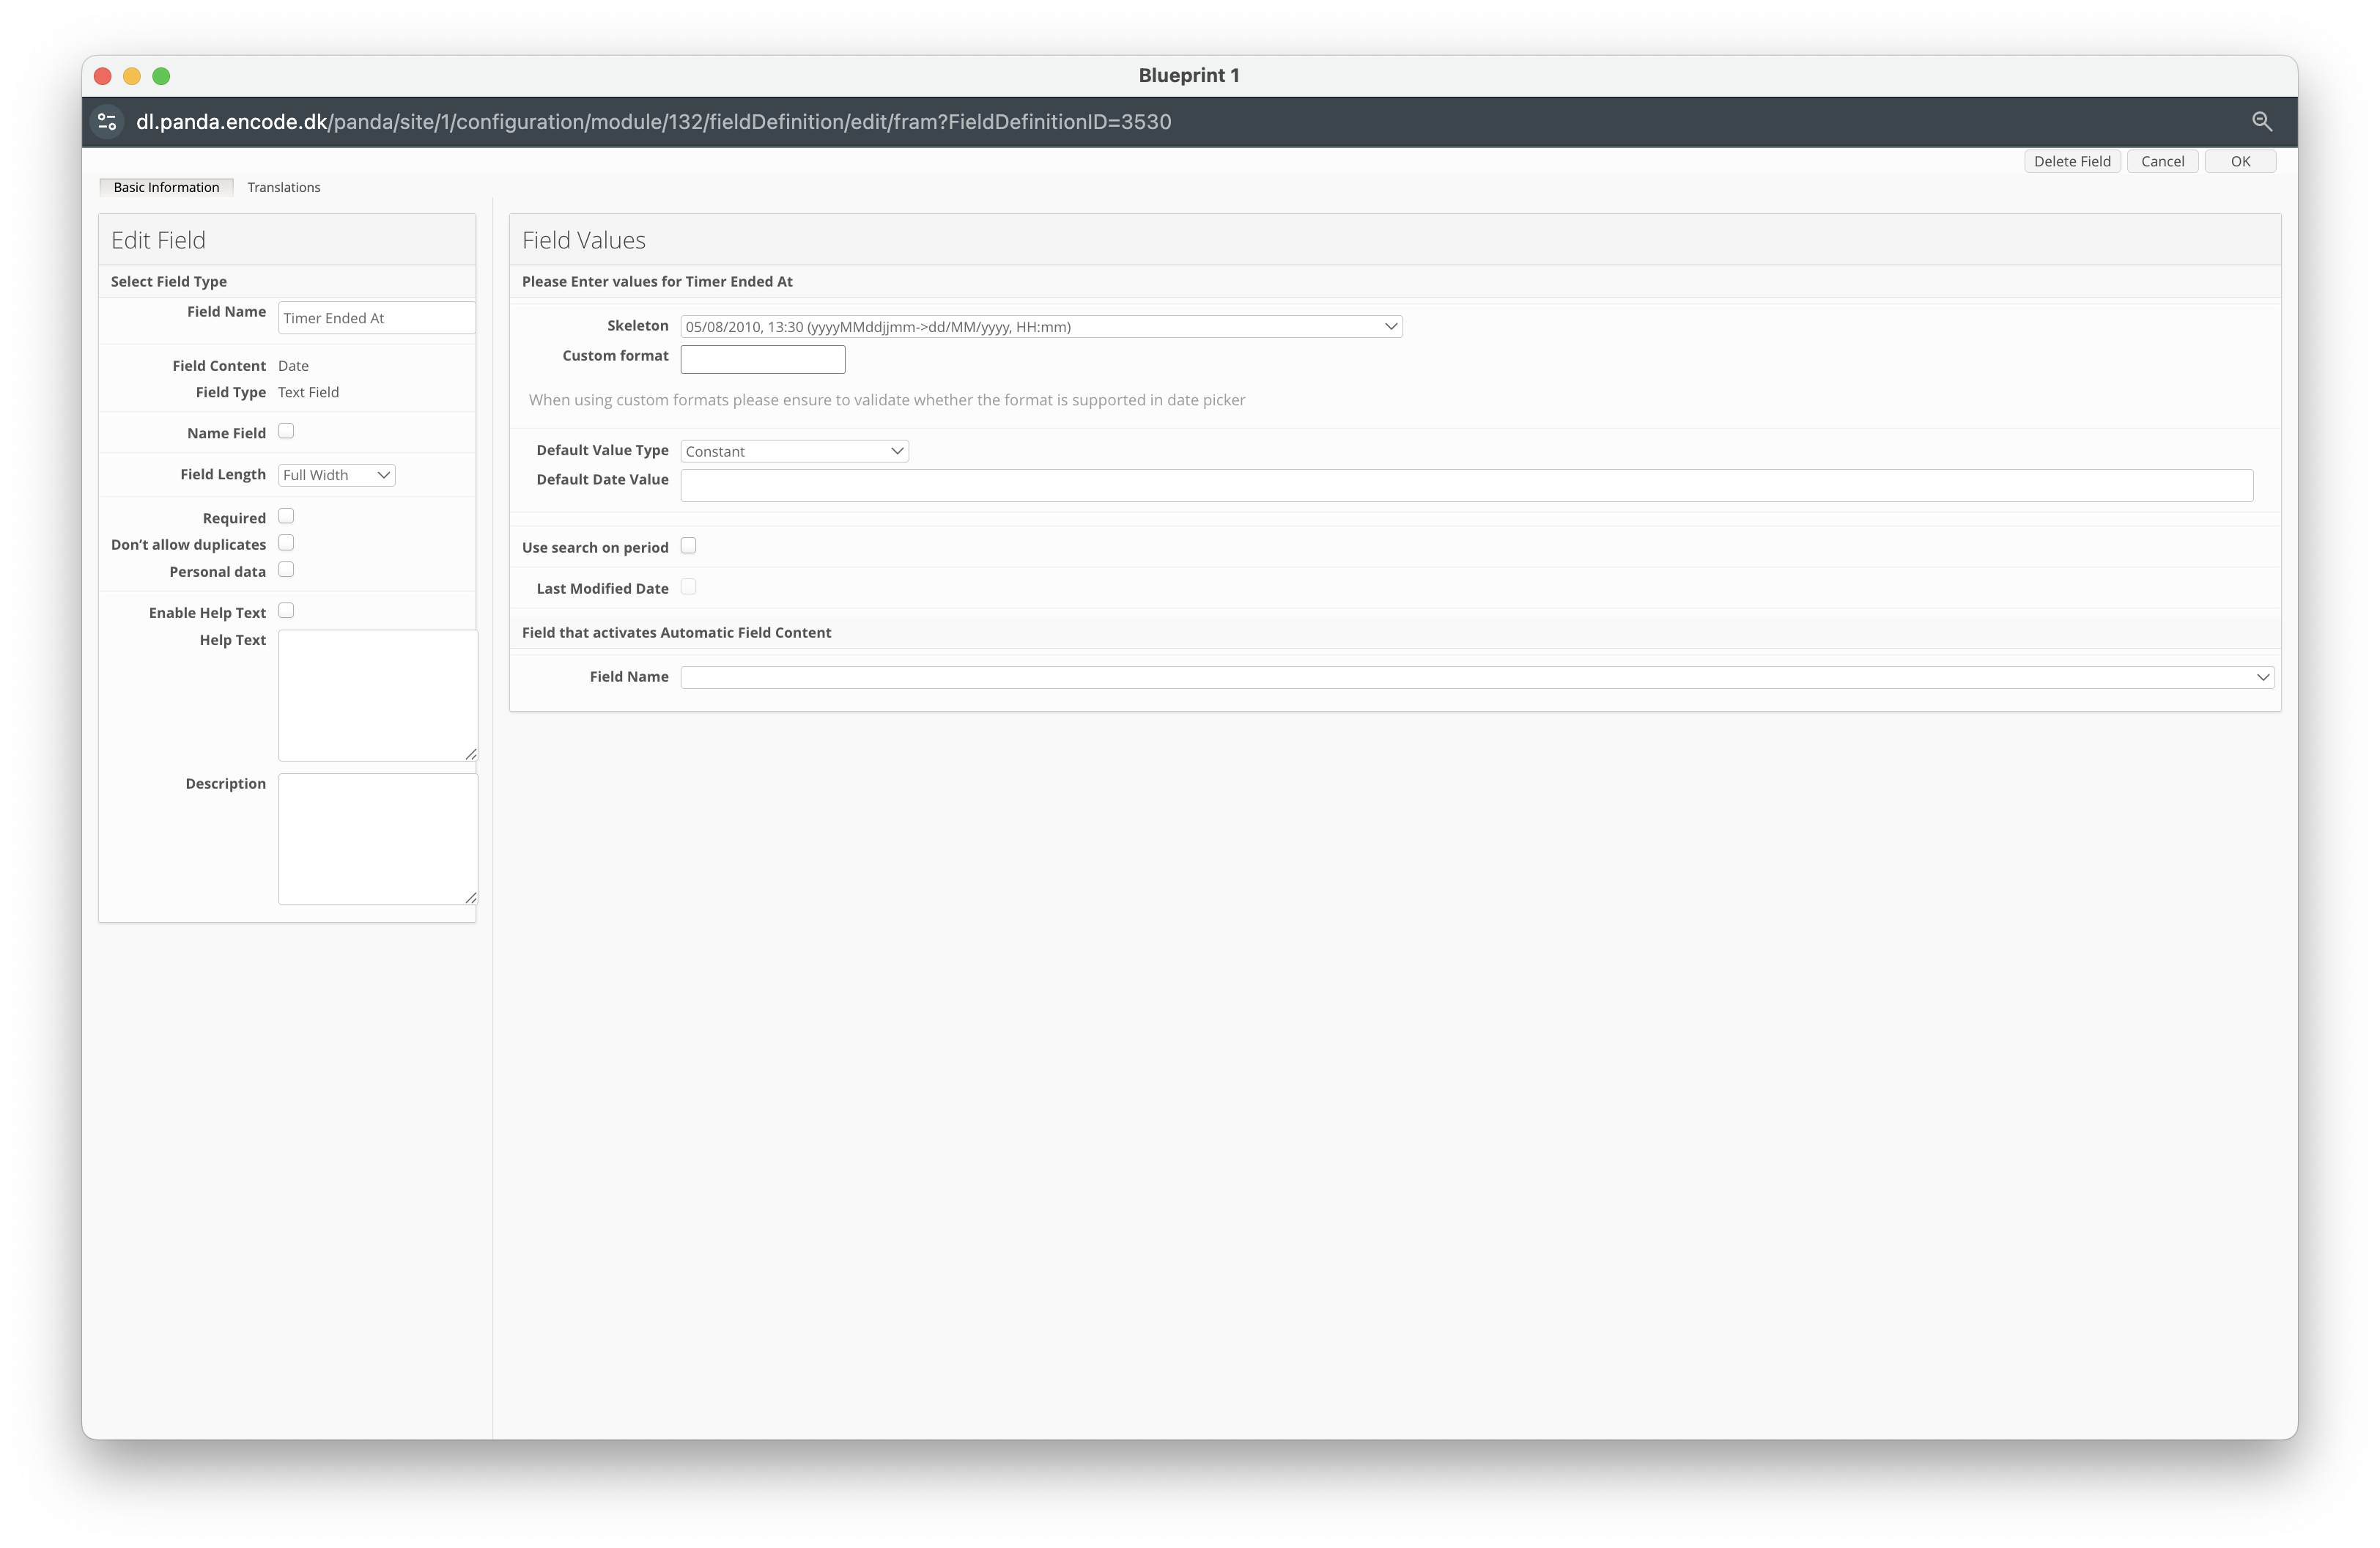
Click New Field.
Enter a Field Name (e.g. Timer Ended At)
In the Field Content dropdown, select Date.
Locate the Skeleton field, and define the specific date format option.
Click OK to create the field.
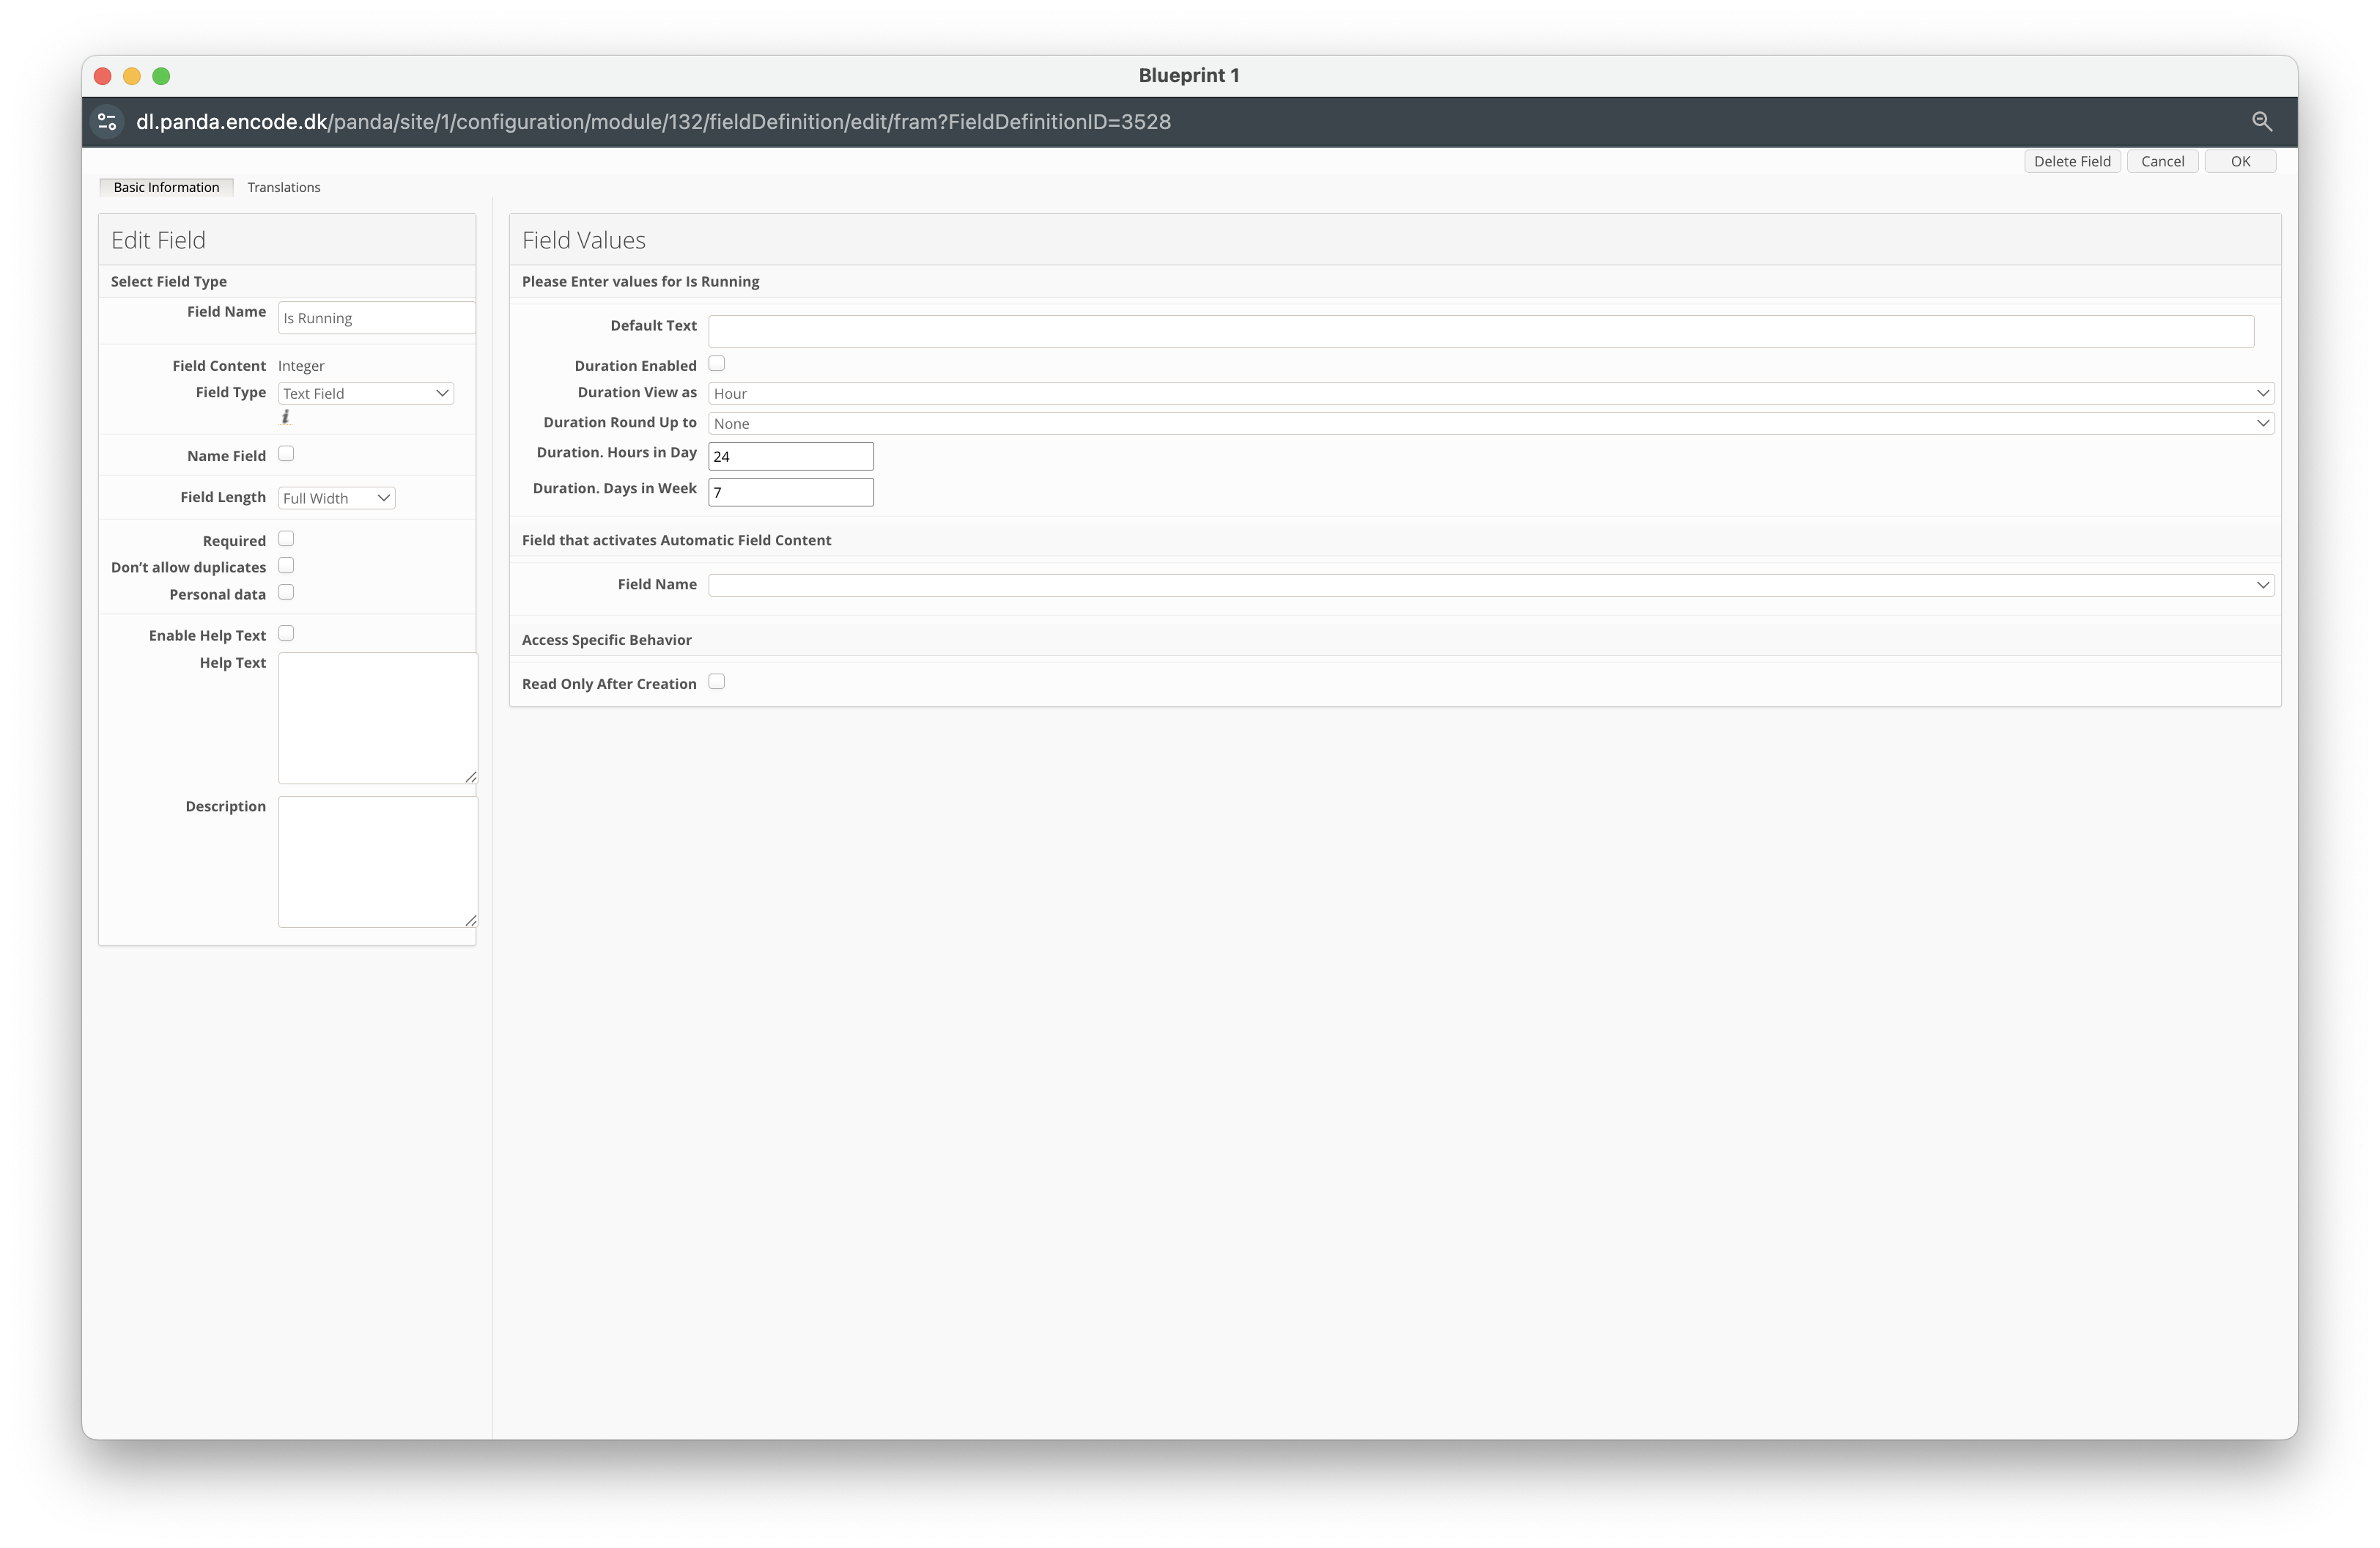
Click New Field.
Enter a Field Name (e.g. Is running).
In the Field Content dropdown, select Integer.
Click OK to create the field.
Configuring the Teams Module
Next, you will need to configure the Teams Module, but follow the steps below:
Navigate to Site Configuration → Site Configuration → Modules.
Click Create Module.
Set the Type to Module.
Specify a Name for the module (e.g., Departments).
Select a Template (e.g., With Preconfigured Media Settings and Audit Fields).
Click OK to confirm the module creation.

An image highlighting the Team module named ‘Departments’
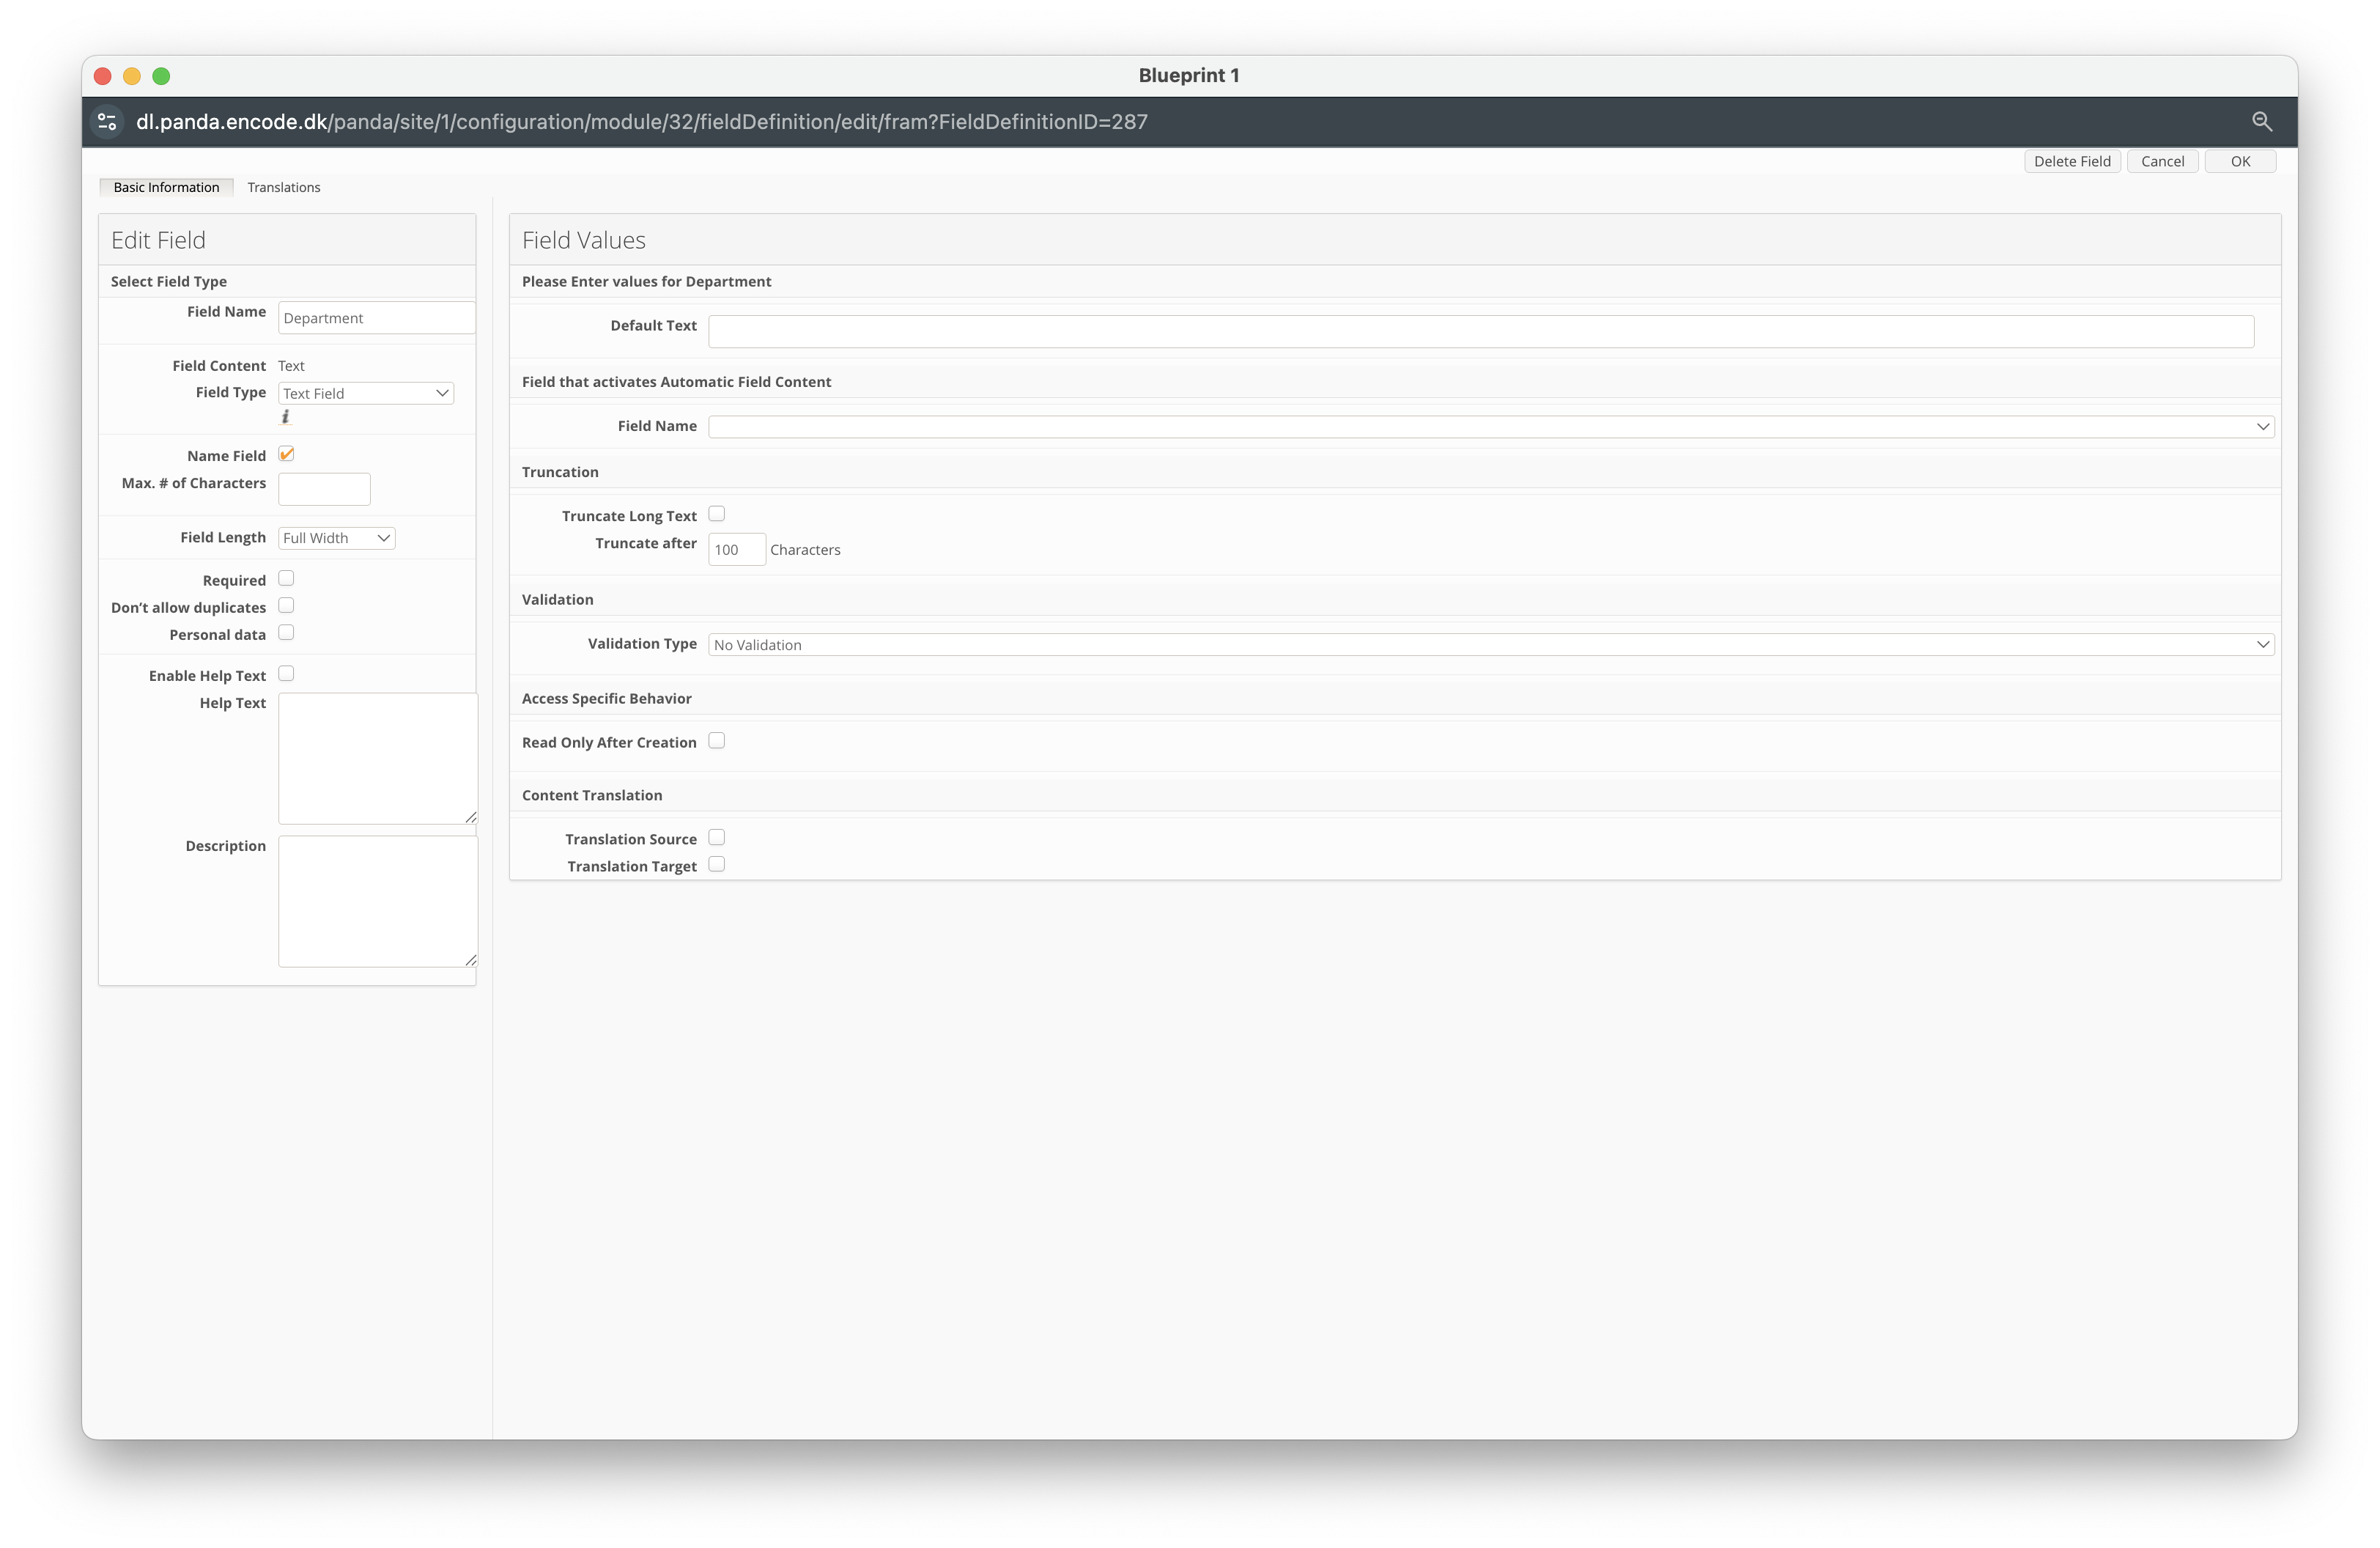
Click New Field.
Enter a Field Name. (e.g. Department)
Ensure the Field Type dropdown is set to Text Field.
Click OK to create the field.
Configuring the Users Module
Next, you will need to configure the Users Module, but follow the steps below:
Navigate to Site Configuration → Users Configuration → Field Definition
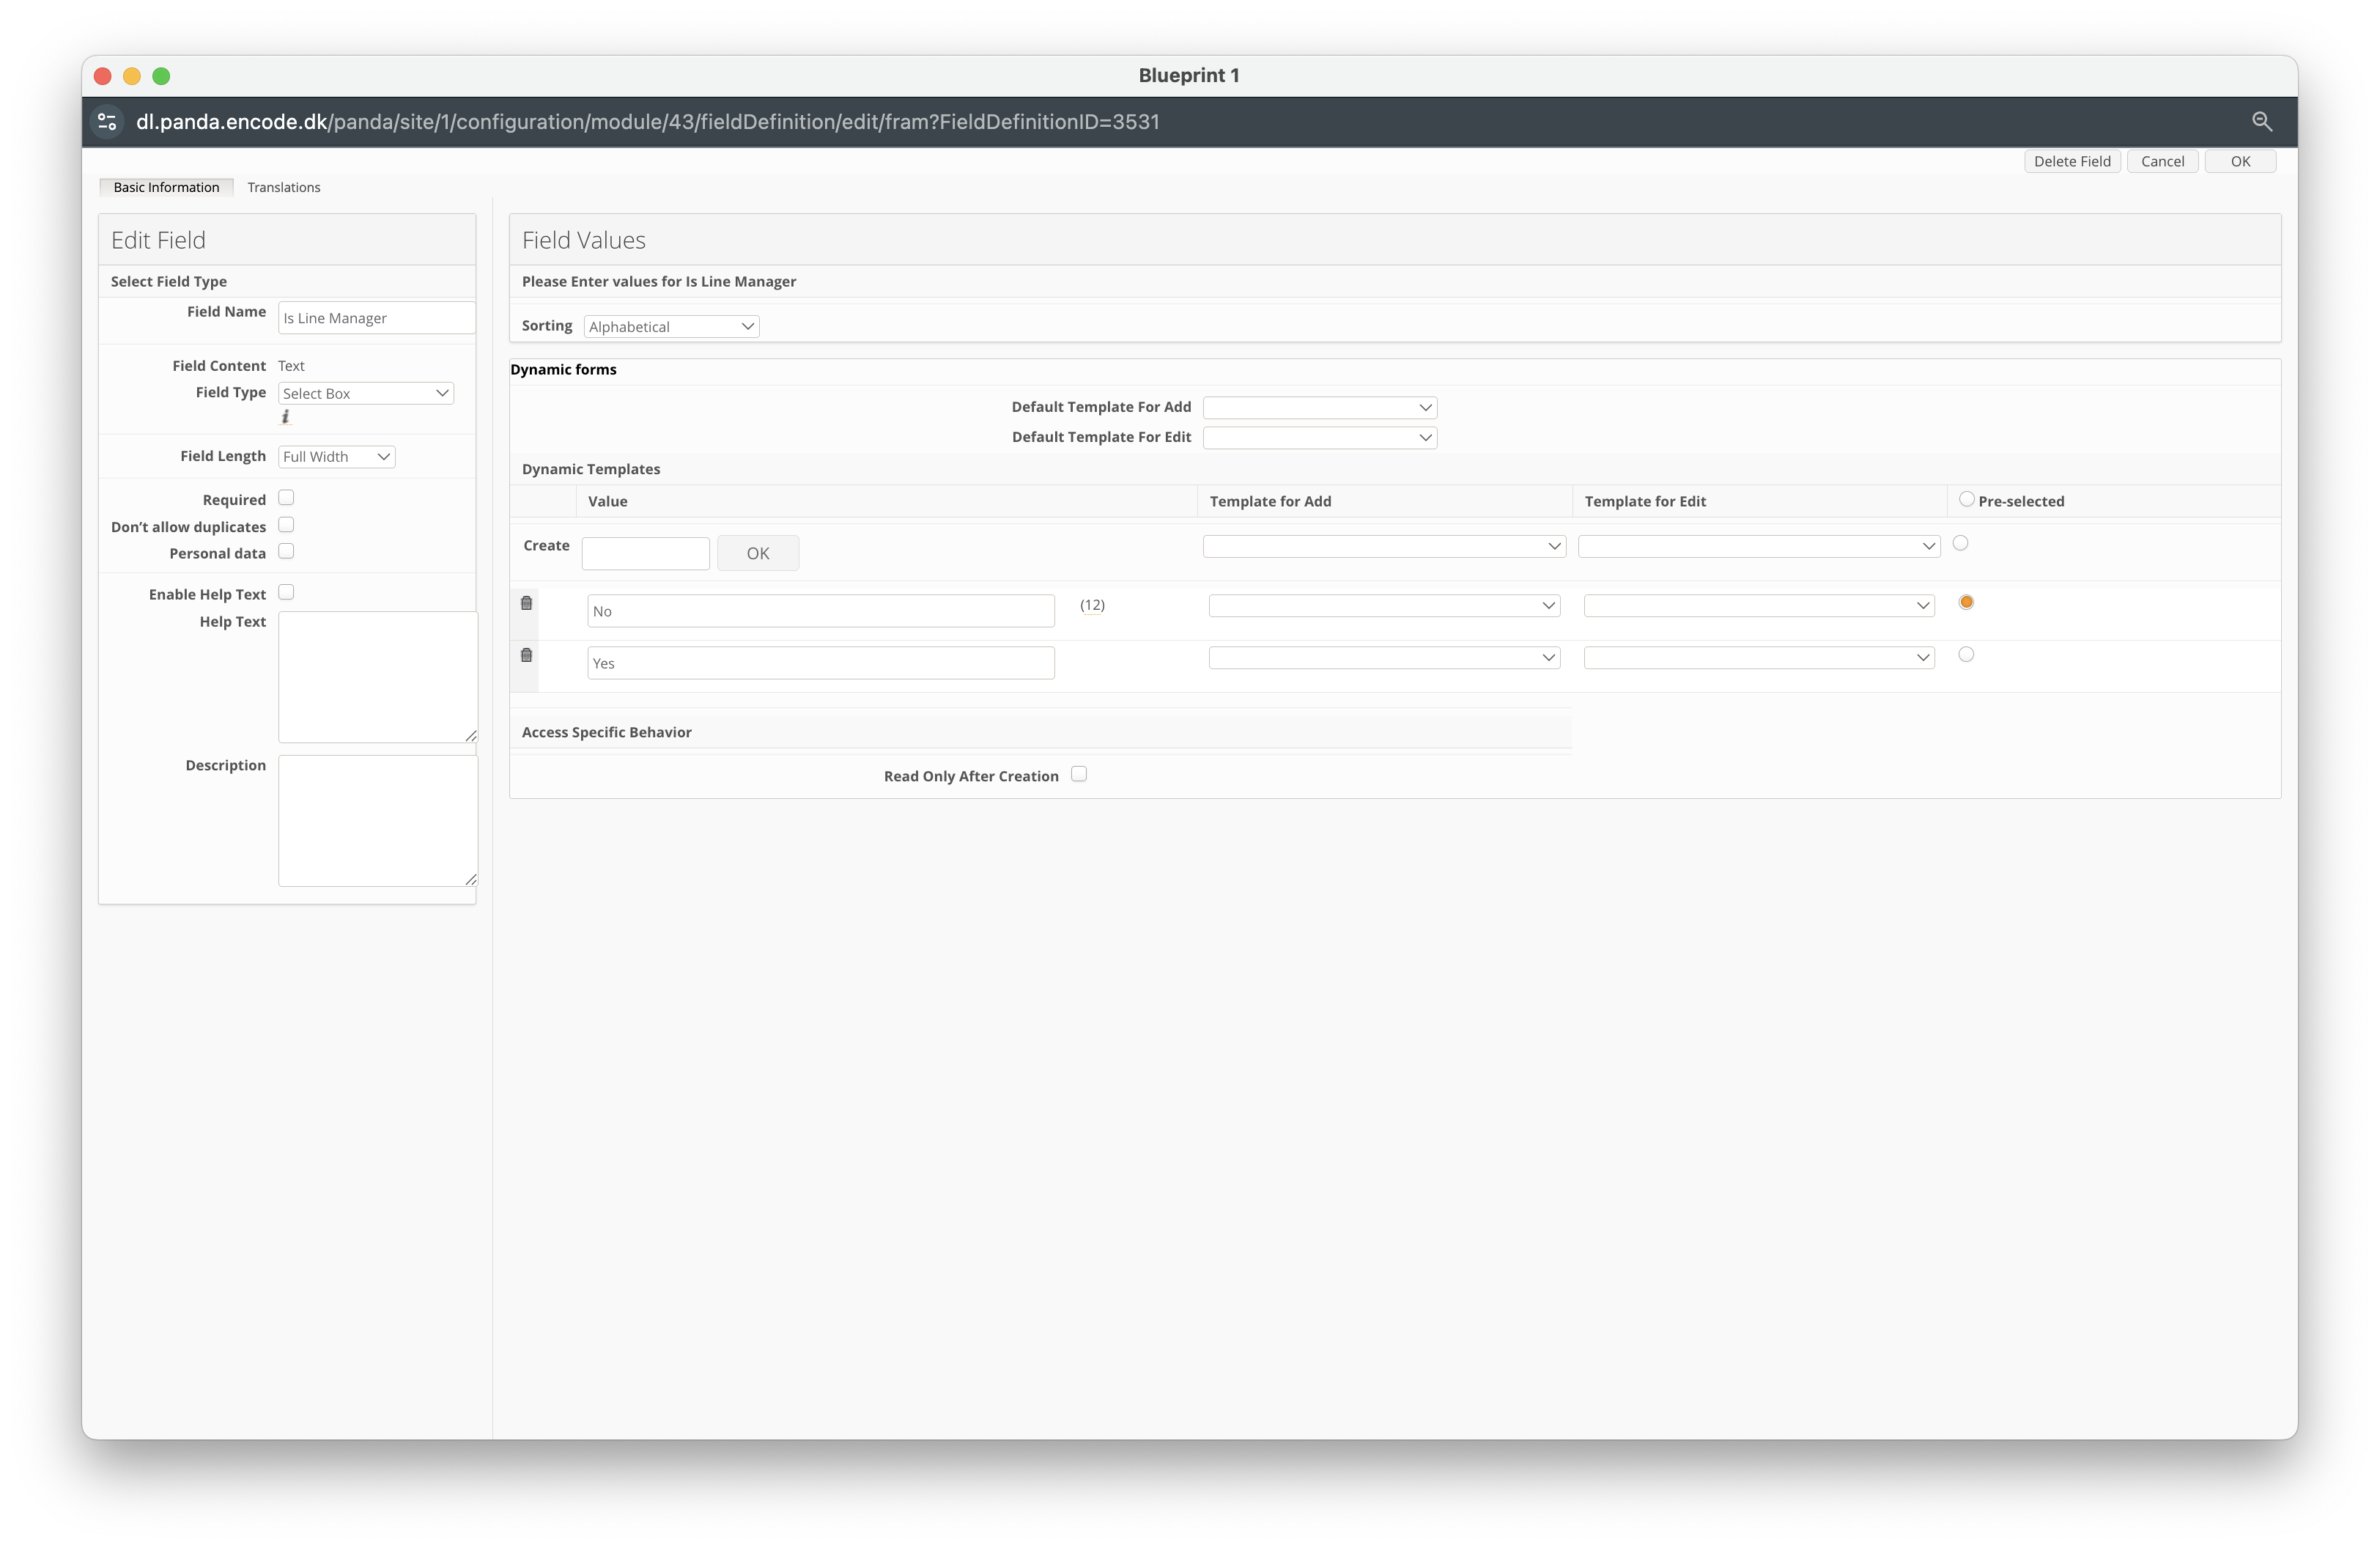
Click New Field.
Enter a Field Name. (e.g. Is Line Manager)
Ensure the Field Type dropdown is set to Select Box.
Locate Create and add two options to the dropdown: Yes and No
Click OK to create the field.
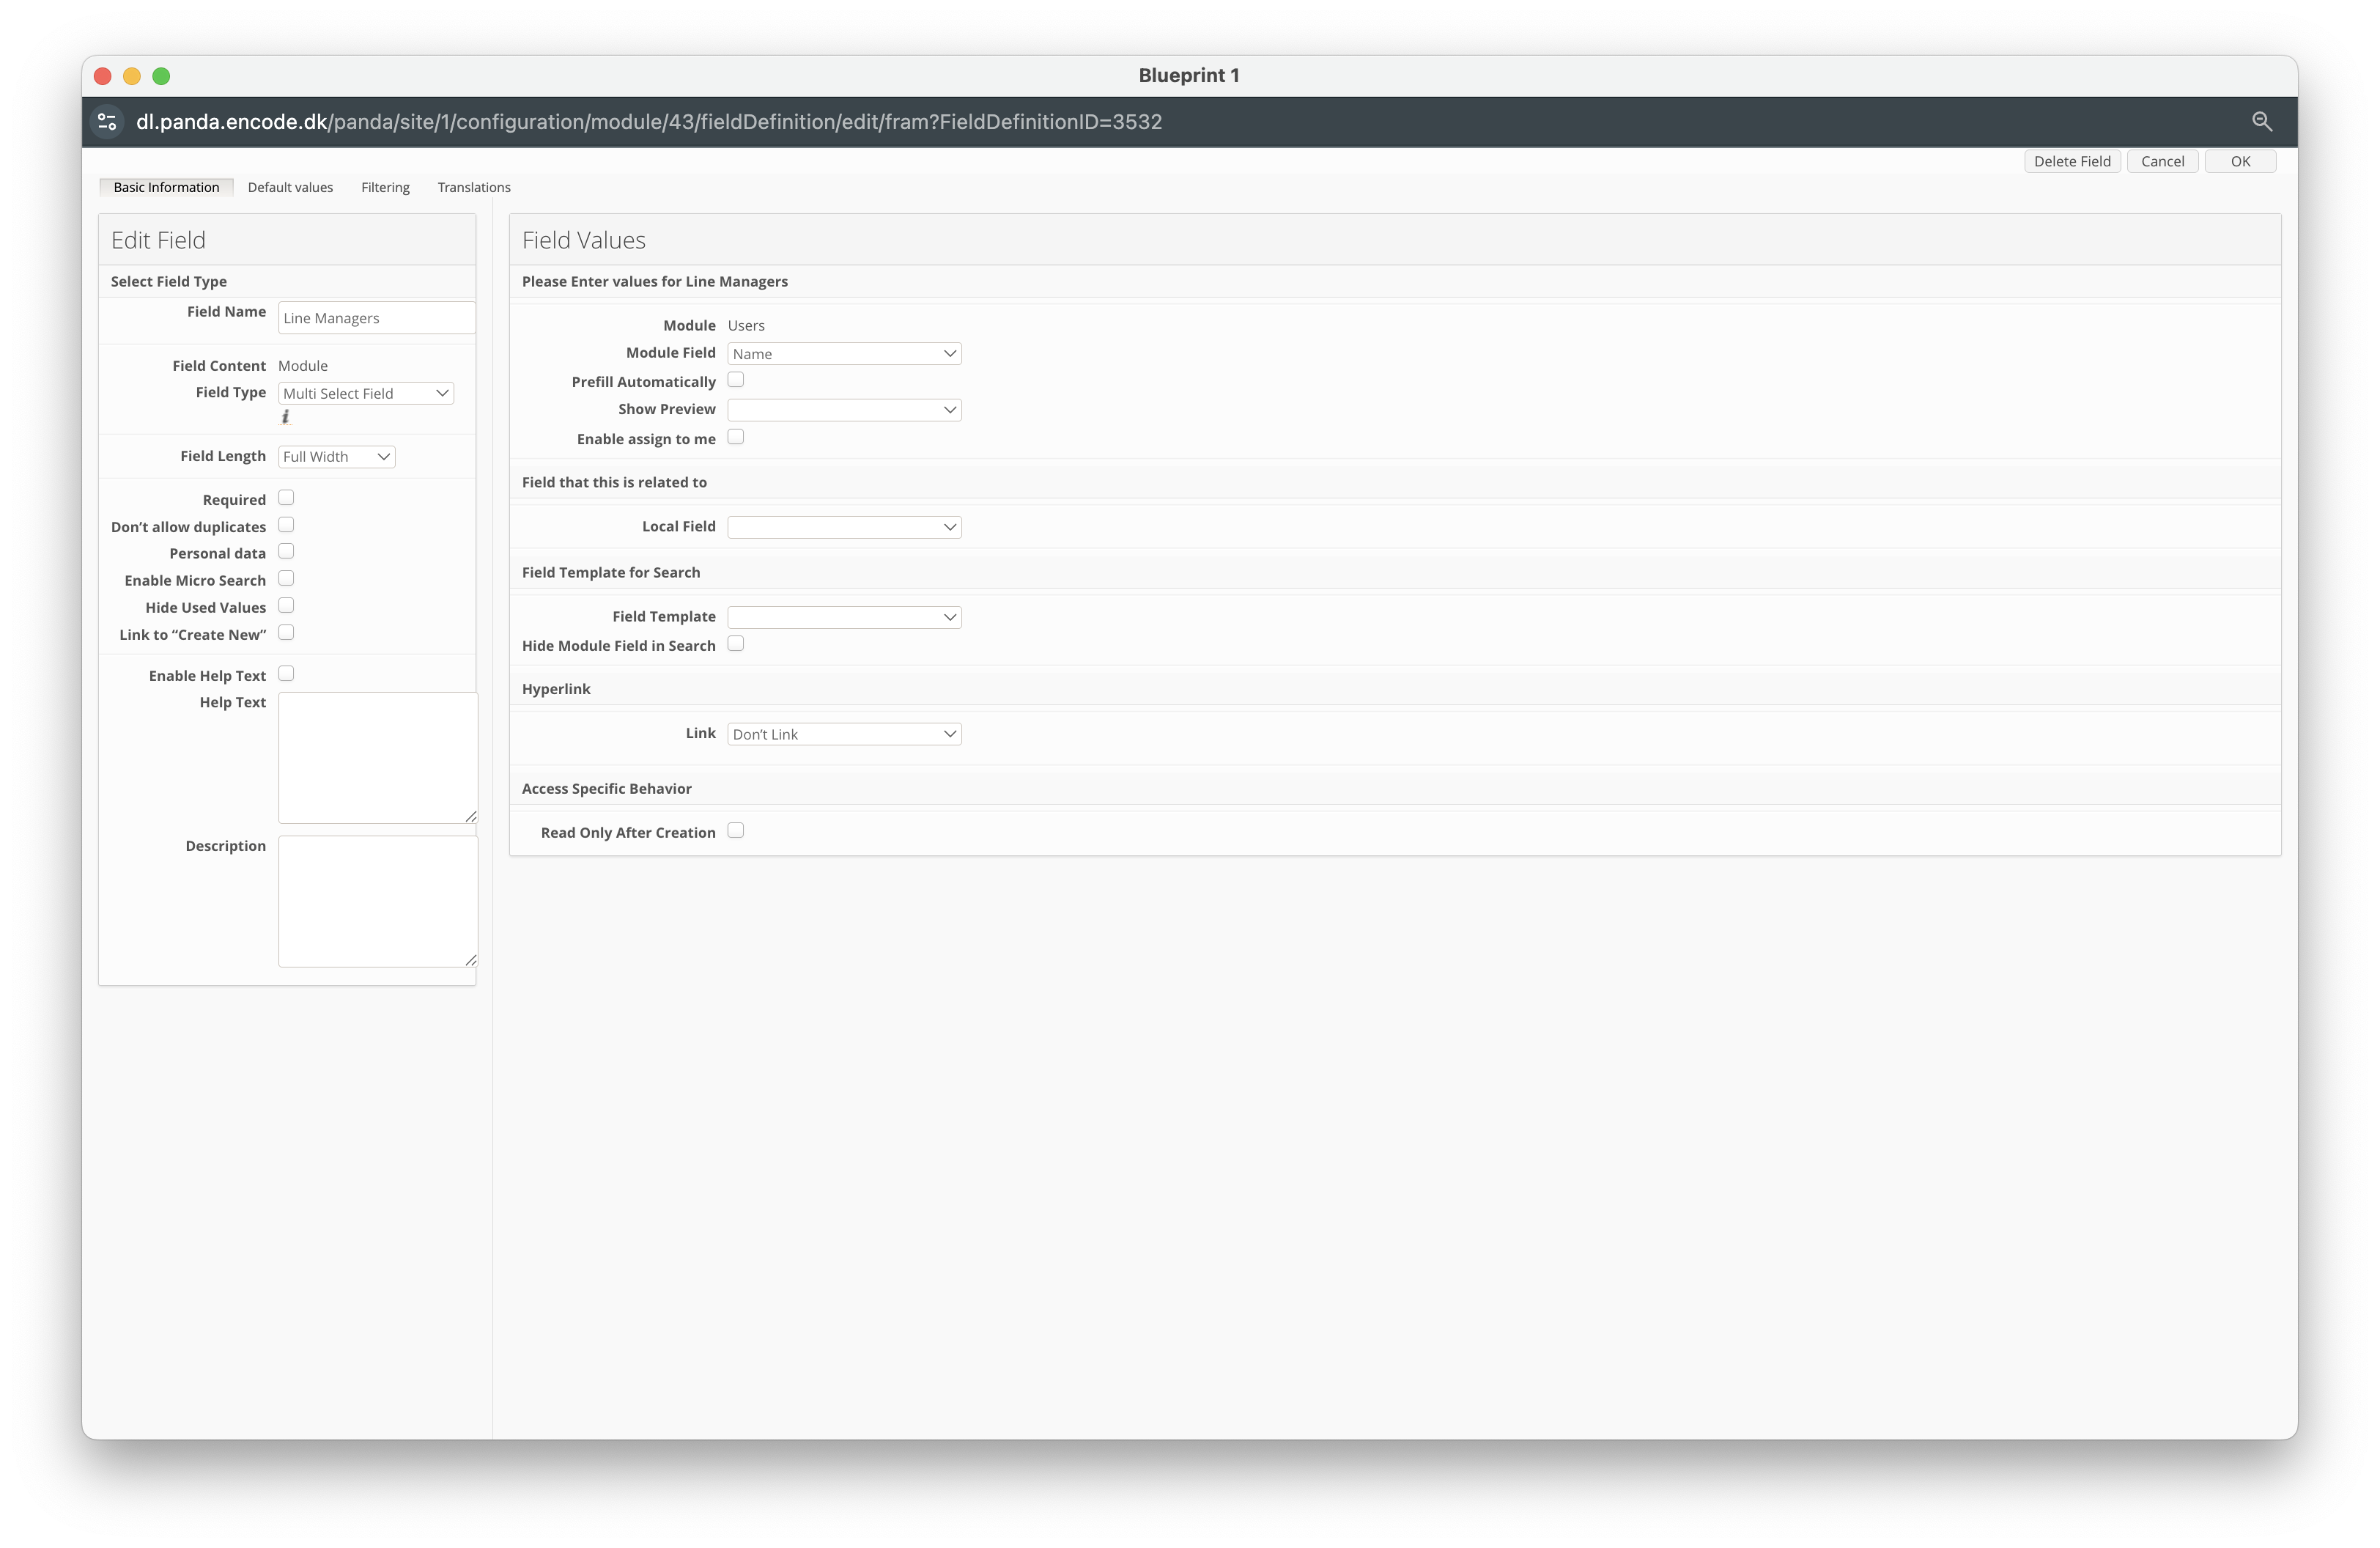
Click New Field.
Enter a Field Name (e.g. Line Managers).
Select Module from the Field Content dropdown.
In the Field Type dropdown, select Select Box.
Locate the Module field and select the Users module previously created
Within the Module Field dropdown, select the Text Field that defines users fu’s full name
Click OK to create the field.
Click New Field.
Enter a Field Name (e.g. Working Hours).
In the Field Content dropdown, select Integer.
In the Default Text, specify 8.
Locate the Duration Enabled field and ensure it is checked.
In the Duration View As dropdown, select Hour.
In the Duration Round Up To dropdown, choose the desired rounding behaviour.
In the Duration Hours in Day field, specify the default working hours per day.
In the Duration Days in Week field, specify the default working days per week.
Click OK to create the field.

Click New Field.
Enter a Field Name (e.g. Main Department).
Select Module from the Field Content dropdown.
In the Field Type dropdown, select Select Box.
Locate the Module field and select the Department module previously created
Within the Module Field dropdown, select the Text Field that defines Department
Click OK to create the field.

Configuring the Time Tracking App
To enable the app, follow these steps:
Navigate to Configuration → Apps Library from the sidebar.
Locate the Time Tracking / Hours App and click the card.
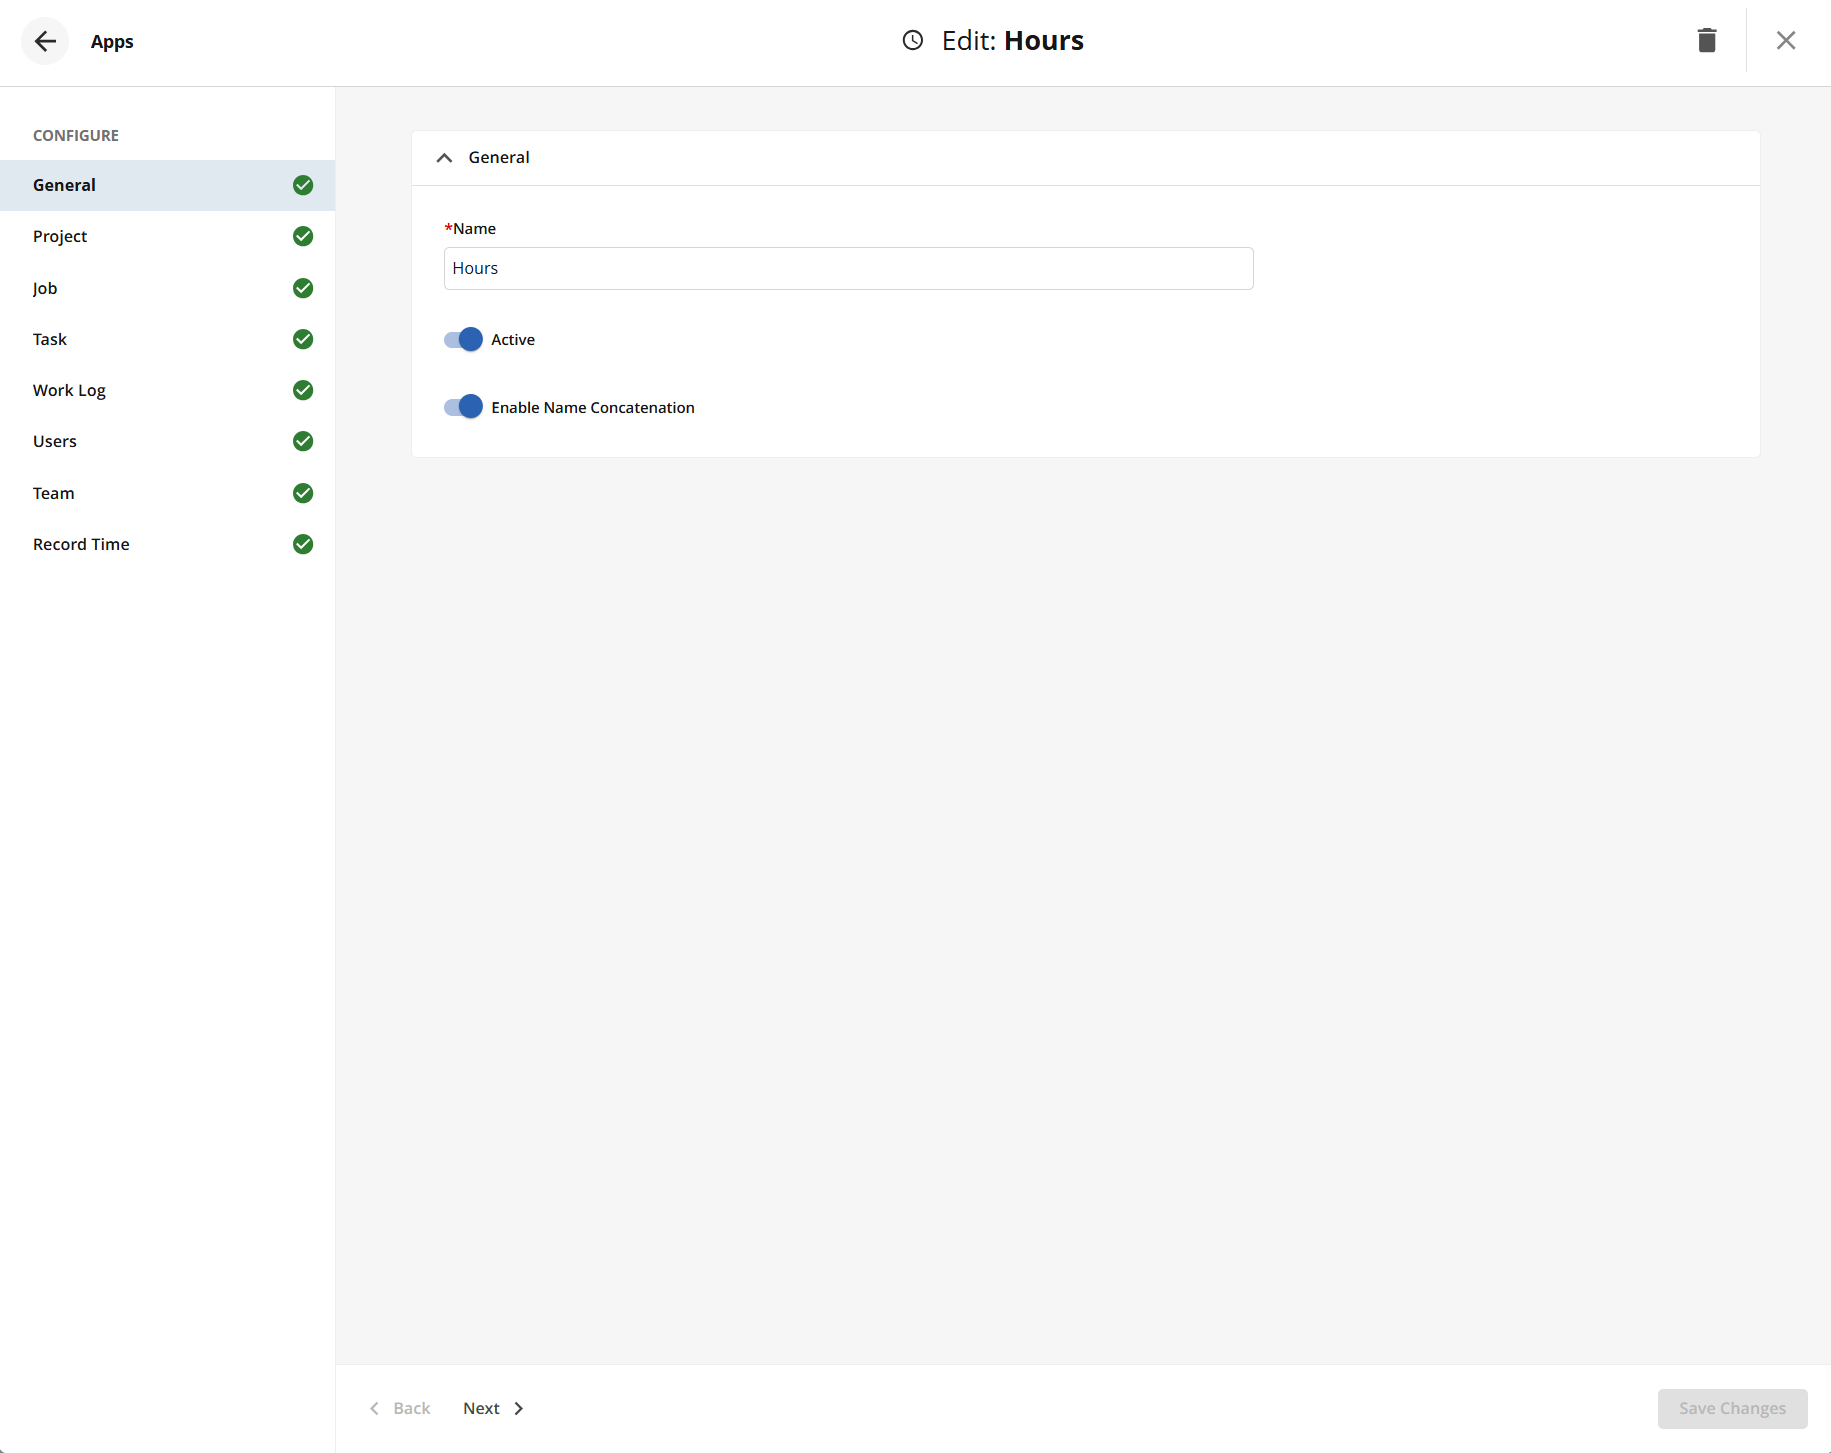
The app Name will be pre-filled with ‘Hours’. Adjust to your requirements.
Specify whether you wish to Enable Name Concatenation. This option allows you to display more context about the project, job and task level within the Hours App.
Navigate through each configuration option, ensuring to select the fields previously created.
Click Create to confirm settings.
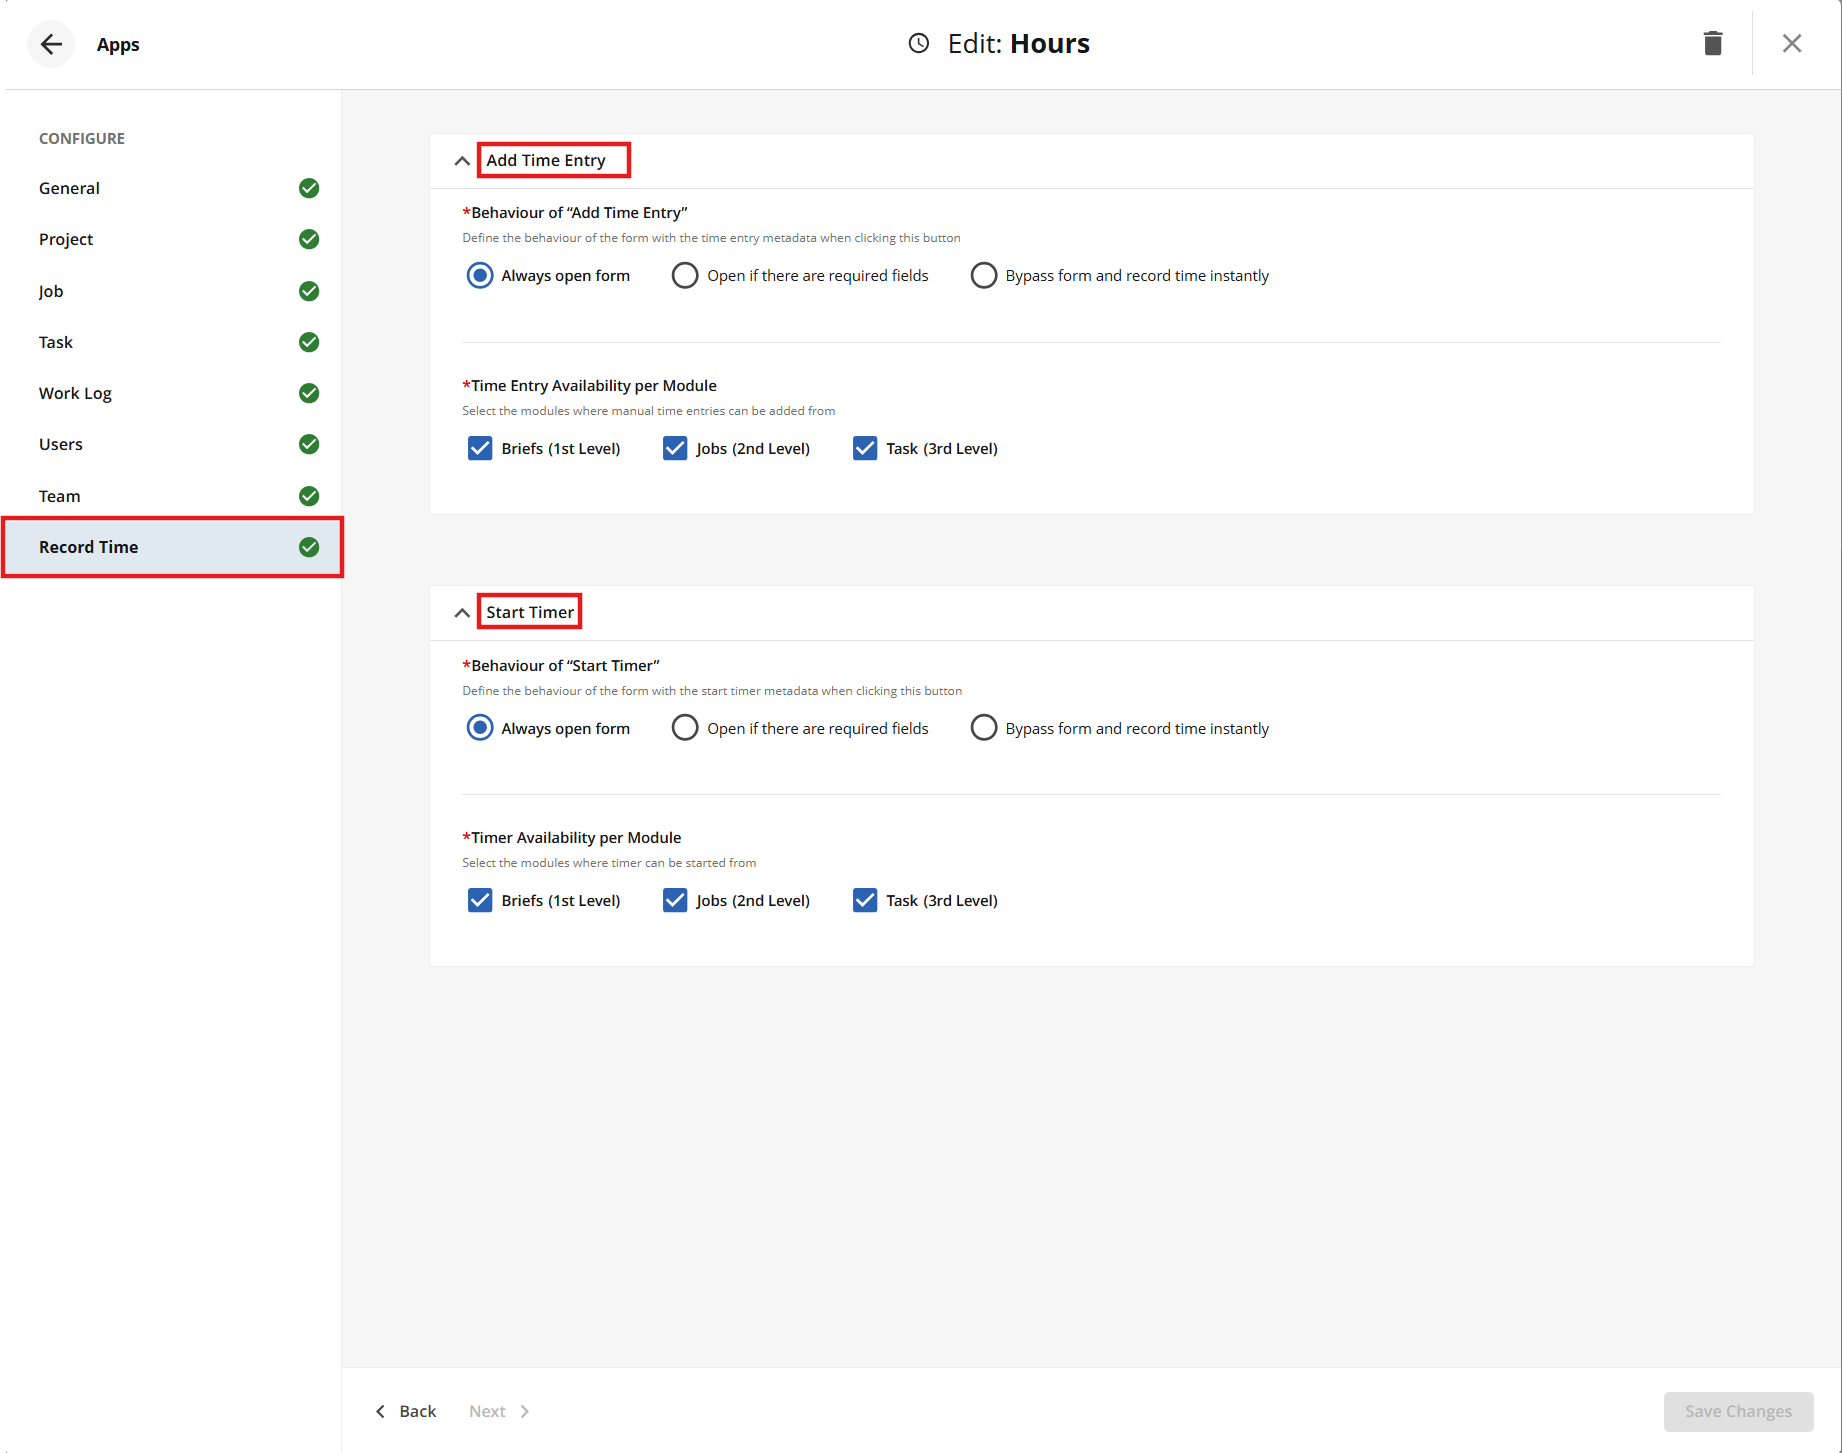
Record Time tab (available from version 23)
It is possible to configure the desired behaviour for both Add Time Entry and Start Timer from the Record Time tab. An admin user can define whether the form should open when adding a new time entry or if the form should be bypassed and the time instantly recorded. It is also possible to define at which module levels Add Time Entry and Start Timer are available to users. By default, the settings are configured to always open the form, display Add Time Entry in all module levels, and make Start Timer visible only at the Task level.
Note: When configuring the option “Open if there are required field” is referring to fields in the Worklog module.
Configuring Estimation Field
The Estimation field represents the amount of time expected to complete a work item. It is used to compare planned effort with the actual time logged (Time Spent). It will display the total time considering all the time logged in that item, considering all users involved. The Estimation field can be enabled at the Project, Job, and Task levels.
Part 1: Creating New Field Definitions for Estimation
(in Project, Job, and Task modules)
Navigate to Site Configuration → Task → Field Definition
Click New Field
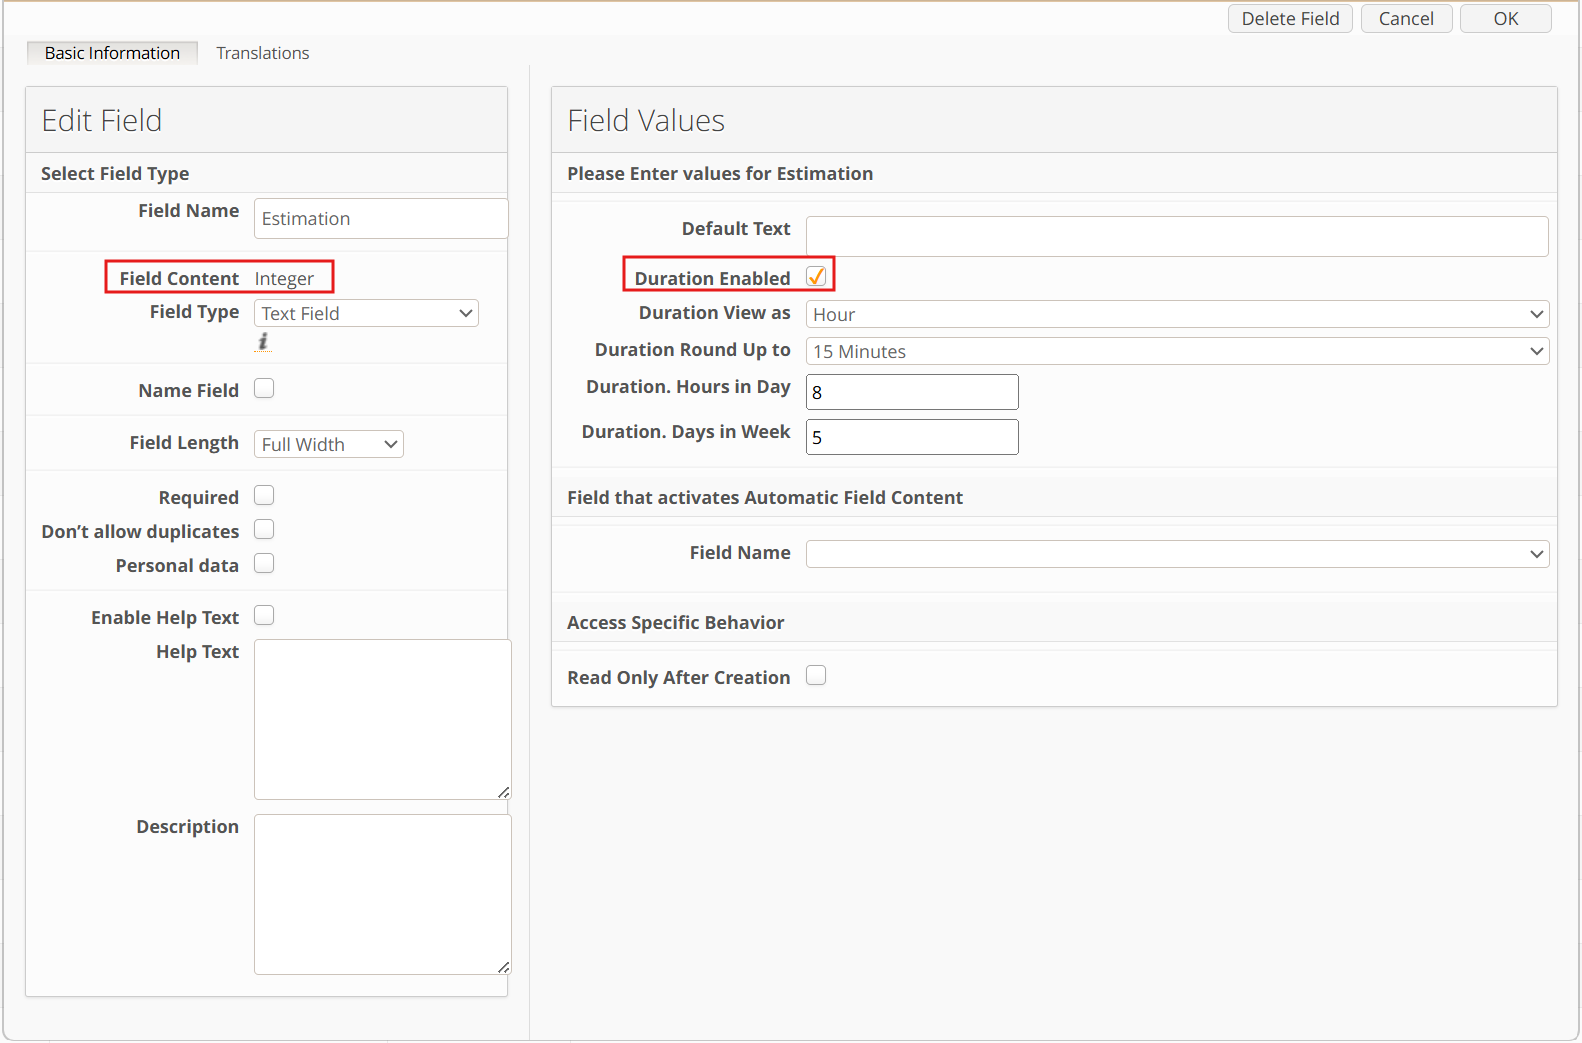
Enter a field name (e.g. Estimation)
In the Field Content dropdown, select Integer
Locate the Duration Enabled option and ensure it is checked
In the Duration View As dropdown, select Hour
In the Duration Round Up To dropdown, choose the desired rounding behaviour
In the Duration Hours in Day field, specify the default working hours per day
In the Duration Days in Week field, specify the default working days per week
Click OK to create the field
Note: This example applies to the Task module. Repeat the same steps for the Job and Project modules if needed.
Part 2: Adding the Field to Module and Item Views
Add the newly created Estimation field to the relevant module and item views.
See here how to configure Module and Item views
Part 3: Configuring the Time Tracking (Hours) App
Navigate to the corresponding module in the Time Tracking (Hours) app configuration (e.g. Project), then scroll down to the “Project – Optional” section.
Select the newly created Estimation field from the dropdown and save the configuration.
![]()
Part 4: Setting Estimation Values
Navigate to the Project, Job, or Task module
Open an existing item
Enter a value in the Estimation field (e.g. 40h) and save the item
Once configured, the Timesheets popover and Log Time Callout will display the estimated hours for the item.
For more details about comparing Time Spent vs Estimation, see Time Spent and Estimation.
Known behaviour
A user should have at least "Read" access to the Project, Job, Task and Work Log modules specified within the app configuration.
A user should have "Read" + "Upload" access to the Work log module to be able to add time registration in the app.
A user without "Delete" access to the Work log module can delete already existing work log entries.
Status access restrictions are ignored in the Work log module if configured.
Date picker respects the browser locale settings.
The "Timer started at", "Timer ended at", and "Is running" fields from the Worklog module should be displayed on the form. In case hidden by field usage, the timer functionality will not work.
The following Duration field settings are currently not supported in the app when entering worklog:
Duration. Hours in day
Duration. Days in week