How to configure Page Status
When using online proofing, you can enable Page Status (available in the document proof viewer only), allowing users to assign a status to individual pages. To enable this feature, follow these steps:
Navigate to Modules > Manage Modules > {Module} > Module Configuration > Proofing and Comments
Click Edit Settings.
Locate the option Enable Page Status and tick the checkbox.
Depending on whether Limit access to Comments and Page Statuses by is set to Access Rights or User Groups, you can define who has access to each status value. The system supports three status states: No Status, Green Status and Red Status. A custom label can be assigned to each state to align with your business requirements.
Click Save to apply the changes.
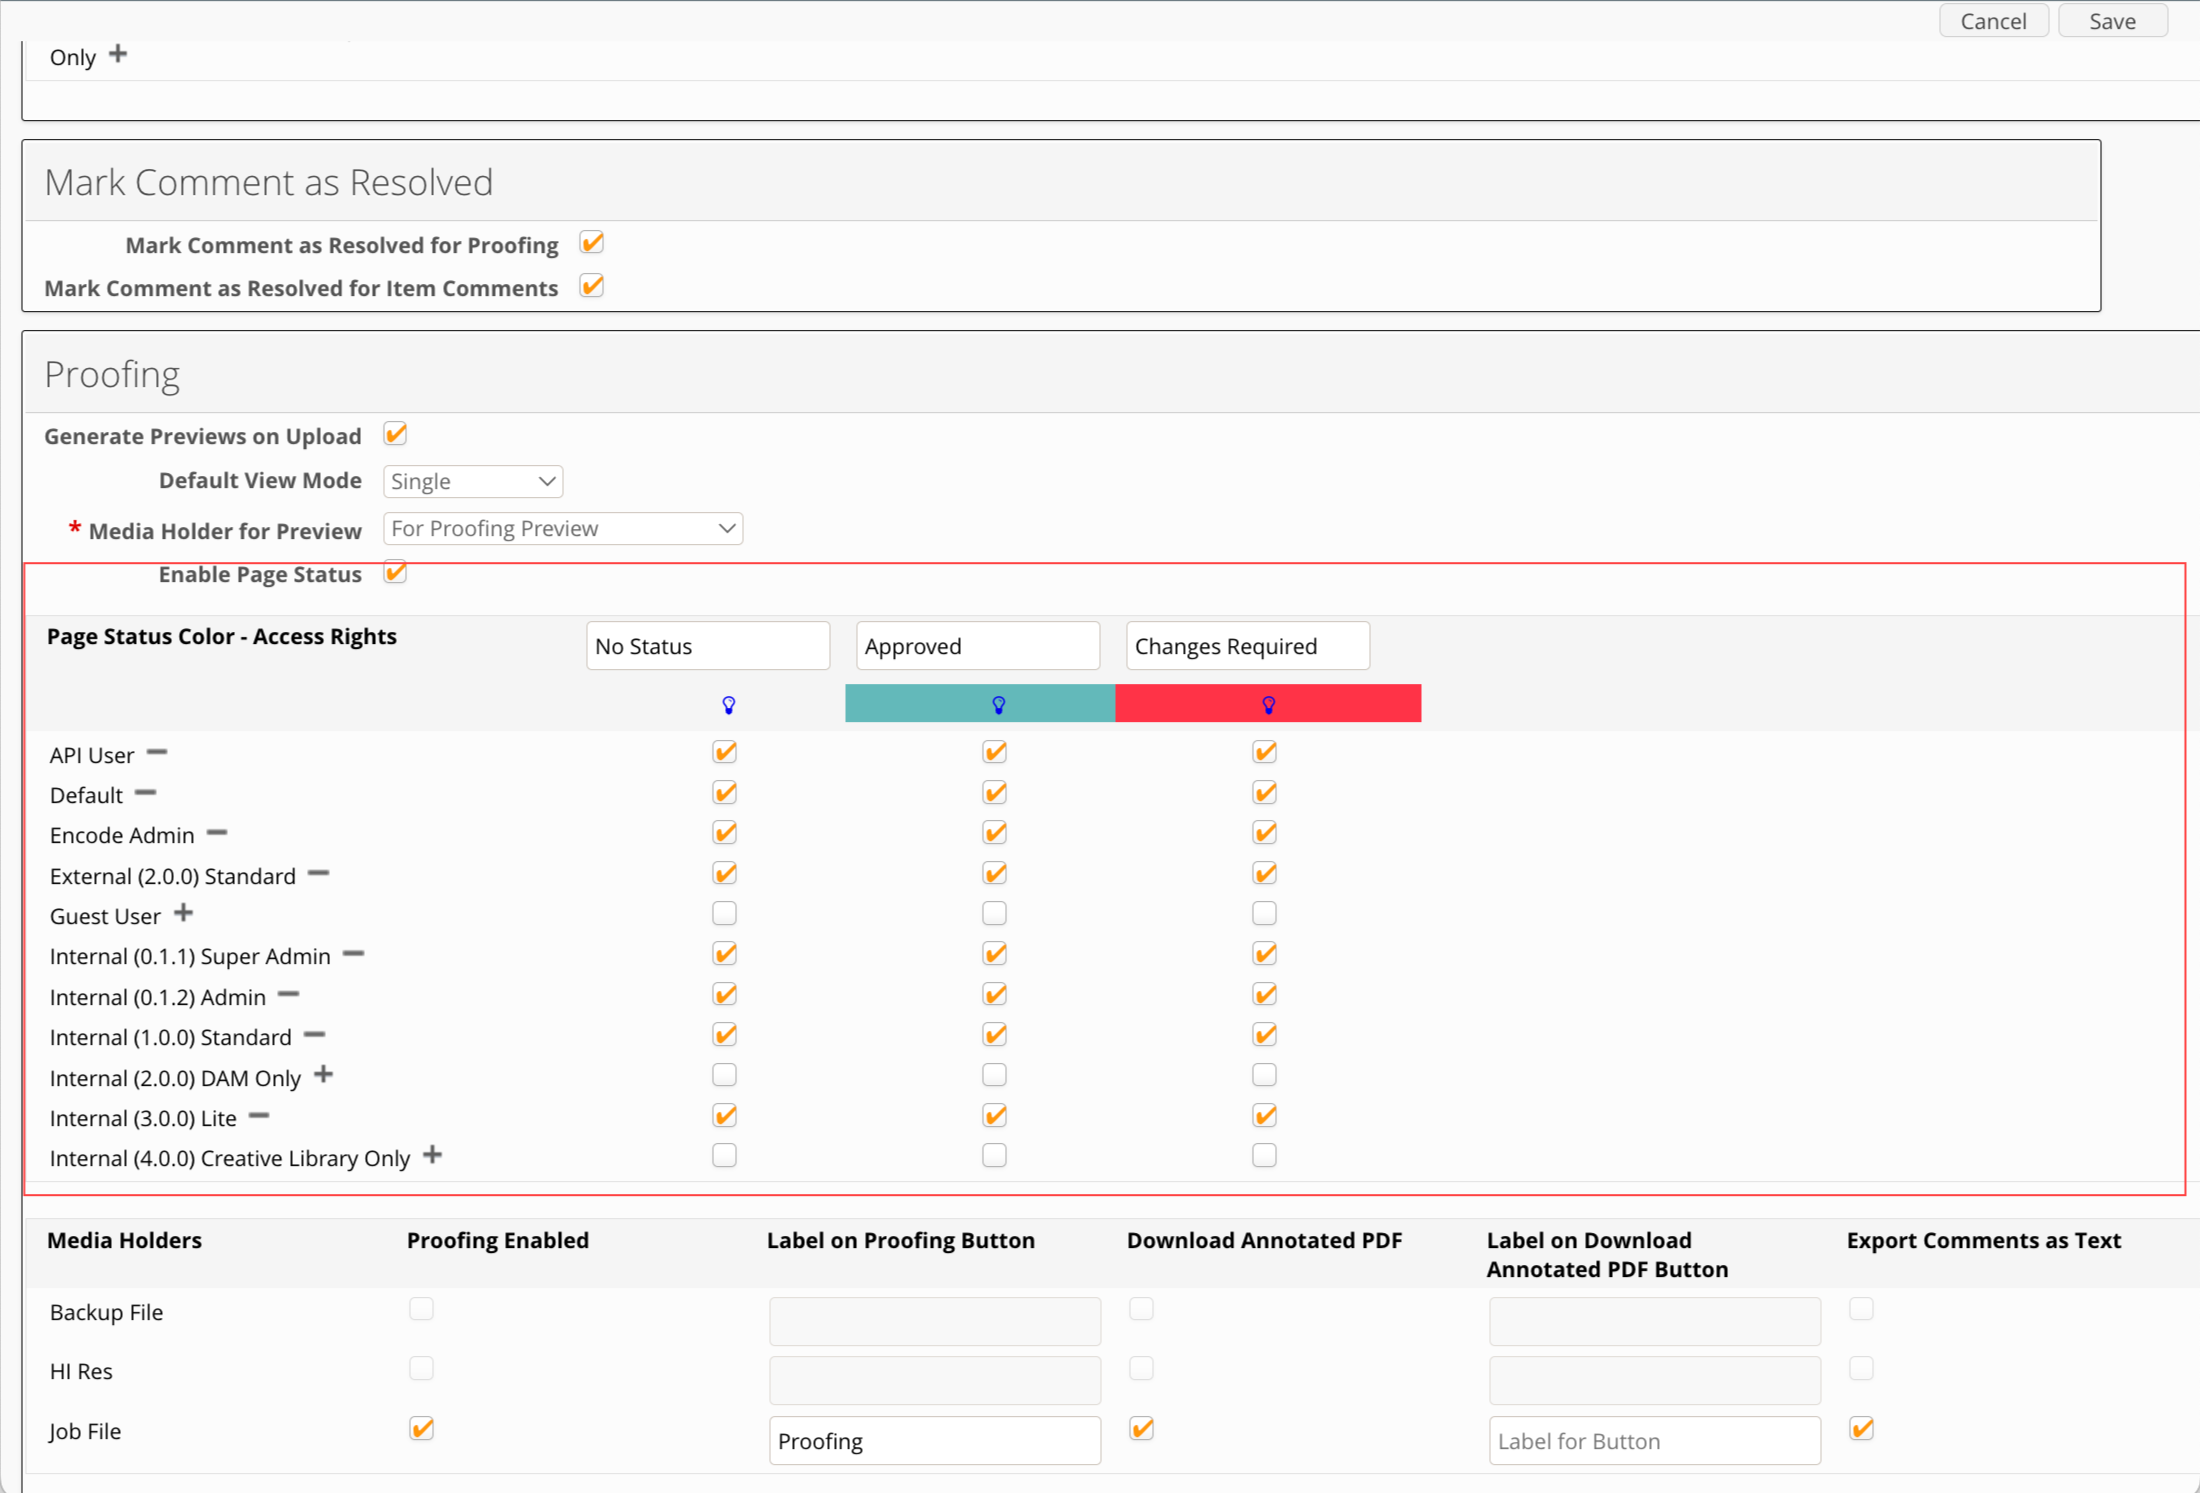
An image of the Proofing and Comments configuration screen highlighting the section to enable page status
How to apply a Page Status
Once configured, the Green Status can be applied to an individual page using the ![]() icon, while the Red Status can be applied using the
icon, while the Red Status can be applied using the ![]() icon. Its possible to assign a status to individual pages from the following locations:
icon. Its possible to assign a status to individual pages from the following locations:
From the action menu on each gallery card within Multiple File Proofing
The
 Thumbnail panel against each page
Directly from the canvas
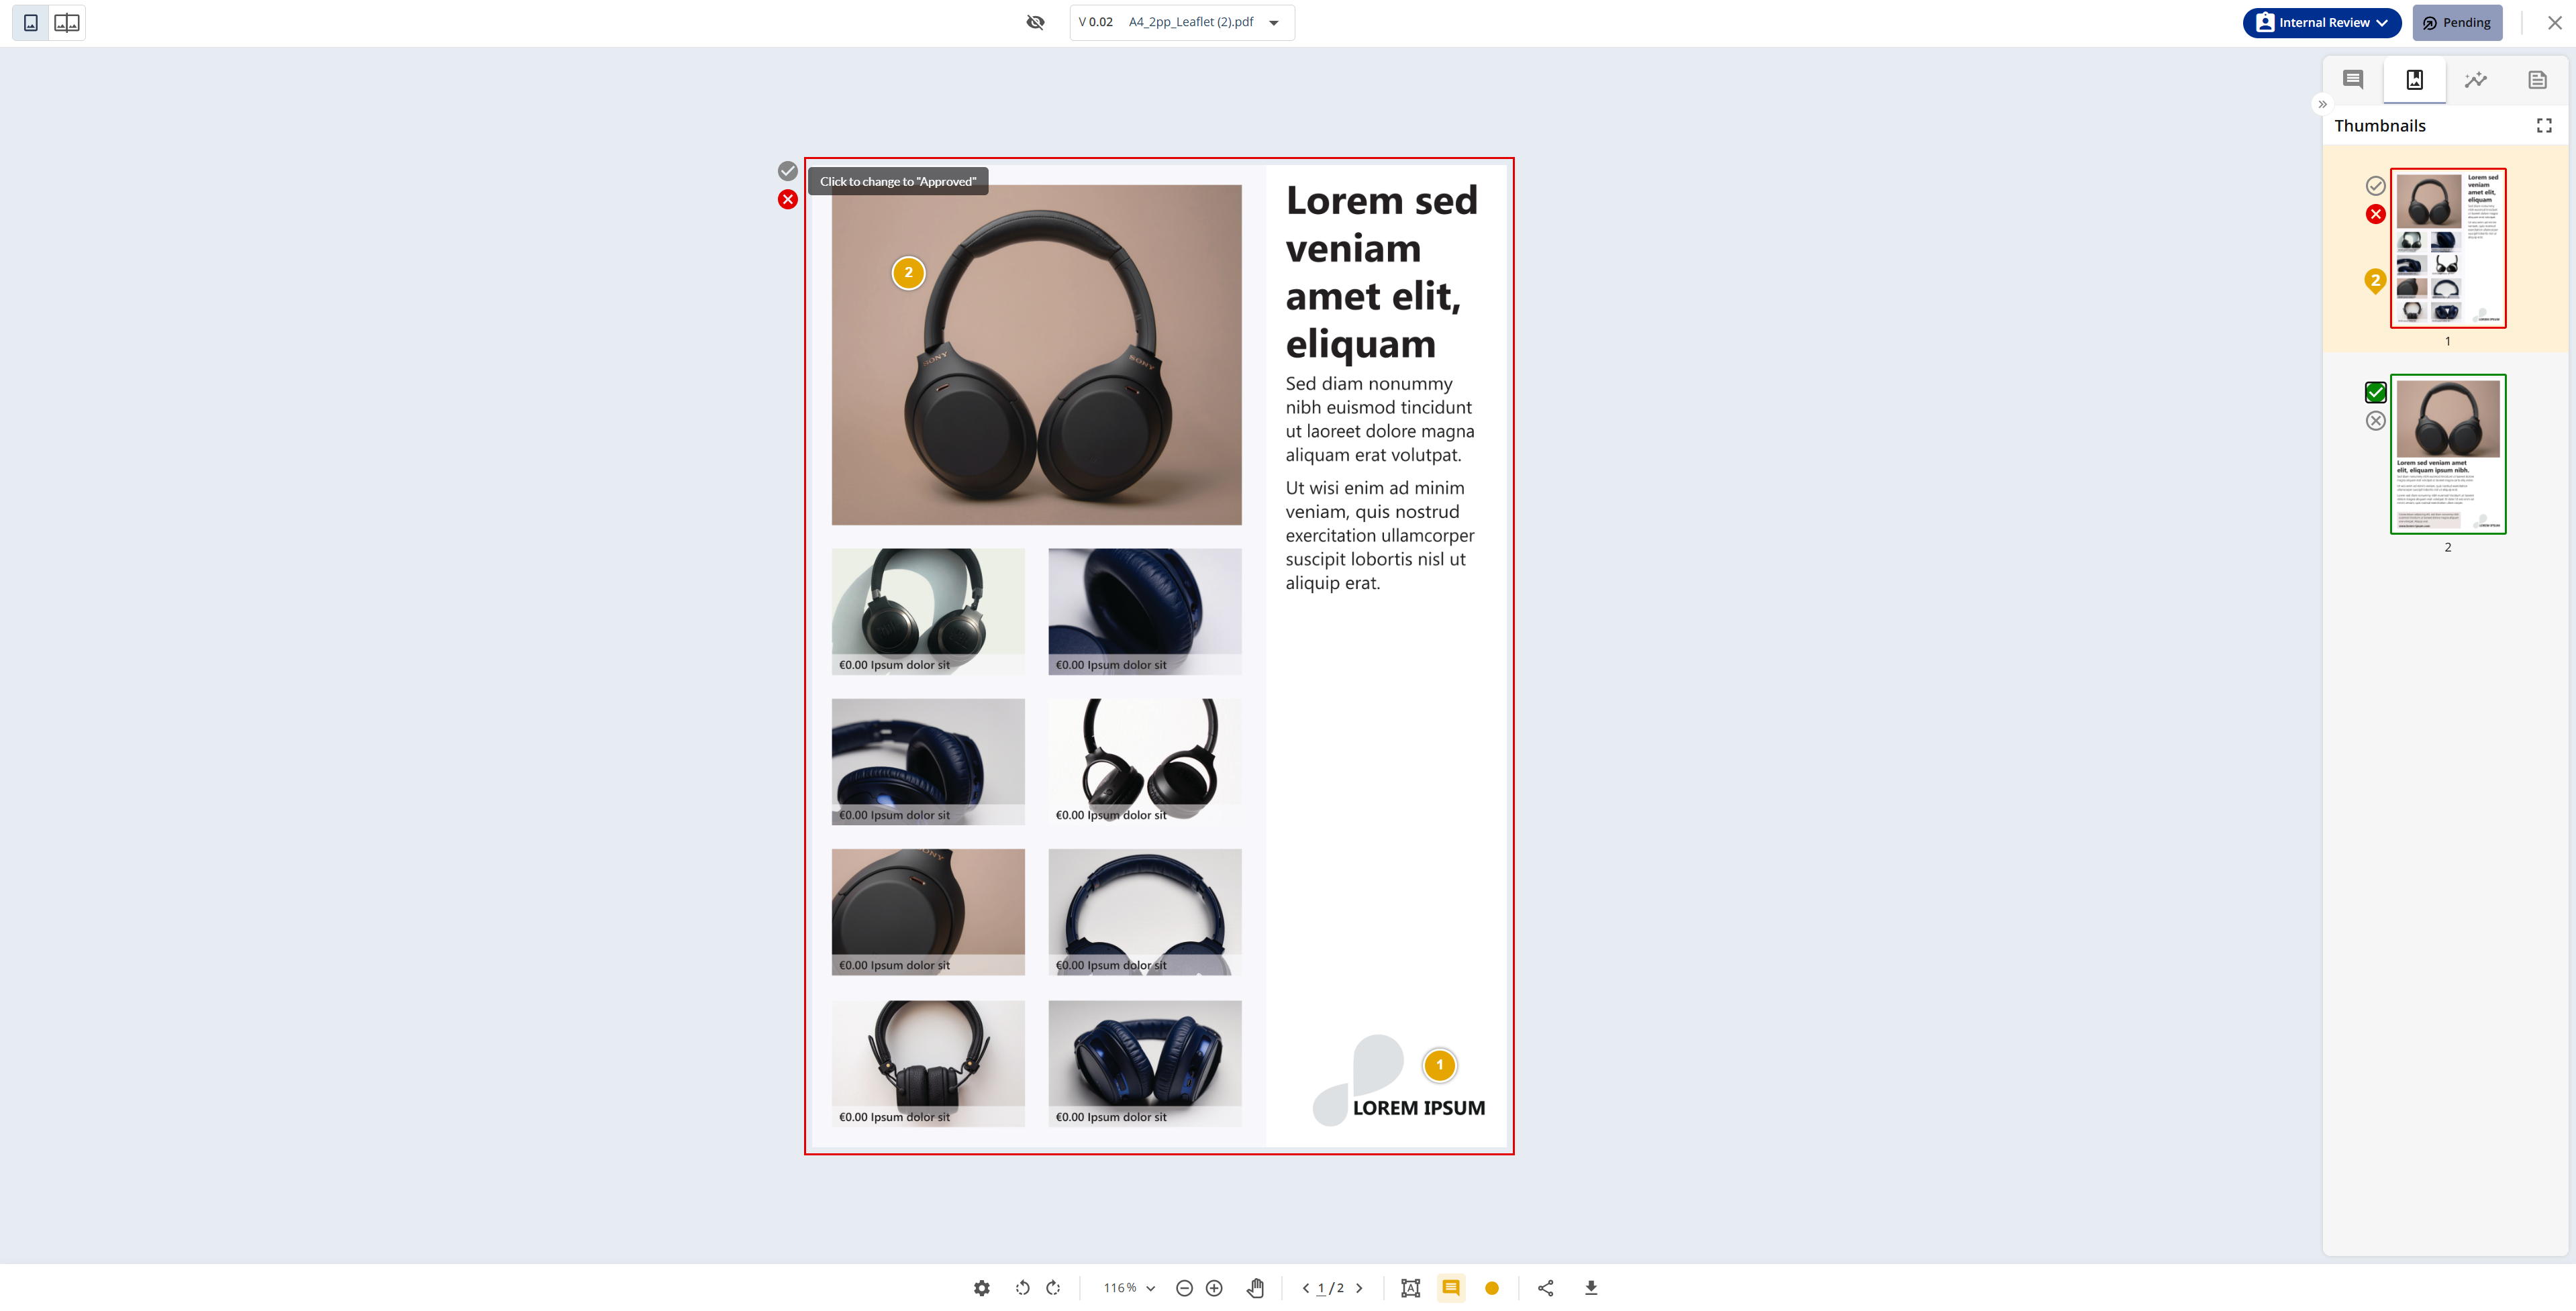
Document proof viewer showcasing the page status functionality
Known limitation:
The status colour icon is partly hidden by default for landscape files in specific resolutions like 1280x800 and 1280x1024
The status colour icon becomes partly hidden on canvas: after zooming in double page layout;