It is possible for the admin user to enable Rich Text Editor in the field definition settings of the Text Box fields.
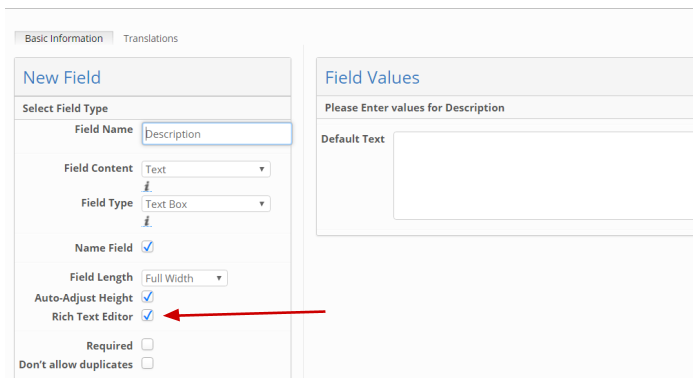
When enabled, the Rich Text Editor control panel is displayed when editing the field in Add/Edit item window, so users can apply styling to the text according to their needs. After saving, formatted text is shown in all places where the field with rich text is displayed (including dashboard widgets).
Formatting tools of the text editor are listed below:
Icon | Name | Description |
|---|---|---|
| Source | Switch to plain HTML view, where you can directly edit the markup |
| Bold | Applies bold format to selected text |
| Italic | Applies italic format to selected text |
| Underline | Applies underline format to selected text |
| Strikethrough | Applies strikethrough format to selected text |
| Subscript | Make text Subscript |
| Superscript | Make text Superscript |
| Remove Format | Removes the custom formatting applied to the selected text. Can be useful if you paste already formatted text from the web-page or Word document and want to restyle it |
| Block Quote | Appy special styling that allows highlighting the text block as quotation |
| Align Left, Center, Right, Justify | Align the paragraph according to the selected method |
| Text direction | Normally used direction from left to right. When selecting the opposite direction, the typed text will appear to the left of the cursor |
| Insert/Remove Numbered List |
|
| Insert/Remove Bulleted List |
|
| Increase Indent | Text with indent |
| Decrease Indent | Text without indent |
| Link | Adds a hyperlink to an external resource. In the opened "Link"-window you can choose a link type (URL or Email) and define how it should be opened (same window, popup etc.) |
| Unlink | Removes a hyperlink from the text |
| Image | Allows inserting an image by specifying the link to it. You can use a link to the item’s preview image from Module. In opened "Image Properties"-window you can either adjust the picture size, alignment, and text wrapping, border, indents etc. |
| Insert Horizontal Line | Does exactly what it is supposed to:) |
| Insert Special Characters | Allows to select from various additional symbols that cannot be directly entered from the keyboard |
| Formatting Styles | Three predefined Header styles are available + one Normal text style |
| Text Color | Allows to chose the color of highlighted text via the colorpicker |
| Background Color | Allows to chose the color of highlighted text background via the colorpicker |
| Insert Table | Alows to insert a table with custom number of columns and rows (from 1x1 to 10x10) |
| Column | Tools for the actions with columns:
|
| Row | Tools for the actions with rows:
|
| Merge Cells |
|
| Table Properties | Allows to apply formatting to the table:
|
| Cell Properties | Allows to apply formatting to the selected cells:
|
| Select All | Allows to select all the content inside the editor (the same as the 'Ctrl+A' combination does) |


Note! If you simply copy and paste text into the editor window, its main formatting will be perfectly kept, including the hyperlinks, bullets, style and even images.
Rich Text Editor is not available for users without “Edit in Edit” access to the field (“Edit in Edit Custom” in Briefing), though they will see the read-only text with formatting applied.
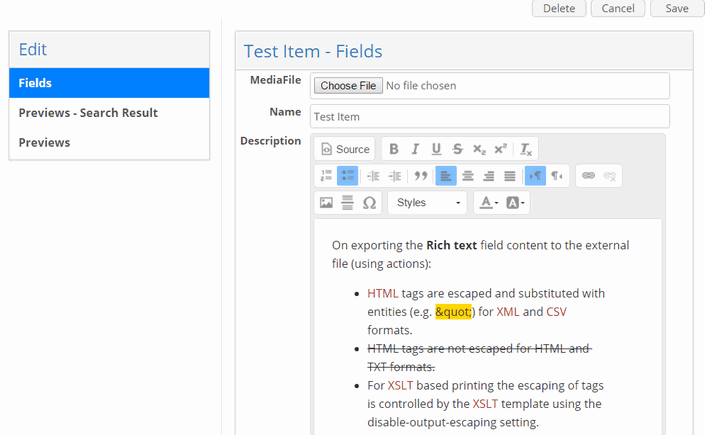
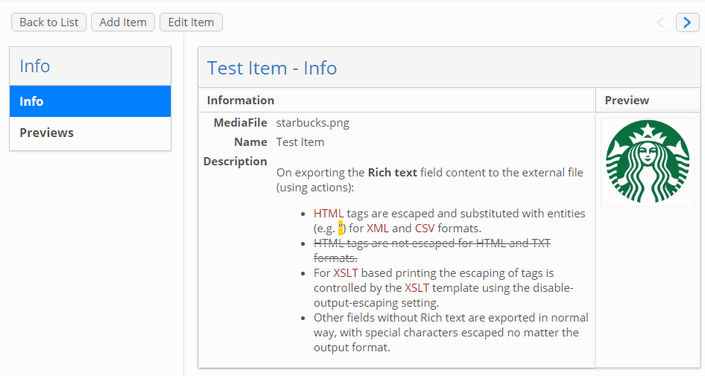
On exporting the Rich text field content to the external file (using actions):
HTML tags are escaped and substituted with entities (e.g. ") for XML and CSV formats.
HTML tags are not escaped for HTML and TXT formats.
For XSLT based printing the escaping of tags is controlled by the XSLT template using the disable-output-escaping setting.
Other fields without Rich text are exported in the normal way, with special characters escaped no matter the output format.
Custom CSS files for additional styling must be placed in the following directory:
On production:
{ApplicationDir}/css/custom/commonOn test server:
{ApplicationDir}/webapp/src/main/webapp/css/custom/common
It is possible to have several CSS files. After that custom styles will appear in the Style dropdown list of the Rich Text Editor and can be applied.
In order to have styles applied in exported PDF or HTML they must be linked in the section of the template used for exporting. For example:
<!— Link basic styles included into the delivering package —>
<link rel="stylesheet" href="https://qa.test.com/qa/css/rte.css" type="text/css"/>

<!— Link custom styles configured by the system admin —>
<link rel="stylesheet" href="https://qa.test.com/qa/css/custom/common/test.css" type="text/css“/>
Limitations for field with “Rich Text Editor” enabled
Searching by field with Rich text is not fully functional since there are underlying HTML tags which are respected by search engine but not visible by user.
Sorting is not available.
HTML tags are escaped in AdBuilder printed PDF (also including AdBuilder based Legacy Print).
Text Truncation functionality is not available (because of the risks of truncating the tags that will break the layout).
Automatic Field Content (autofilling) is not available.
If styles with identical names are present in custom CSS files, only the first style found is respected.
For the existing field which already contains the text with line breaks, the line brakes will not be rendered in the field due to HTML peculiarities. However line brakes will still be kept in DB until the field is re-saved, On re-saving, the field the line breaks will be lost.
AI Assistant for rich text editor fields
Rich text editor has an AI Assistant implemented to help you create and refine content faster and easier.
The AI Writing Assistant helps create and refine content with less effort. It can write new content from scratch, improve existing text, or summarize long passages into key points. Users can describe what they need in their own words, or select from pre-defined options.
AI Assistant is available across the following locations where rich text editing is available:
Spreadsheet
Form View with Tabs
Wizard Form
Guides & Announcements
Help Messages
Text Widget config
Adbuilder rich text editor fields
Access AI Assitant commands
Highlight the text you want to modify or place your cursor before, inside or after the text block.
Click the AI Commands
 icon in the toolbar.
From the dropdown, select one of the following categories:
Make It Sound
Improve It
Change It
Translate to
Each category opens additional list of commands that can be found in the table below
Category | Option and it’s short description |
|---|---|
Make It Sound (use this group to change the tone or style of your writing.) |
|
Improve It (use this group to enhance quality and correctness.) |
|
Change It (Use this group to modify the length or level of detail.) |
|
Translate to (Use this group to translate your text into another language.) | Supported languages include:
|

An image showing AI Commands in Rich Text Editor
Access AI Assistant
Select any AI custom command and click on it OR click the AI Assistant icon
 in the toolbar
A modal titled AI Assistant will appear.
(Note: AI Assistant modal opened after selecting command will contain already adjusted text based on specific AI command)
In the AI Assistant modal, enter a prompt or request in the text field labeled “Ask AI to improve generated text” or select already used request in “Prompt History” dropdown
(Note: in order to transform existing text it should be highlighted in Rich Text Editor first)
Press Enter or click the arrow button to submit.
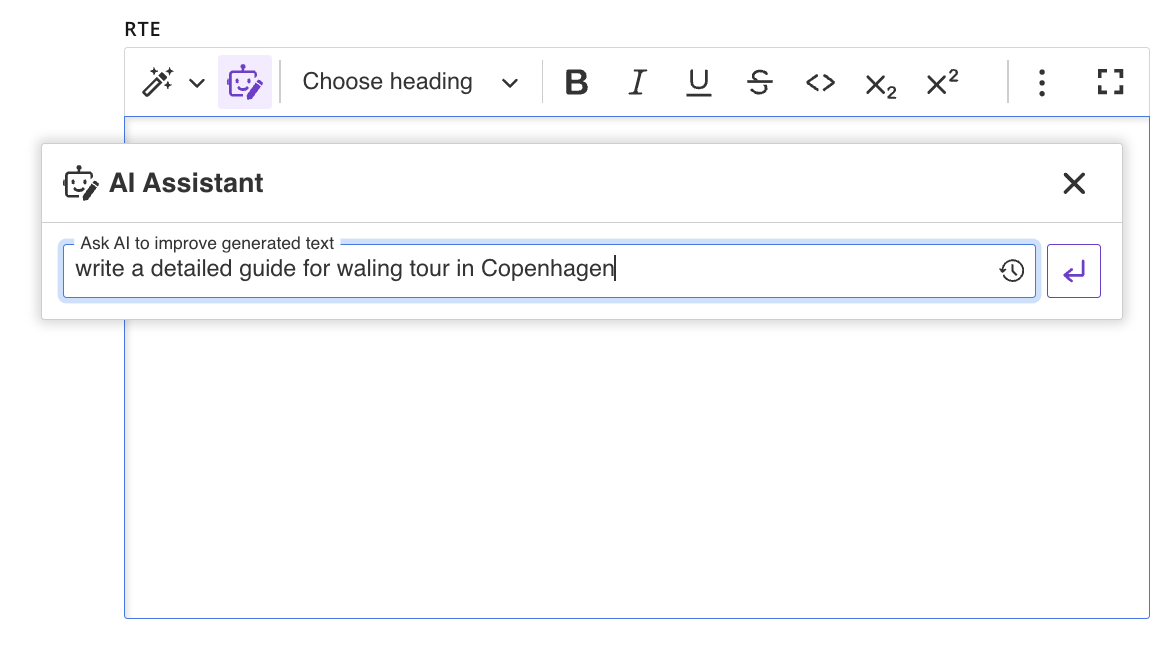
AI Assistant pop-up before text generation
The AI Assistant will generate text in the display area above the input field.
After reviewing, choose one of the following options:
Replace – Replaces the existing content in your editor with the AI-generated text.
Insert below – Adds the AI-generated content below your existing text.
Try again – Requests the AI to generate a new alternative.
Stop – Cancels the current AI generation process.
Also generated content can be copied via “Copy” icon.
Formatting will be preserved in generated content.
NOTE: The “AI Assistant” modal window is draggable and can be positioned anywhere on the screen.
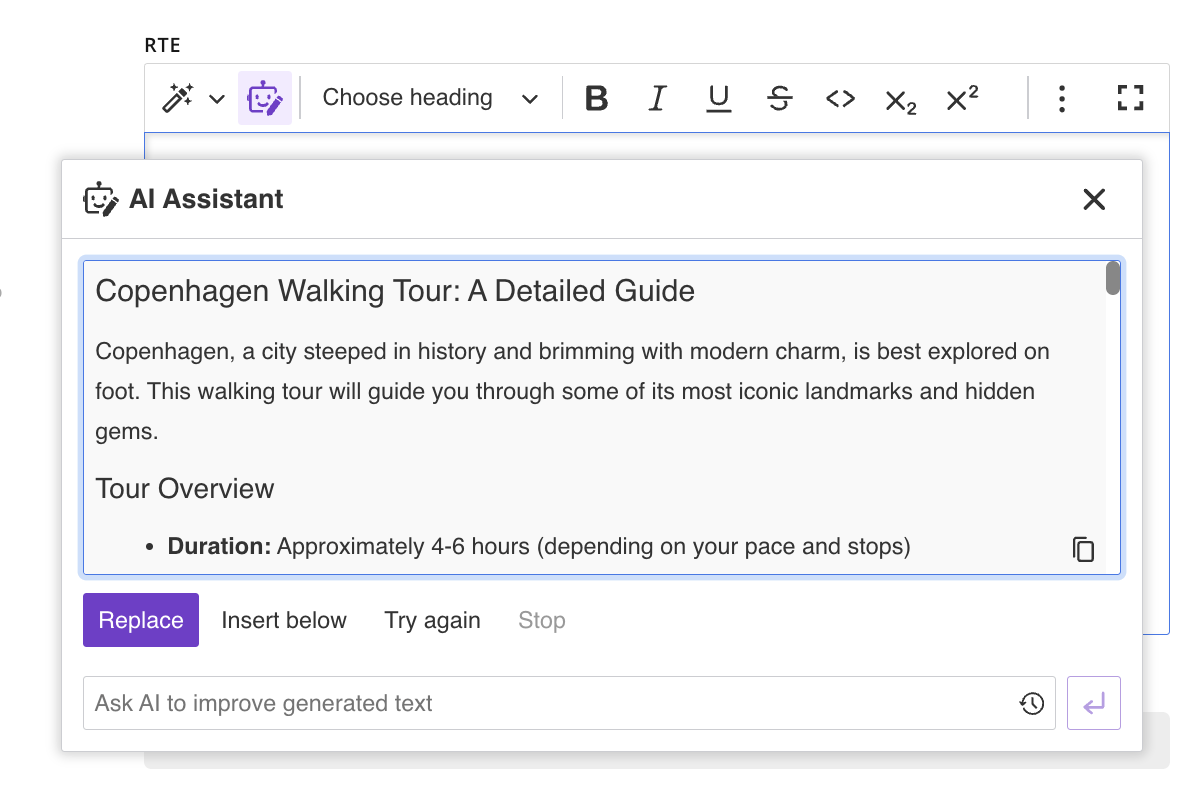
AI Assistant pop-up after text generation
Known limitations:
The AI Assistant will be inactive if the current selection contains one of the following elements: media embed, HTML embed, or table of contents.
“header” tag is not supported for adjusting text - transformed text will always have <p> tag (“paragraph”)