How to configure Review status
When using online proofing, you can enable an additional review feature that allows individually assigned reviewers to make a definitive decision (e.g., Approved or Rejected), enabling parallel approvals alongside traditional workflow processes. Each review process is linked to a specific file version.
To enable the review feature, follow these steps:
Navigate to Site Configuration → Site Configuration → Modules.
Click Create Module.
Set the Type to Module.
Specify a Name for the module (e.g., Client Reviewers).
Select a Template (e.g., Without Media Settings and Audit Fields).
Click OK to confirm the module creation.
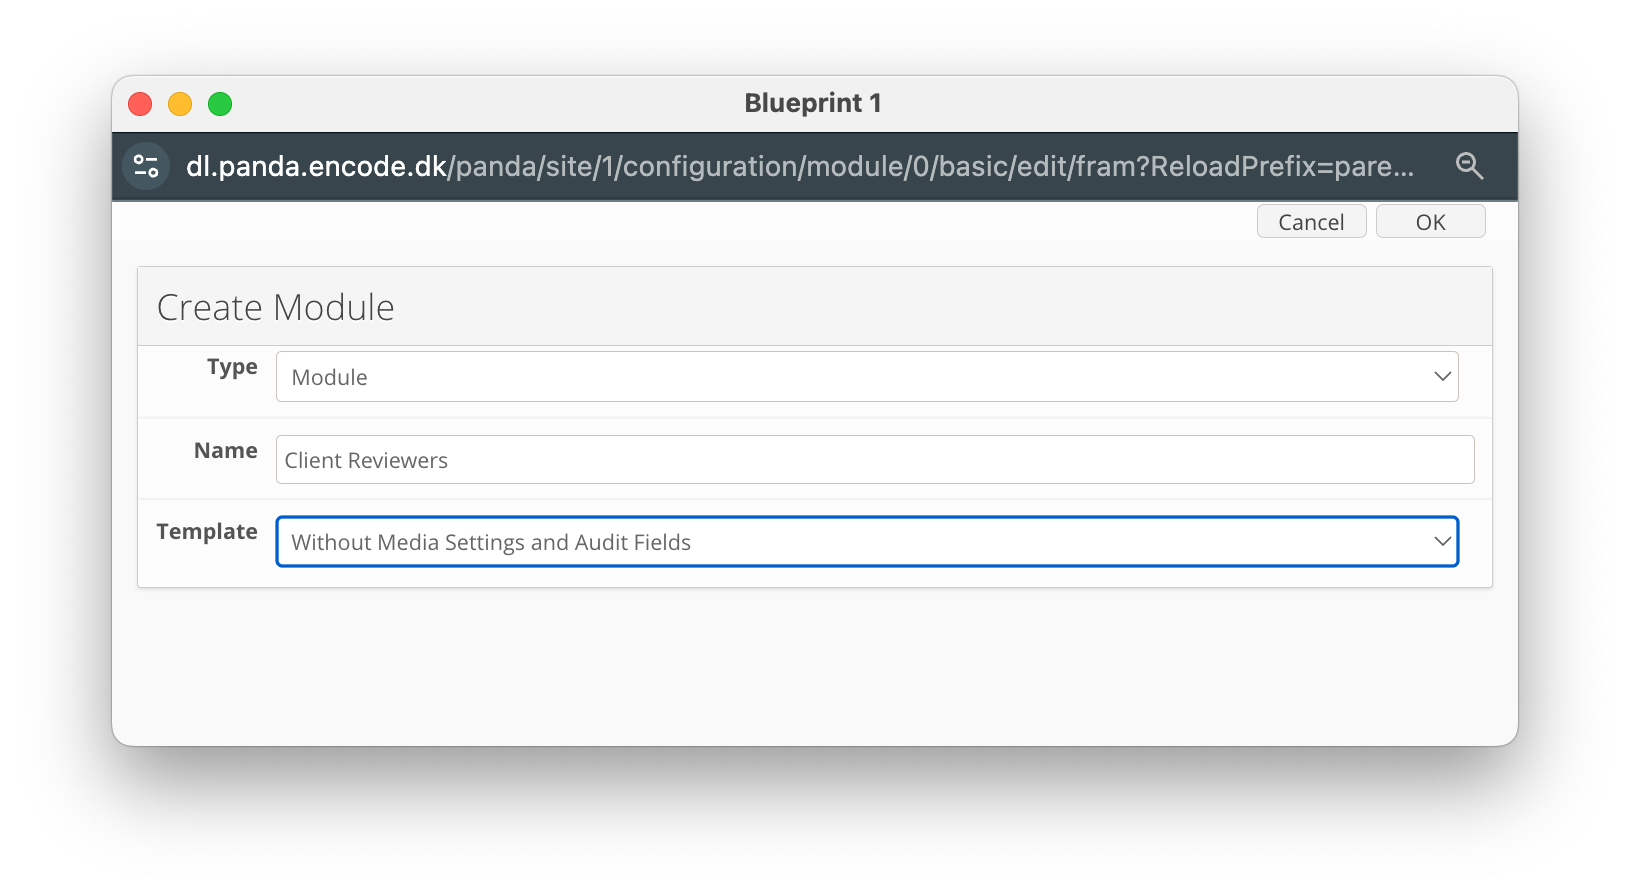
An image highlighting the creation of reviewers module
You will first need to create a status field to define each approval stage (e.g., Pending, Approved, Rejected). Follow these steps:
Navigate to Site Configuration → {Module} → Field Definition.
Click New Field.
Enter a Field Name.
Select Status Field from the Field Type dropdown.
Locate Create, then add each required status value, selecting OK to confirm.
Define whether a specific status value should be pre-selected.
Click OK to create the field
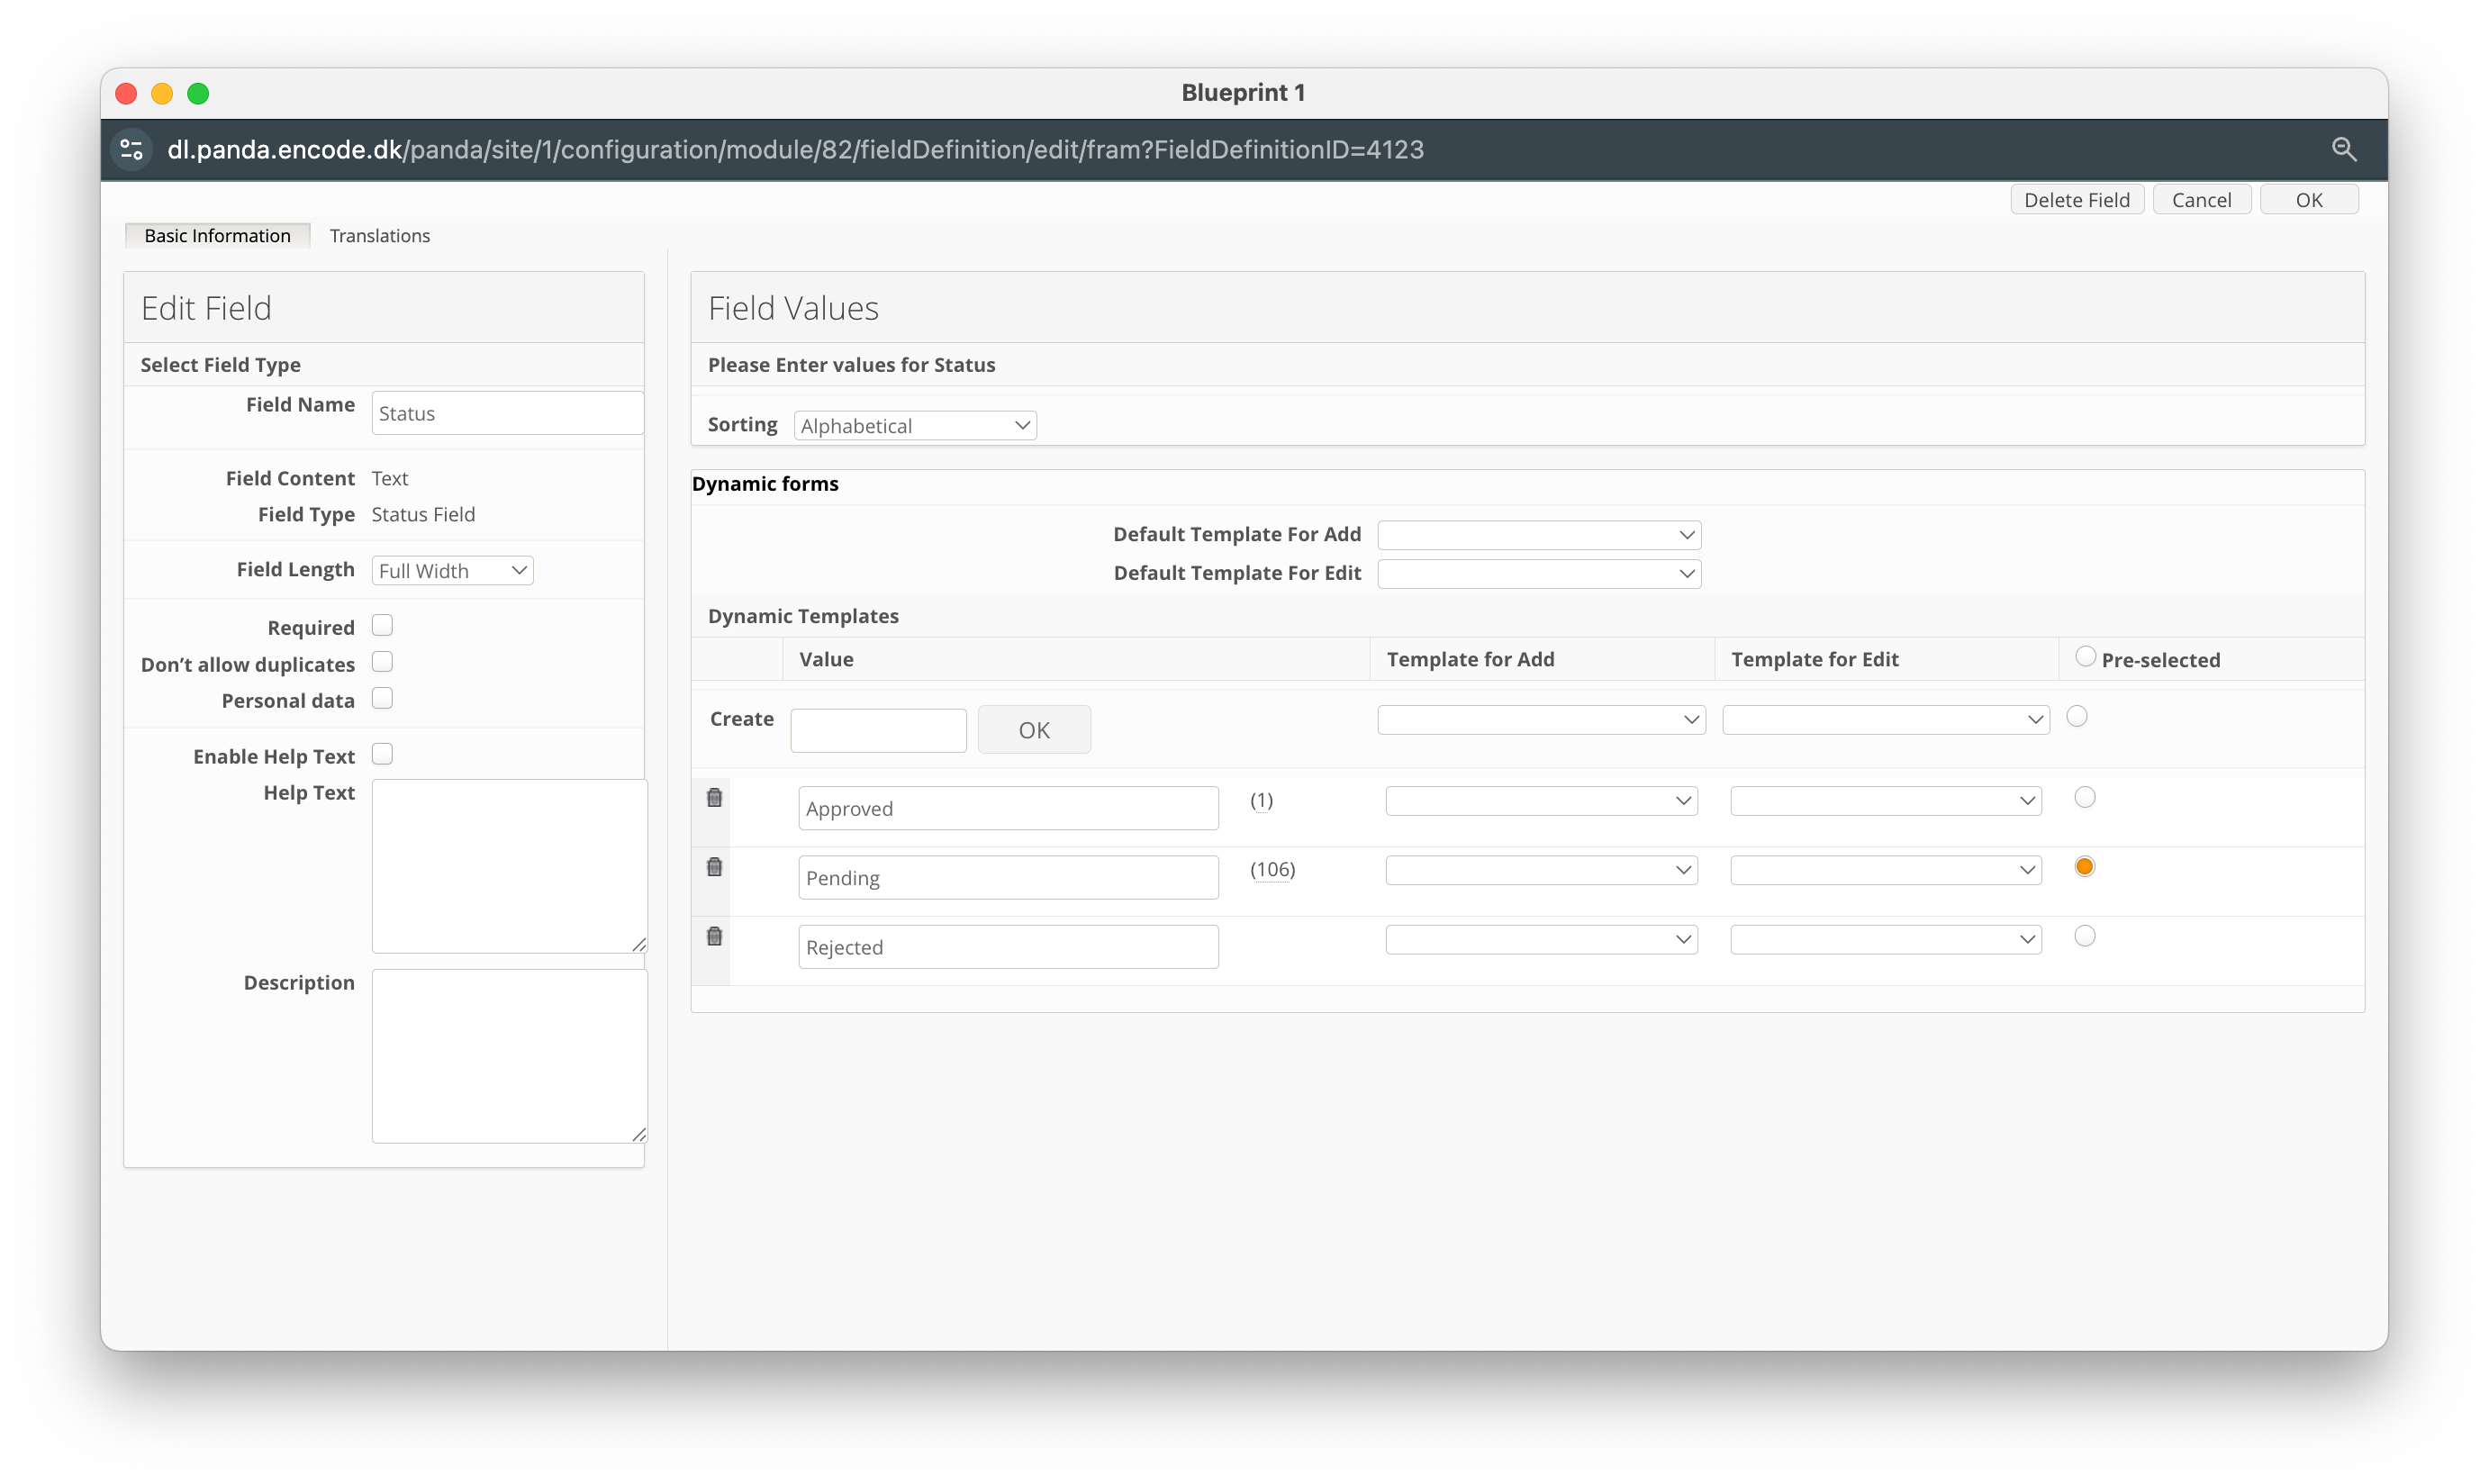
An image highlighting the creation of the status field
Next you will need to create a link to the parent module. Follow these steps:
Click New Field.
Enter a Field Name.
Select Module from the Field Content dropdown.
In the Field Type dropdown, select Selectbox.
Locate the Module field and select the parent module.
Within the Module Field dropdown, select the specific link field.
Click OK to create the field.
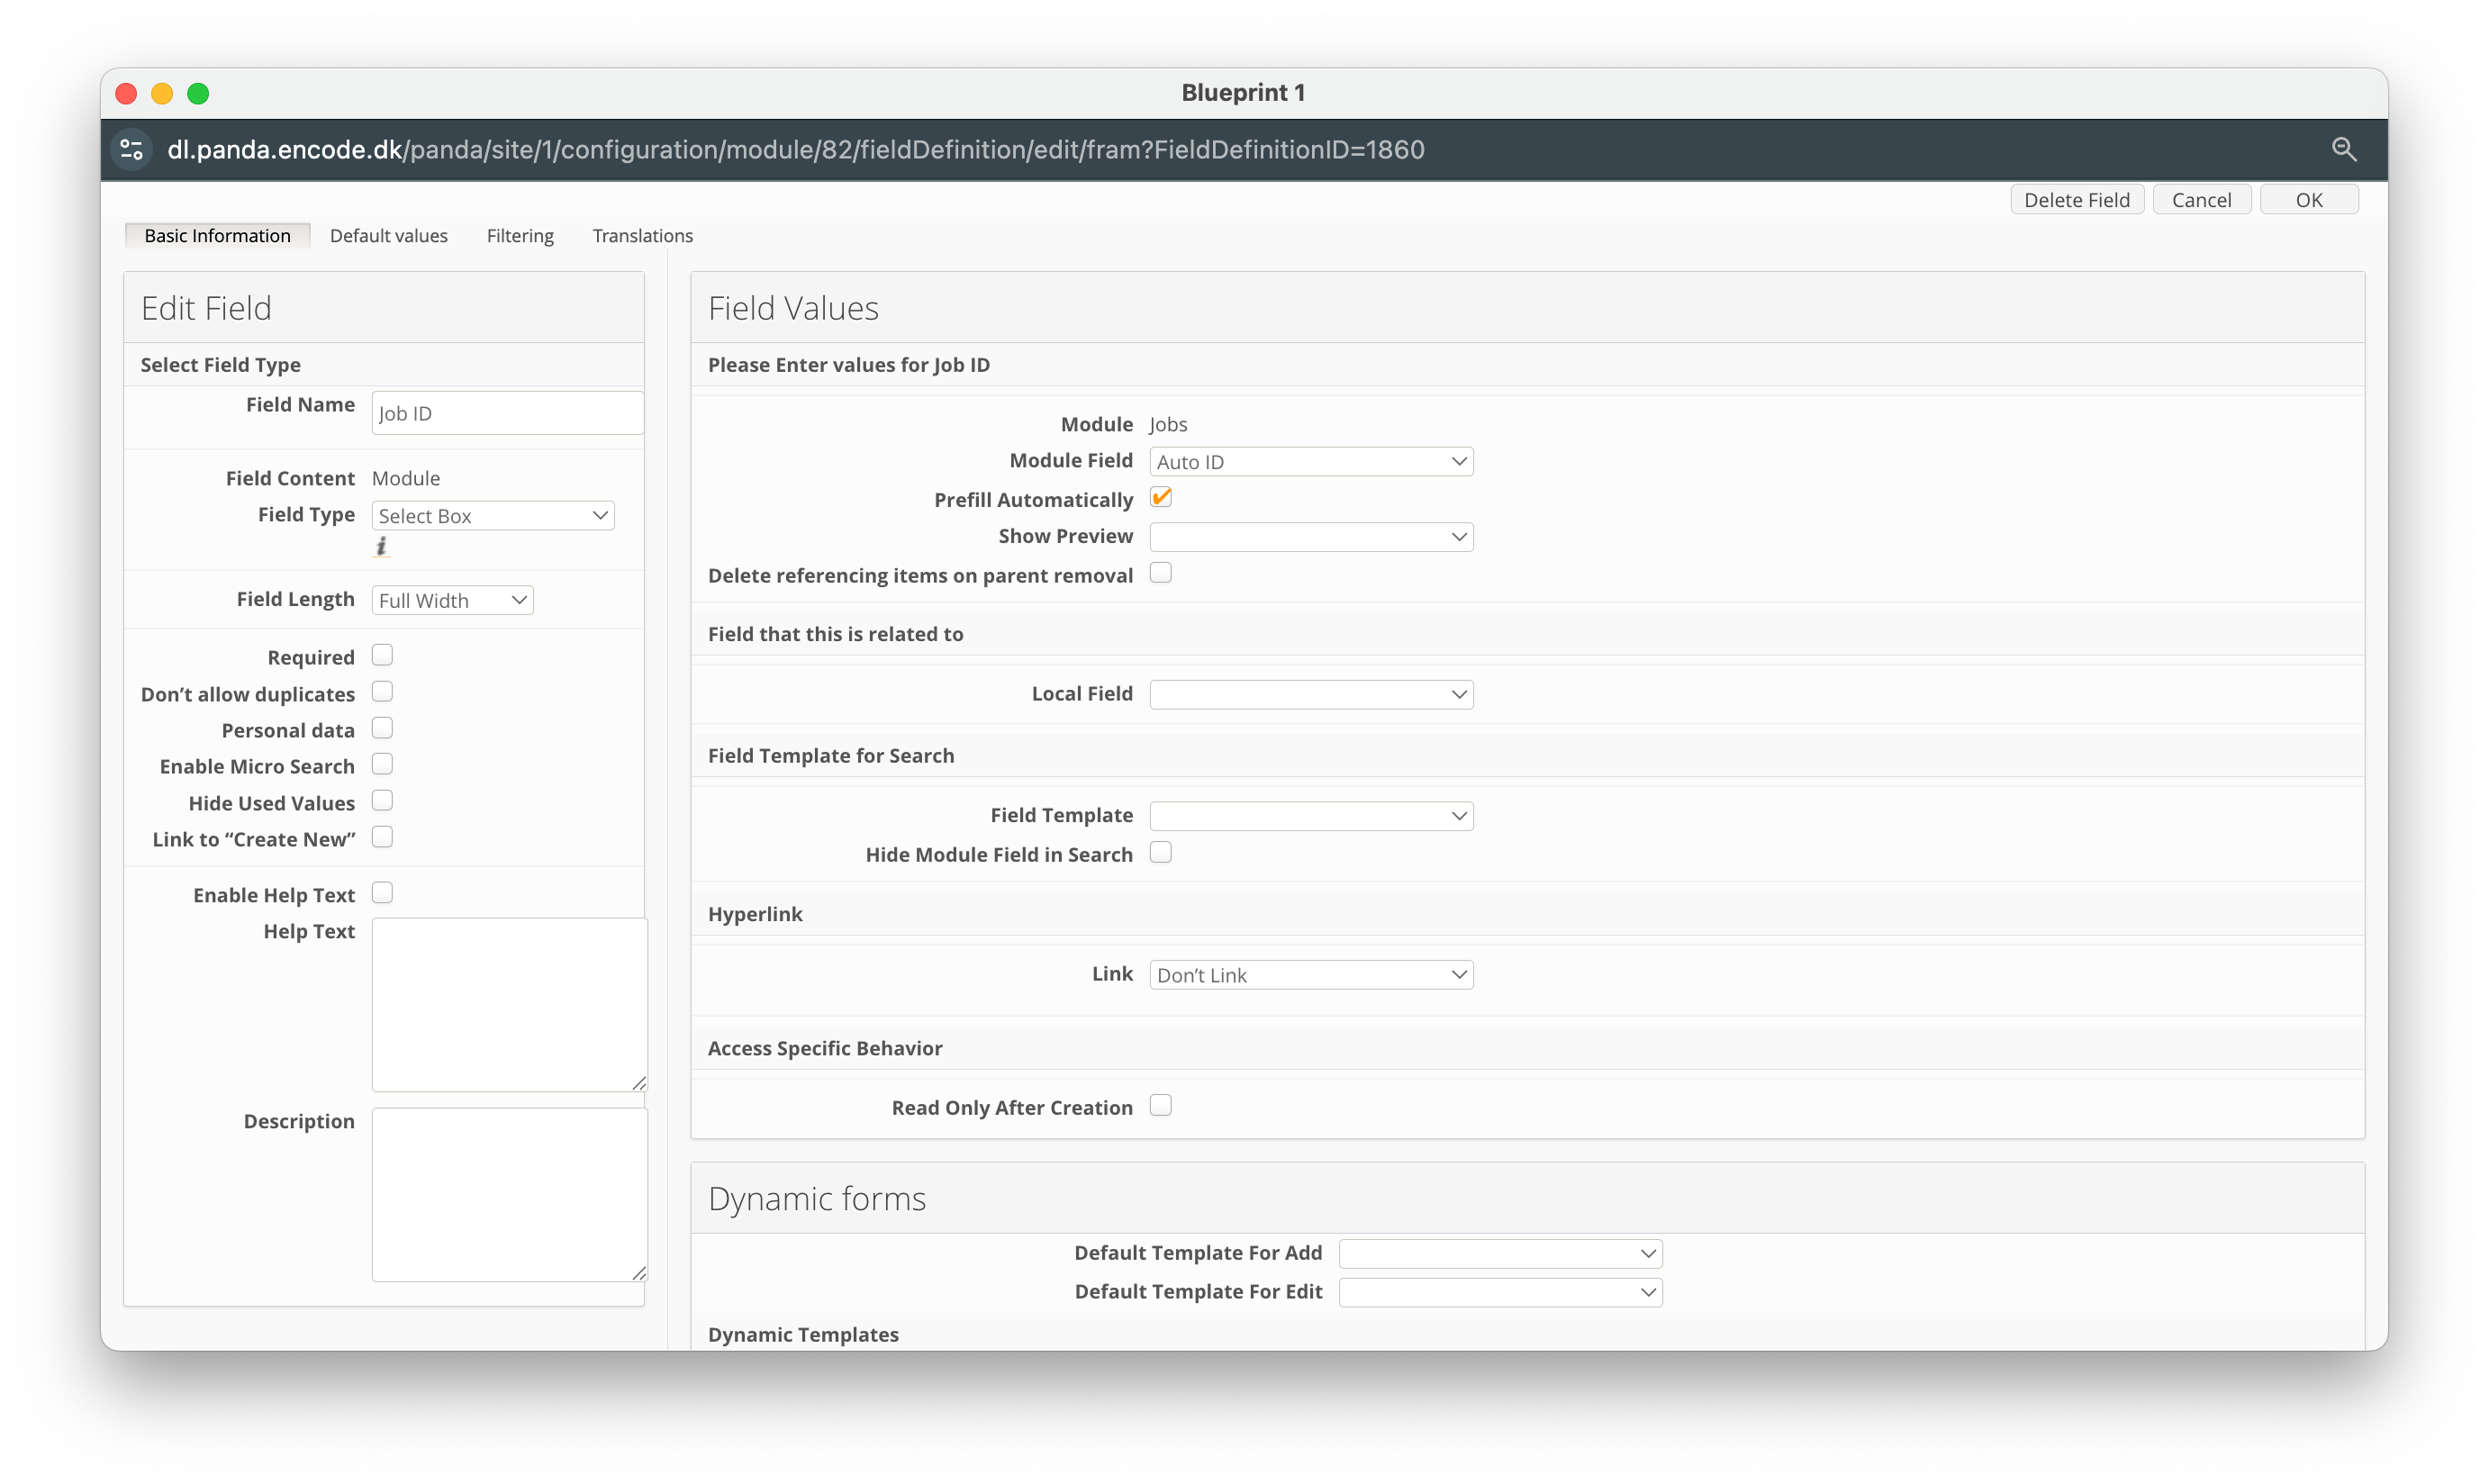
An image highlighting the creation of module link to parent module (e.g. Jobs)
The next step will be to create a module link field to the user management module. Follow these steps:
Click New Field.
Enter a Field Name (e.g., Reviewers).
Select Module from the Field Content dropdown.
In the Field Type dropdown, select Selectbox.
Locate the Module field and select the User Management module.
Within the Module Field dropdown, select the field defining Full Name.
Click OK to create the field.
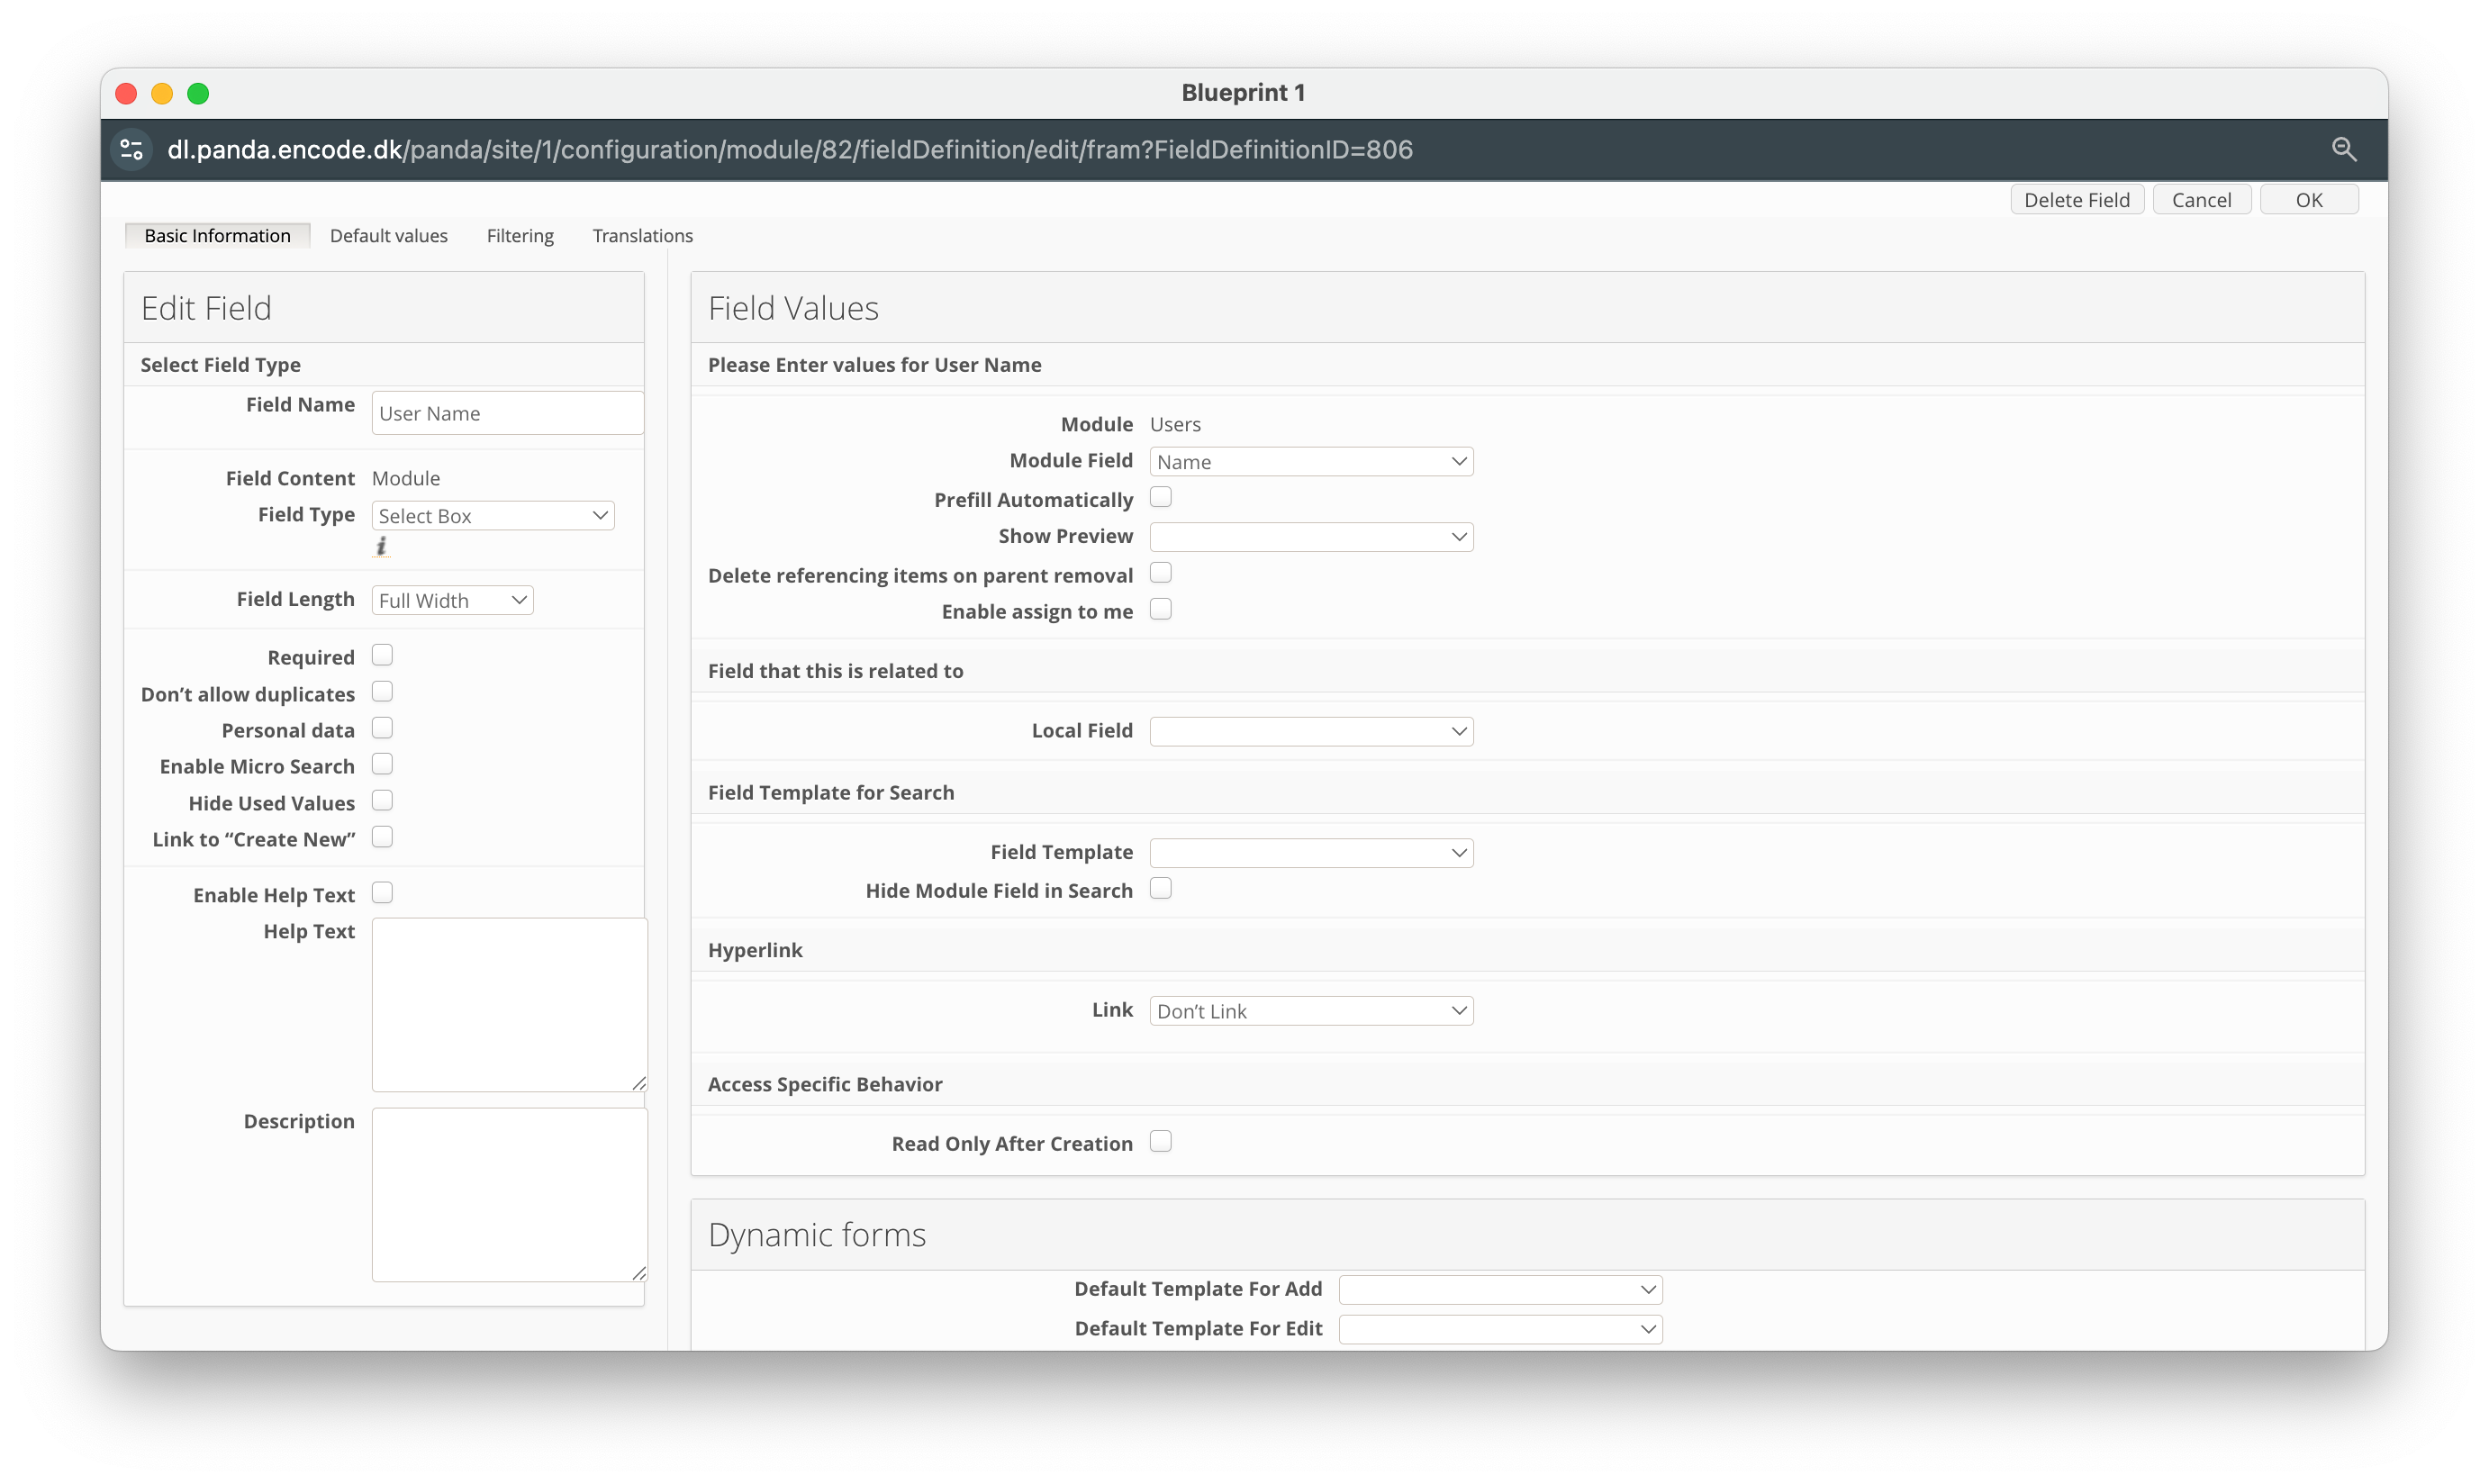
An image highlighting the creation of module link to user management module
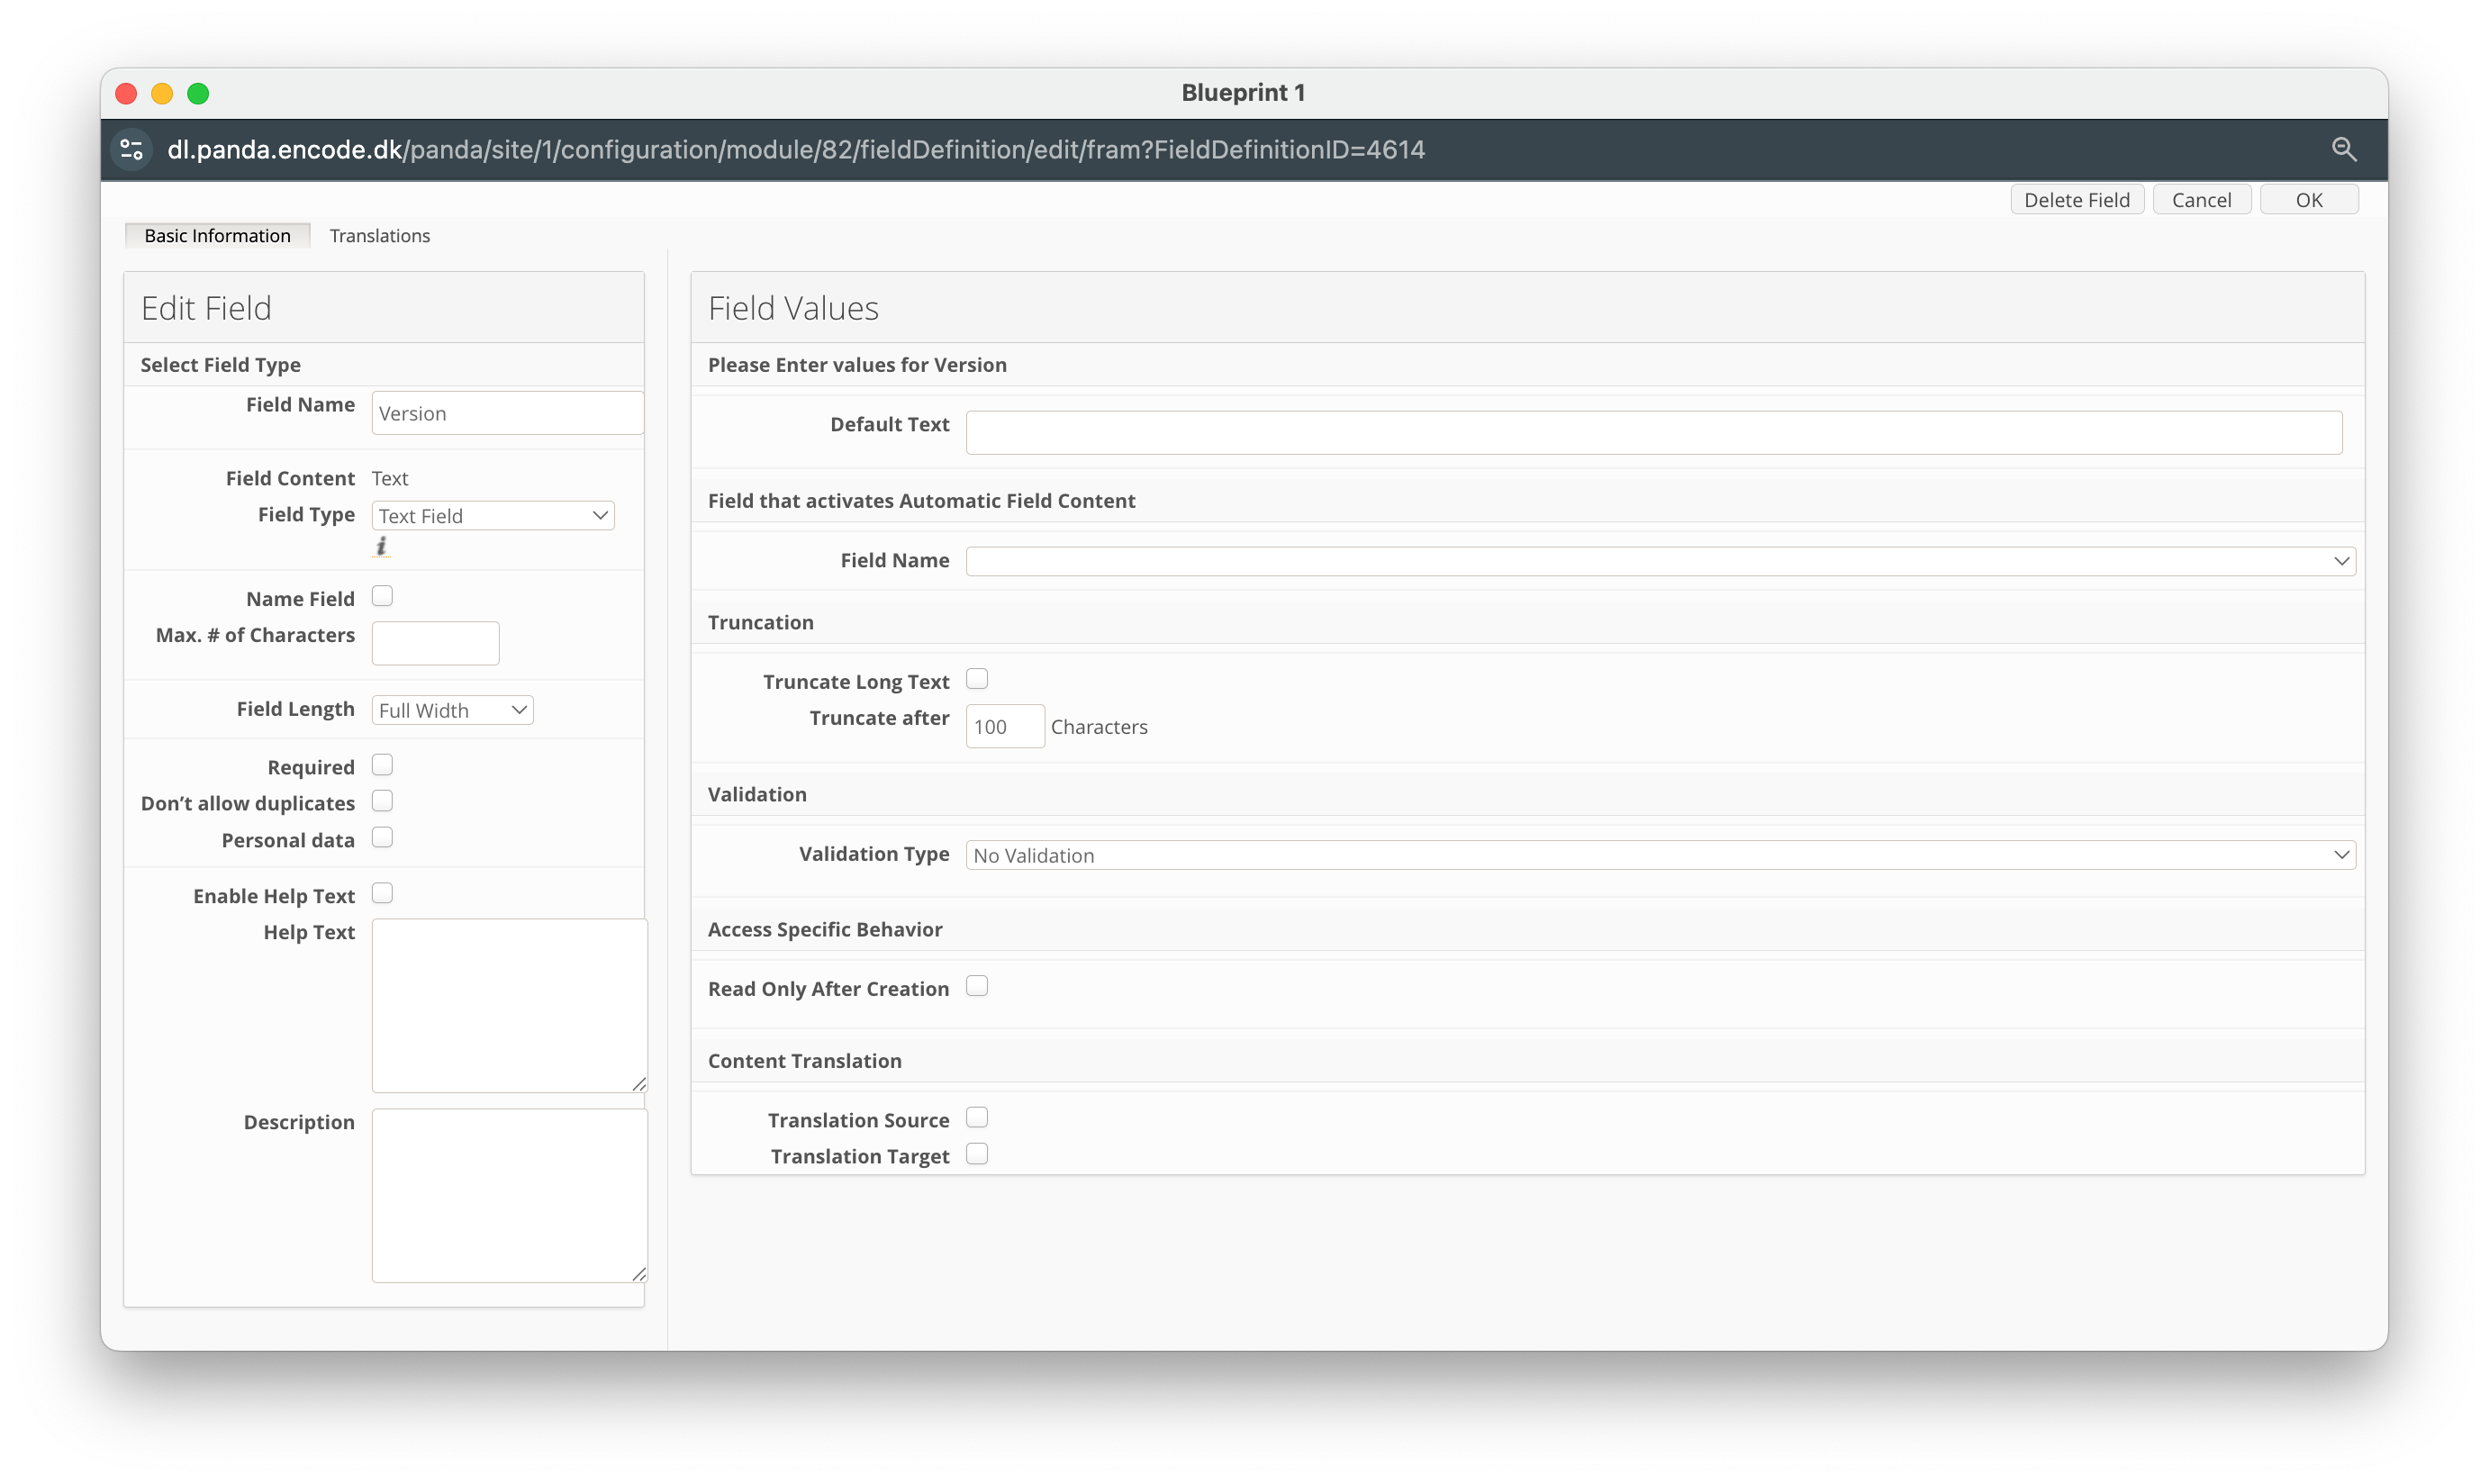
The last field you will need to create is a field to define the versions:
Click New Field.
Enter a Field Name (e.g., Version).
Ensure the Field Type dropdown is set to Text Field.
Click OK to create the field.
An image highlighting the creation of version field
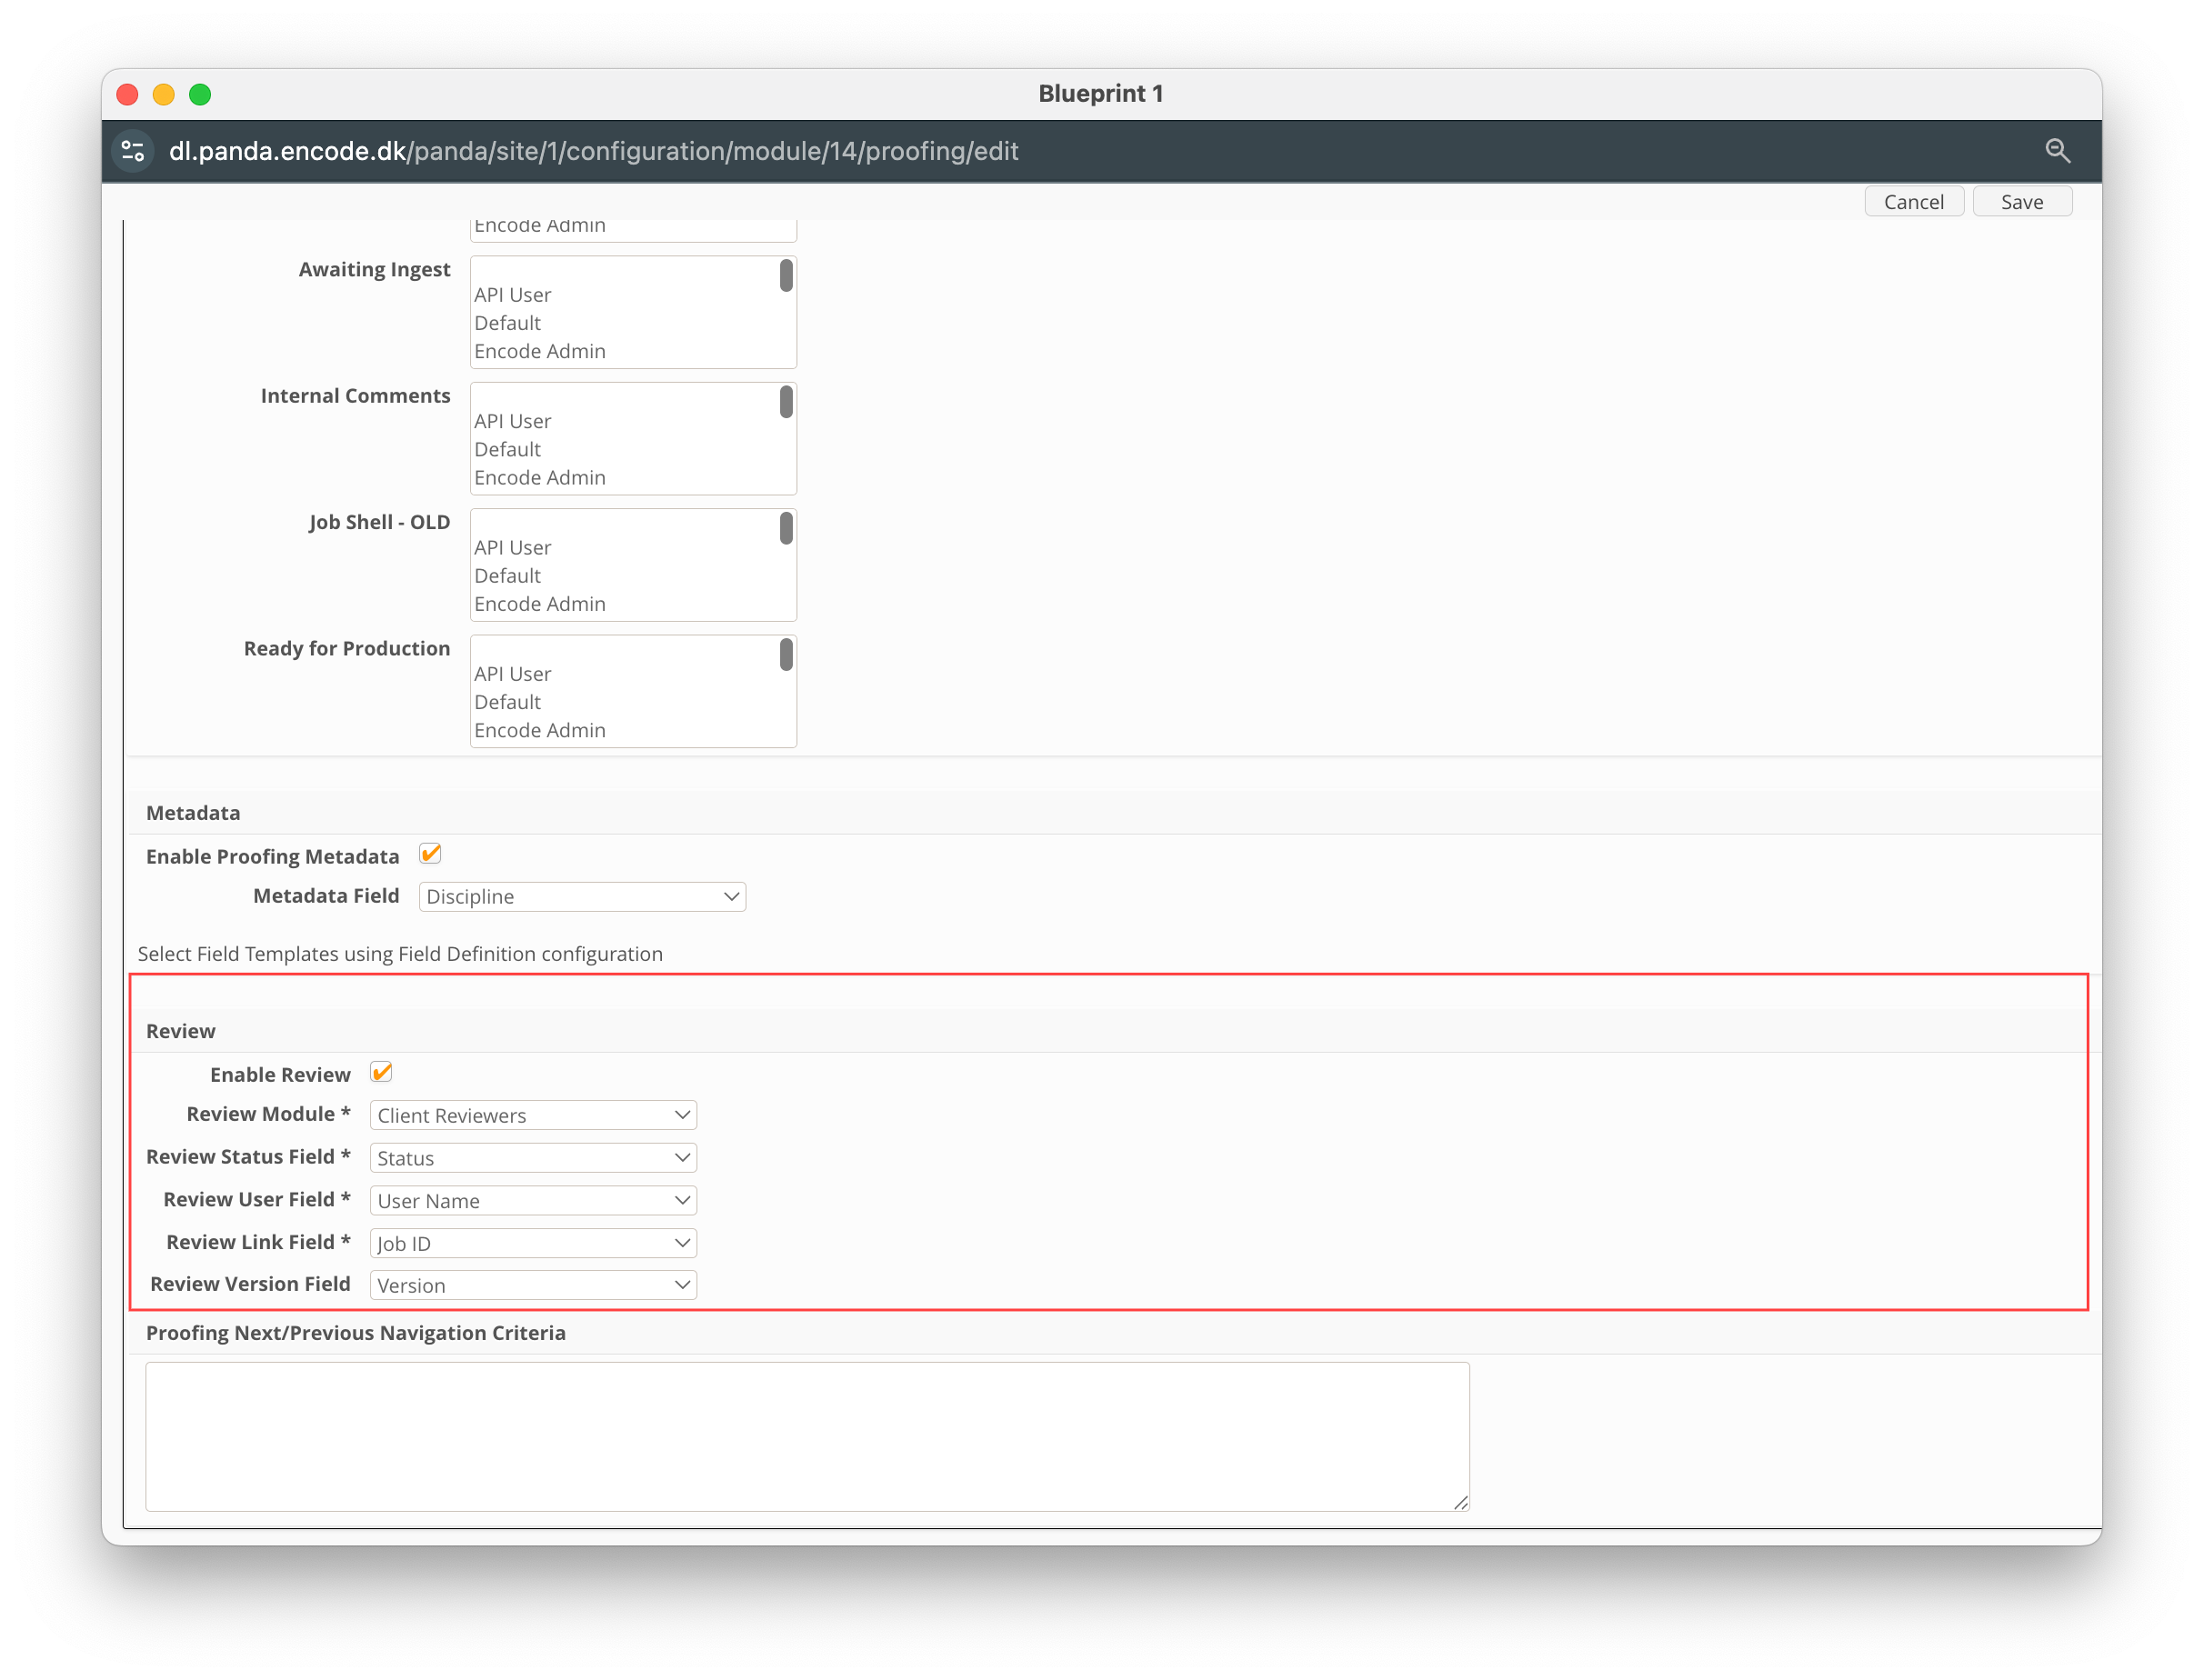
Now you have configured the module and associated fields. The final stage will be to configure the review functionality within proofing settings. Follow these steps:
Navigate to Site Configuration → {Module} → Proofing and Comments.
Click Edit Settings.
Locate the Review section.
Find the option Enable Review and ensure the checkbox is ticked.
Select Review Module
In the Review Status Field, choose the status options that will represent the approval stages (e.g., Pending, Approved, Rejected).
In the User Field, select the module link field to the User Management module, representing the assigned reviewer.
Specify the module link field which connects the inline module to the parent module within the Review Link Field.
In the Review Version Field, select the text field where the file proofing version will be specified. Ensure the version format matches the format defined in the module settings.
Click Save to apply the changes.
An image highlighting the configuration of Review feature
How to add a Reviewer
To initiate a review, create a dedicated item within the review module for each user who needs to make a decision for that specific version.
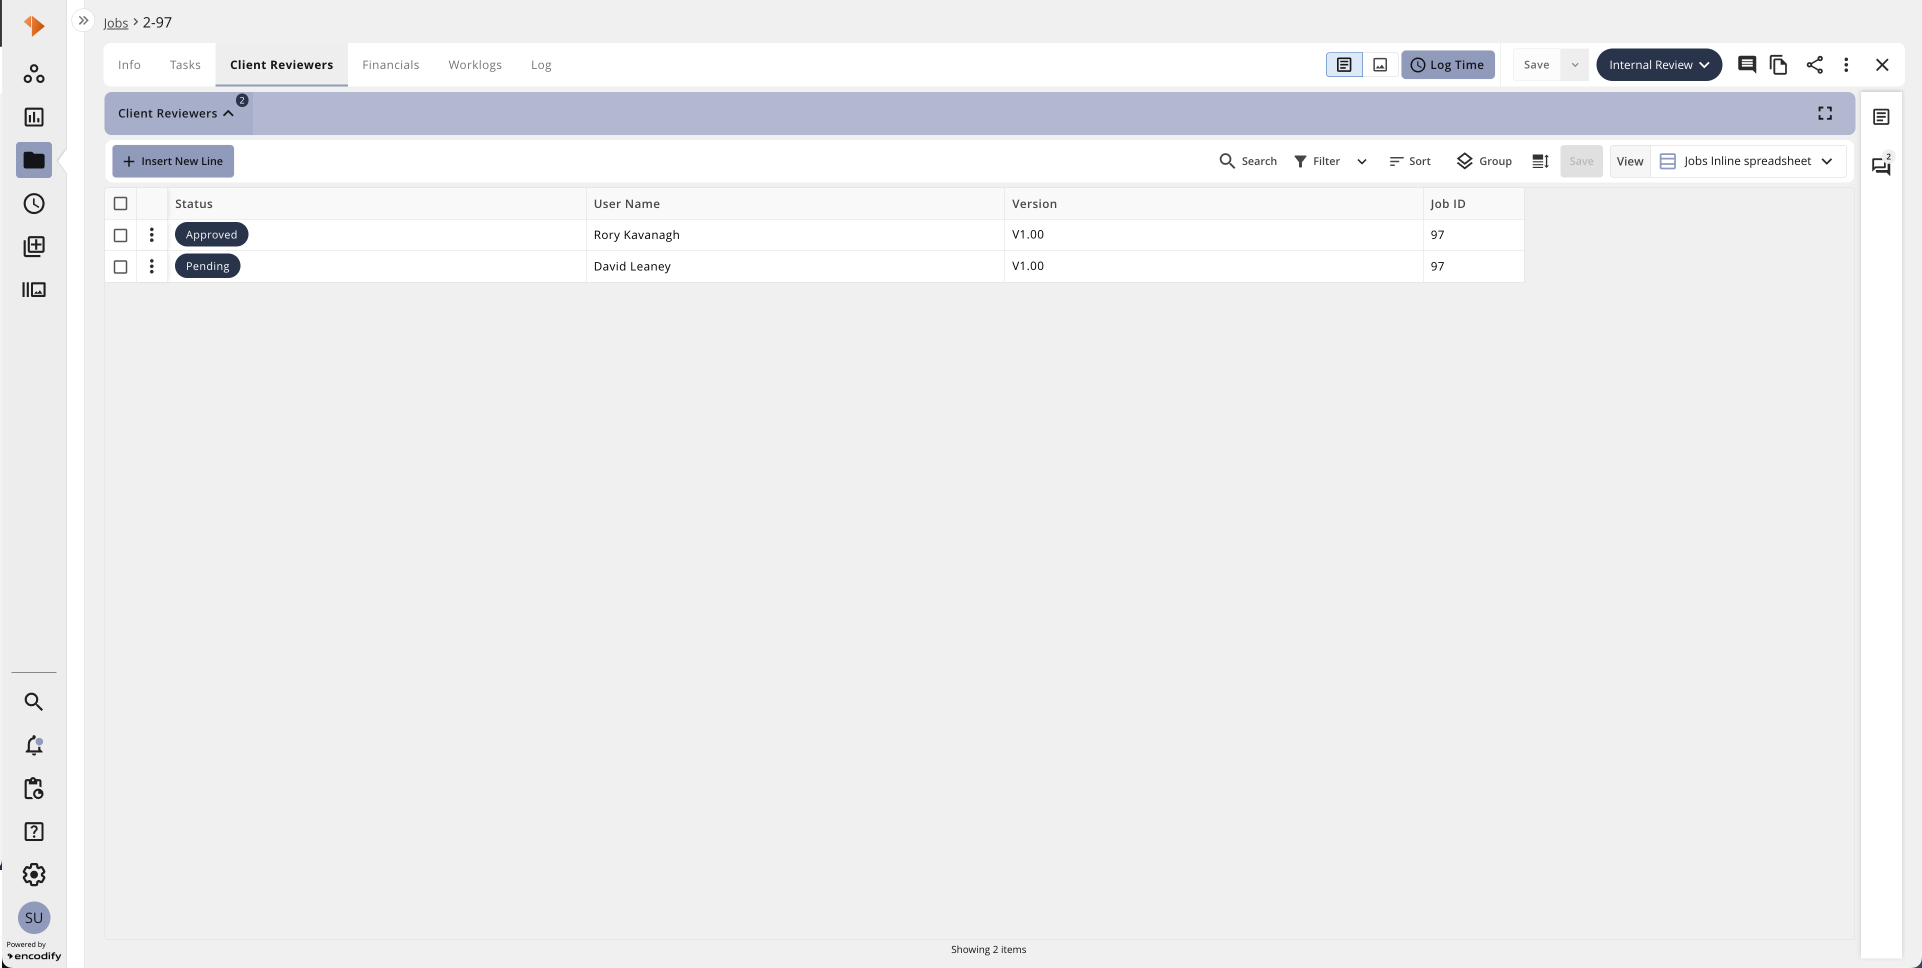
An image highlighting two reviewers specified for version 1.00
Making a Review Decision
Designated reviewers will see an additional status button in the proofing toolbar. Users who are not assigned as reviewers will not have access to this option. Once a reviewer has completed their assessment, they can select the button and set a specific status value. The chosen status will be instantly reflected in the corresponding review module.
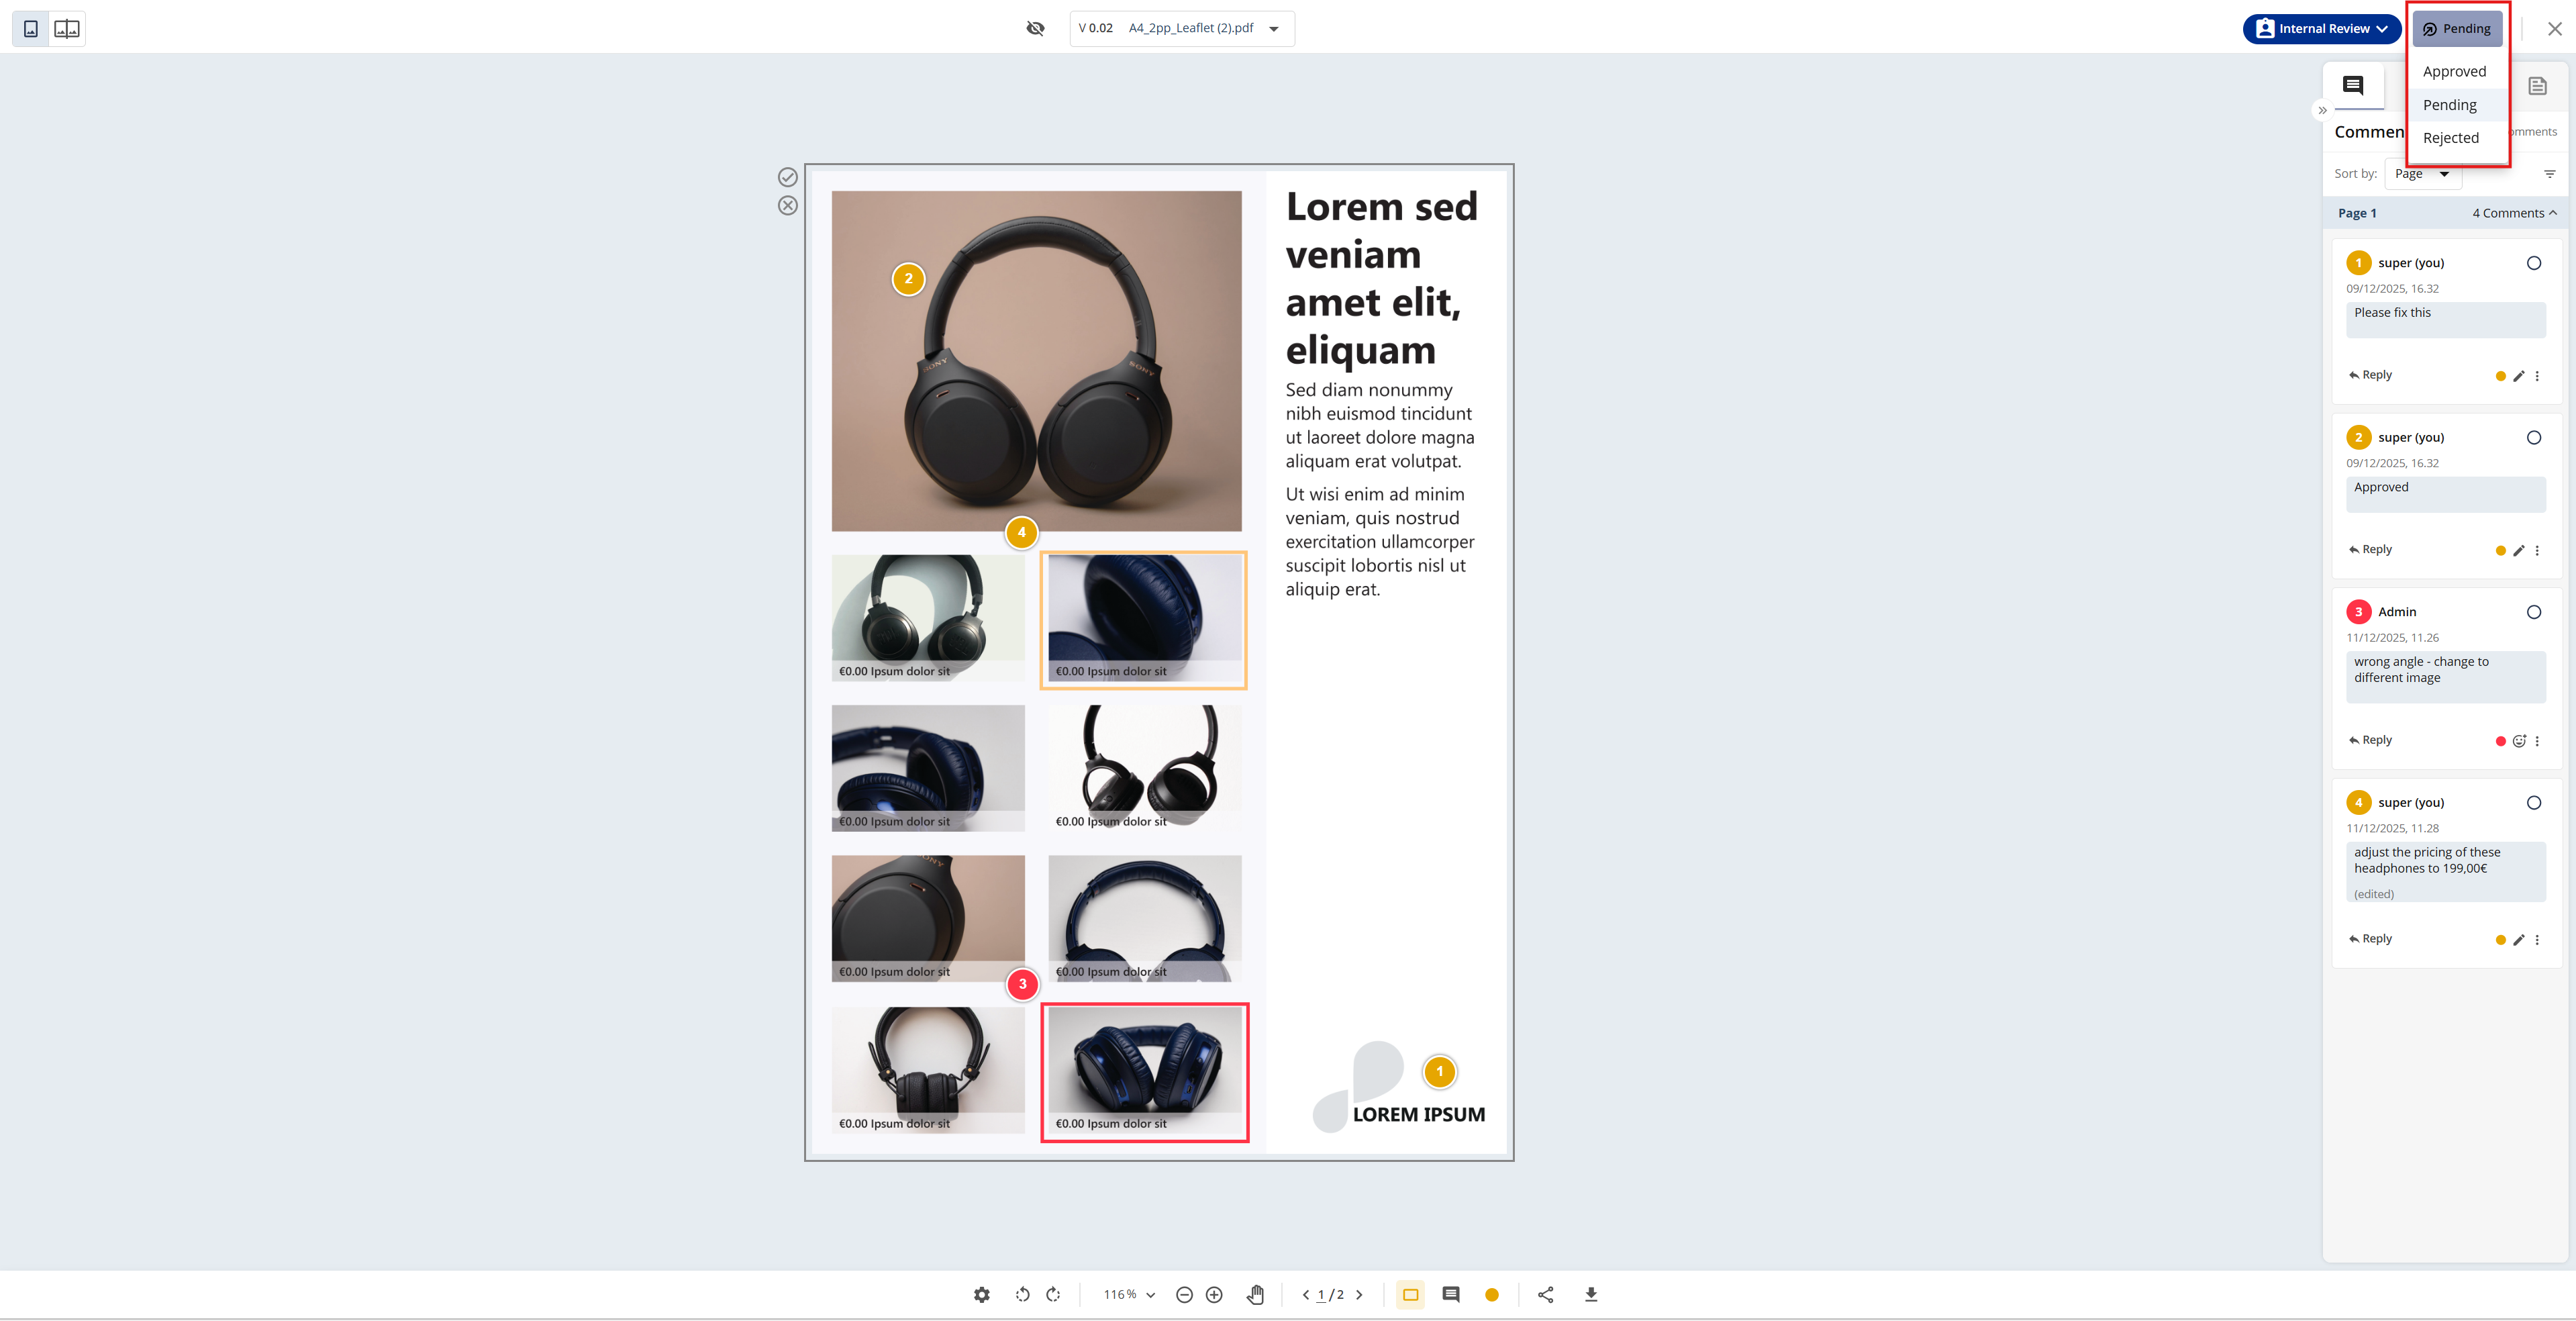
An image highlighting the reviewer status button for one of the invited reviewers
Inviting Guest Users to Review Content
To allow guest users to review proofing content, the Request to Review toggle can be enabled in the Share modal when properly configured in Guest User App. By the time they are invited to proofing, review items in the Review module are automatically created for them.
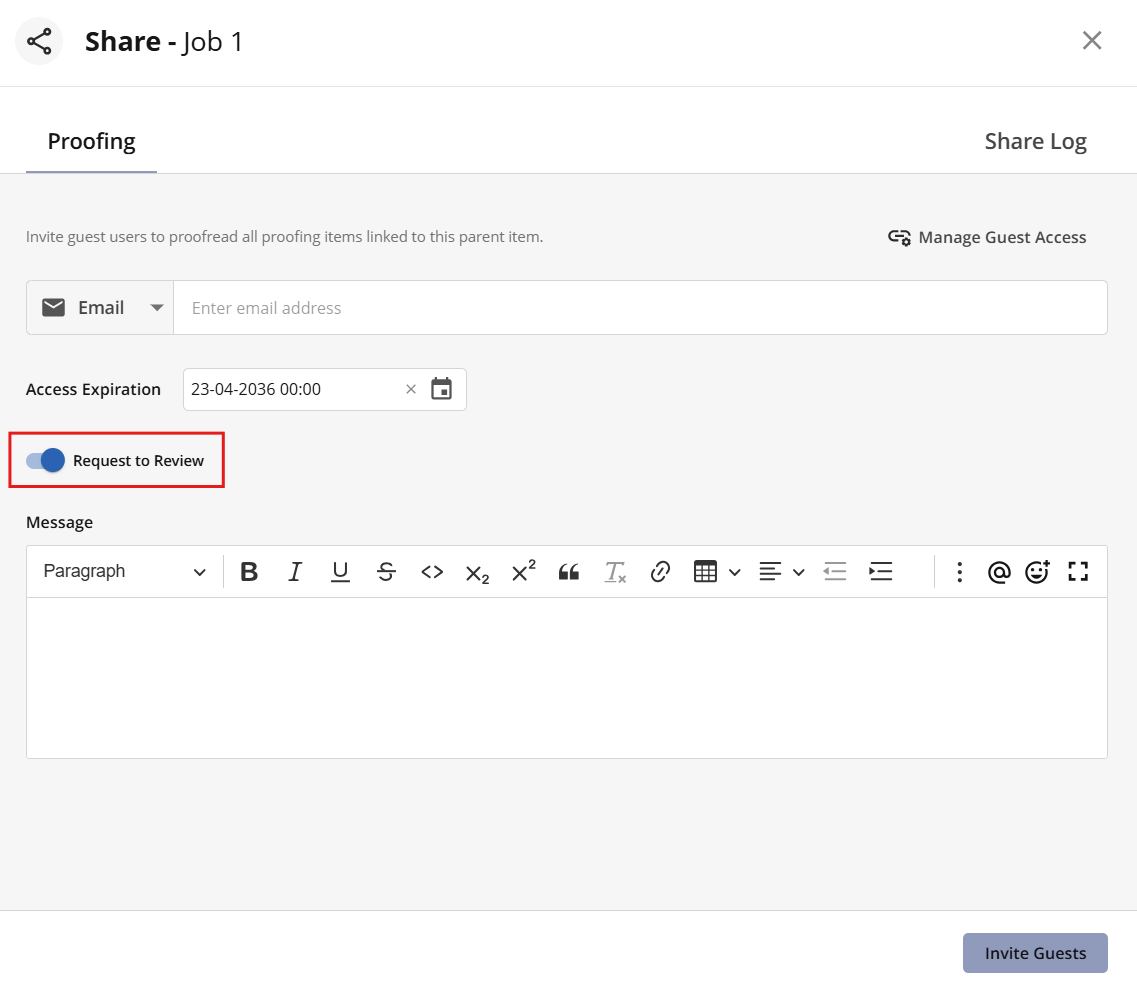
Image displaying Share modal with Request to Review toggle enabled