How to create a Calendar Widget
To open the Calendar widget configuration modal, follow these steps:
Navigate to the Widget Library (see Manage Widgets for more details).
Locate Calendar and click on the card.
Select a module in Module select box.
Toggle the following options if needed: Weekends, Week number, Fade events in the past.
Select Default Calendar Period(default value is “Week”).
Configure Widget Refresh Rate (seconds) if needed. If enabled, set a time interval – the widget will auto-refresh after this period, unless previous request is still in progress.
In the Fields section, configure the Bar Label Field, Start Date Field, and End Date Field options.
Specify a Filter to limit the data returned and define which records should appear in the search results (active, inactive, etc). To use an existing filter from the module, select Saved Filters. To create a new filter, choose Custom Filter.
Define available item actions in the Widget Actions section.
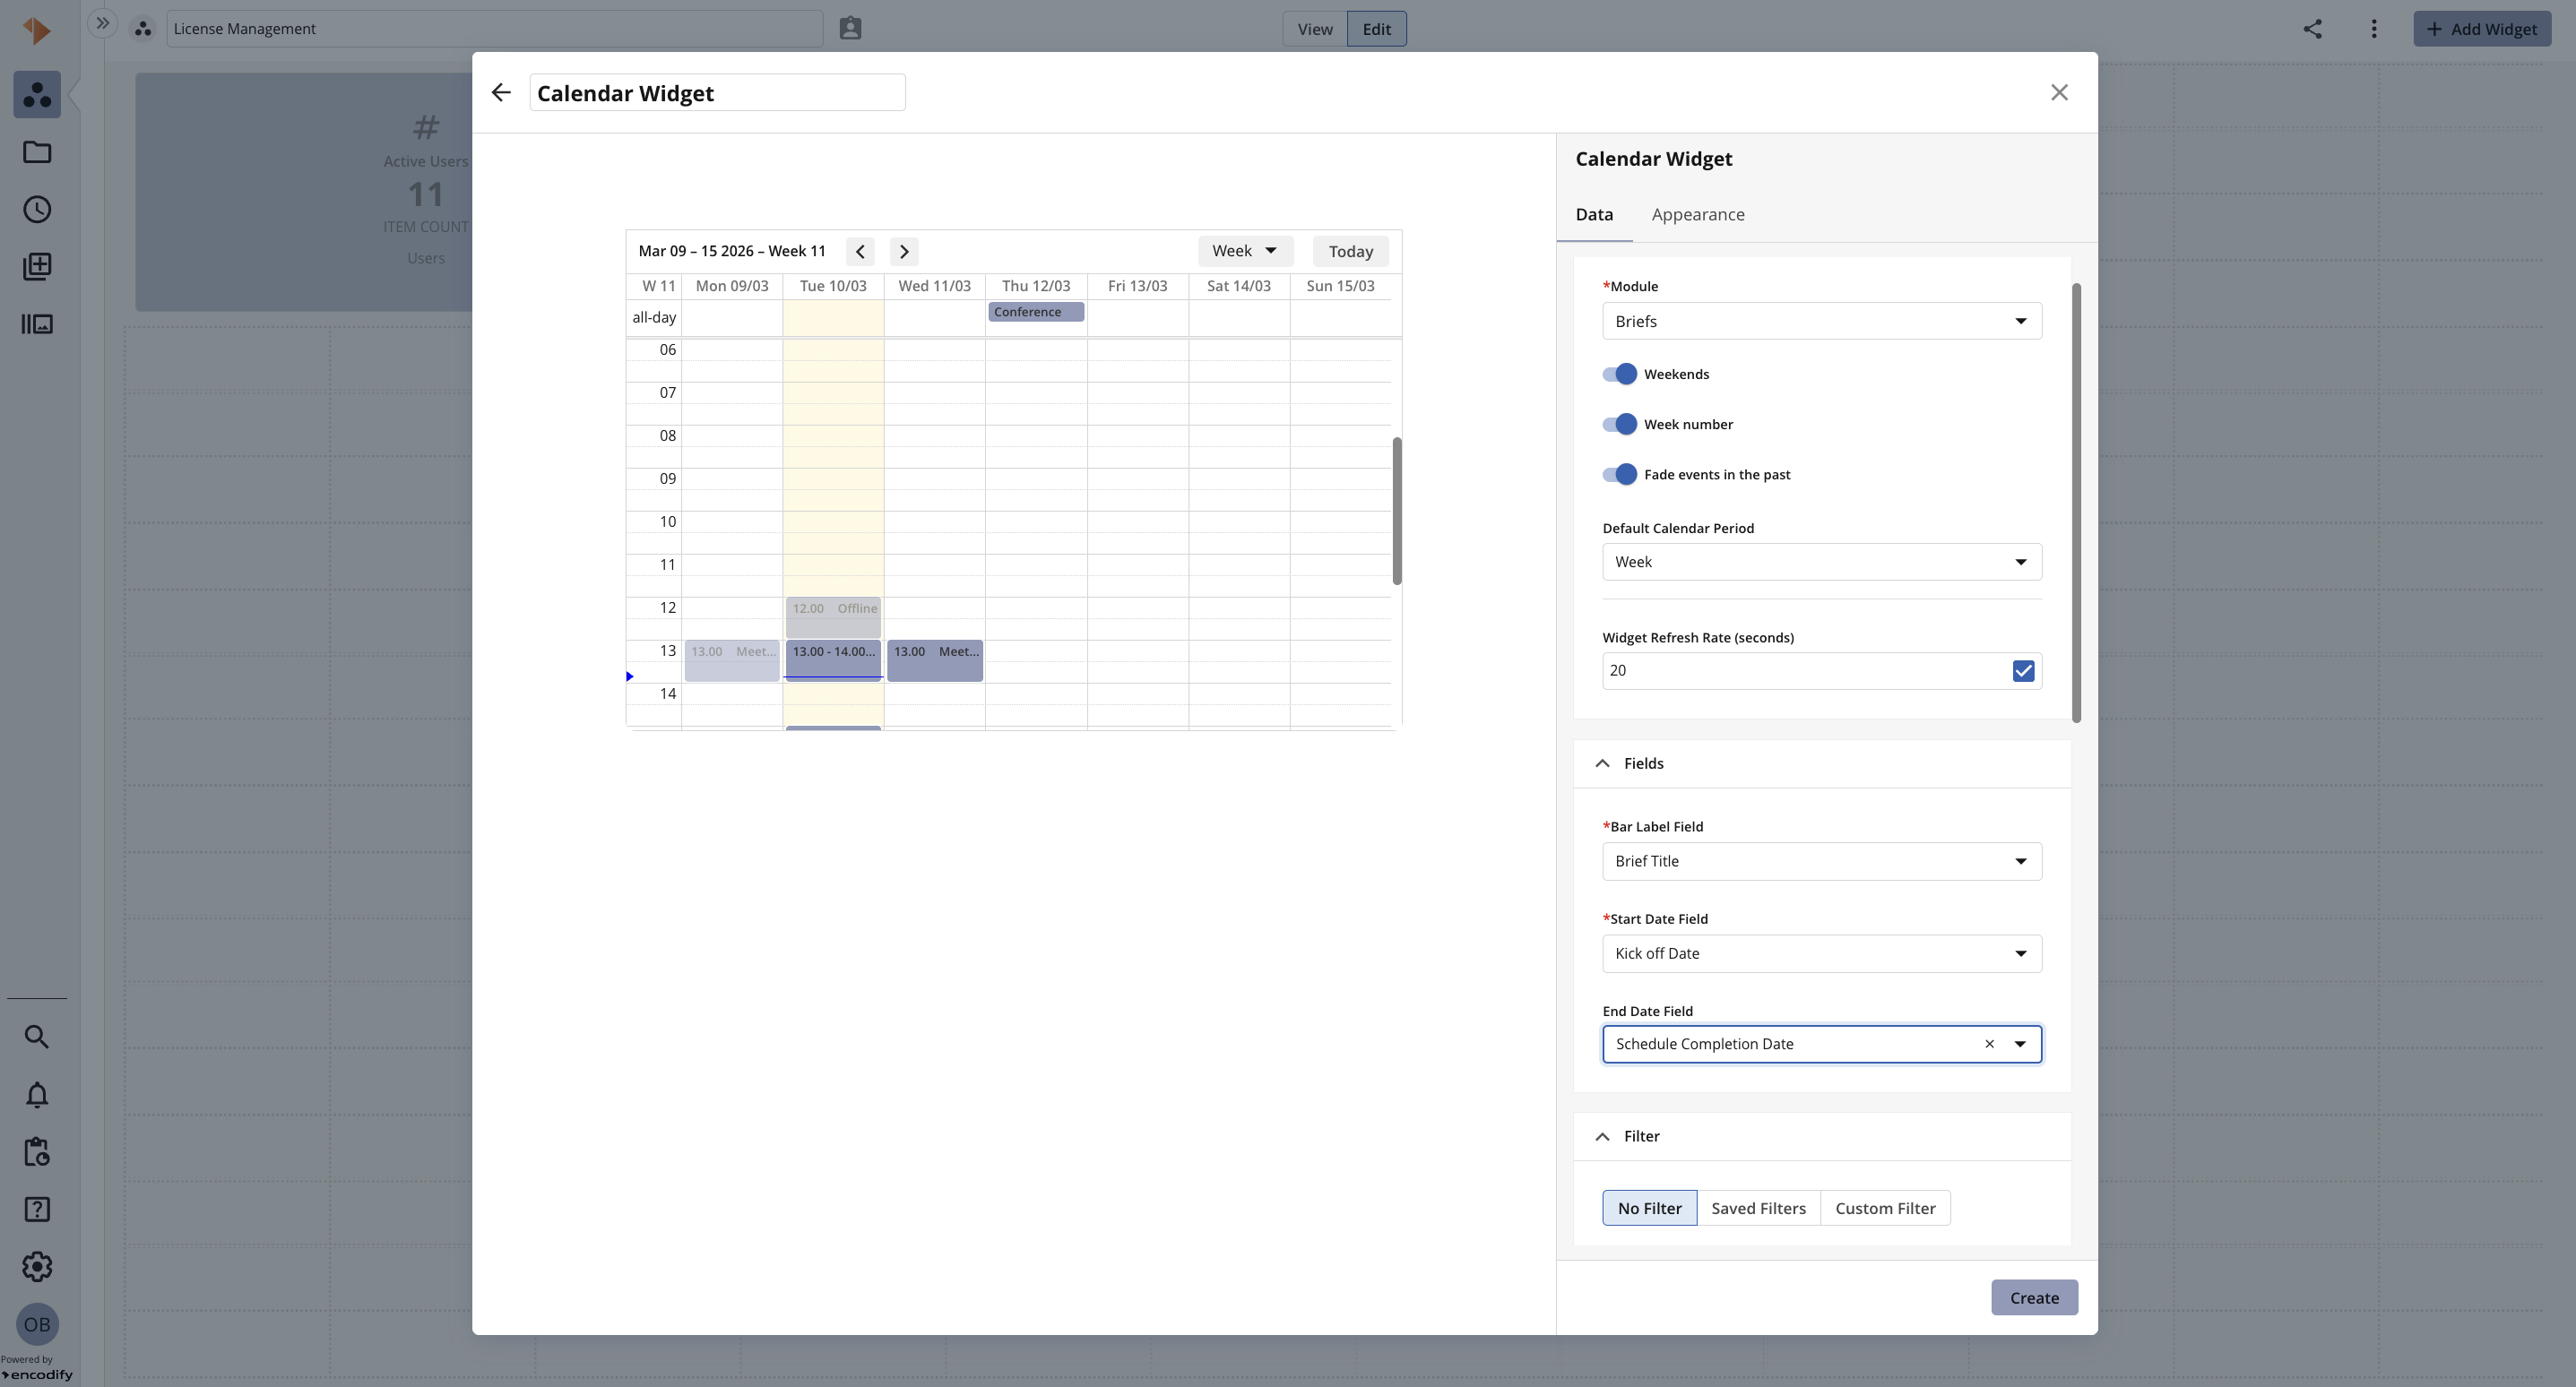
An image highlighting the Data tab within Calendar Widget configuration
Navigate to the Appearance tab to configure widget’s appearance or click Create to save with default settings.
Select a Bar Color from the color picker, or add Conditional Formatting to apply dynamic formatting based on the item’s data.
Click Create to confirm your settings and add the widget.
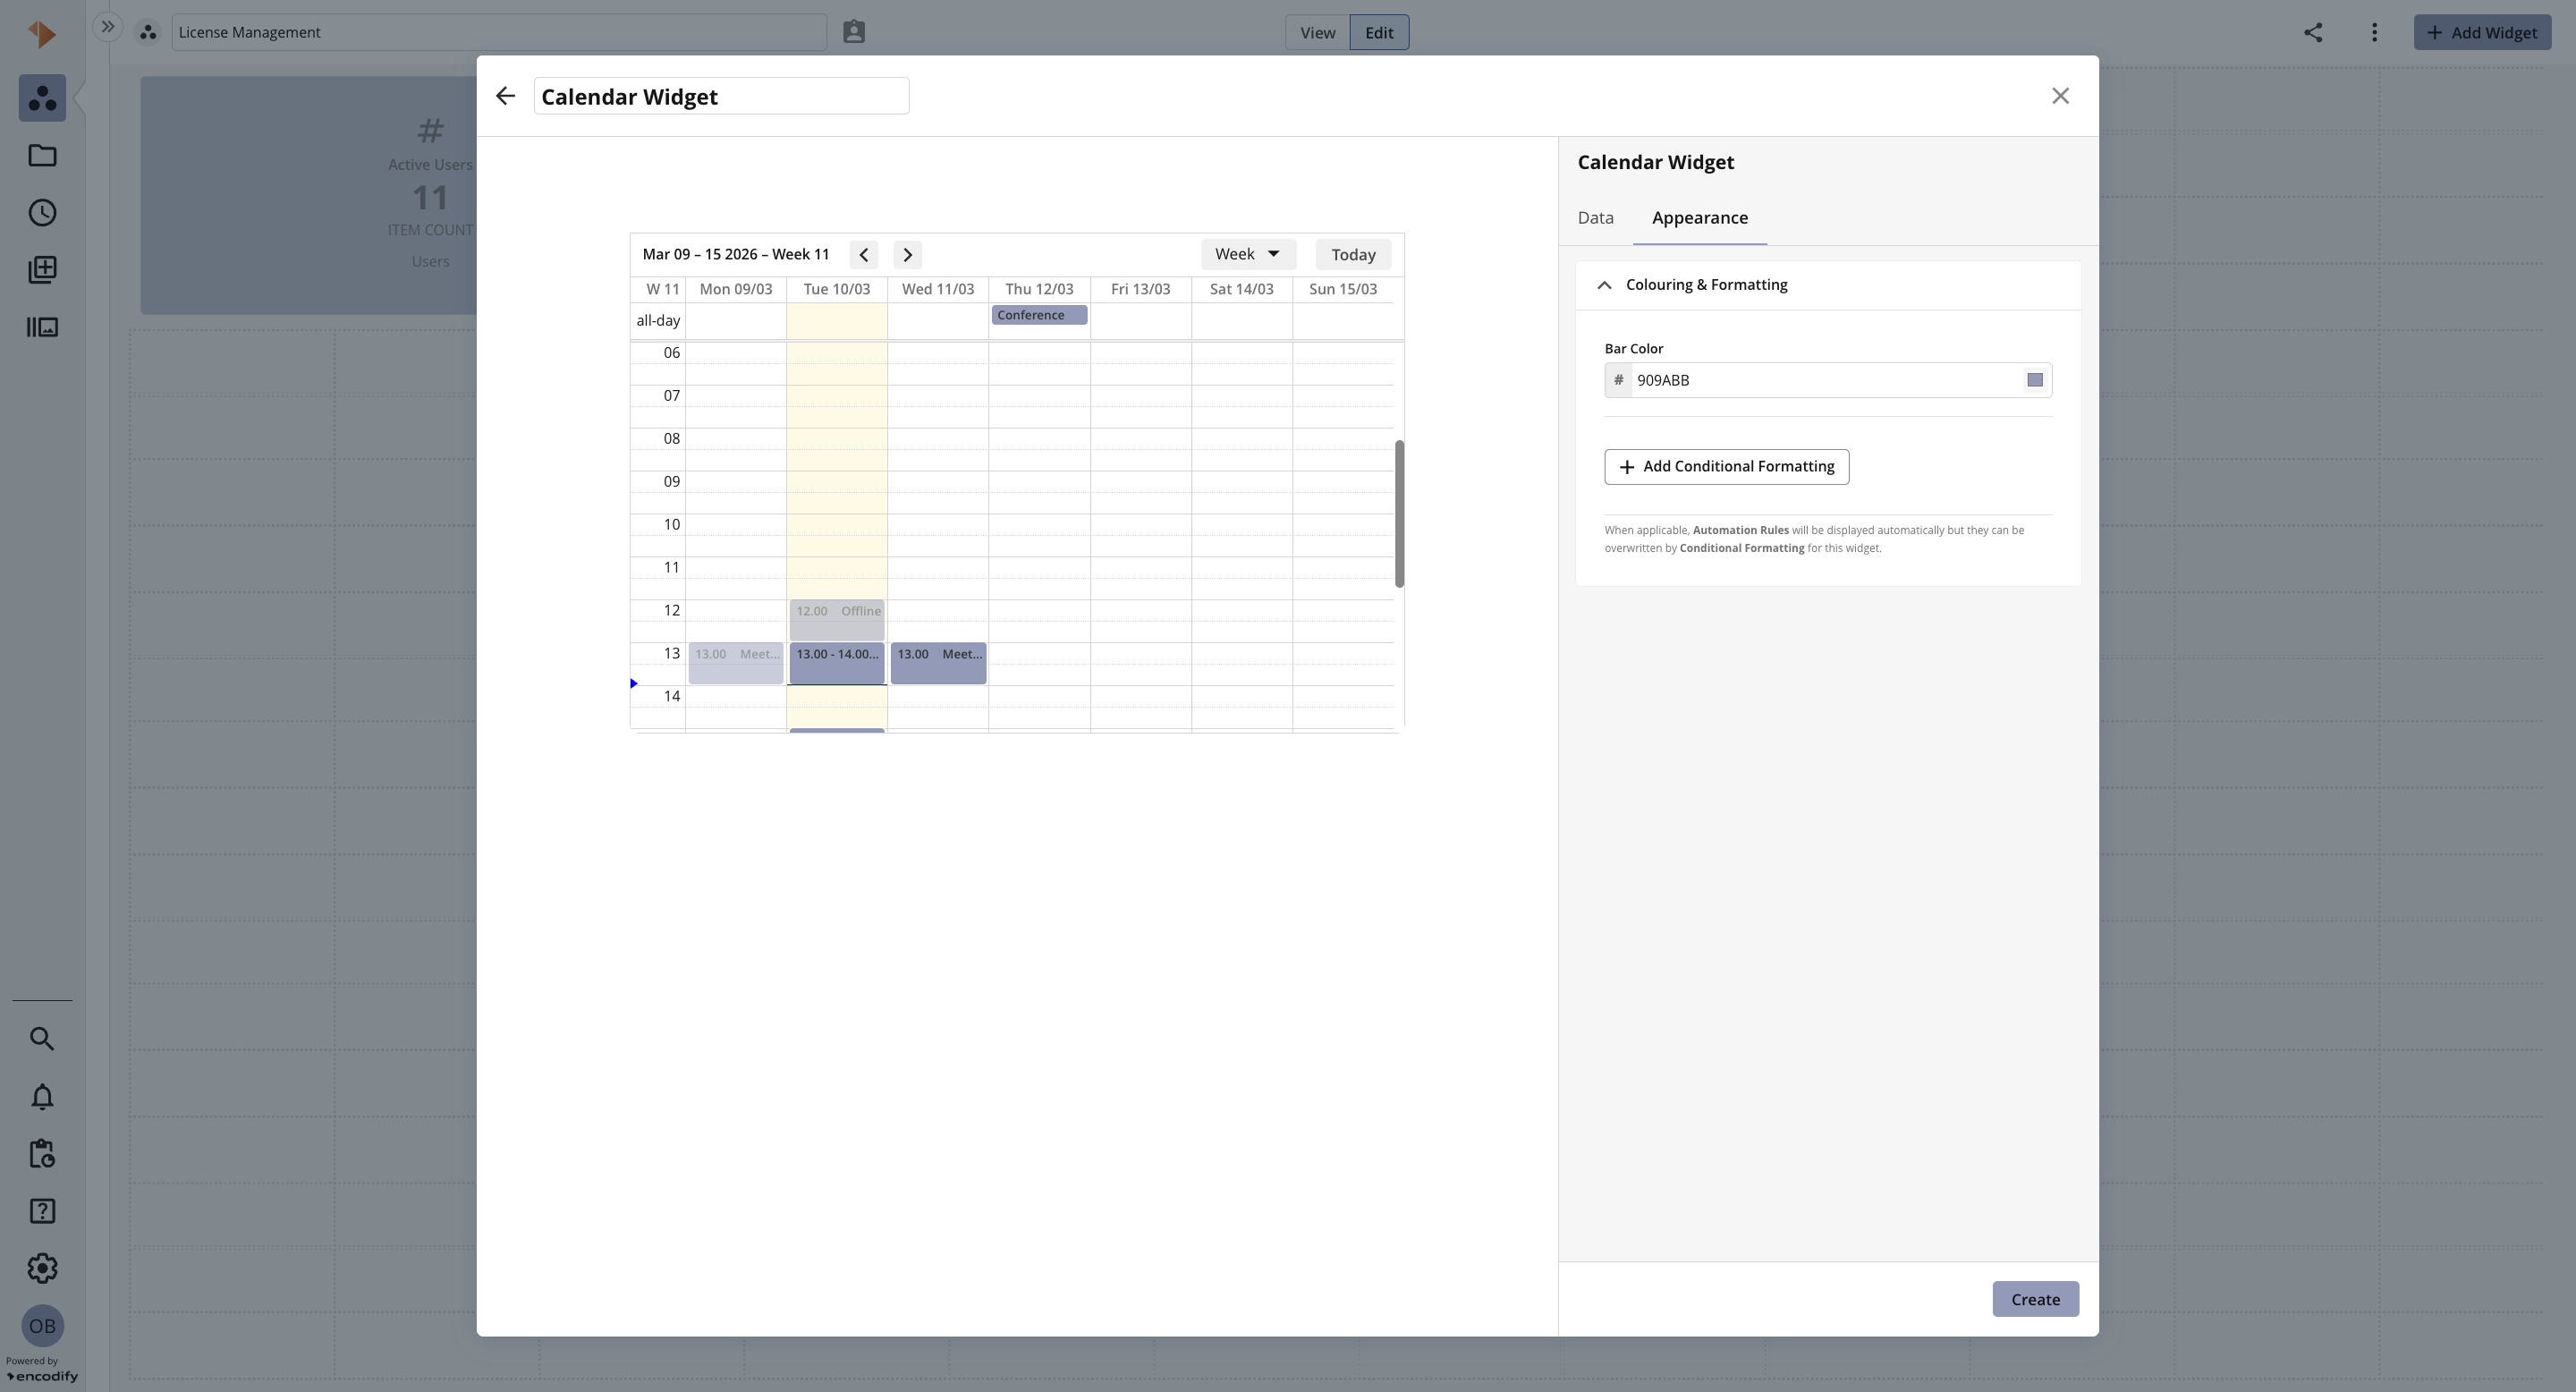
An image highlighting the Appearance tab within Calendar Widget configuration
Known behaviour: after implementing the “Default Calendar Period” property, the user’s preference is reset to “Week” for all existing Calendar widgets during migration.