The Activity > Field Logs provides a centralised view of all changes made within the item — including updates to fields, operations over the item(create item, update item, inactivate item, reactivate item, etc.), triggered events(action, import, automation rule) and their details.
Each entry captures who made the change, when it occurred, and what data was modified.
Accessing the Field Logs
Navigate to the item where you want to review history.
Click the Activity tab icon (
 ) on the side panel. Activity will be present in the tabs in which the logs are configured in the item view.
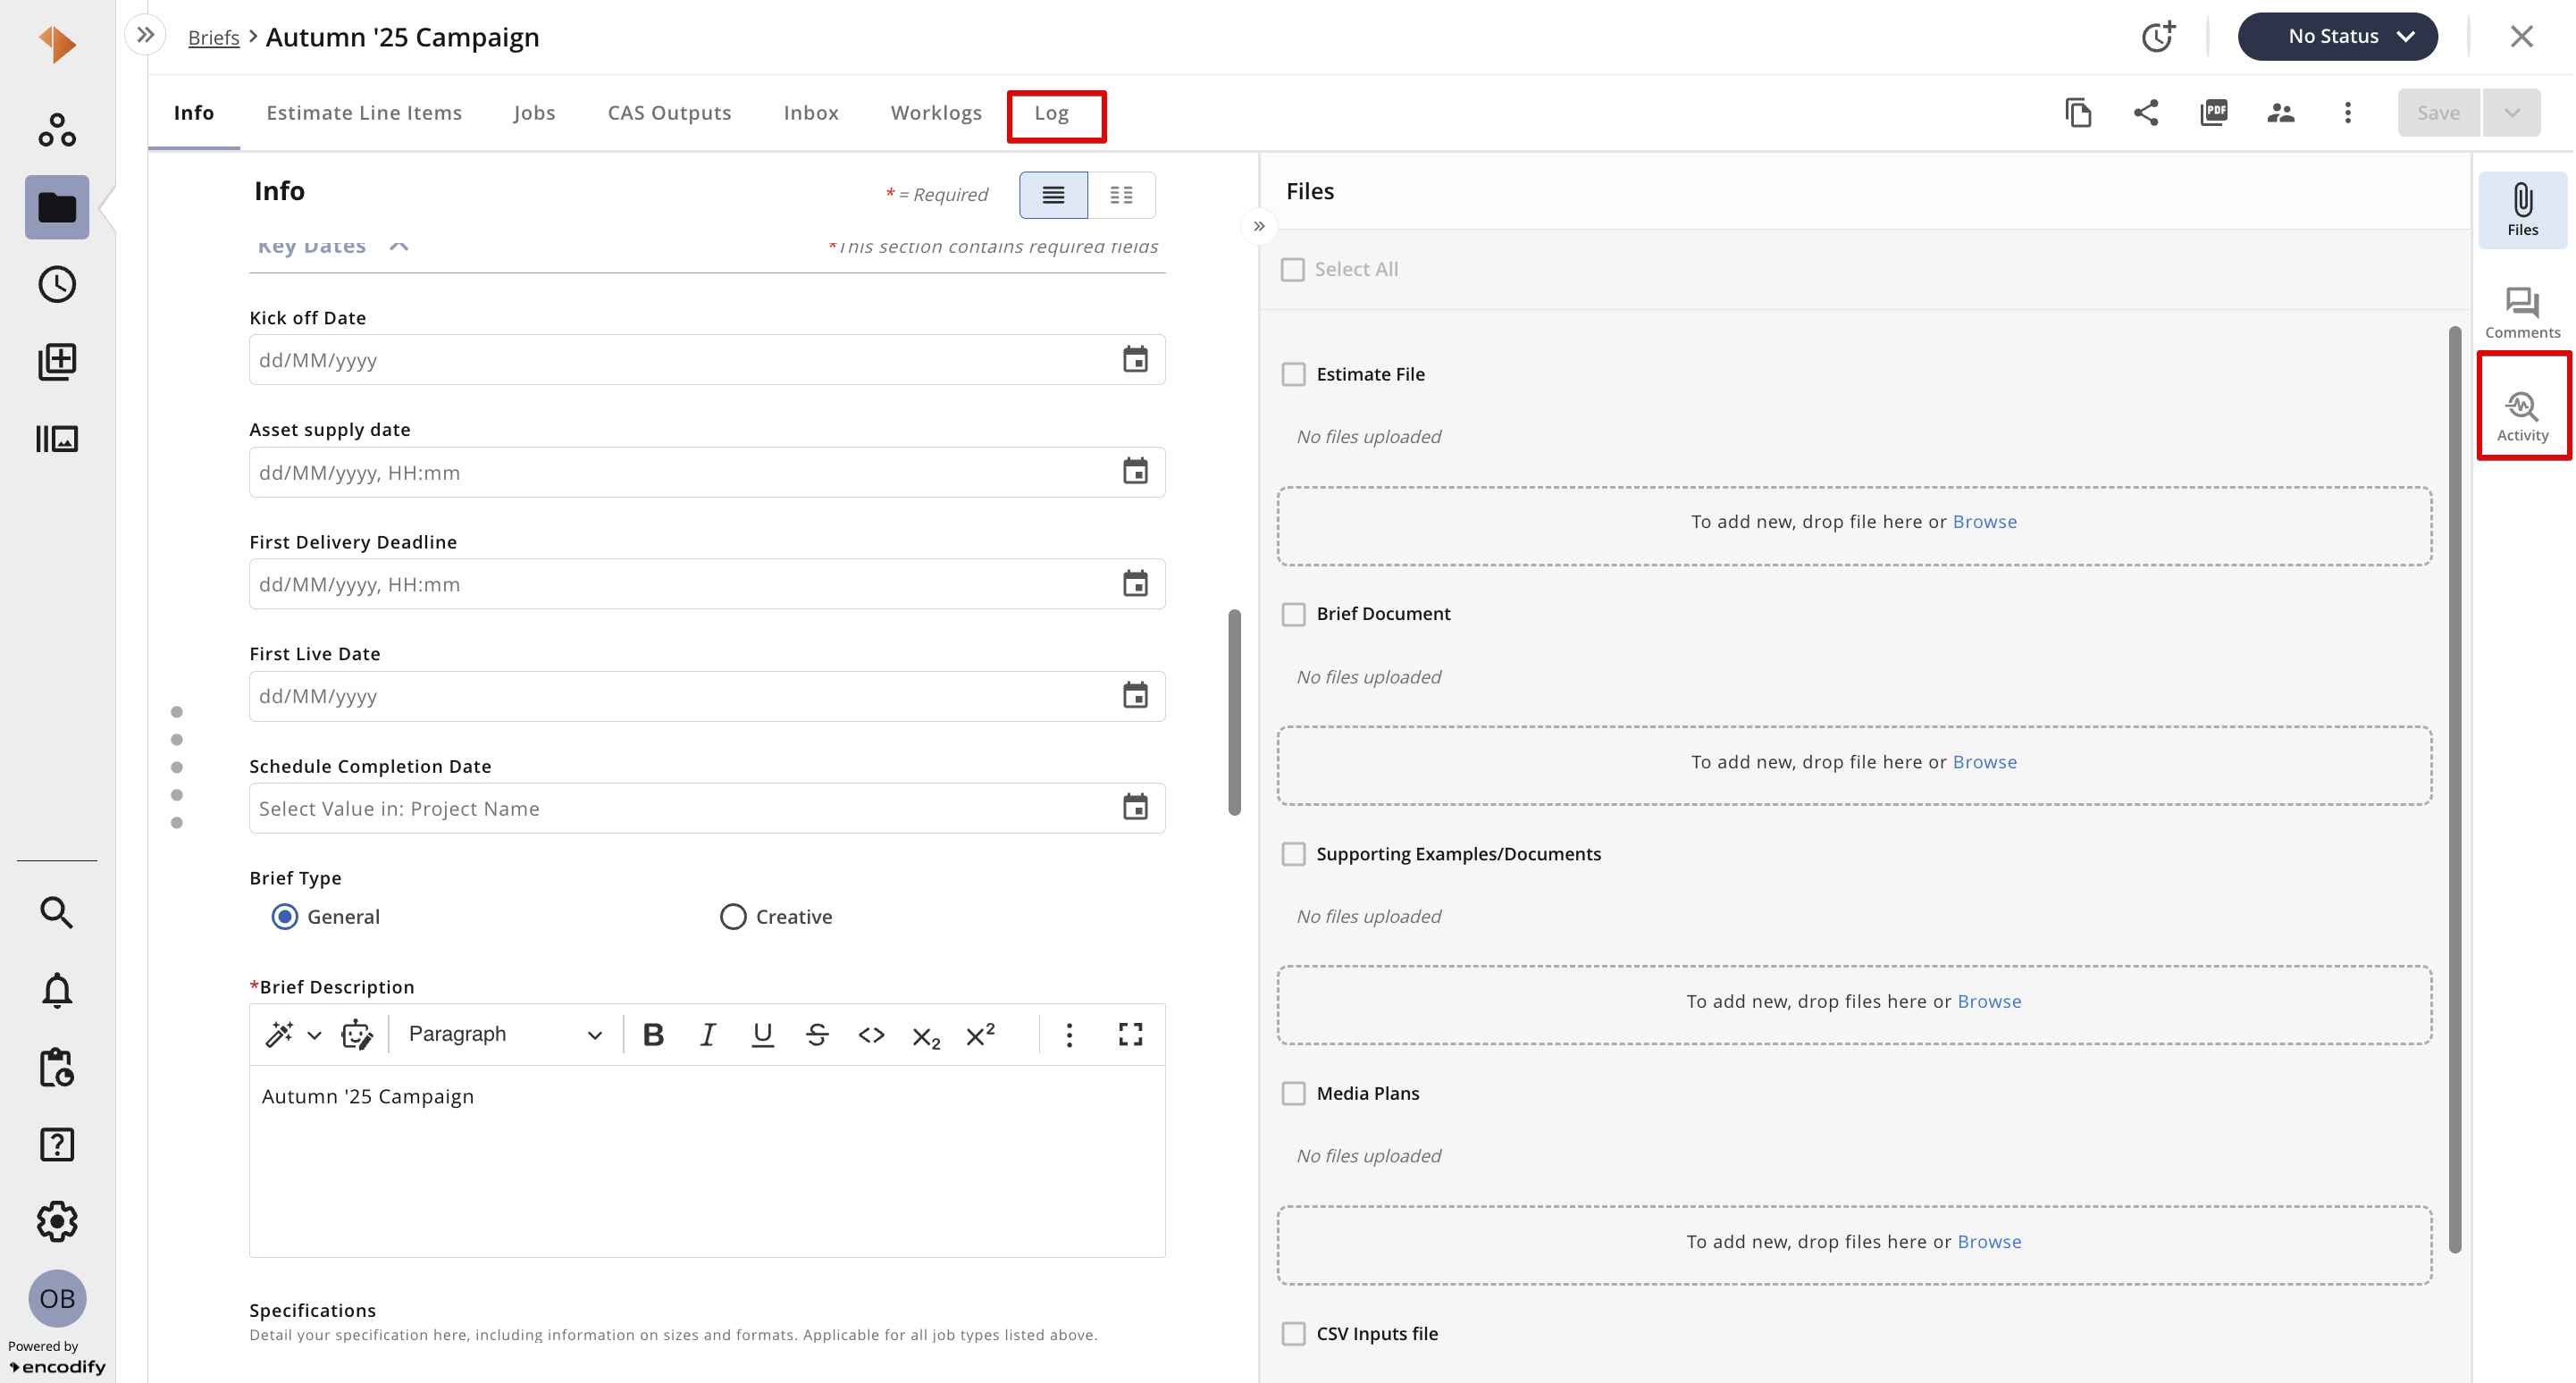
Image showing how to access Field Logs from the sidebar or from the item tab with logs
Select Field Logs in “Activity” dropdown, which displays field-level update details.
NOTE: To access Field Logs, the user should have “Log” access to the selected module and “Fields” should be selected on “Logs to show” for the exact tab in Item View Config beforehand.
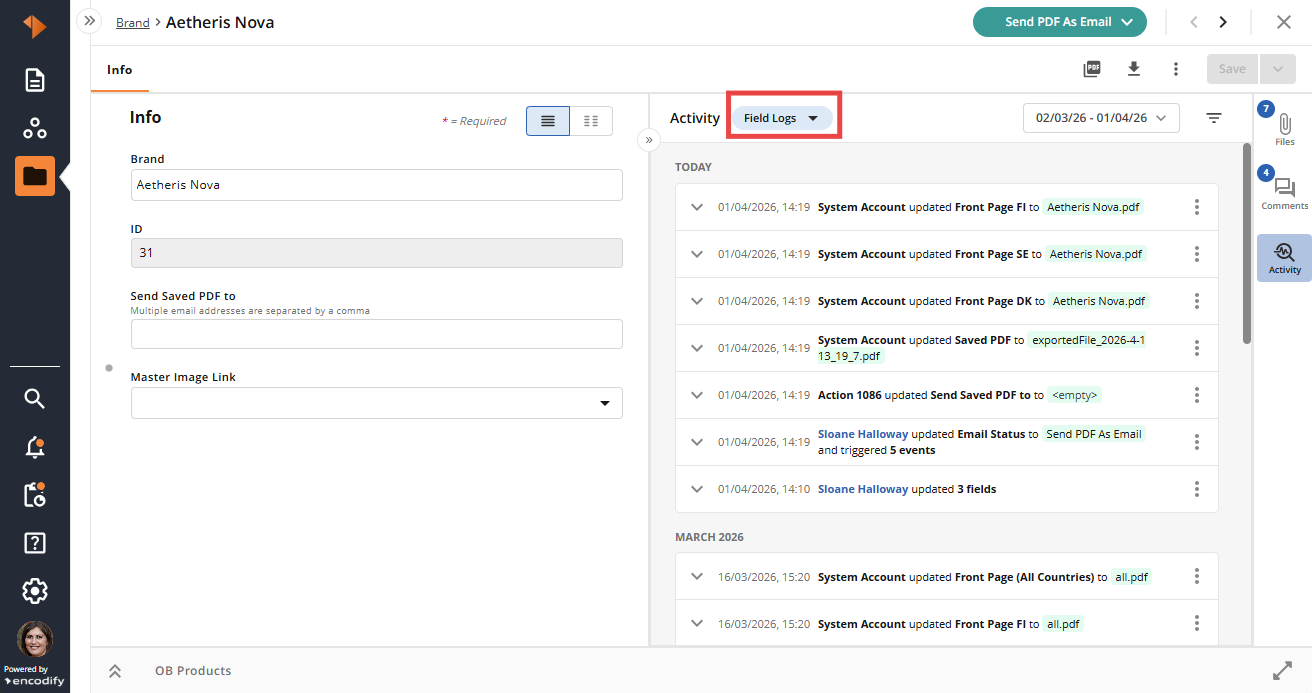
Image showing “Field Logs” selected in the “Activity” panel
Viewing log entries
The list of log entries is sorted by Date and Time DESC, grouped by “Today”, “Yesterday”, and “Month” groups (when applicable).
Each log entry shows a summary:
Date and Time of change
Username who made changes to the item OR both Impersonator name (user who made changes to the item on behalf of another user) and Username
(Example: an admin who switched to another user and made any changes on behalf of that user)
Event (action, import, automation rule) that initiated item changes
Number of fields updated and events triggered(if multiple fields were updated, multiple events were triggered)
Field name and its new value, event type, and its ID (if 1 field was updated, if 1 event was triggered)
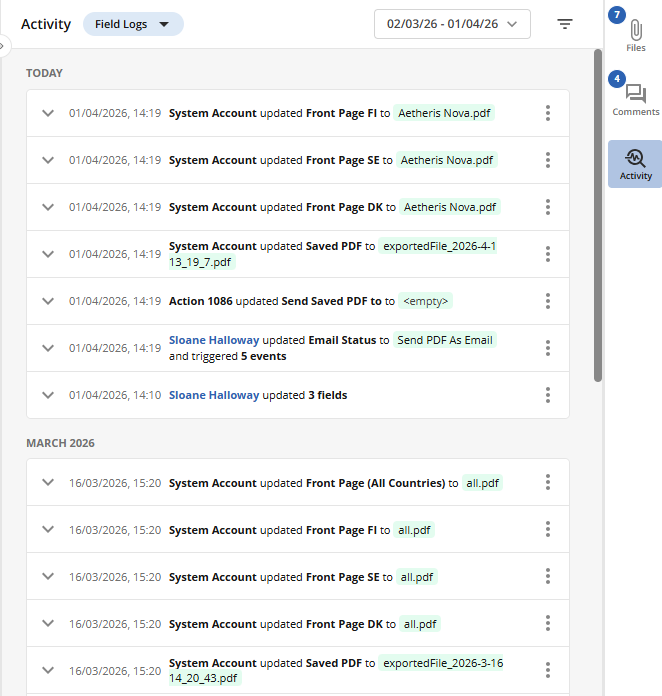
Image showing a list of grouped log entries in the collapsed state
Inspecting Field-Level Changes
Click the arrow (˅) beside a log entry to expand it.
You’ll see a detailed list of modified fields, showing:
Previous value (in red - on the left)
New value (in green - on the right)
The log may also show triggered events - action, import, automation rule and their ID.
For admins, hovering over the event shows its name. Clicking on the event, either in collapsed state or in expanded state, redirects to the event config page in a new tab.
Note: only admin users are allowed to be redirected to the event config page.
A log entry that doesn’t contain any field updates or triggered events is not expandable.
If the log entry contains a failed event, a red badge is displayed next to the triggered rule or action. Hovering over the badge shows a short error message describing why the execution failed.
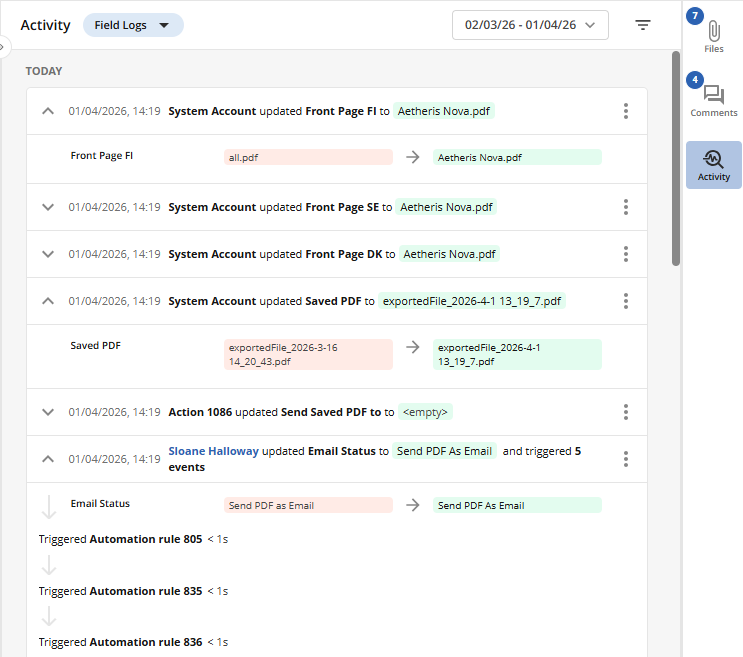
Image showing expanded log entries
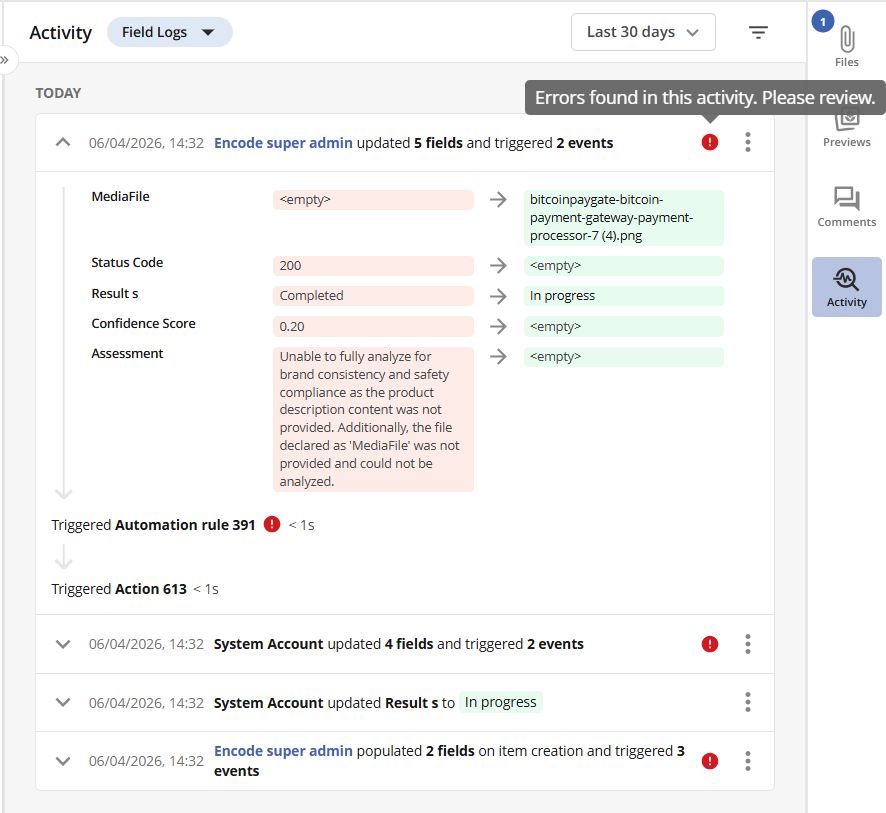
Image showing failed rule executions in the Activity log with red badges
Using the Contextual Menu
Each log entry includes a ⋮ (vertical ellipsis) that provides additional options.
Clicking it opens the menu with the next available actions:
Option | Description |
|---|---|
View Items in Module | Opens the list of items that were changed via Bulk Operation, including the current item |
Copy Batch ID | Copies the unique batch identifier of the bulk operation that triggered changes to the current item |
Copy Span ID | Copies the span identifier for distributed tracing or performance tracking. |
Copy Trace ID | Copies the full trace ID used for correlating logs across systems |
Note: only admin users are allowed to copy Span ID and Trace ID.
Known limitation: contextual menu is not available for log entries migrated from the earlier version of the Field log.
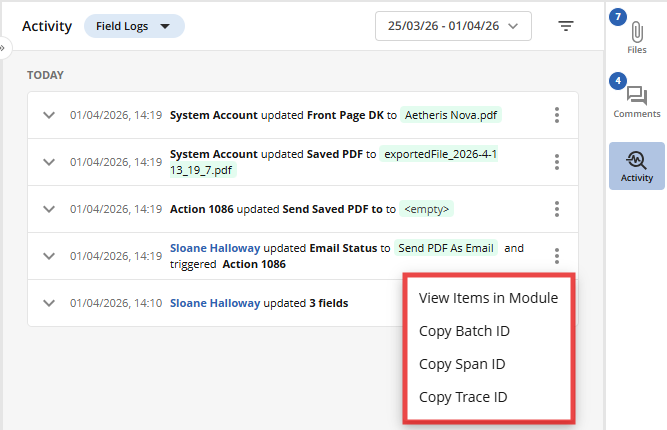
Image showing contextual menu with options for log entry
Filtering by Date Range
To ensure you always see the most relevant activity history, the system anchors all log filters to the Last Modified Date of the item you are viewing. This provides an immediate view of the data surrounding the item's latest updates.
The Default Filter View
When you open an item’s logs, the system automatically applies a 7-day lookback based on the date the item was last updated.
Dynamic Range Labels: The filter button explicitly displays the actual date range currently in use (e.g., 03/03/26 - 10/03/26).
Anchored "Date To": The default "Date To" point is always the Last Modified Date rather than the current calendar day.
Customising Your Search
When setting a Custom Period, the system ensures your search stays within the valid history of the item.
Boundary Limits: You can only select dates that fall between the item’s Creation Date and its Last Modified Date.
Intelligent Datepickers: The “Today” button within the calendar is automatically hidden if today’s date falls outside the item's creation or last modified range.
To set a specific date range:
From the Period dropdown, choose Custom...
A pop-up titled Custom Period will appear.
Enter the desired dates:
Date From – the start date of your period (required)
Date To – the end date of your period (required).
Click Apply to update the Activity Log.
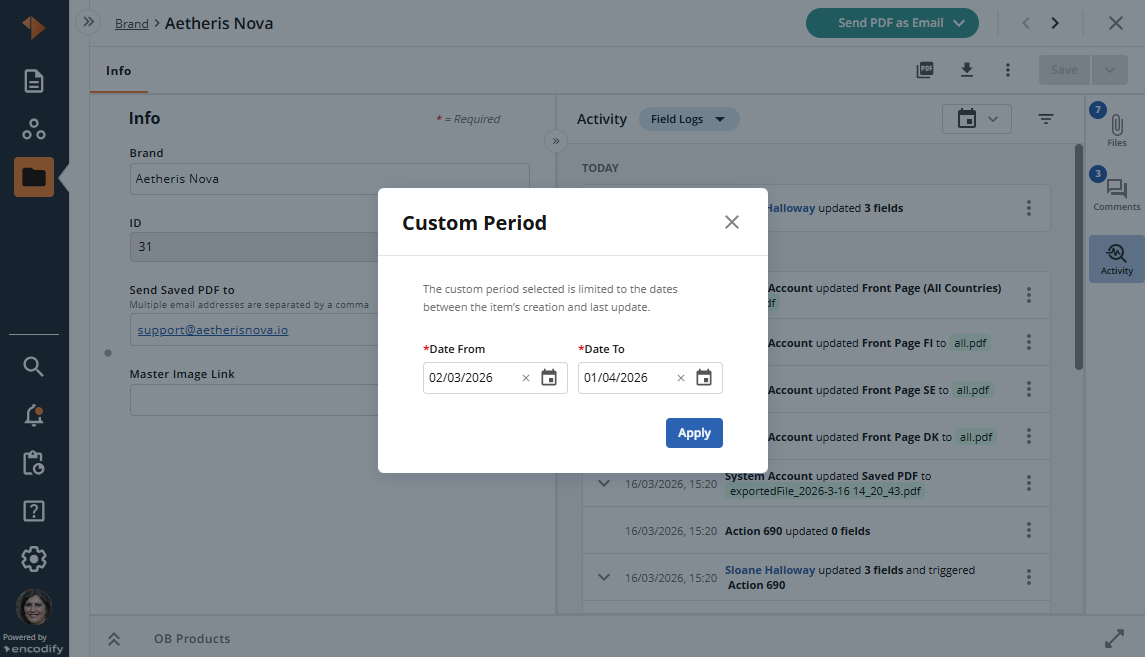
Image showing “Custom Period” popup
Understanding Preset Limits
The system provides quick-select presets for Prior 7, 15, and 30 days. Because these are bound by the item's actual lifespan, note the following:
.png)
Image showing Period dropdown
Lifespan Constraints: If you select "Prior 30 days" for an item created only 2 days ago, the system will only display the 2 days of available data.
Default Display: All items open with a "Prior 7 days" filter by default. If the item is newer than 7 days, you will see the logs for the days available since its creation.
Applying Filters
To narrow down results even further, use the Filters panel:
Click the filter icon (
.png) ) next to the date range selector.
) next to the date range selector.The Filters panel will appear.
Available Filter Options
Values – Search for specific updated or previous values.
Fields – Select which field changes to display.
Users – Select the user who made the changes.
Change Types – Select the type of activity performed:
Created
Updated
Deleted
Inactivated
Reactivated
After selecting filters, the log entries will update automatically.
Click Clear All to reset all filters.
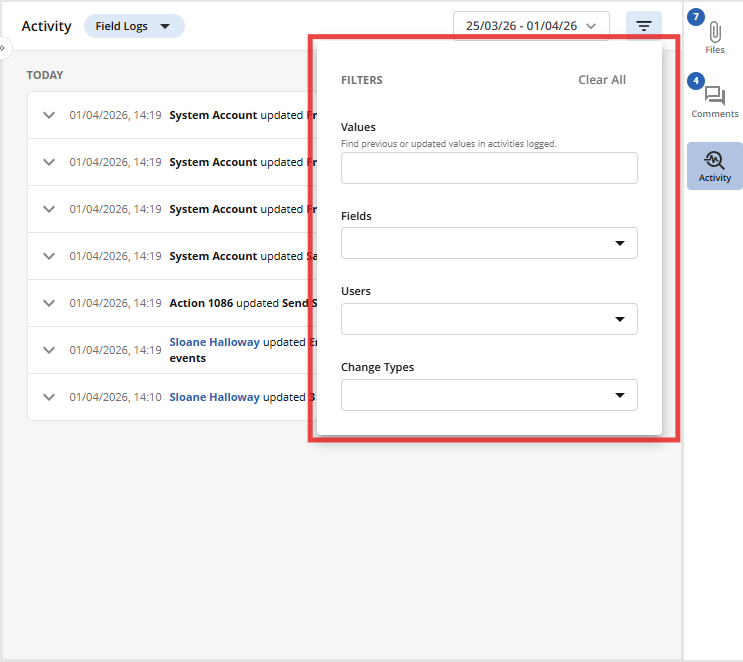
Image showing the filter panel with filter parameters
Known limitation: it is not possible to filter out migrated logs by Change Types