The Picture Element, or Picture Field, is a placeholder for pictures that users can put on their Ads. A Picture Field defines the properties of an image that will be inserted in it. It also specifies the set of pictures that the user can choose from when filling the field. The following table looks at all the settings of a Picture Element.
Option | Default | Meaning |
|---|---|---|
Name of Element | None | Name of the element as it will appear in the Edit Ad window |
Hide Element in Editor | No | If the check box is selected, the field will not visible in the Make Ad window, but the element will be present in generated PDF. |
Position | Absolute | Determines whether or not the element should be placed relative to some other element on the page. The Position box lists all other elements found on the page, so you can select an element relative to which the current field should be positioned. |
Offset | n/a | Available for fields with a relative position, this sets the coordinates of the field relative to a corner of the element selected in the Position box. The corner is specified in the list next to the Offset fields. |
Location | X: 0 mm / Y: 0 mm | For elements with an absolute position, this determines where the element will be placed on the page. The X and Y coordinates that you enter here are measured from the upper-left corner of the page and determine the position of the top left pixel of the element. |
Size | B: 0 mm / H: 0 mm | Determines the space allocated to the element on the page. To set this parameter, specify the breadth and height of the element in millimeters. |
Border | None | Determines if there should be a border around the element. To set a border, specify its color by typing in CMYK values. |
Border Weight | 0.0 pt | Specifies how thick the border should be. |
Fitting | Fit content proportionally | Determines the way the image will be positioned within the field. Five options are available here, all of which are explained in detail below (see Image fitting options). |
Vertical Alignment | Center | Vertically aligns the image inside the element. |
Horizontal Alignment | Center | Horizontally aligns the image inside the element. |
Get Pictures From Module | None | Specifies the module that an image for the element should be taken from. This can be any of the active Modules on the site. |
Field | According to AdBuilder settings | File field in the selected module that stores the picture that should be retrieved. |
Media Holder | According to AdBuilder settings | Media File Holder linked to the selected file field that the actual image should be retrieved from. Starting from version 9.105 Both single and multiple file fields are available. |
Media Holder for Preview | According to AdBuilder settings | Media File Holder from which pre- view images for the Micro Search dialog box should be retrieved. |
Assign All Pictures | n/a | With this option selected, all images from the selected module that are found in the specified Media Holder will be available to the user when inserting an image in the resulting picture field on the Ad. |
Assigned Picture ID’s | None | This lets you assign specific pictures from the selected module to the field, by indicating the reference numbers that they have in that module. Separate numbers by commas as you enter them in the box. You can also assign pictures through the Micro Search dialog box (for details, see Assigning Pictures to a Picture Element below). |
Preselected Picture | None | Preselects an image for the field. To select a picture, either type its reference number in the box or locate the required image using the Micro Search facility available on clicking the Select Picture button. |
Rotation | 0 | Specifies the angle for picture element rotation. Use positive values specify clockwise rotation, negative - for counter clockwise. |
Use position in group | disabled | Functionality of enabling extracting image from a group of products (elements). Applicable in Creative Automation Print Studio only. |
Index of element in group | 0 | Value of the element index in group. "0" value specifies fisrt element in the group. Applicable in Creative Automation Print Studio only. |
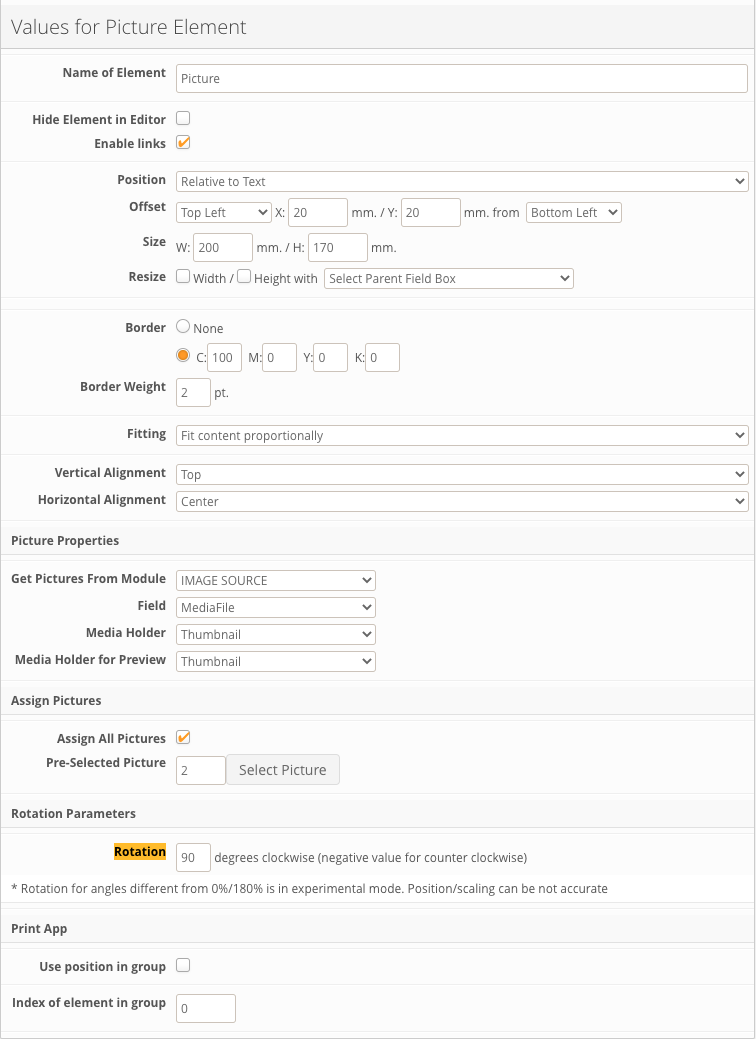
Fig.1. Picture Element Configuration window
Image fitting options
The Fitting parameter mentioned in the table above determines how the image should be handled in order to fit into the resulting picture field.
Option | Description |
|---|---|
Fit content proportionally | This scales the image proportionally to fit into the picture box in both height and width, with no cropping involved. The alignment settings determine how the image is aligned in the picture box. |
Fit content proportionally (cropped) | This scales the image in the dimension that involves a minimum scaling ratio and crops the image in the other dimension. The alignment settings define which part of the image is cropped (e.g., when scaled horizontally, the image will be cropped at the bottom if Vertical Alignment is set to Top; when scaled vertically, the image will be cropped on the left if Horizontal Alignment is Right etc). |
Fit content non-proportionally | Fits the image in the picture box in both dimensions without preserving proportions. The alignment settings are not applicable in this case. |
Fit content vertically | Scales the image so, that it fits in the picture box vertically (by height) and crops it on the sides if its width exceeds the width of the picture box. The alignment settings define where the image is cropped. The vertical alignment is not applicable. |
Fit content horizontally | Scales the image so, that it fits in the picture box horizontally (by width) and crops it at the top and/or the bottom if its height exceeds the height of the picture box. The alignment settings define where the image is cropped. The horizontal alignment is not applicable. |
Assigning pictures to a Picture Element
When configuring a Picture Element, there are 2 ways for determining which pictures are available to the user when selecting an image for the picture box on the Ad:
select all pictures from the target Media Holder of the linked Module by checking the "Assign All Pictures" box under Assign Pictures.
define the selection by specifying which pictures from the linked Module should be available—assign these specific items to the Picture Field.
This allows you to either make all pictures available or limit the selection to certain predefined images.
The following steps explain how to assign specific pictures from the linked Module using the Micro Search functionality:
Make sure the Assign All Picture checkbox is not selected: otherwise, the option will be unavailable.
Click the Assign Pictures button under the Assigned Picture ID's box.
In the dialog box that opens, search the module for required items using the Search Menu on the left.
To select a particular picture from the list of items returned for your search, click the Assign Picture button under the corresponding item. As you assign pictures, their reference numbers appear in the Assigned Pictures area below.
To view the selected pictures, click Show Assigned Pictures in the Assigned Pictures area. The assigned pictures will then appear in the Search Result pane of the dialog box. You can remove any picture from your selection by clicking Remove Picture under it.
Note! You can add more pictures to your selection at any time, by running another search. Those of the items selected earlier that meet the new search terms will remain selected in the new list of search results.
.png)
Fig.24. Assigning pictures to Picture element
Inserting Images into PDF
Images assigned to picture elements that are inserted into the PDF are converted to the .png format with applied RGB color space. The exception is the following file formats that are being inserted into PDF as-is:
PNG
BMP
JPG (starting from version 11.0.0)
For pictures that are inserted into PDF as is transparency layers will not be applied as no conversion is taking place. Such images will also retain their original color space in the generated PDF.
Note! Original color space of the JPG image will not be retained if cropping tool has been applied and cropped image is inserted into PDF. Cropping functionality in adbuilder does transformation of the file to the PNG format with RGB color space.
Image Editing ( New UI )
Starting from version 13.0.0, users can edit images in AdBuilder Make Ad window, using Crop Tool similar to editing image in Item Info Sheet file section.
How to edit image in AdBuilder (new UI):
Select an image in corresponding field inside AdBuilder Make Ad window
Click 'Edit image' icon
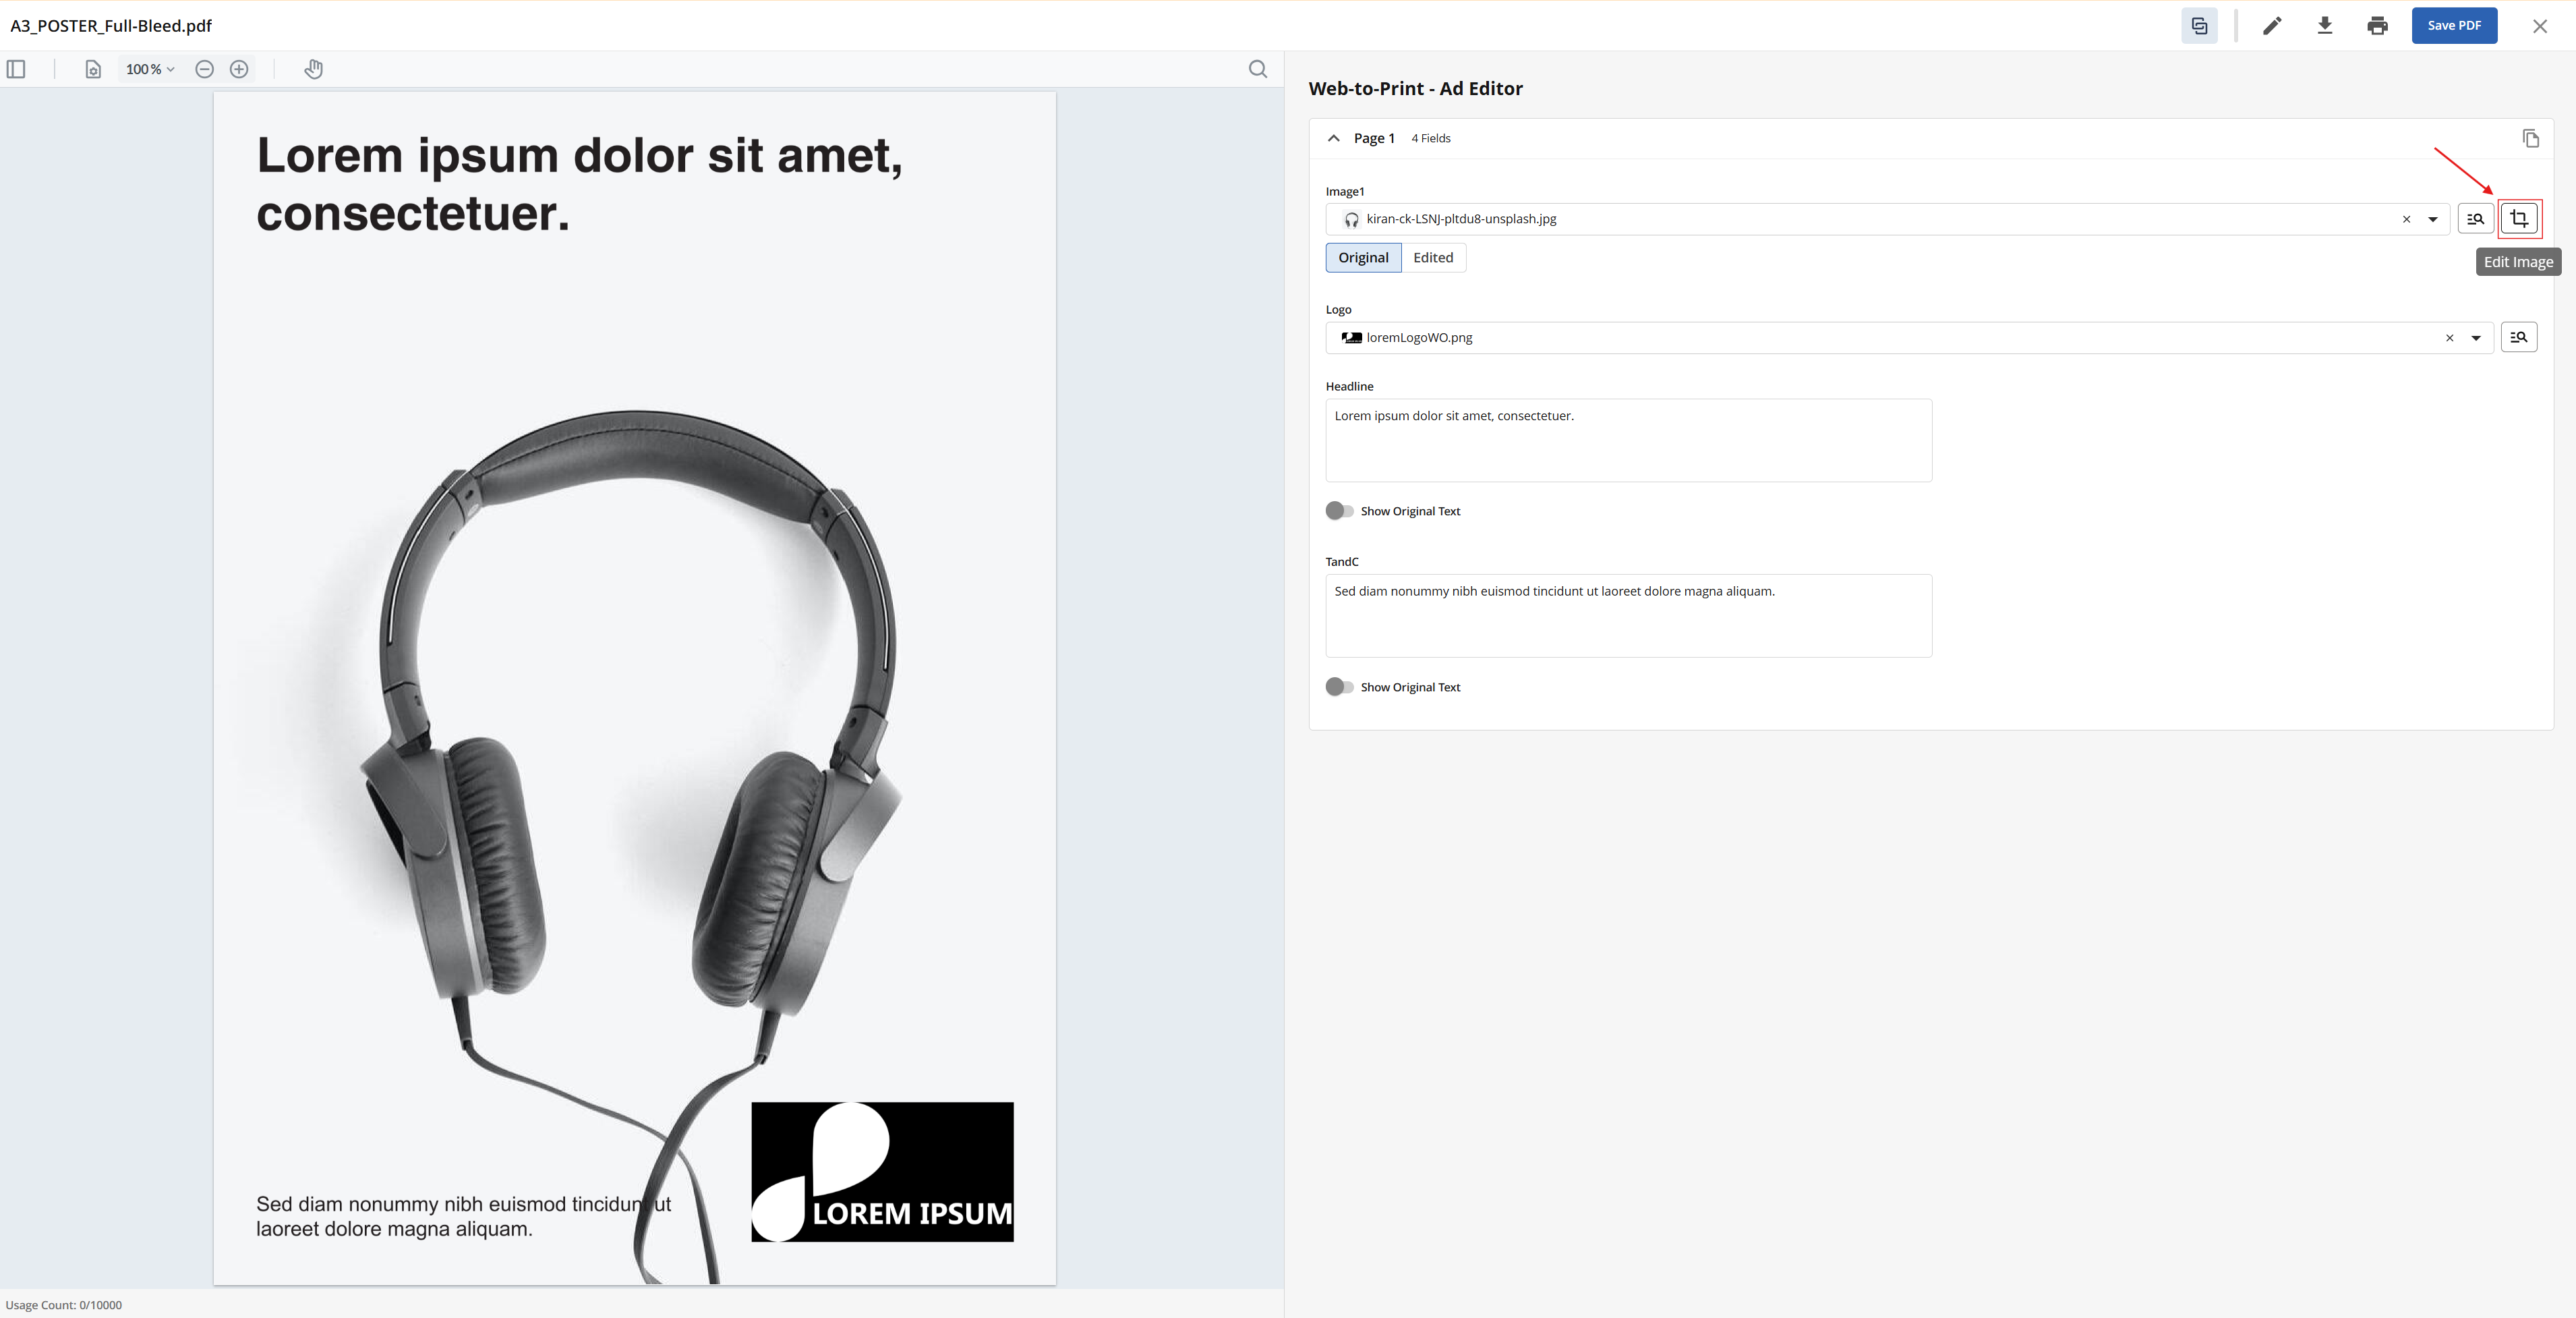
Edit Image modal is displayed:
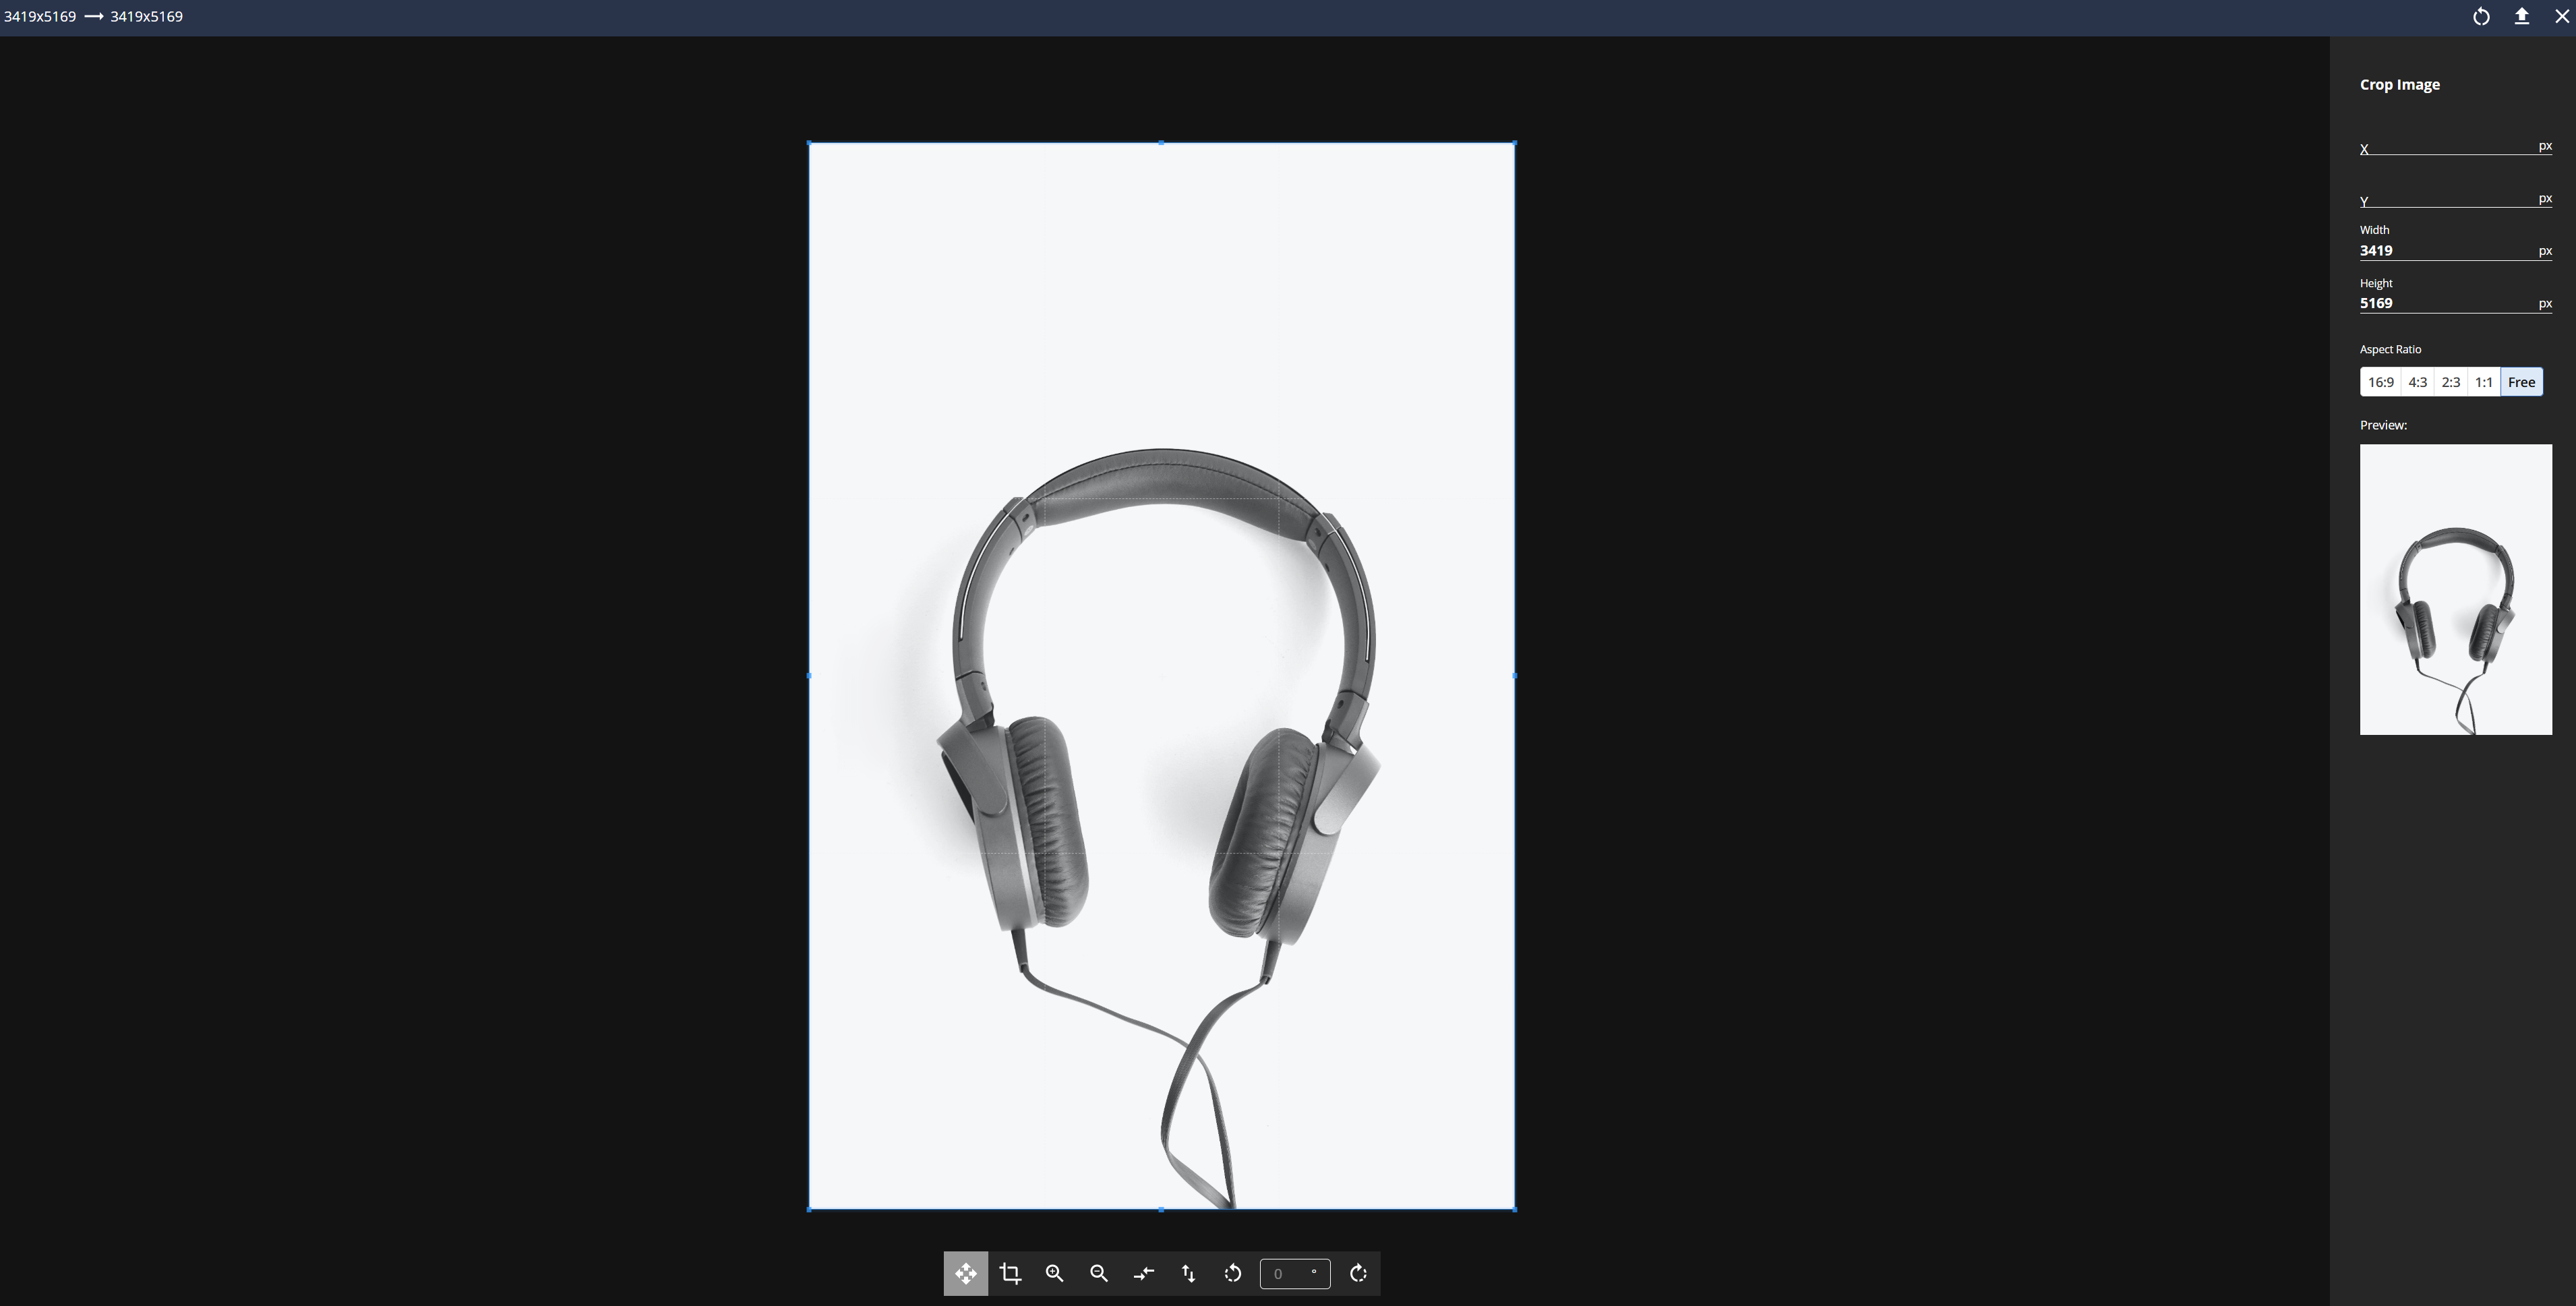
Cropping tools: Original image
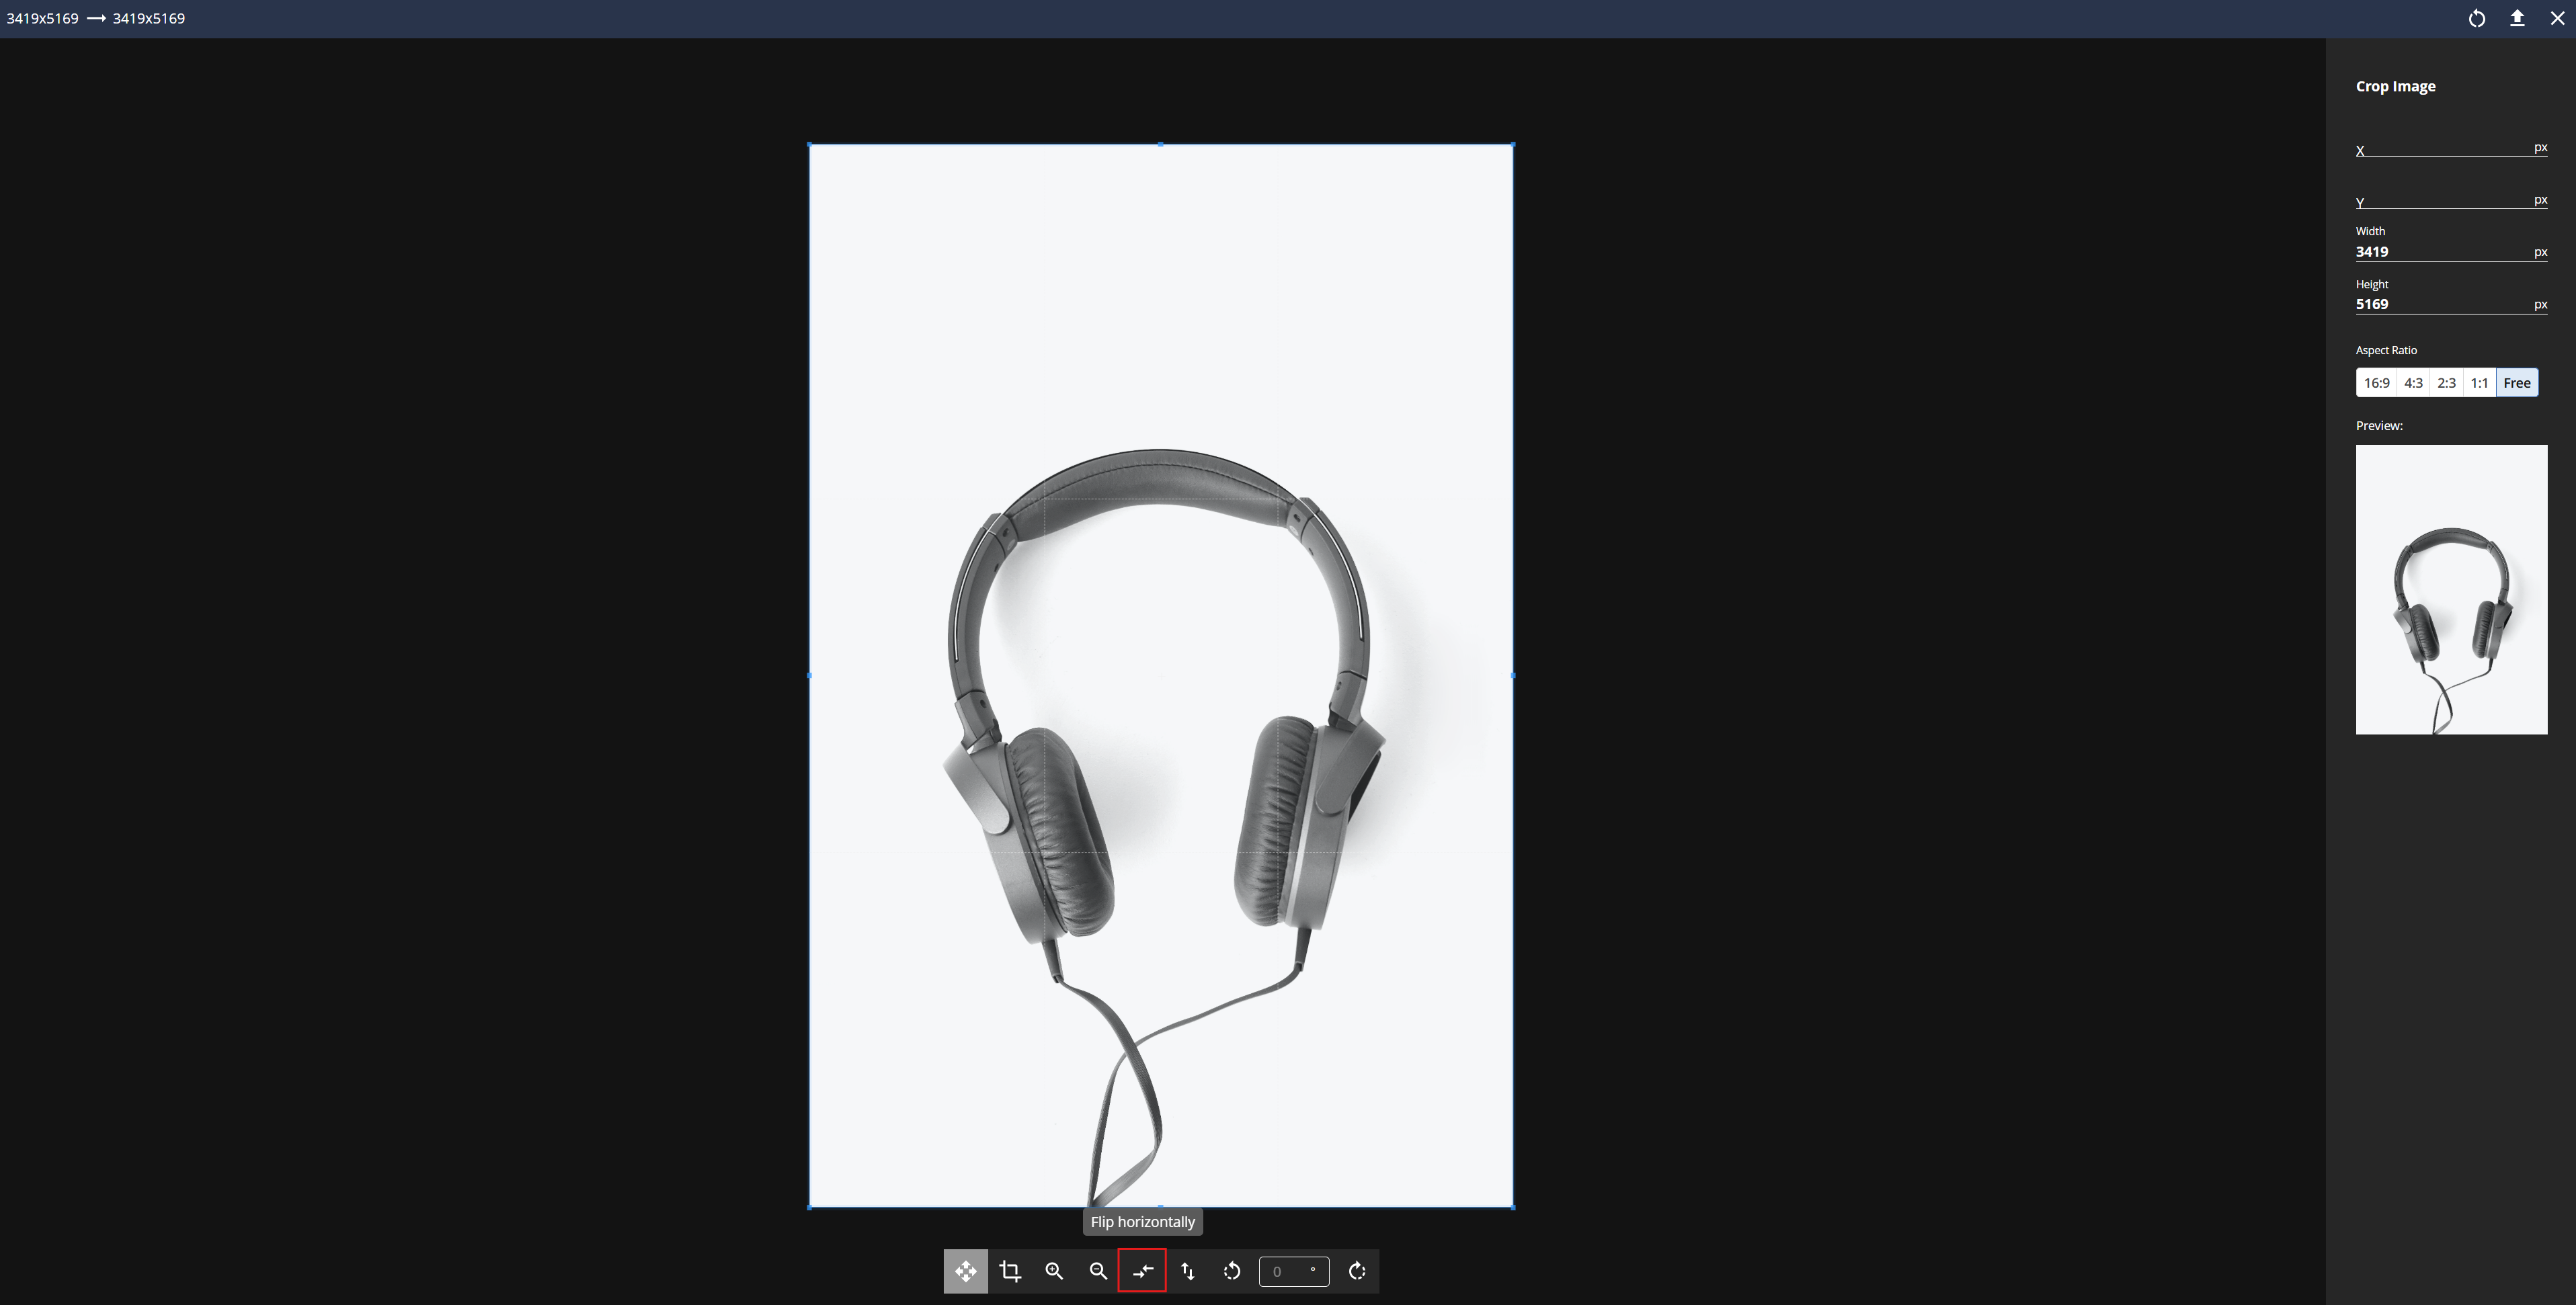
Cropping tools: Horizontal flip
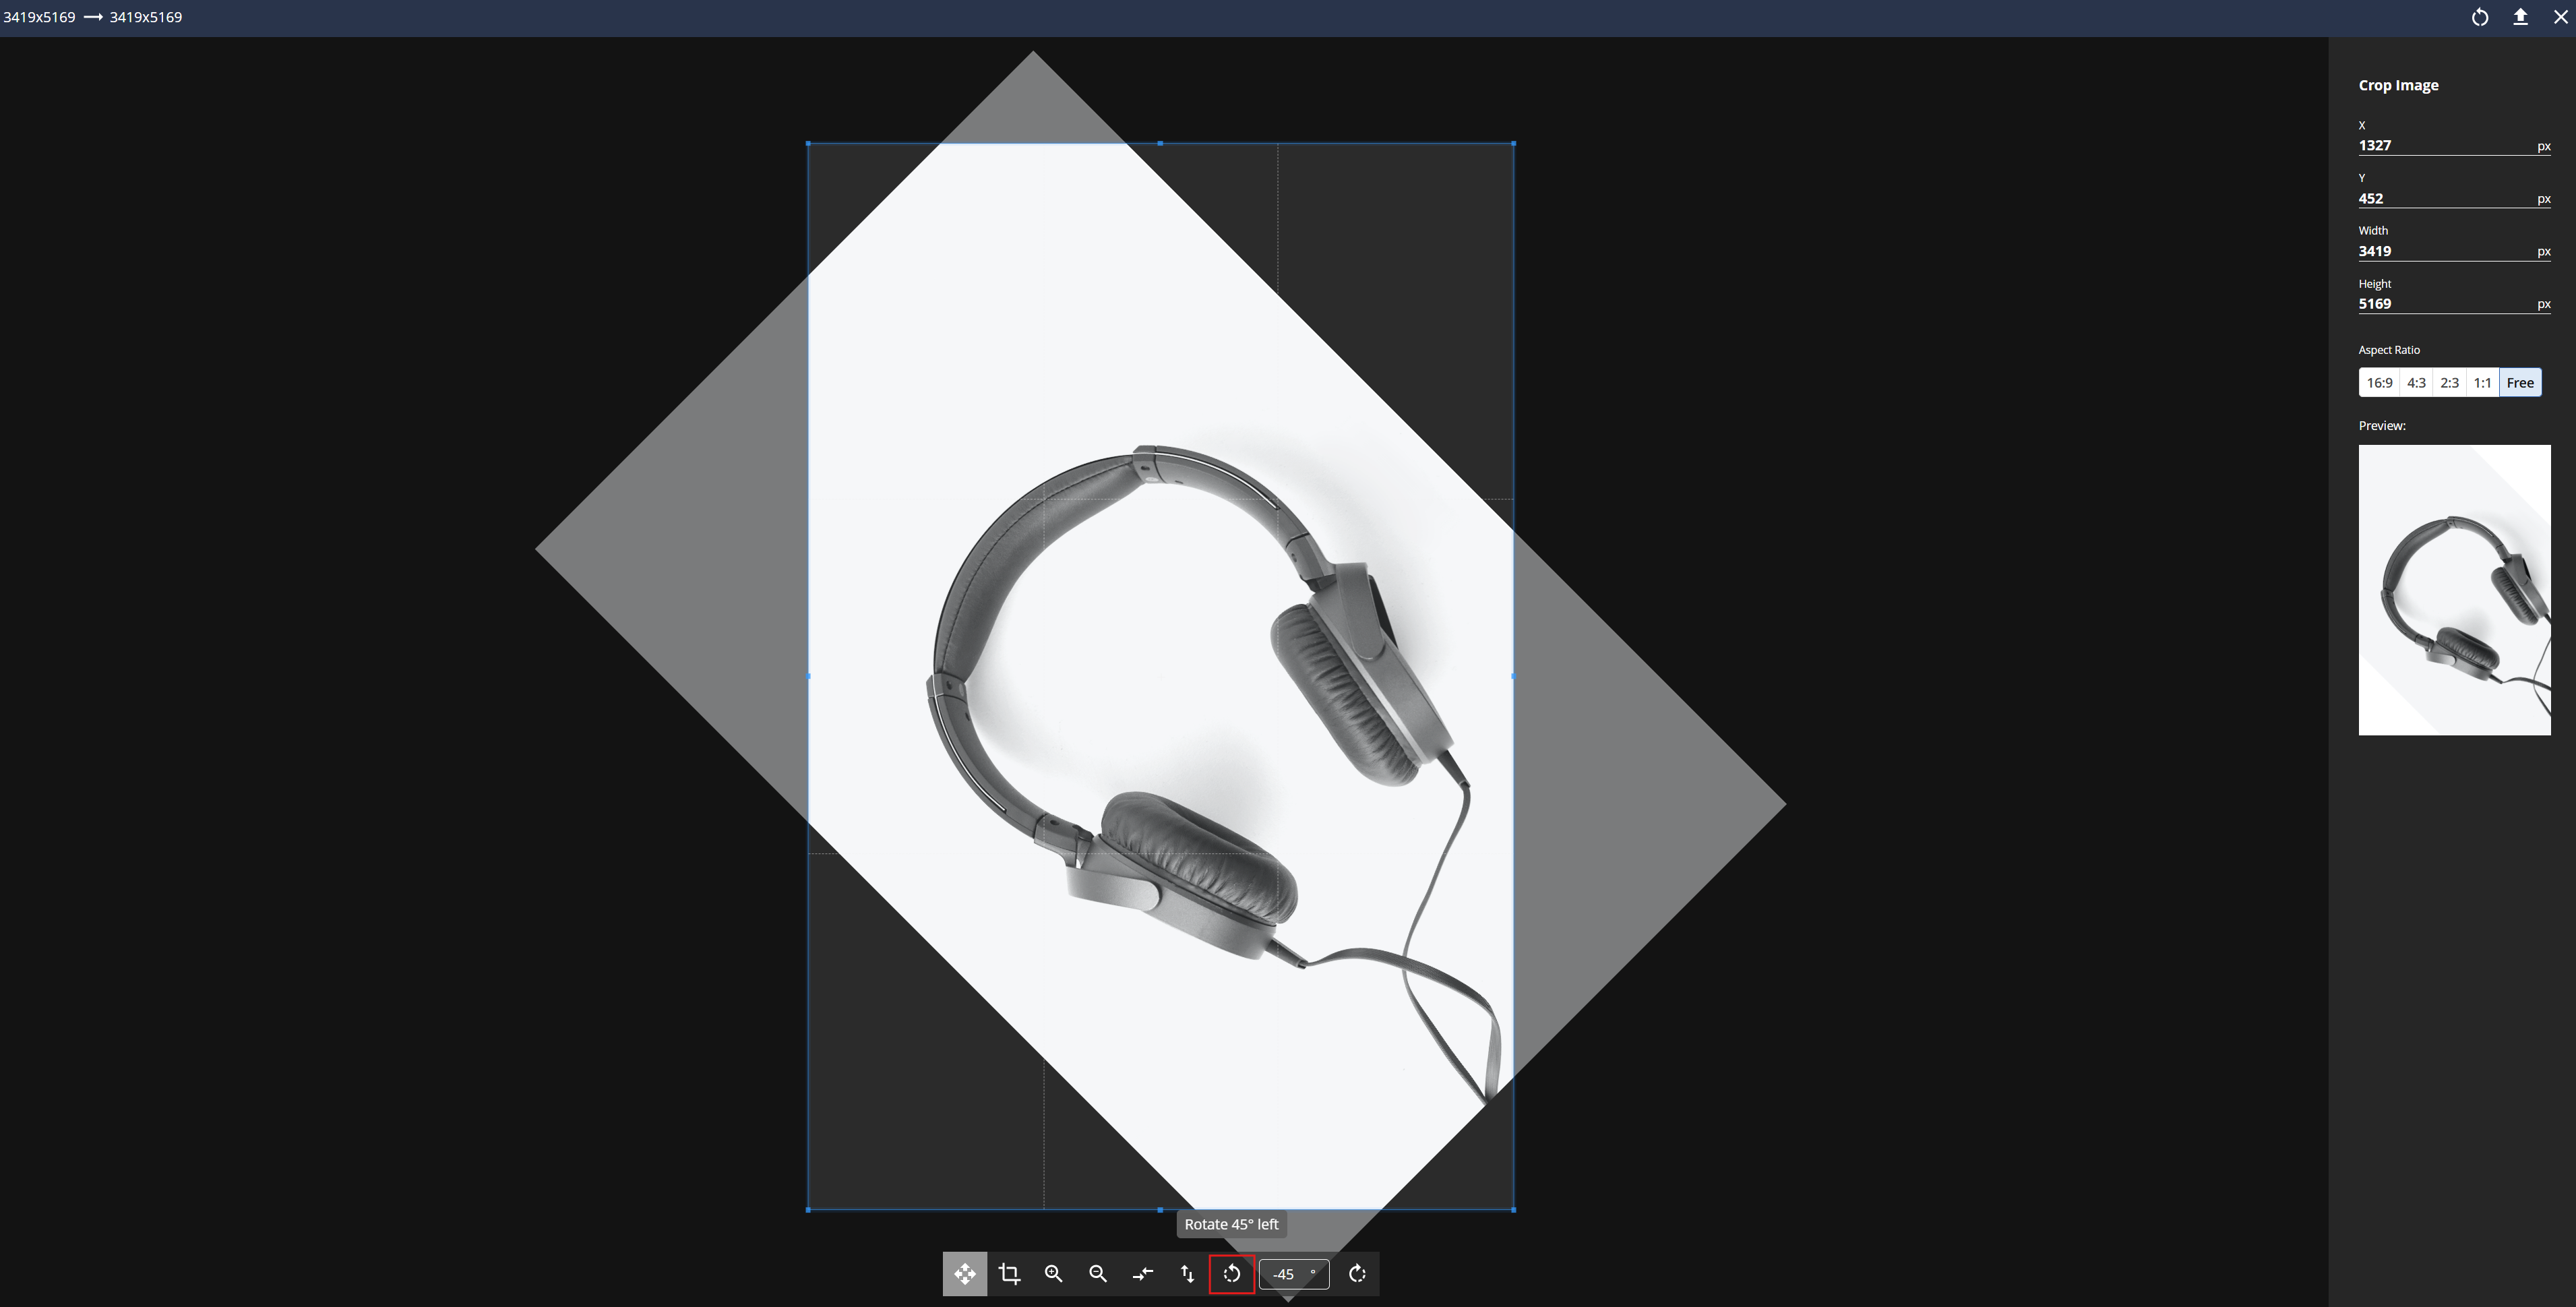
Cropping tools: Rotation
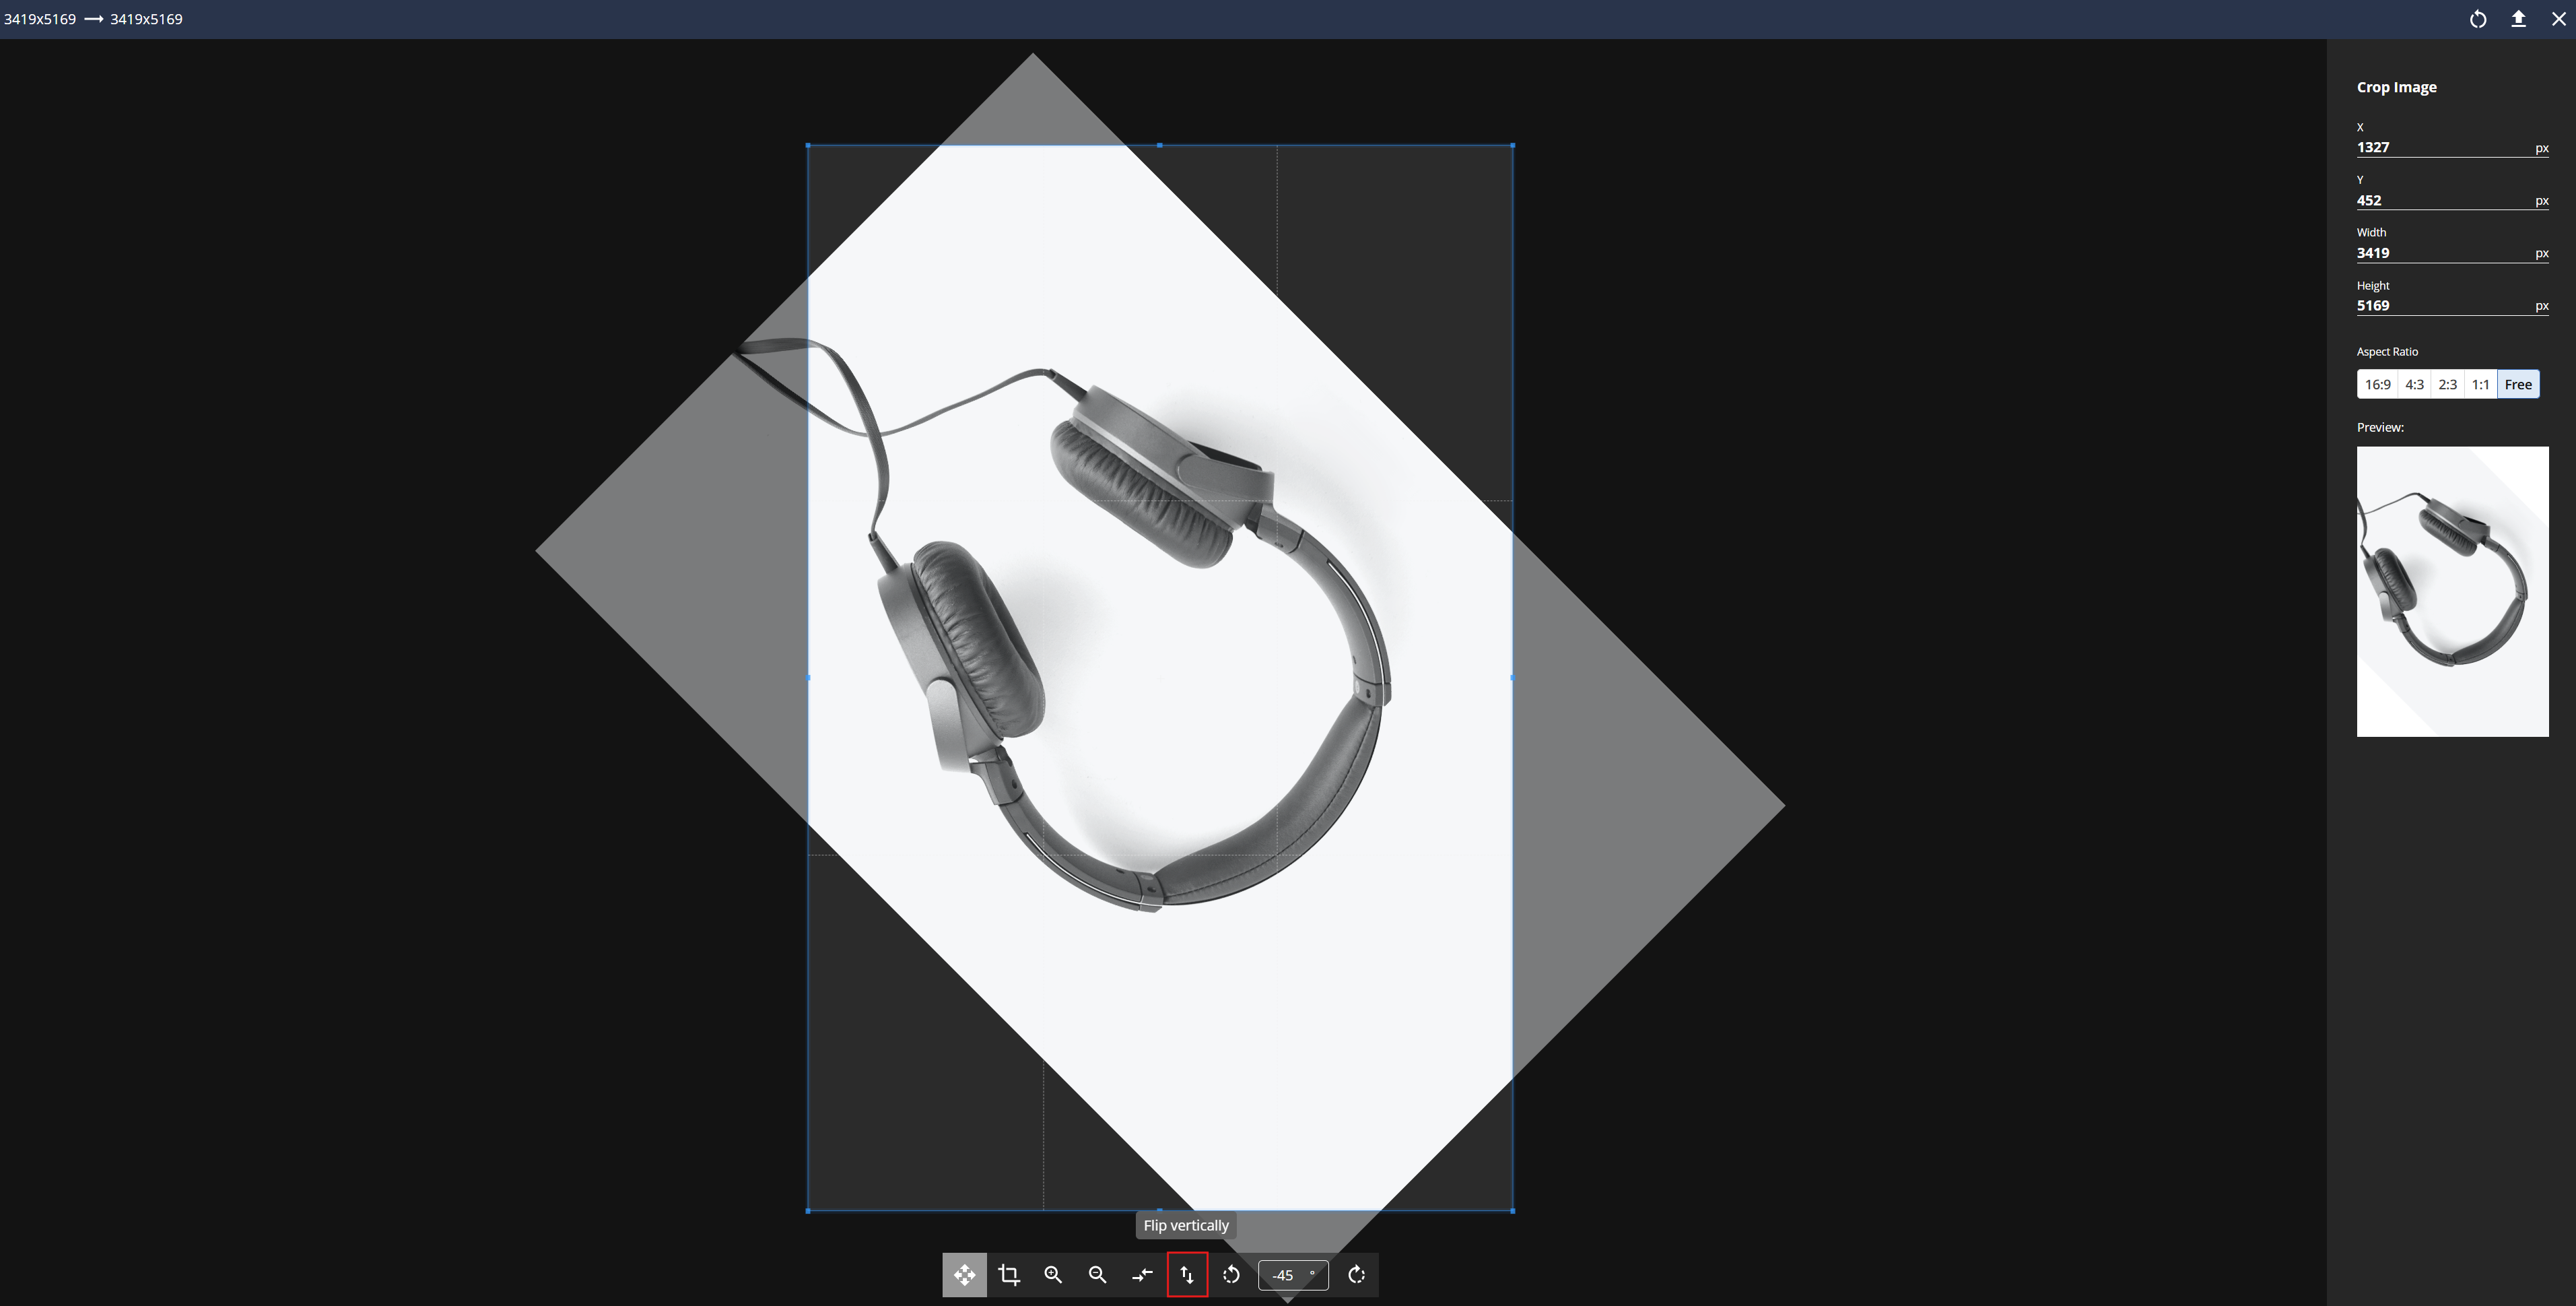 Cropping tools: Vertical flip
The following cropping tools are available in the cropping view:
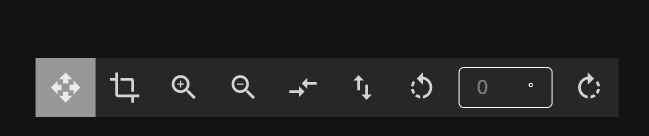
Moving Mode: Allows user to move the selected area
Cropping Mode: For selecting desired cropped area
Zoom In & Zoom Out
Flip Horizontally: Image will be flipped to show mirror image
Flip Vertically: image will be flipped up side down
Rotate Left º: Rotates image -45 degrees each time button is clicked
Custom Rotation degree: Allows user to manually set rotation degree
Rotate Right º: Rotates image 45 degrees each time button is clicked
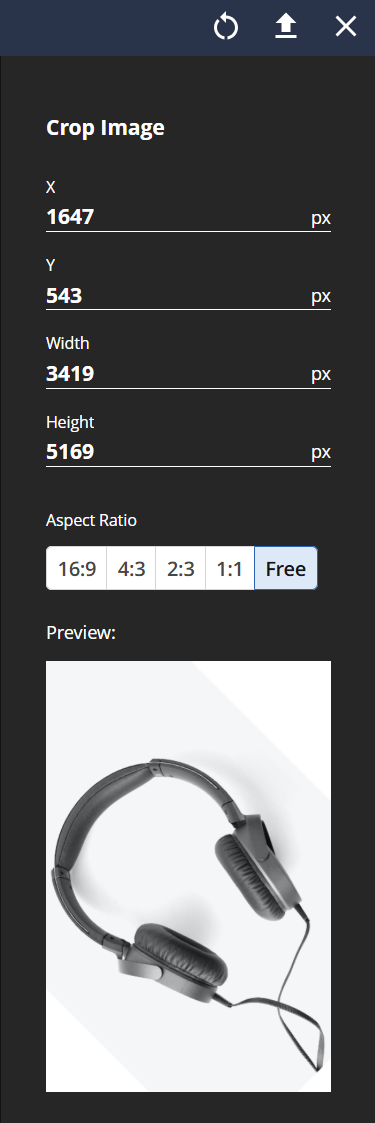
Additional cropping tools are available on the panel right side of the image:
X and Y axis: To change the position of the cropped area
Width/Height: Size of cropped area can be adjusted using width (px) and height (px) fields
Aspect Ratio: Cropping ratio can be changes between free (default) ,16:9, 4:3, 2:3 and 1:1
Reset: Previously applied changes can be reverted using ![]() icon from the top bar
icon from the top bar
Preview: The preview window will show the current unsaved changes made during the image editing
Upload: to apply changes to the image can be done by clicking ![]() icon from the top bar.
icon from the top bar.
Once changes are applied using 'upload' button, they are visible in the AdBuilder Make Ad window
Edited images will be saved in their corresponding module ( see AdBuilder configuration ) and user is able to selected between 'Original' and 'Edited' versions of the image.
.png)
Ad Editor: Edited Image selector
.png)
Ad Editor: Original Image selector
Note: AdBuilder image Cropping tool is available for the JPEG, PNG, SVG and WEBP file formats only in the new UI ( from version 13.0.0 onward).