Overview
Creative Automation Studio feature allows to generate multiple media creatives like images, banners, video from the existing source data by combining different parameters using internal AdBuilder engine.
Enabling the Feature
Corresponding feature flag must be configured in webapp.yaml file. Specify site IDs separated by comma or use * for all sites.
Properties
On the first step of Creative Automation Print Studio configuration user has two optional properties that can be selected:
Property Name | Explanation |
|---|---|
Enable Merging Outputs | Disabled by default; Defines if manual merging steps should be added on Outputs step |
Cleanup Merged on Reset | Disabled by default; Defines if we need to do cleanup of merged output item on reset *Before version 14.0.0 we were relying on whether merge module is mapped or not |
Modules Configuration and Mapping
Before creating and configuring the app, following modules and fields need to be created:
Field Name | Field Type |
|---|---|
Module: Template Used for storing the template item with parameters | |
Name | text |
XML Template | File field storing XML file with configuration parameters |
PDF Template | File field storing background PDF file |
Module: Request Stores request items. | |
Name | Text |
Source file | File field used to store the import file containing data for Inputs. |
Status | Status field (optional text or module link) _______________________________________________ *Before version 14.0.0 - Status field with the following list of options:
The status field options must match the exact naming. Renaming these values may break the integration. Options can be translated. |
Status - Design | Option from the field Status can be selected for each field *if not specified - value will be set by hardcoded names used before version 14.0.0 |
Status - In Progress | |
Status - Done | |
Status - Error | |
Module: Input Module storing source data for the configured template parameters. Input data can be added either by manually creating items or using import file with data uploaded to a previously created request. | |
Name | Text field |
Request | Module link to Request module. It is recommended to enable "Prefill automatically" option for the module link to avoid filling in the field manually. |
Group key | Text field. |
Templates | Module link to templates module. |
Import Configurations | |
Import Configuration | Import configuration in Input module for bulk import of input items. |
Module: Output Input items or generated combinations are stored in this module. Each combination is an item with certain set of parameters. | |
Name | Text field |
Template | Module link to module Template |
Request | Module link to module Request |
Input | Module link to module Input |
Status | Status field (optional text or module link) _______________________________________________ *Before version 14.0.0 - Status with options:
|
Status - Design | Option from the field Status can be selected for each field *if not specified - value will be set by hardcoded names used before version 14.0.0 |
Status - Done | |
Status - Error | |
Status - Merge Approved | Option from the field Status can be selected ⚠️This field must be filled in to use manual merging of Outputs |
Generation Started | Date (all skeleton formats are supported) |
Generation Finished | Date (all skeleton formats are supported) |
Error Reason | Text |
Output File | Single or Multi file field |
XML Template | Single file field |
PDF Template | Single file field |
Sent to Generation by User | Module link to module Users |
Scale Size *appears in 14.0.0 | Module link to the Sizes module. If specified - output should be scaled to it |
Merge Group | Select box, Status, Radio button fields; module link is recommended Defines the field for grouping Outputs |
Merge Rule | Integer or Text field Id of the Merge PDF rule manually assigned to the Output(s) will be automatically added into the field once merging is finished |
Date | Date field |
AdBuilderID | Integer |
Module: AdBuilder Module of the type AdBuilder with the following configuration: | |
Name | Value |
Template Module | Module: Template |
Field with XML Templates | XML Template field in module Template |
Field with PDF Templates | PDF Template field in module Template |
Module with saved PDF Files | Module: Output |
Field with Saved PDF | Output File field in module Output |
Field with XML Template | XML Template field in module Output |
Field with PDF Templates | PDF Template field in module Output |
Field with Name | Name field in module Output |
Field with Date | Date field in module Output |
Field with AdBuilder ID | AdBuilderID field in module Output |
Merged PDF Module storing generated outputs merged into 1 file | |
Request | Module link to module Request |
APP Configuration: Access Rights
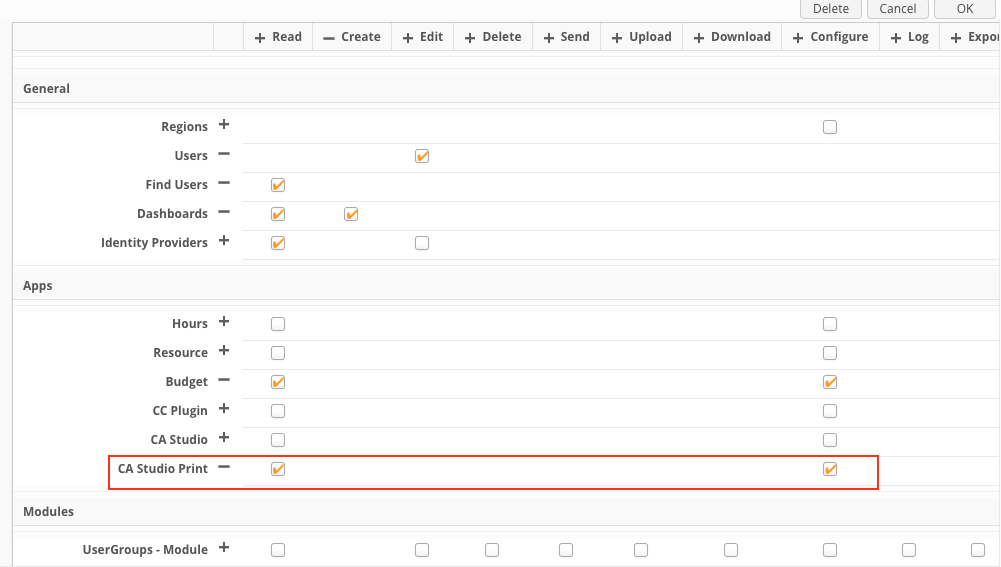
Access to Creative Automation Print Studio and its configuration is controlled by the "CA Studio Print" access option under "Apps" section in Access rights configuration window.
"CA Studio Print" access option allows configuration of "Read" and "Configure" access. In order to give user access to configuration of CA Studio print, both options should be selected.
APP Configuration
Configuration of the Creative Automation Print Studio is available from:
Site Configuration > Apps (removed in version 10.0)
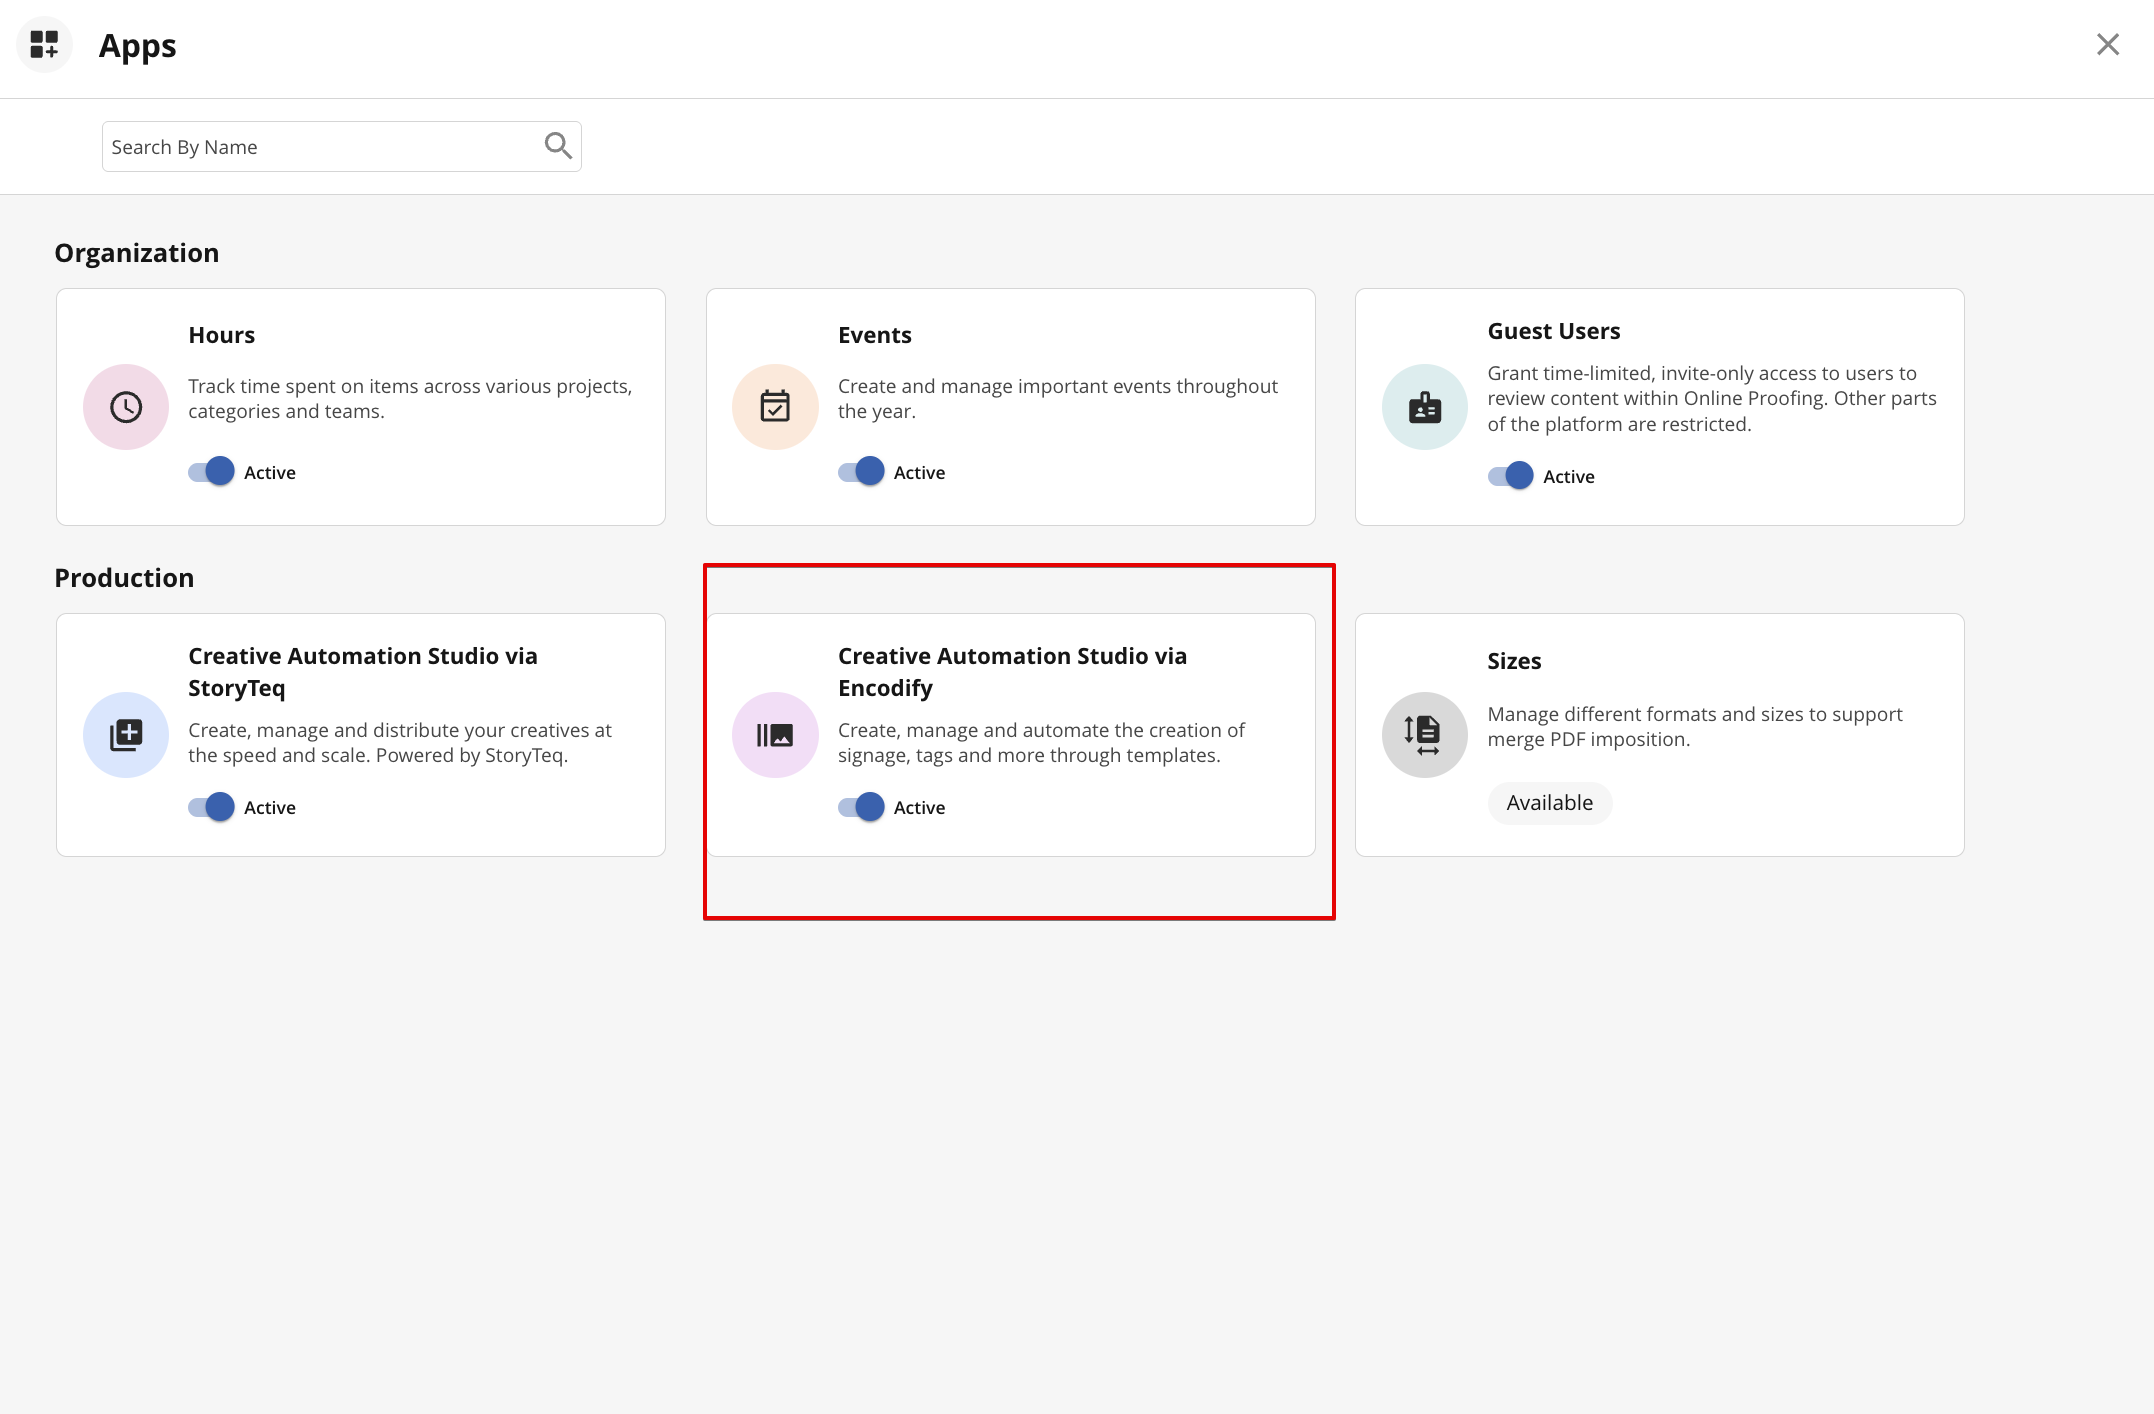
Dashboard > Applications
It is recommended to use Dashboard > Applications menu for creating the app, which gives a better user experience and possibility to configure mappings and enable generation of variations, which is not availble in Site Configuration > Apps using classic UI.
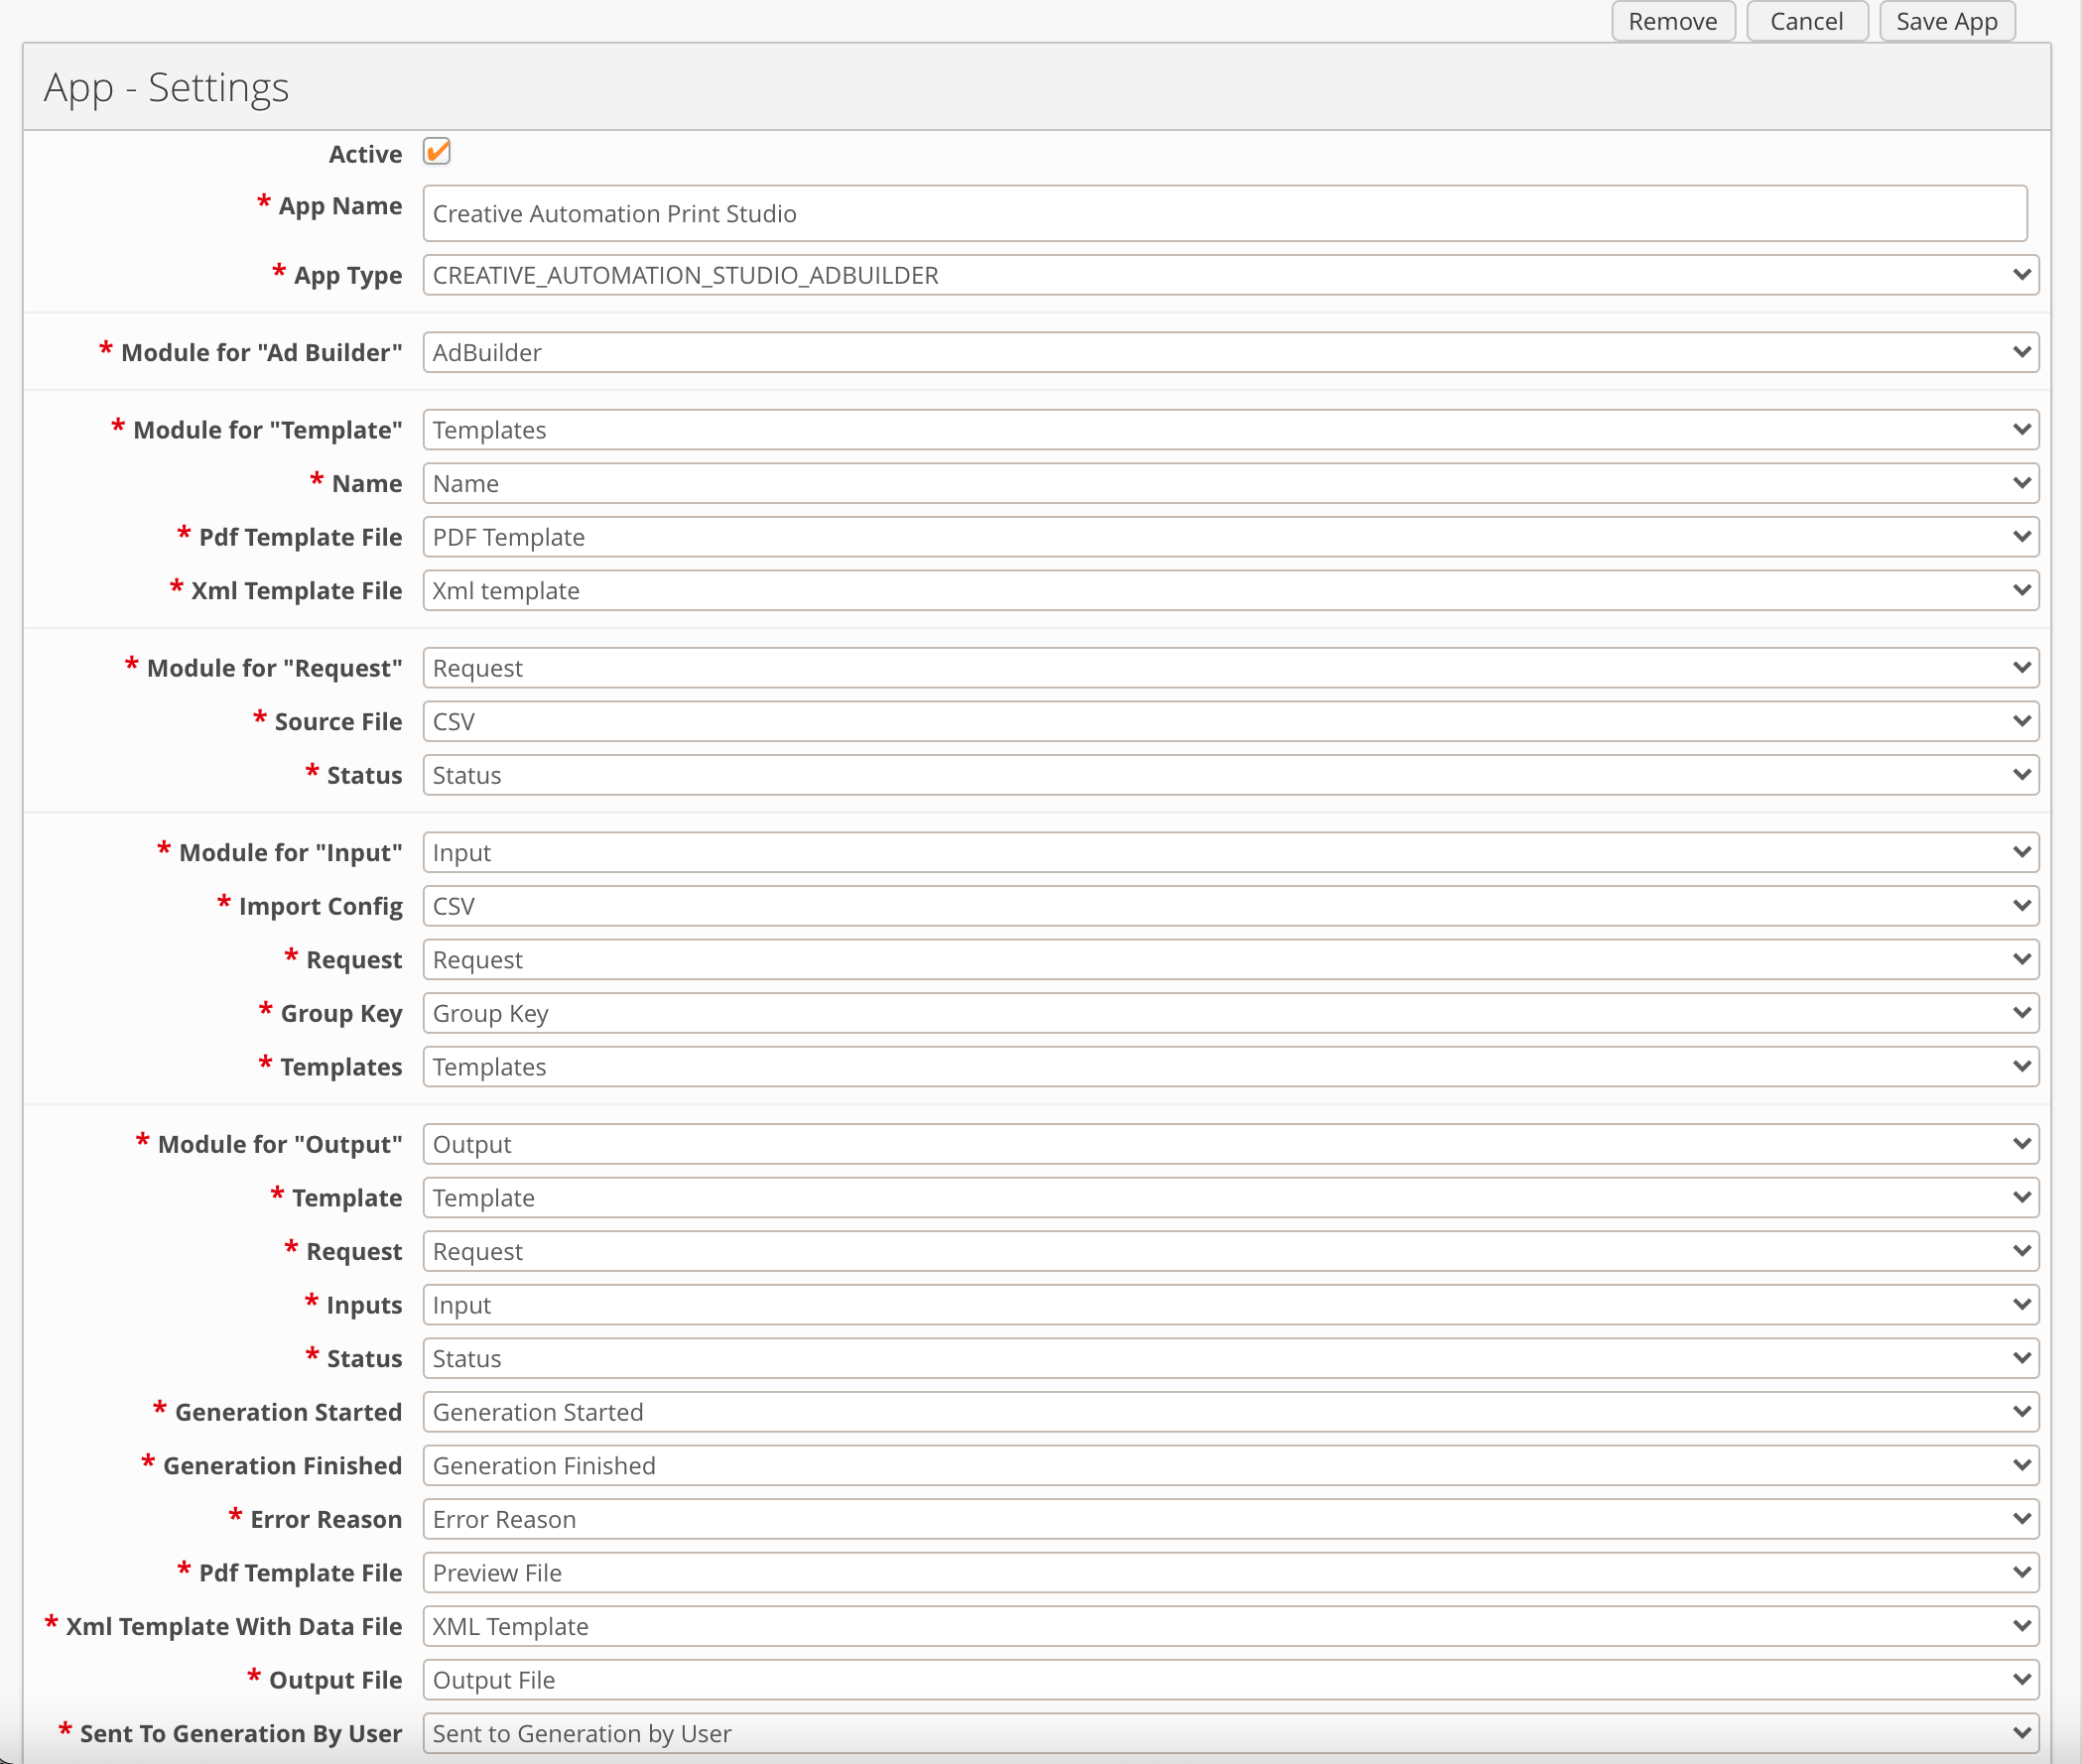
Site Configuration > Apps (Configuration page - Classic UI)
In Site Configuration > Apps create a new app and select a new application of type CREATIVE_AUTOMATION_STUDIO_ADBUILDER .
Map the parameters to the corresponding modules and fields.
Site Configuration > Apps (Configuration page - New UI)
Configuration of the CA Print Studio via new UI allows creating of mappings and variations that will be applied on generating outputs from the inputs. This configuration is available on the Mappings menu of the App Configuration.
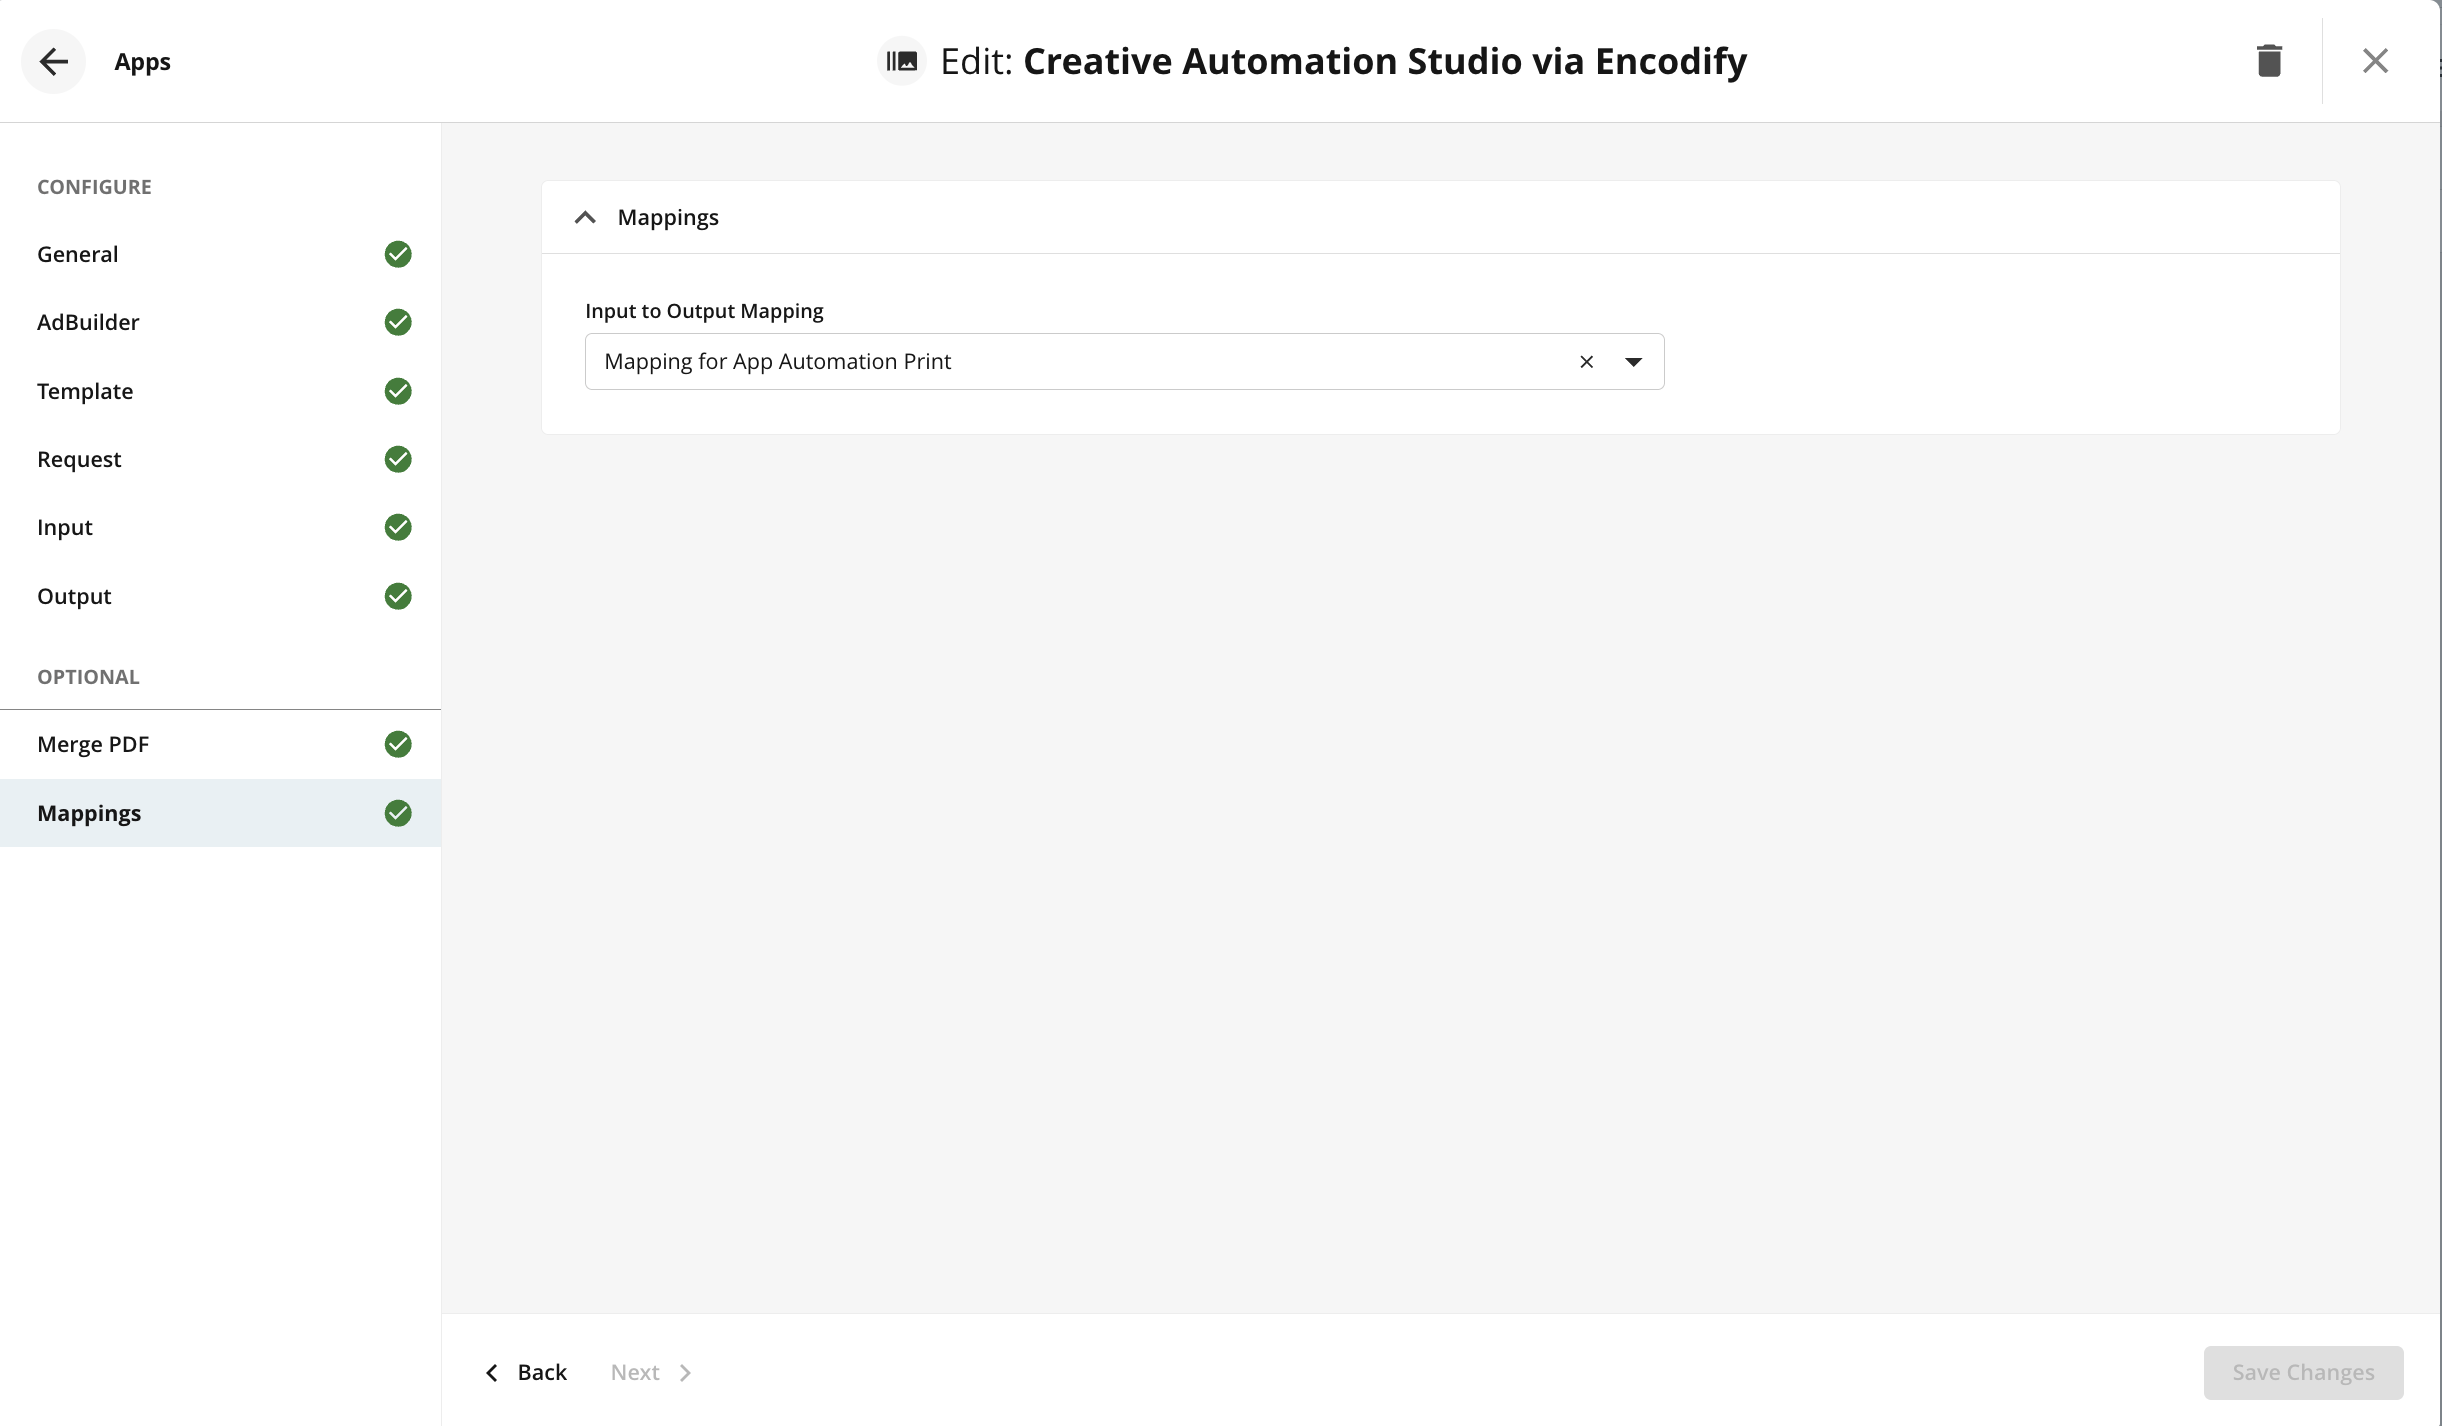
Mappings - mapping of fields defines which field values should be copied from the input module items to the output module items. Mappings can be created within Field-To-Field Mapping menu.
⚠️ For existing apps mapping lines will be migrated to Field-To-Field Mapping menu automatically.
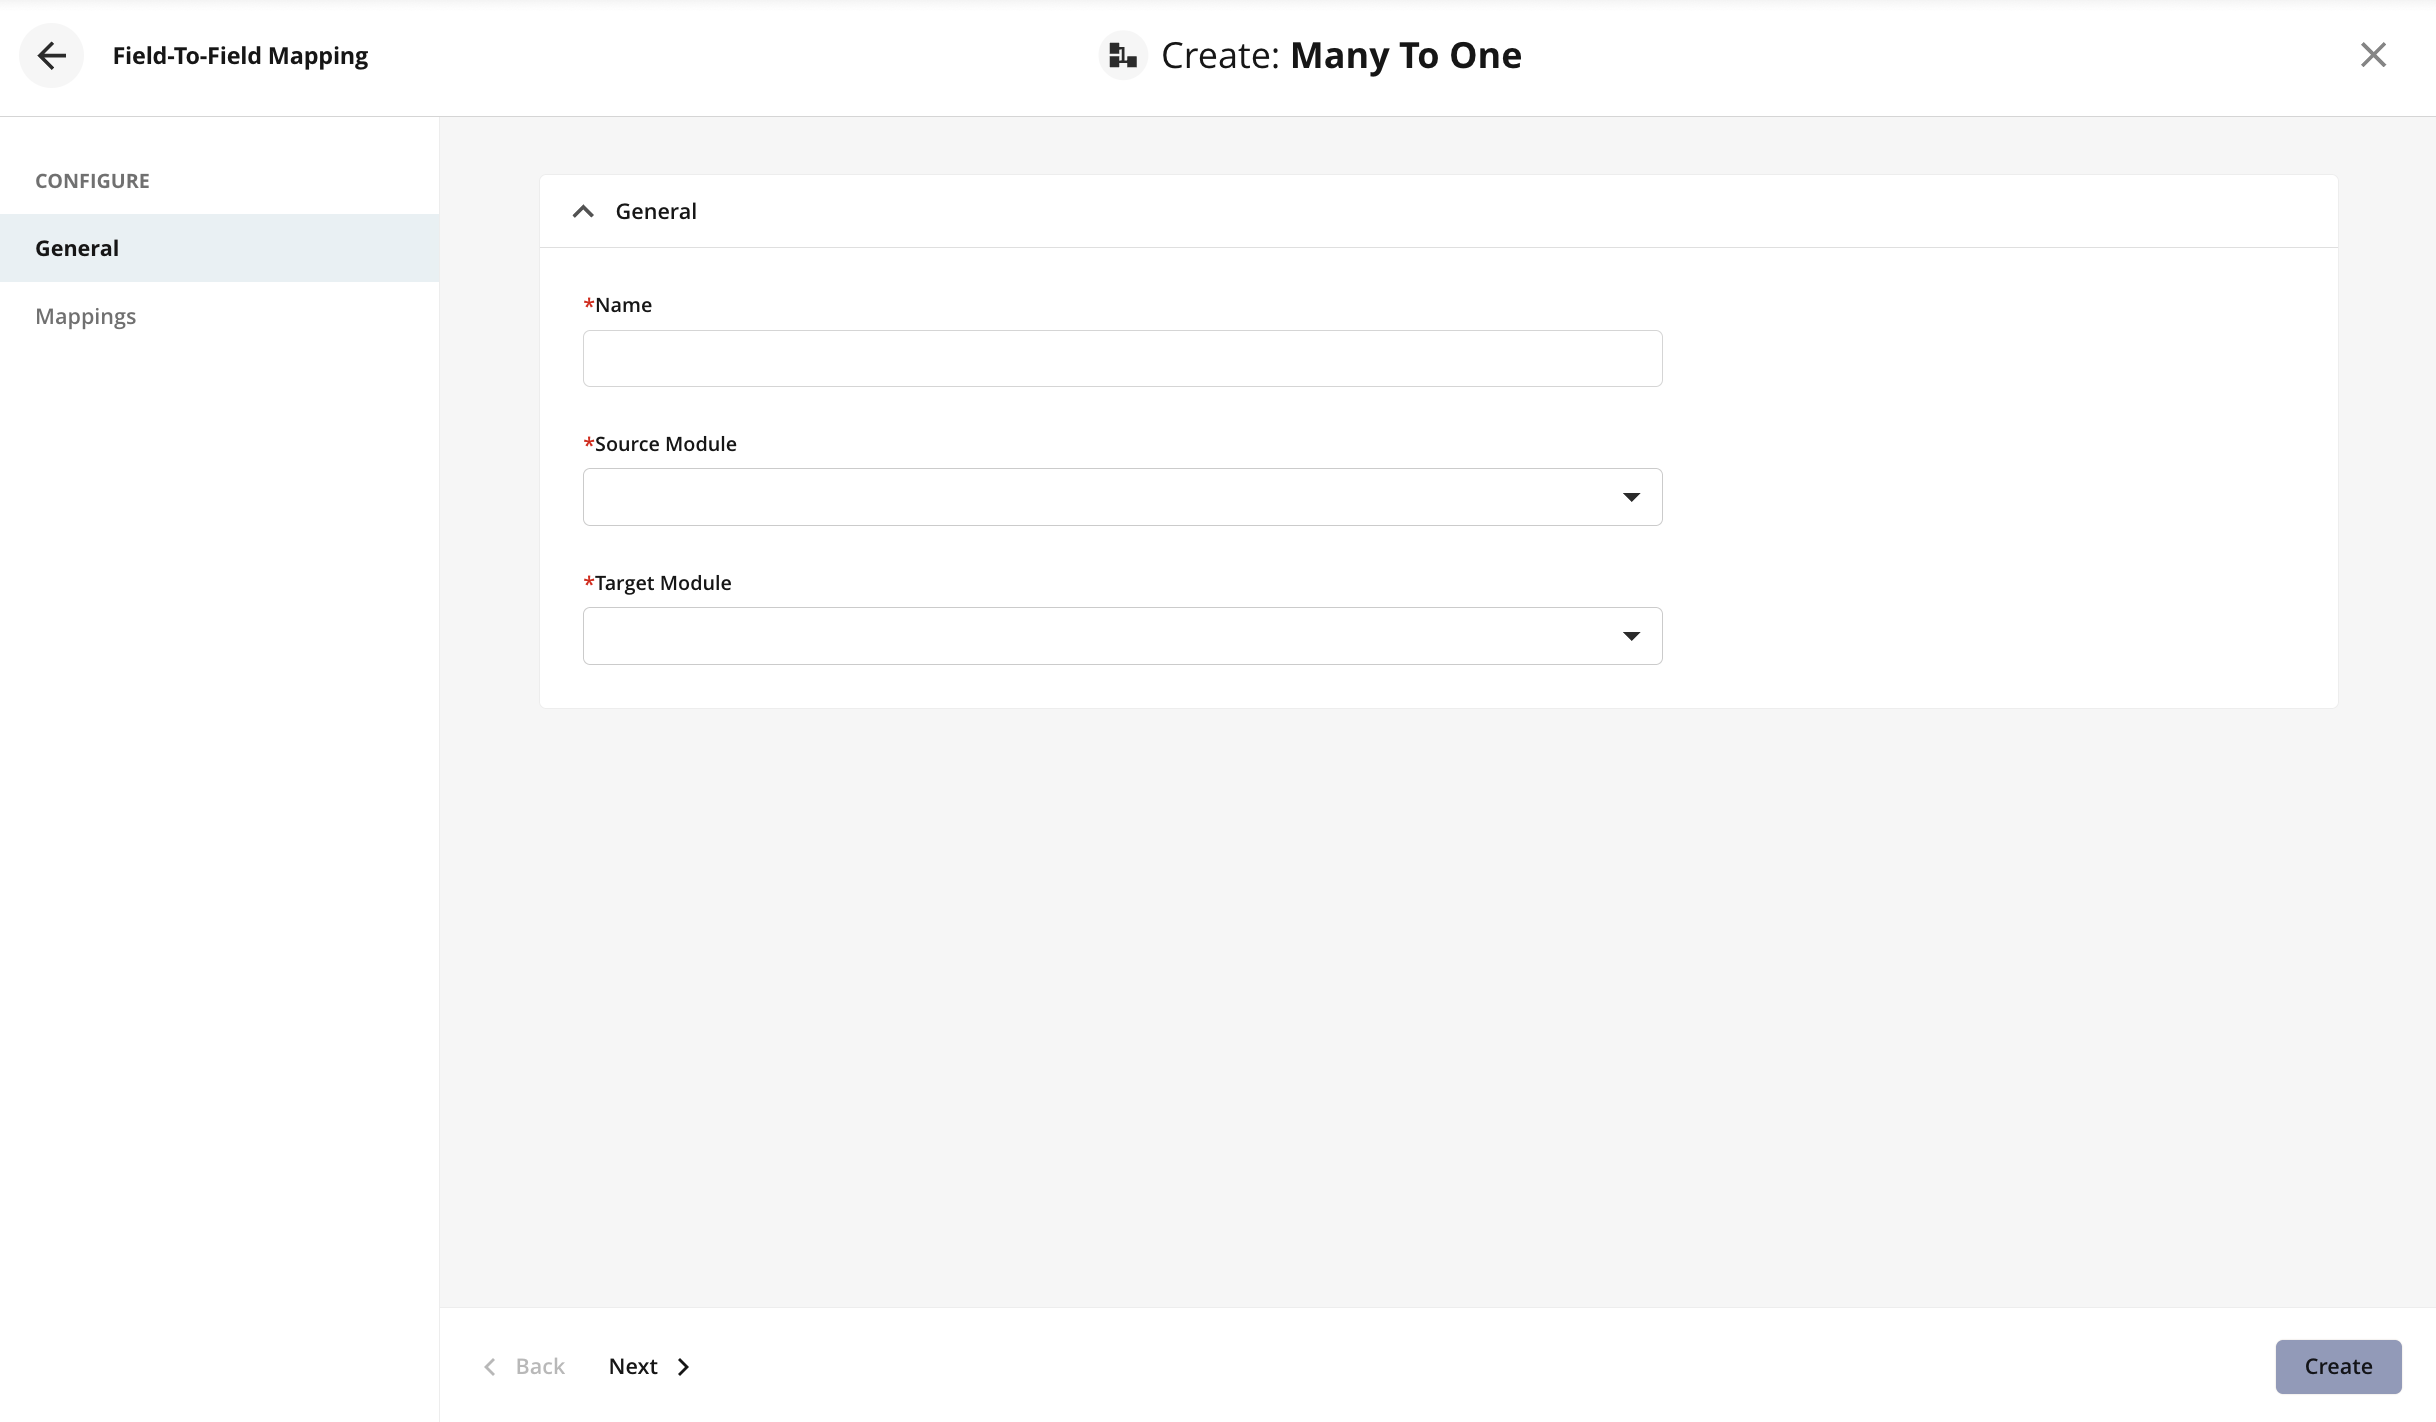
Field-To-Field Mapping
Mapping of fields to be used in Creative Automation Print studio and Merge PDF automation rule(s) can be created on the separate tab - Field To Field Mapping.
This tab is available only for Site and System admin users.
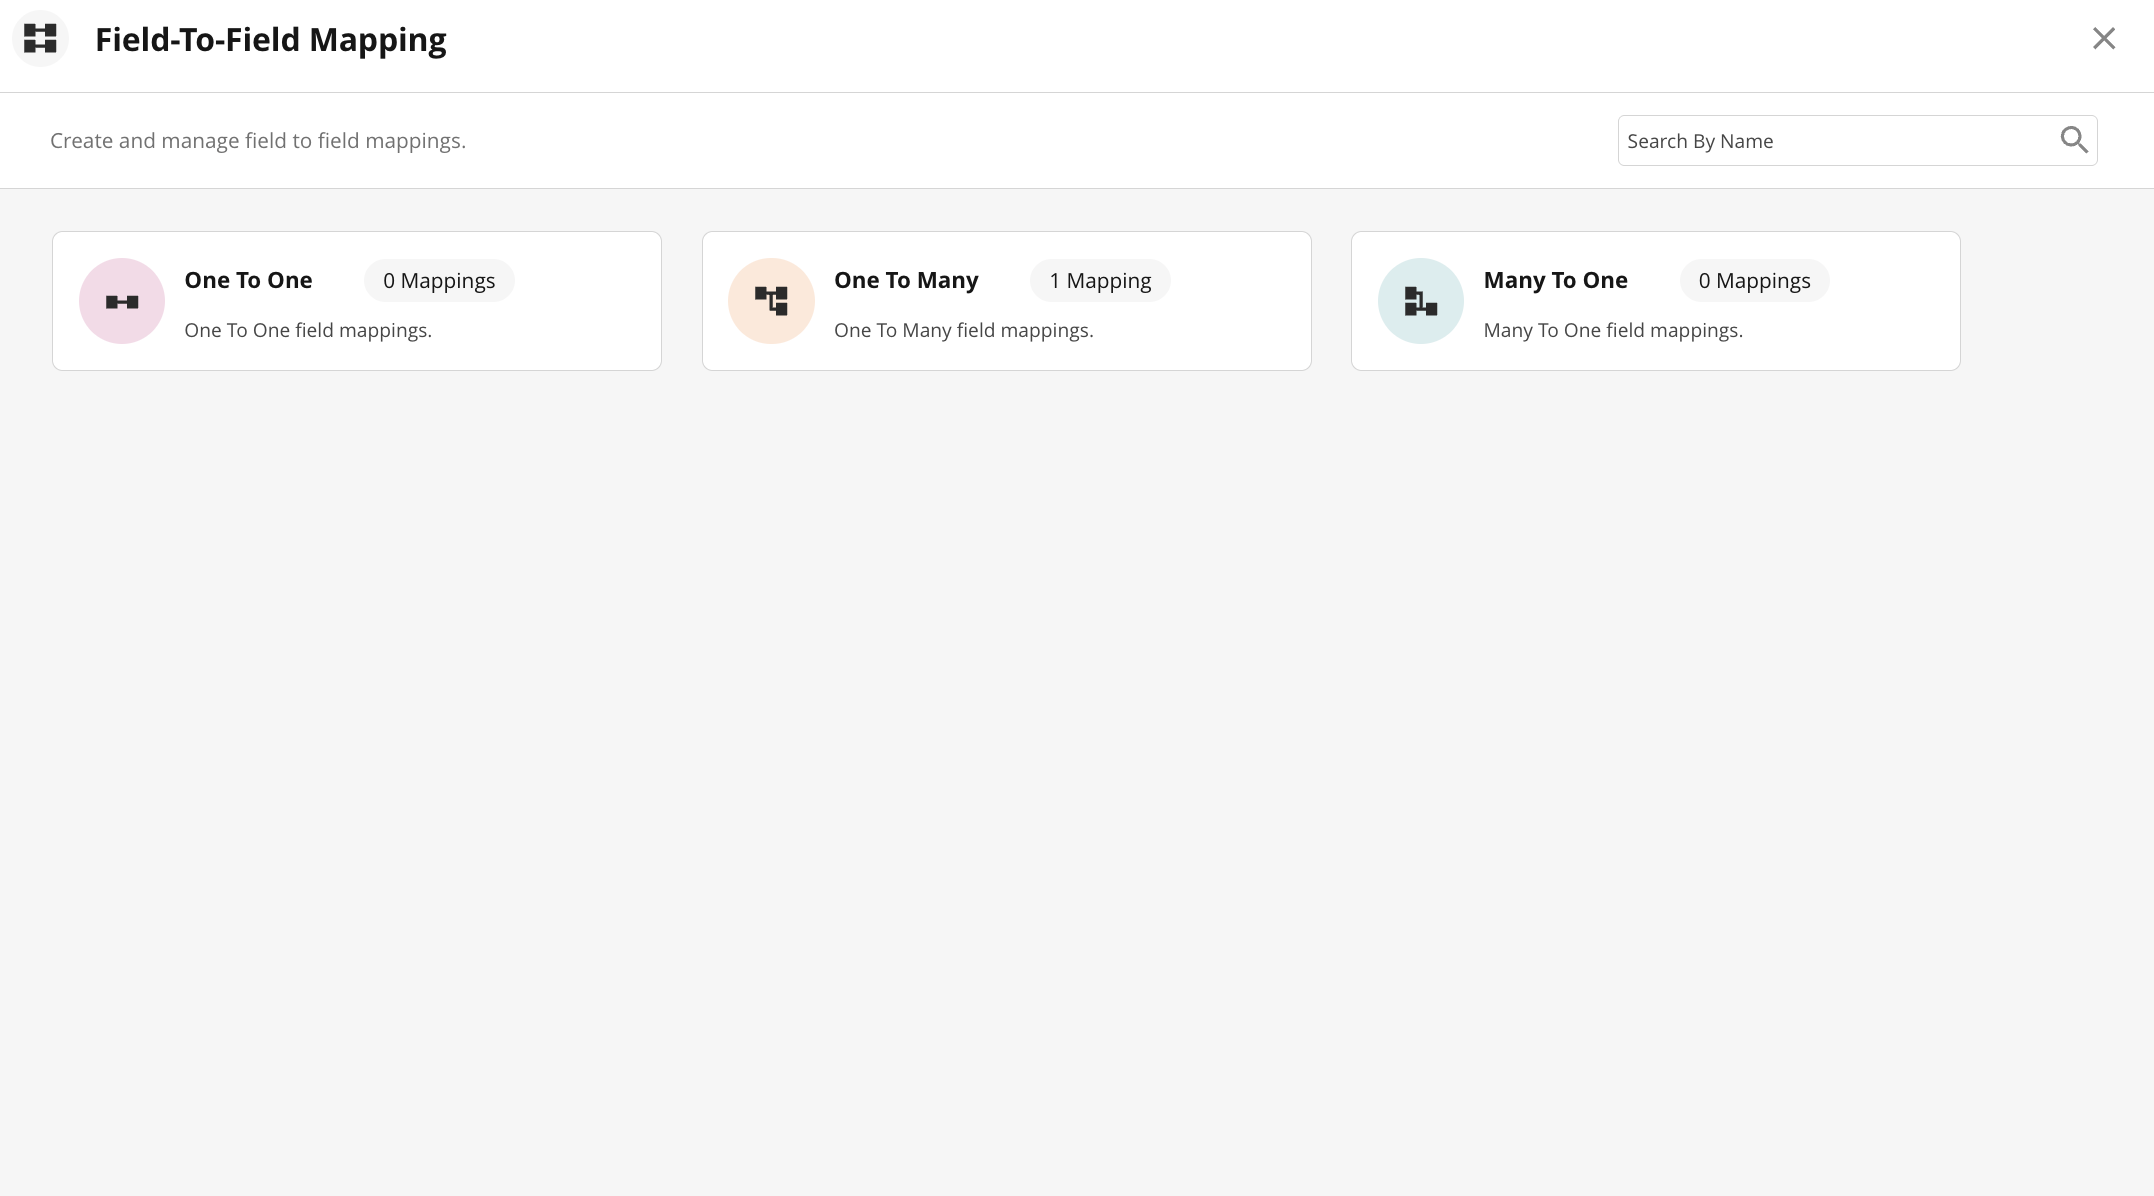
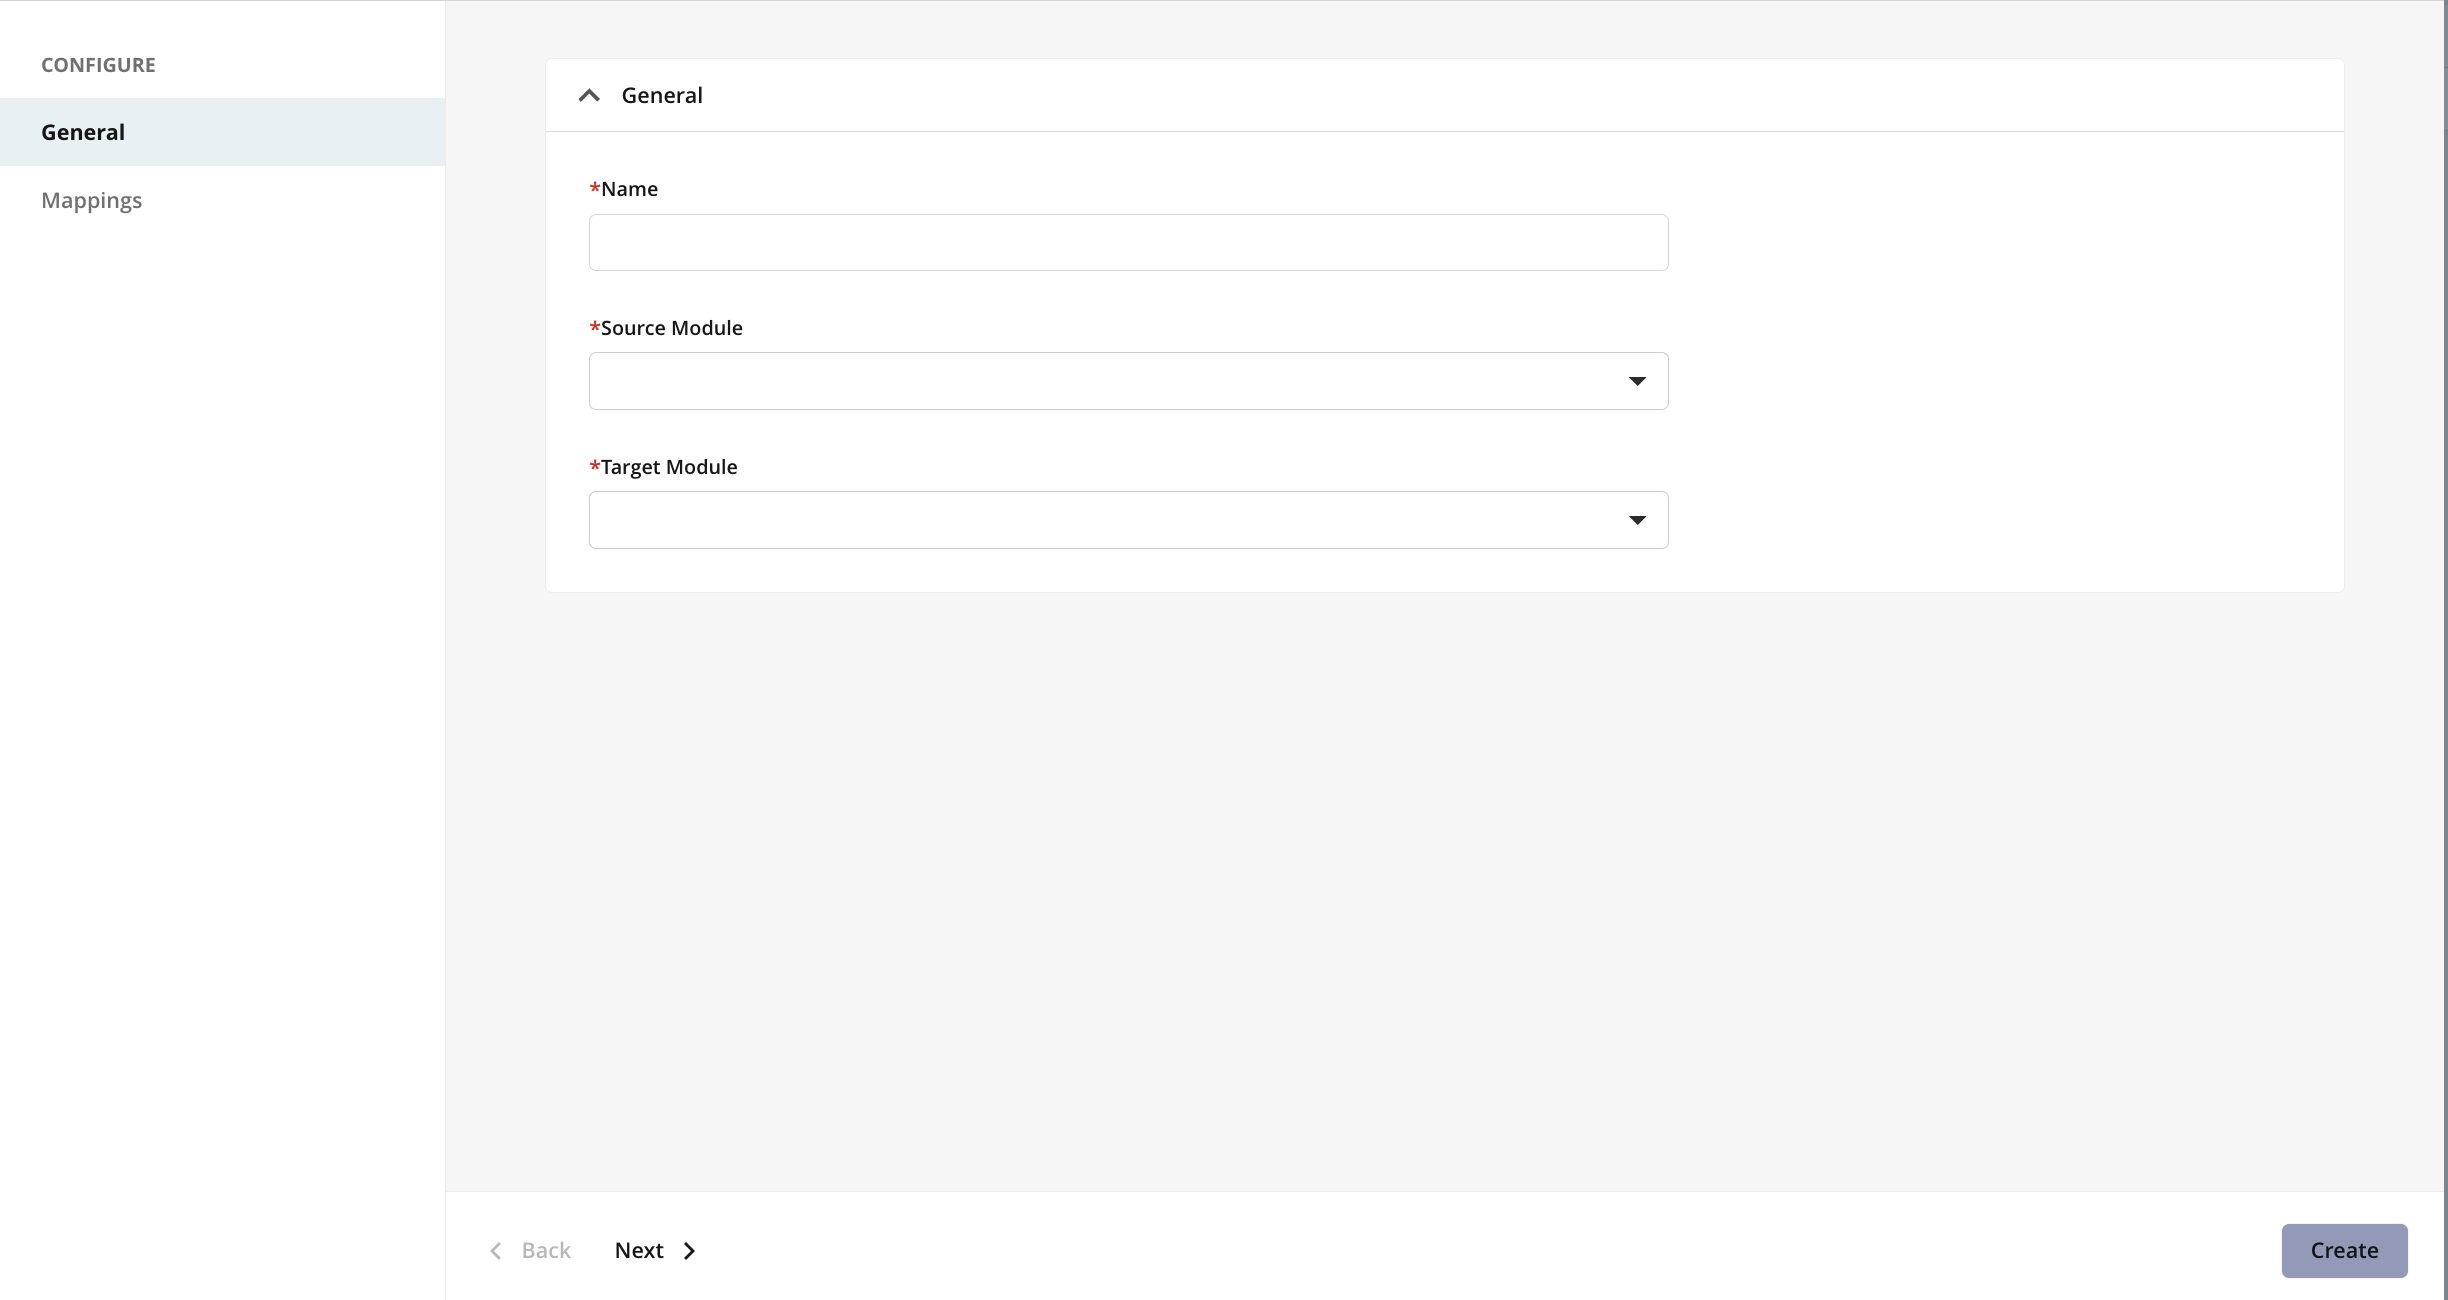
Each mapping has the same first step of configuration - General, where user has to select modules for further actions.
'Mapping' step differs for each of 3 possible configurations:
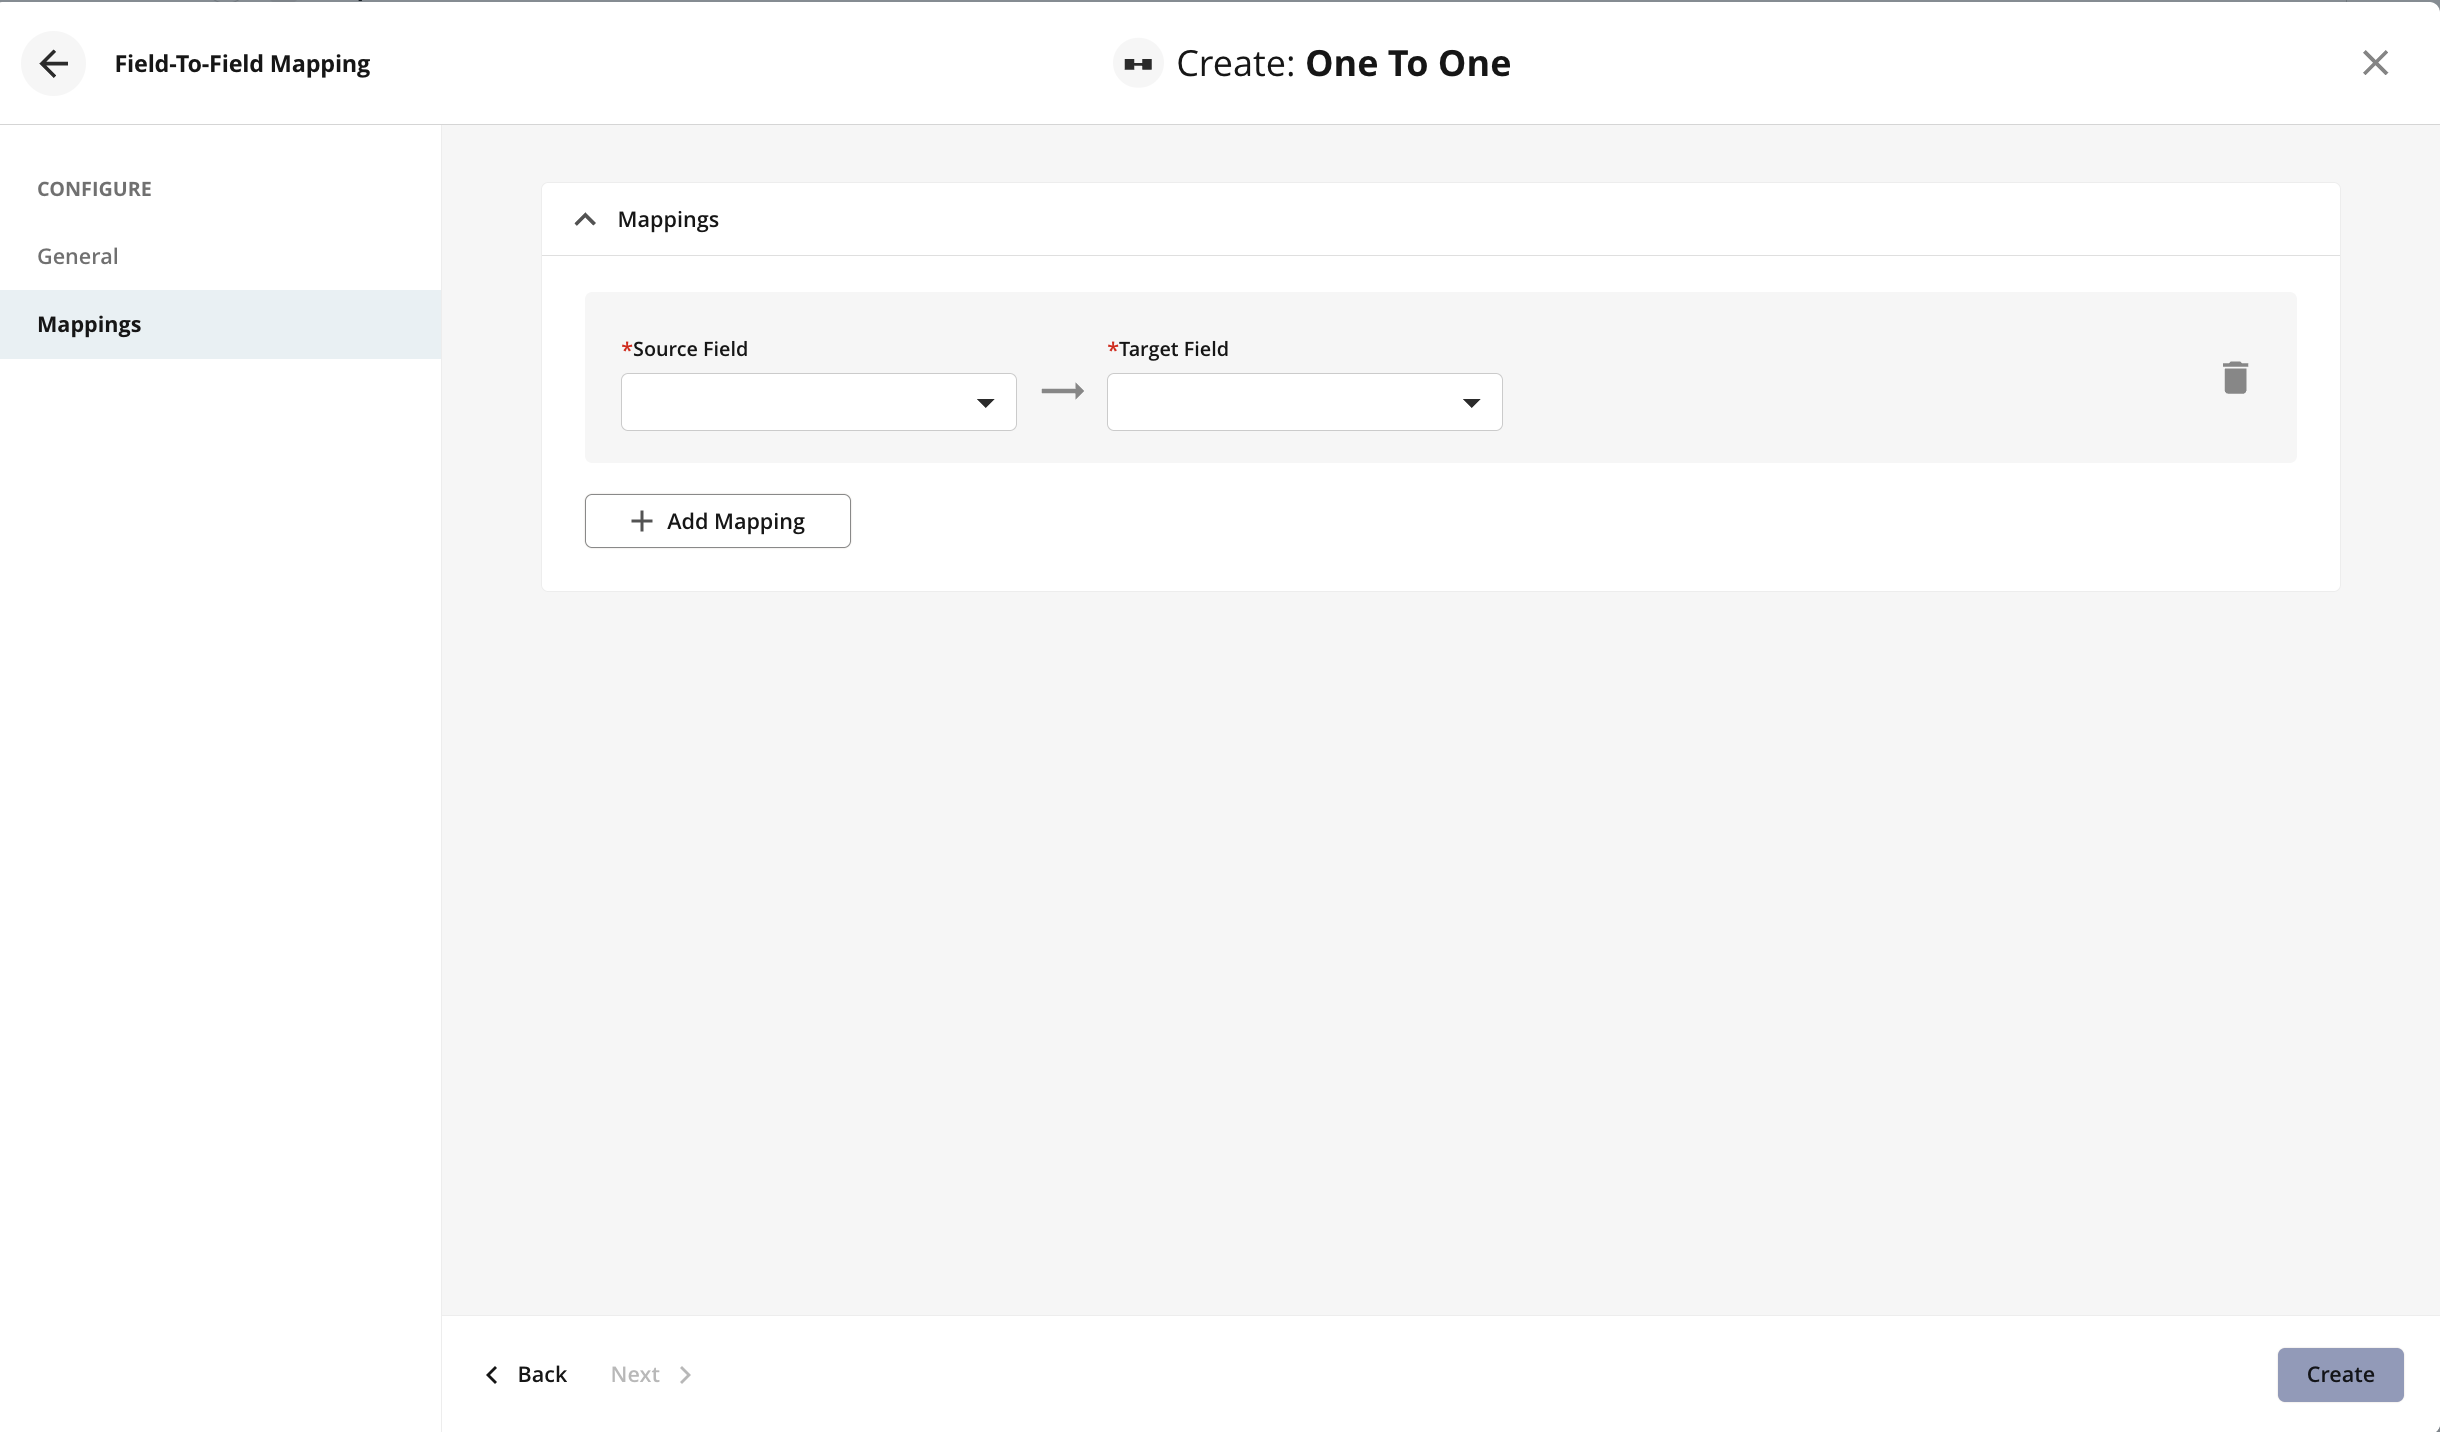
One To One
One To Many
Mapping previously created in existed Creative Automation Print App (before version 14.0.0) will be migrated to this section automatically.
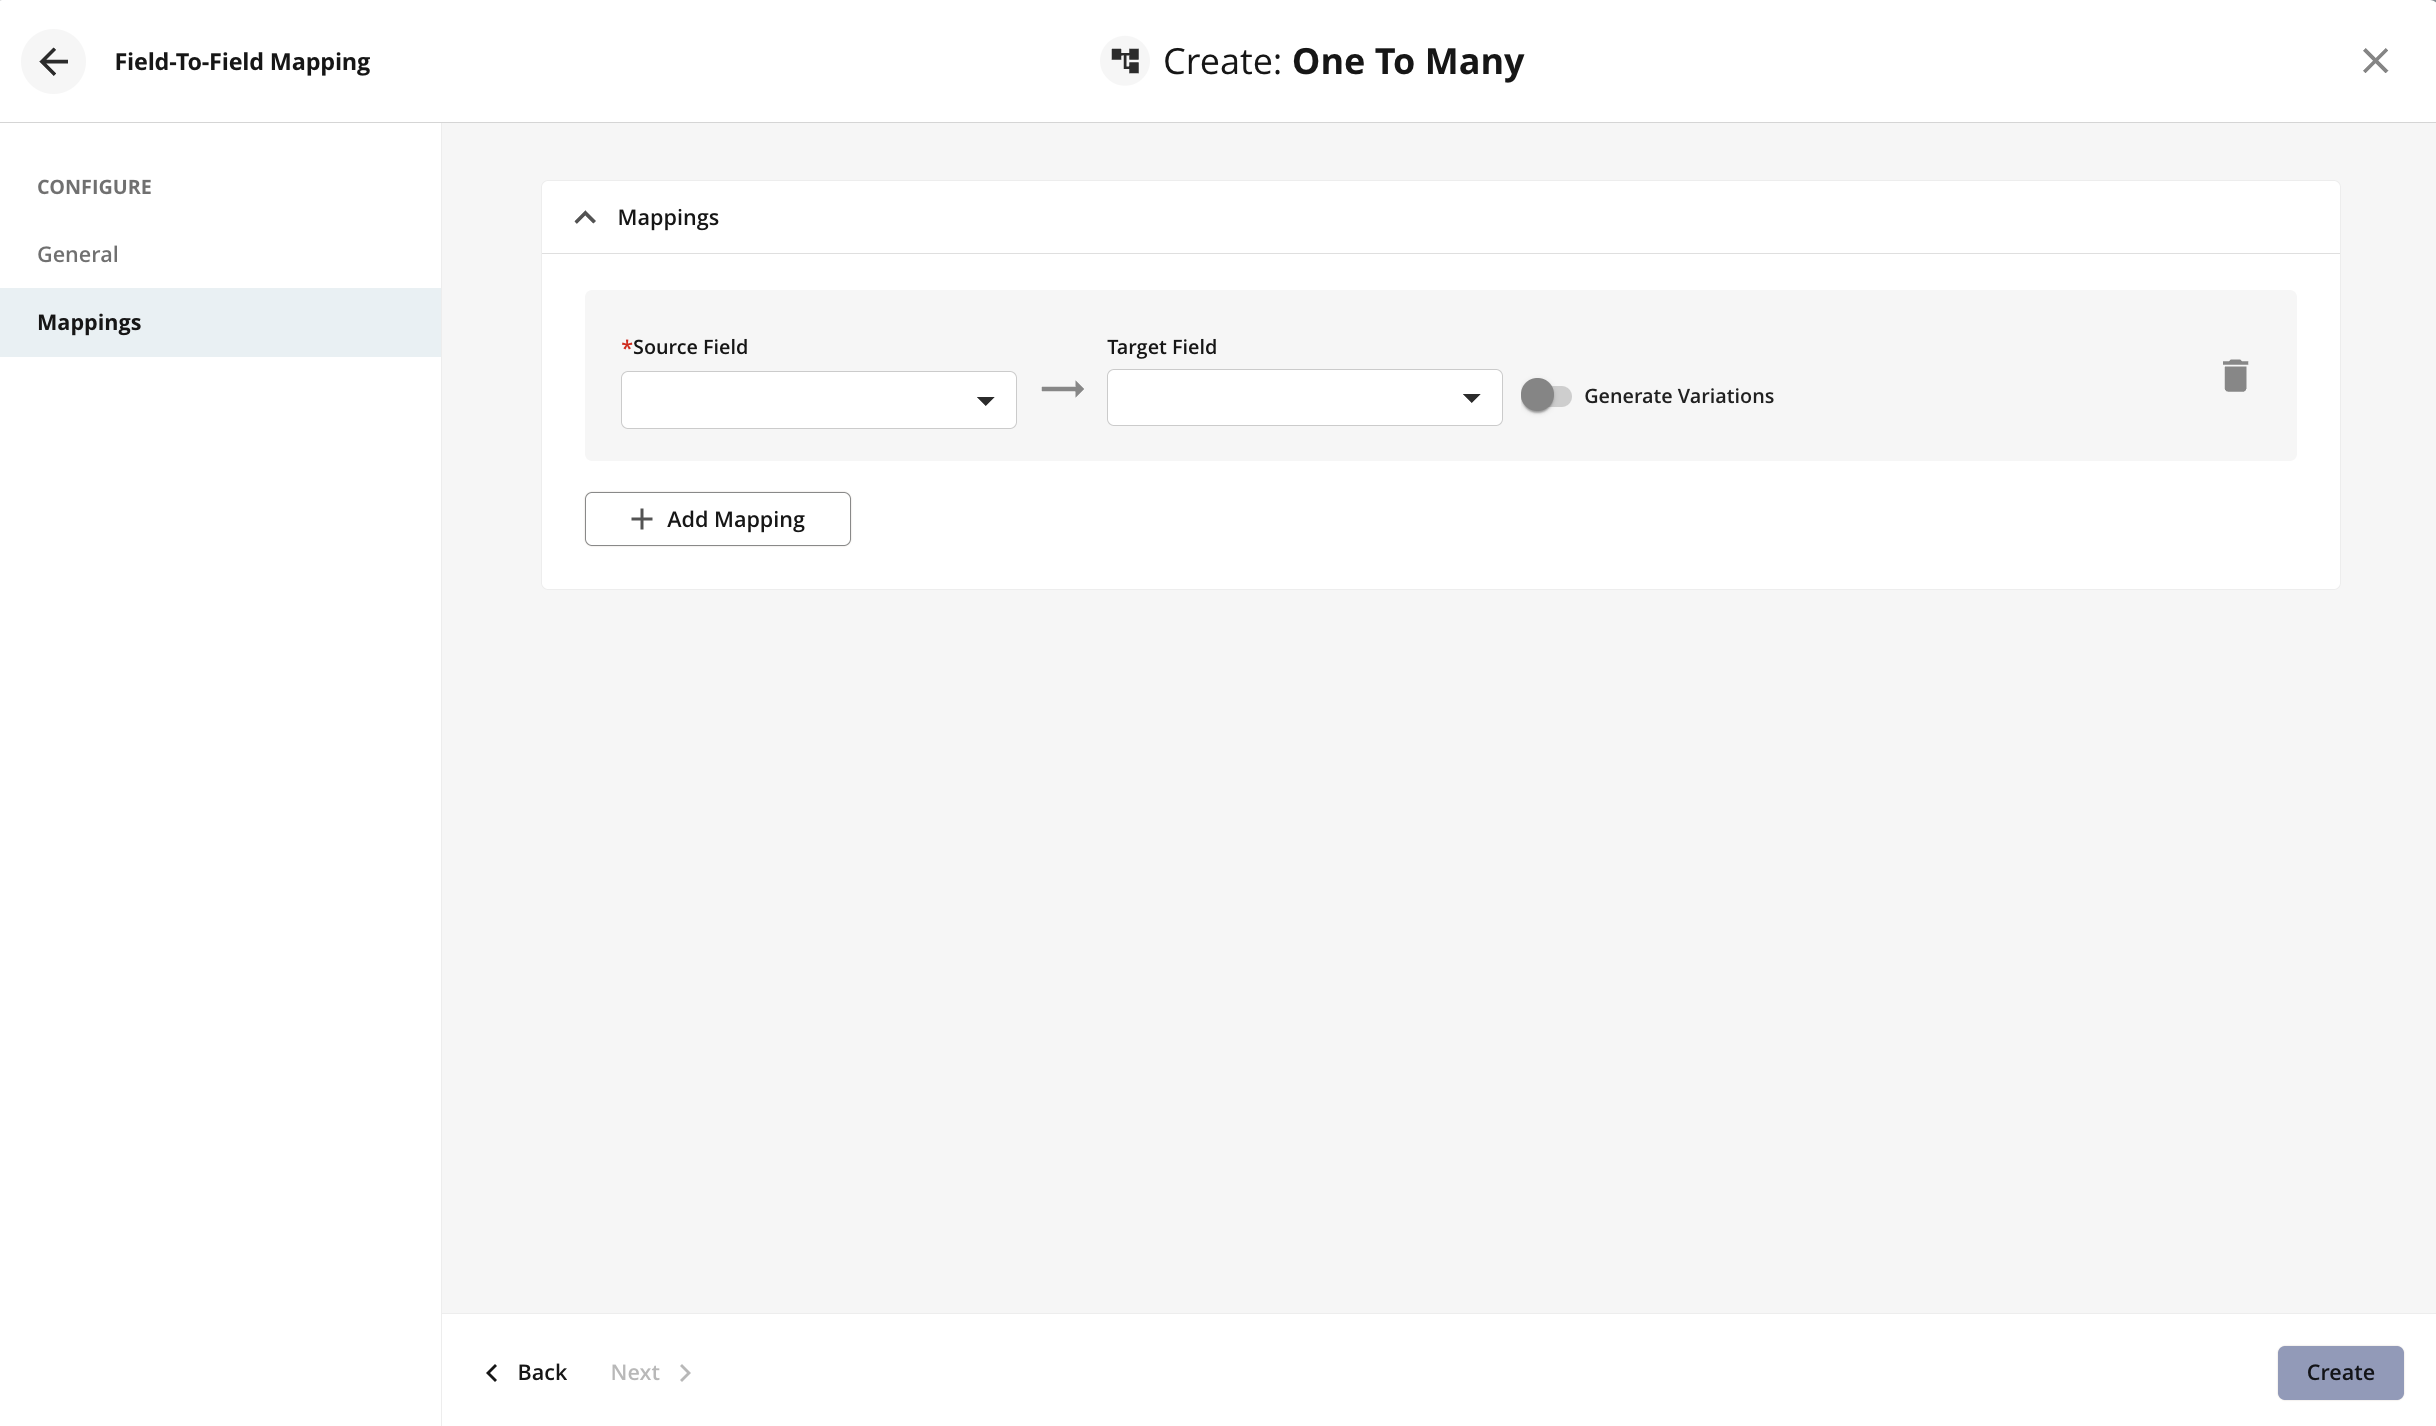
Generate Variations - check box that defines if combinations corresponding to the selected options should be created on output generation.
⚠️ It is possible to only select the Generate Variations check box and leave the target field in mapping empty. With this configuration field values will not be copied from inputs to outputs, only variations will be generated.
Many To One
Mapping previously created in existed Merge PDF action will be migrated to this section automatically.
Only mappings from this section can be selected in Merge PDF rule.
Search Key - check box that defines the key for searching through existing items. So, instead of creating new items after merging, system updates one that already exists.
Configuration of Actions
Module "Outputs"
Generate PDF Action
"Execute task" > "Generate PDF from XML CA AdBuilder " action type should be created in the module Outputs to initiate output PDF generation.
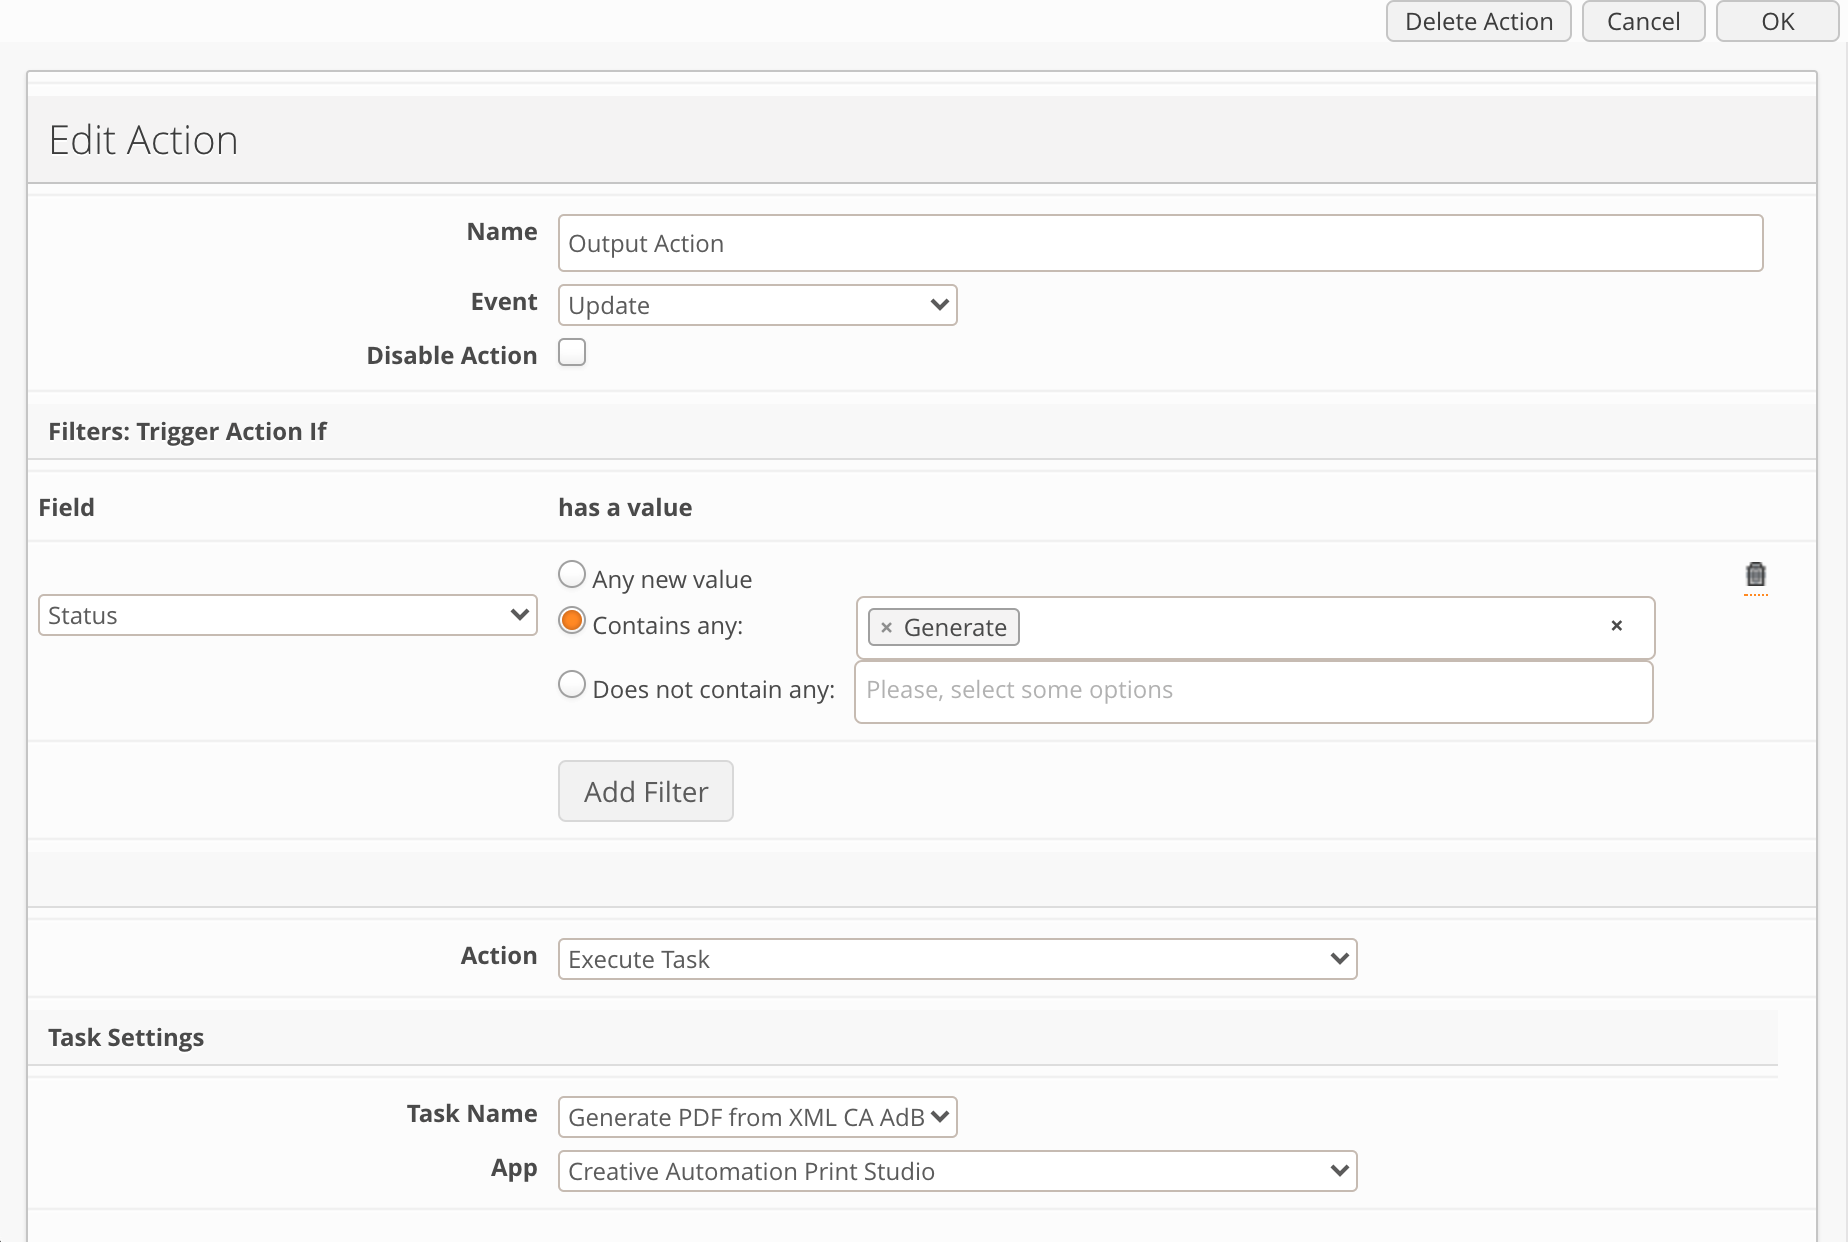
Created action must be assigned to the Workflow transition Design > Generate.
Merge PDF Action
"Execute task" > "Merge PDF" action type should be created in the module Outputs to initiate PDF merge based on specified conditions.
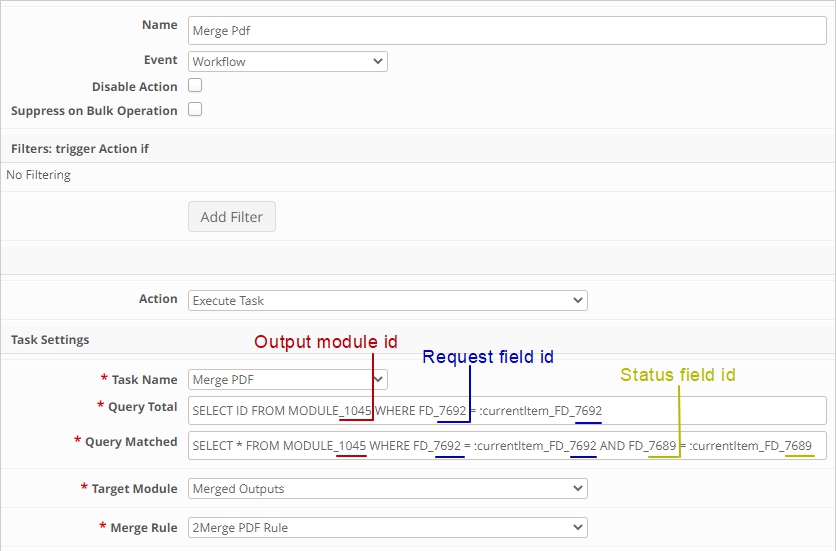
Query Total: Query DSL to define the original list of items to be merged. In case of Creative Automation Print Studio query will fetch all the output items belonging to the same request.
Module_ - id of the Outputs module
FD_ - id of the field that will be used to group items.
= :currentItem_FD_ tells the query to fetch all the items in module Outputs where value of the specified field (FD_) equals to the field value of the current item.
Query Matched: DSL query that defines condition matching which outputs can be merged. Fist part of the query is the same as in Query Total field to fetch all items belonging to the same request following by the condition. As an example, status field can be used to check if all the items belonging to the same request are in the same status. = :currentItem_FD_ verifies that all the items fetched are in the same status as a current item. For workflow actions it will be the target status value the query will be checking for.
Merge Rule: Select previously configured Merge PDF automation rule. Rule allows apply additional parameters to merged pdf including copy field metadata from Outputs to Merge PDF Module.
Created action must be assigned to the Workflow transition Done > Merge.
⚠️ In case at least one item from the fetched list is not in the same status, Merge PDF action will not run.
Using the Creative Automation Studio
Required Access Level
It is recommended to grad the below access to the CA Studio Print modules:
Request - Read + Edit + Upload
Input- Read + Edit + Upload
Output - Read + Edit + Upload + Bulk Edit
Merged PDF - Read + Edit + Upload + Bulk Merge PDF
"Delete" access is recommended for "Input", "Output" and "Merge PDF" modules to ensure consistent clean-up being done by the "Restart Request" functionality.
1. Templates Management
CA Print Studio is based on the AdBuilder, therefore template management process is standard AdBuilder functionality. Templates are managed in the module mapped as module with Templates in AdBuilder configuration and includes both XML and PDT template. Both manually created and templates imported from InDesign are supported.
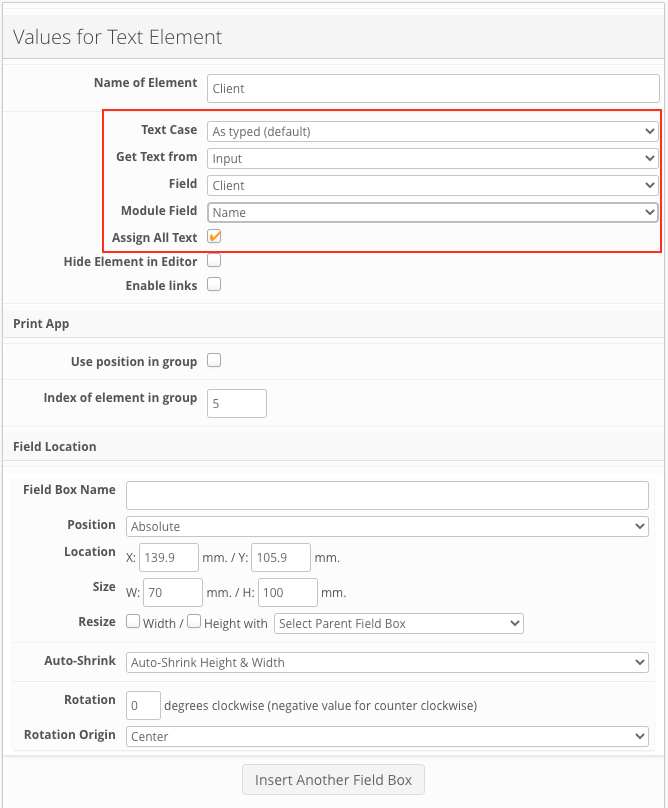
Template Parameters
The source for template parameters is always fields from Input module. Template parameters are configured as "Get Text from" text elements in AdBuilder template and on the step of the output generation, XML template will be populated with the field values of the input items.
Note!
When configuring "Get Text from" elements, it is required to select "Assign All Text" option, to ensure consistent behavior of the CA Print Studio. "Assign text" functionality is not supported within CA Print studio.
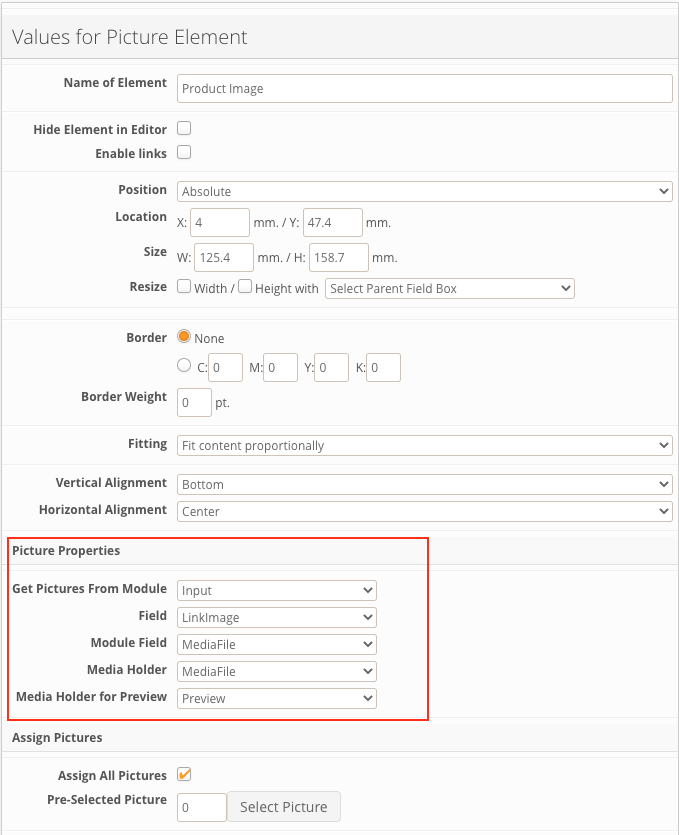
Media Data
Source of Media data that is being handled via the "Picture Field" element in Template configuration is always an Inputs module.
Media data for a template parameter can be pulled either from the loca Media File field or module link field to media module in module Inputs.
Note!
When configuring "Picture field" elements, it is required to select "Assign All Pictures" option, to ensure consistent behavior of the CA Print Studio. "Pre-selected Picture" functionality is not supported within CA Print studio.
2. Creative Automation Wizard
CA Wizard leads a user through the end-to-end process of CAS Print studio workflow, including the following steps:
Create Request
Generate inputs
Create outputs
Generate output PDFs
Merge PDF
Creative Automation Print studio can be opened from:
CA Print Studio App button on the Dashboard
Request module. CA Print Studio can be opened for previoulsy created requests also.
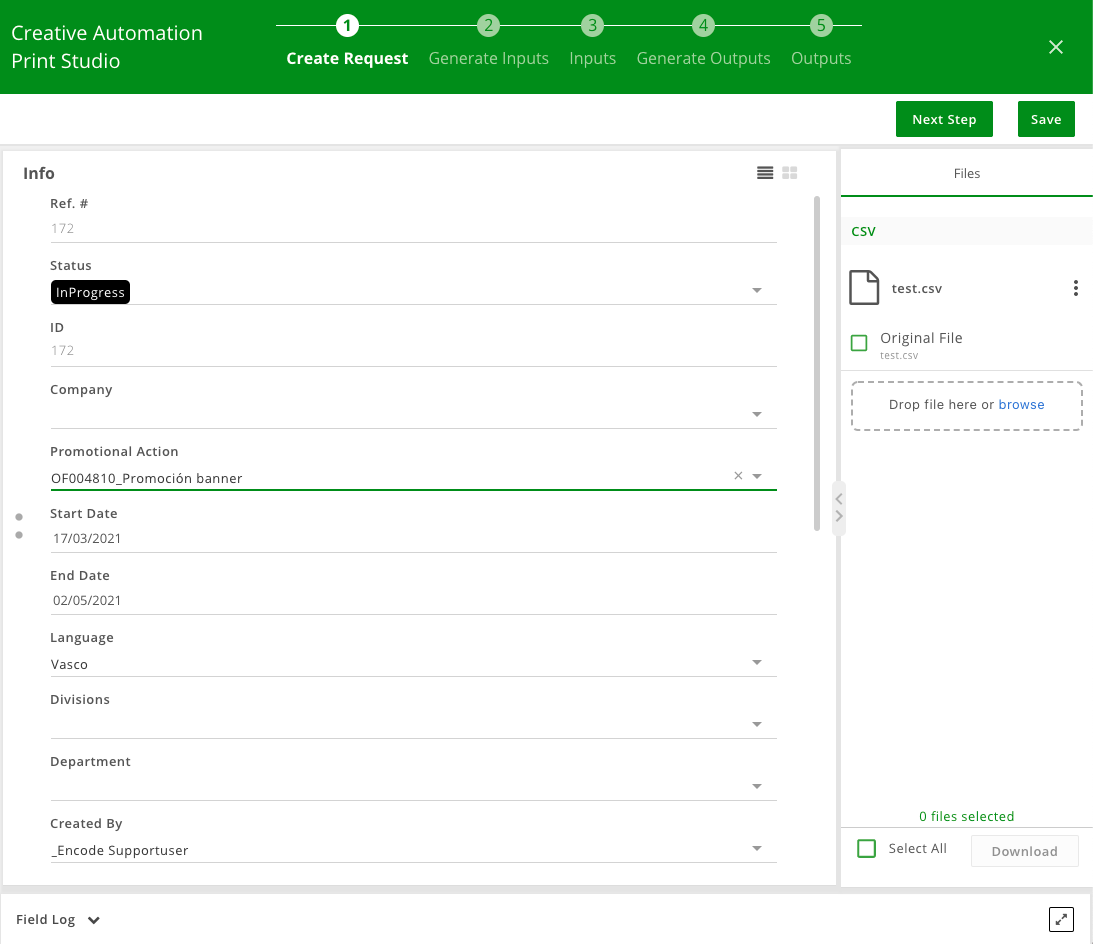
2.1. Create a Request
Creating a request is the first step in CA Print Studio. On this step user enters mandatory metadata for the request, including upload of the csv file that will be used for importing Input items on the next step.
Created request will be inherited by the generated inputs on the next step, provided corresponding "Prefill automatically" option is enabled for the Request module link in Inputs module.
Uploaded CSV will perform import of Input items according to the import configuration specified in CA Print Studio App.
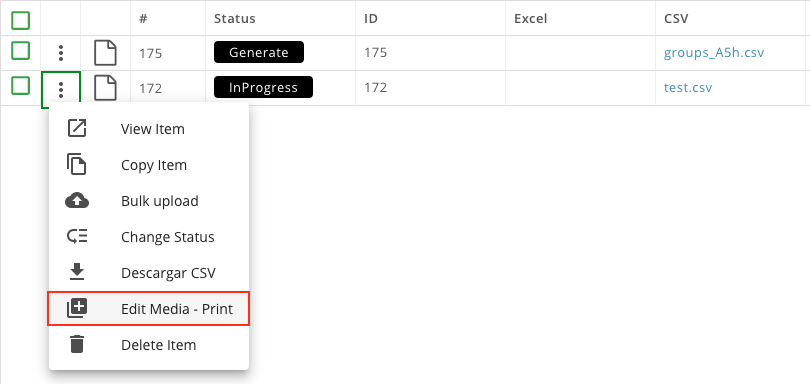
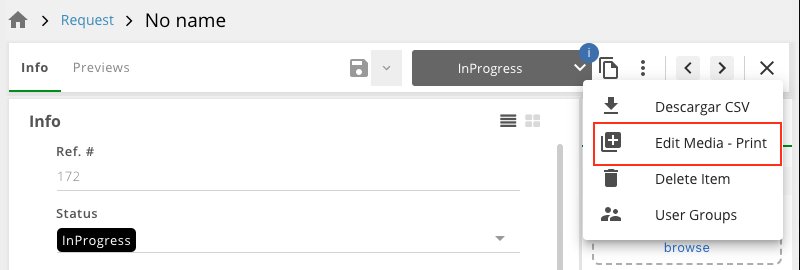
Once request was created, the corresponding request item can be found in the module Request. If you close the wizard, you always can reopen it and continue working with request from the last non-finished step by clicking Edit Media - Print in item menu.
2.2. Generate Inputs
Inputs can be created in 2 ways:
manually by adding items one by one on the Generate Inputs step of the CA Print Studio Wizard
import by uploading CSV on the Create Request step which will trigger import of items into the Inputs module
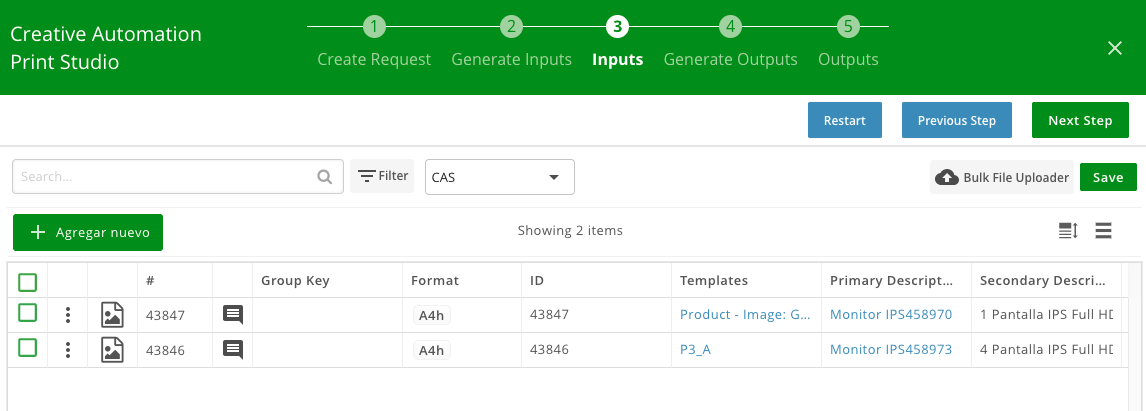
No matter which way input items are added, it is important to make sure that they:
Are correctly linked to a request (Request module link should be populated with the request created on previous wizard step)
Template is assigned for each input item
Template assignment can be both manually by selecting module link value and automatically using configured Rules for module Inputs. (Follow Rules link for rule configuration details).
After making sure that all the Input metadata is consistent, click Next to proceed to the Generate Outputs step.
2.3. Generate Outputs
As soon as Input data is completed, moving to the next step will start generating output items by combining selected values for the parameters.
The following steps are being performed behind the scenes during Outputs generation:
Output variations (items) are created (if configured)
Template is assigned based on the configured rule (excpept when template was manually assigned on the Inputs step)
Values are copied from the input items to the output items (if mapping is configured)
XML and PDF template files are generated and uploaded to the created outputs items. XML and PDF template files will be populated with the template parameters' values taken from the Inputs module.
This step is just informing about the progress. Progress indicator will display information related to the number of templates processed.
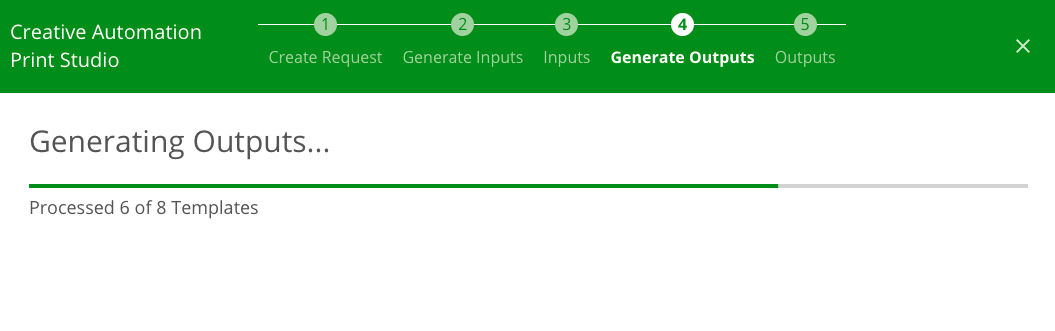
When all the templates are processed and generation is finished wizard will automatically redirect to the next step: Outputs.
2.4. Scale AdBuilder Templates to associated format
When generating outputs via Creative Automation Studio Print possible to easily scale up an AdBuilder template to the required format.
Functionality is controlled by the feature flag and needs the following configuration:
Sizes module storing dimensions for the output paper size
SizesApp created and configured
Module link (Scale Size field) to the Sizes module present in the Output module
Scale Size field mapped to the corresponding settings in CA Print-Output settings
Scale Size field mapped with selected value in CA Print-Mapping settings (field need to be preselected when generating outputs in order to apply scaling)
When feature flag is enabled and all the required configuration is in place, AdBuilder templates (generated and present on Outputs step) are automatically scaled from the specified template dimensions to the appropriate paper size:
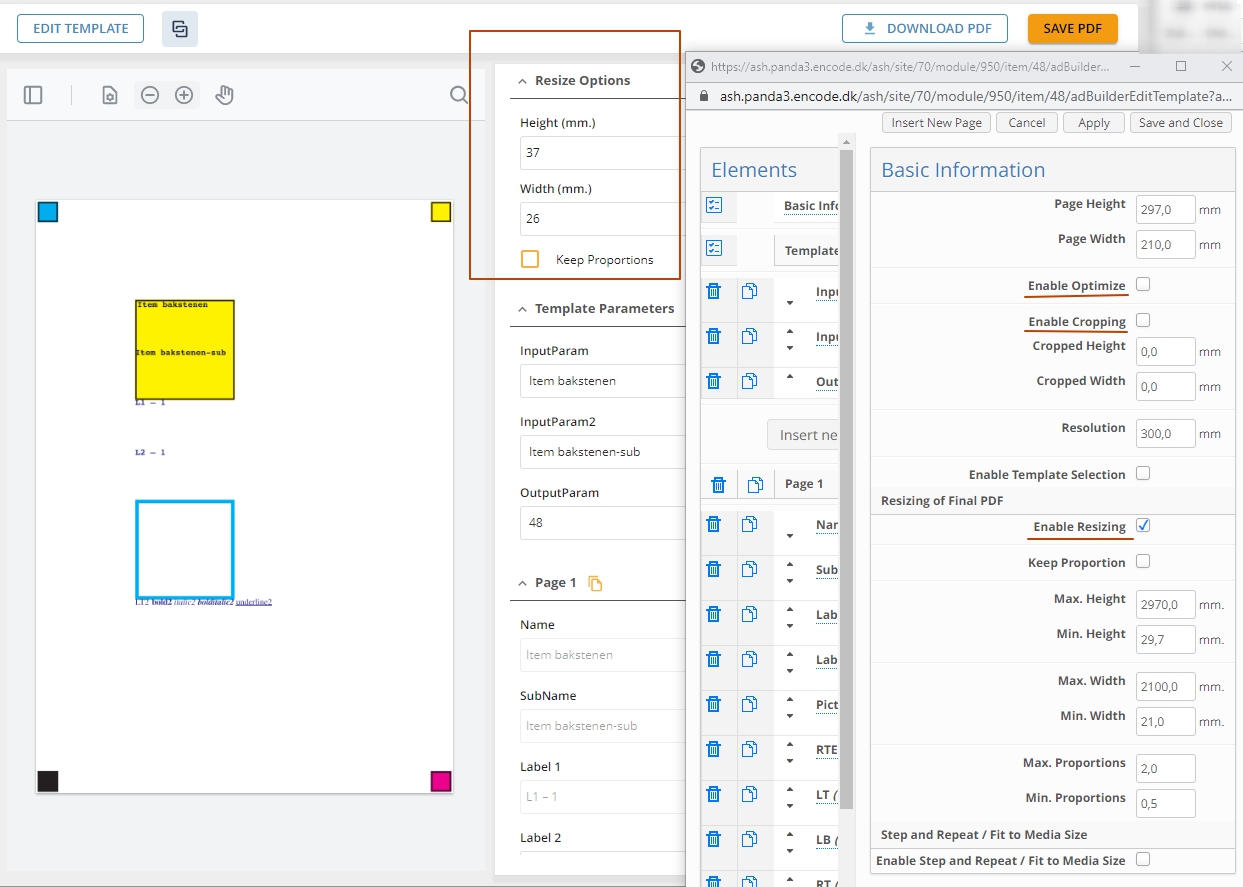
Following changes were added to templates in CA Print Output step:
Cropping is disabled by default. Note: positions of elements can be broken after scaling when Cropping is enabled.
Optimizing is disabled by default. Note: if enabled - can significantly reduce pdf size.
Step and Repeat/Fit to Media Size is disabled to not intersects with scale.
Resizing is enabled by default, with predefined values in related fields: allowed proportions ratio change 0.5-2, allowed sizes interval - upscale/downscale from 10% to 1000% of original template size.
2.5. Outputs
This step represents the generated output items. Each of them will have a unique combination of the parameters values.

It is possible to verify results and do the final adjustments of the parameters values for each output or even create a completely new one. Use standard Edit PDF item menu to open the Make Ad window in adBuilder and verify populated parameter values and make adjustments if needed.
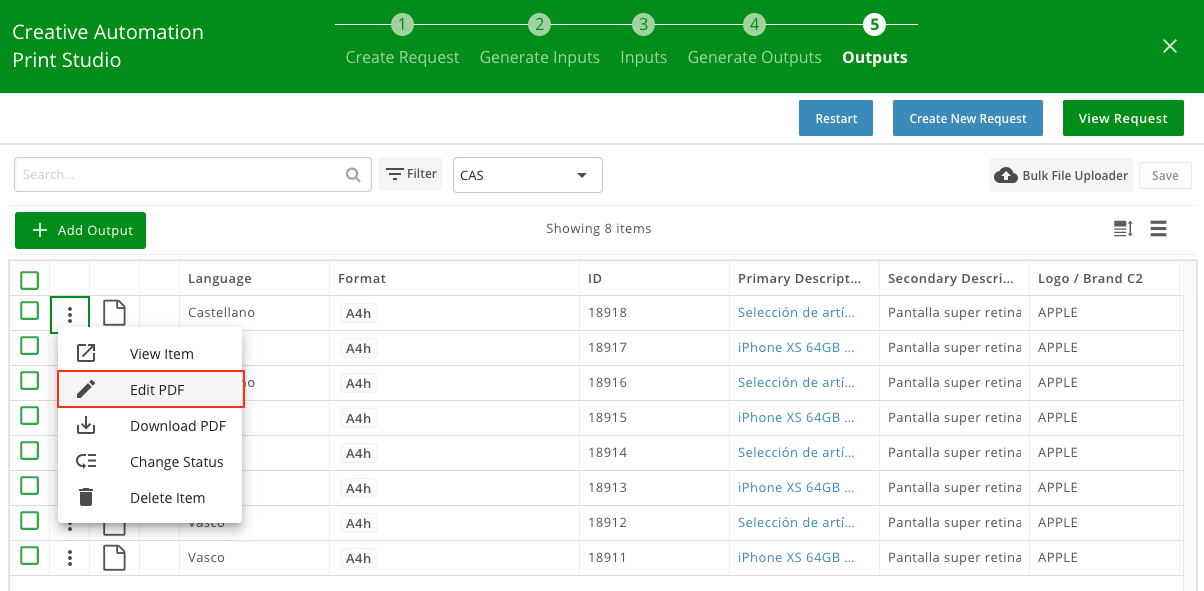
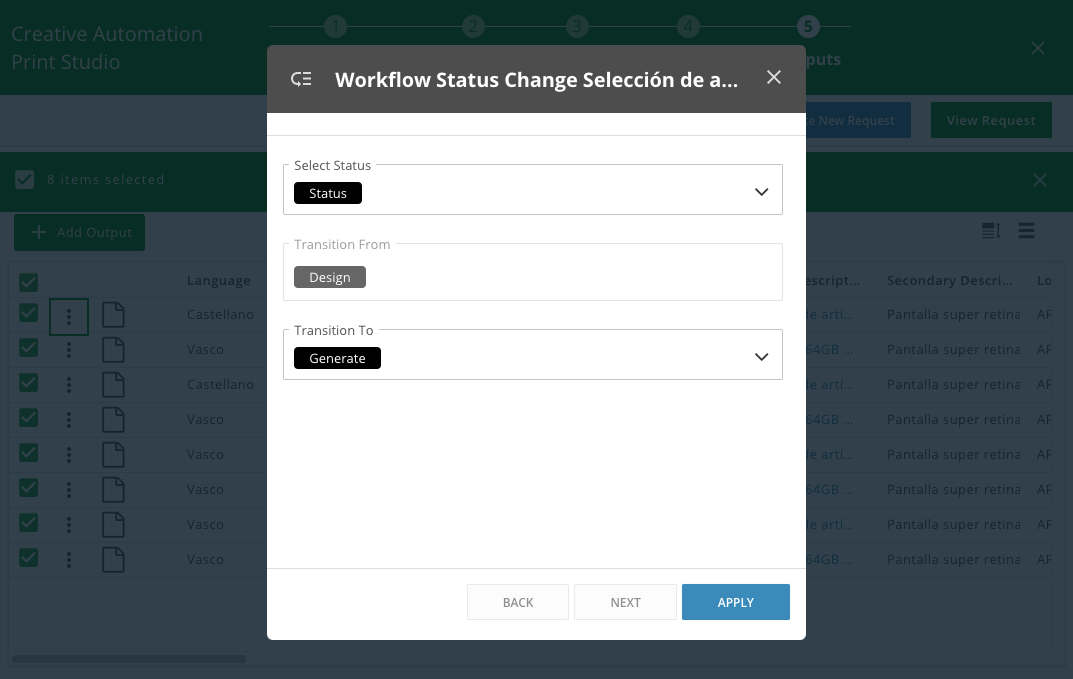
When everything is done, change status from Design to Generate to start output PDF generation process. Previously configured action will launch the process. Depending if configured action is assigned to bulk status transition or not, PDF generation can be done individually per item or in bulk.
When output PDF file is generated, status of the item(s) will change to Done.
3. Merge PDF
When processing outputs via Creative Automation Studio it is possible to both automatically and manually define which merge pdf rule should be applied to a group of items.
⚠️ It is not recommended to use both methods (auto- and manual) in the same app. Either one or another should be selected.
3.1 Automatic Merge PDF (by action)
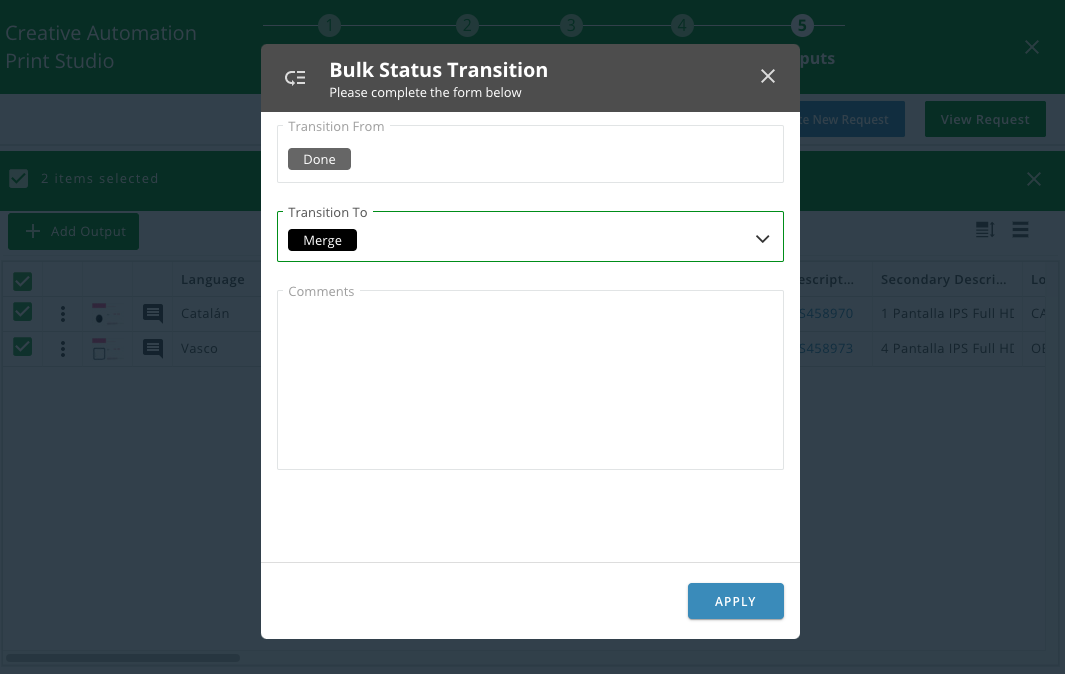
After all the output PDFs have been generated, change the status from Done to Merge to start merge of the outputs PDFs into one and upload of the merged file to the mapped Merge PDF module.
As in case with PDF generation for the output items, status transition that launches merge of PDF can be performed either as bulk operation or individually, but actual merge of PDF will be launched only when the query specified in action configuration will match all the items.
As a result of successful merge, new item will be created in Merge PDF module and merged PDF will be uploaded to the mapped field.
3.2 Manual Merge PDF (by assigning Merge PDF rules to the group(s) of items)
After all the output PDFs within the group have been generated, change their status to the one with merge allowed (that was selected in 'Status - Merge Approved' field in app settings) and select a Merge PDF rule from the list (only rules that match the defined grouping are shown in the list) and press 'Merge PDF' button to start merge of the outputs PDFs into one and upload of the merged file to the mapped Merge PDF module.

Merge PDF process will be finished on background, so next dialog box can be closed.
As a result of successful merge, all processed Outputs will be updated with id of the Rule used for merging (field mapped as 'Merge Rule' in app settings will be prefilled) and new item will be created in Merge PDF module and merged PDF will be uploaded to the mapped field.
⚠️ User need to have Read + Edit + Bulk Edit + Bulk Merge PDF access to Outputs module to perform merging.
⚠️ User need to have Edit access to 'Merge Rule' field in order to have it prefilled after merging.
⚠️ In case of using Multiple File Field as a Target File Field for storing merged PDF, be aware that when Version Control is enabled for the module and media holder and File field contains more than 2 files -> error will be thrown in the log, file will not be stored in the Target File Field after merging.
4. Merge PDF: Combine Outputs for Paper size
Functionality is controlled by the feature flag and needs the following configuration:
Sizes module storing dimensions for the output paper size
SizesApp created and configured
Module link (Size Field Id) to the Sizes module present in the Output module
"MergePDF" action has mapped Sizes app and Size Field Id
When feature flag is enabled and all the required configuration is in place, multiple outputs will be combined to fill the selected paper size.
For example:
Two A4 outputs will be combined on the A3 paper size.
Four A5 outputs will be combined on the A3 paper size.
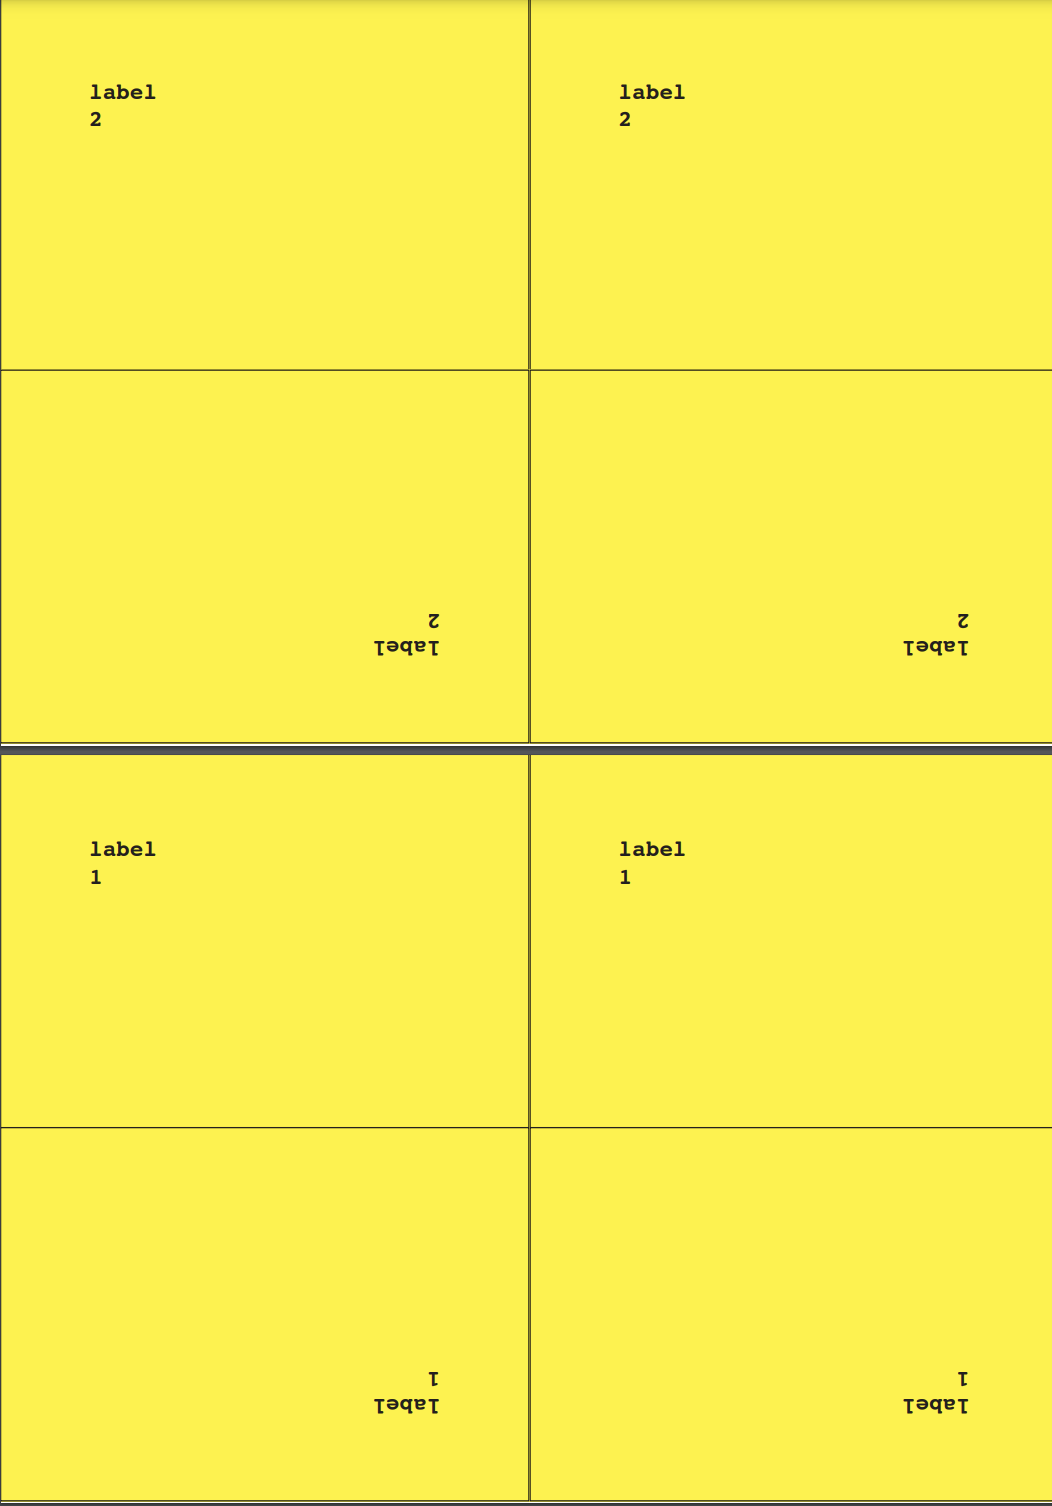
Example of a combination of two A4 outputs with vertical alignment on the A3 paper size with horizontal alignment.

Example of a combination of two A4 outputs with horizontal alignment on the A3 paper size with horizontal alignment and scaled down to A5 horizontal alignment, when "Step and Repeat", "Rotate Even By 180 Degrees" are enabled, "Scale filed Id" is selected in "Merge PDF" action config and scale size is specified in "Outputs" before merging
NOTE!
Starting from v.11.3.0 automatic rotation during imposition for fitting more outputs is disabled.
If 90 degrees rotation is needed for placing more elements - proper output paper size should be selected (Vertical or Horizontal), it won’t be done automatically by system anymore.
Limitations
Combination of pages of different formats is not supported. The result of combining, for example pages of A4 vertical + A5 horizontal + A5 vertical may result in page overlapping or cut off on the selected paper size.
Scaling with different orientation from the source format is not supported. Scaling and source format should have the same orientation. For example: A4V → A6V, A4H → A6H
4. Error Handling: Restart
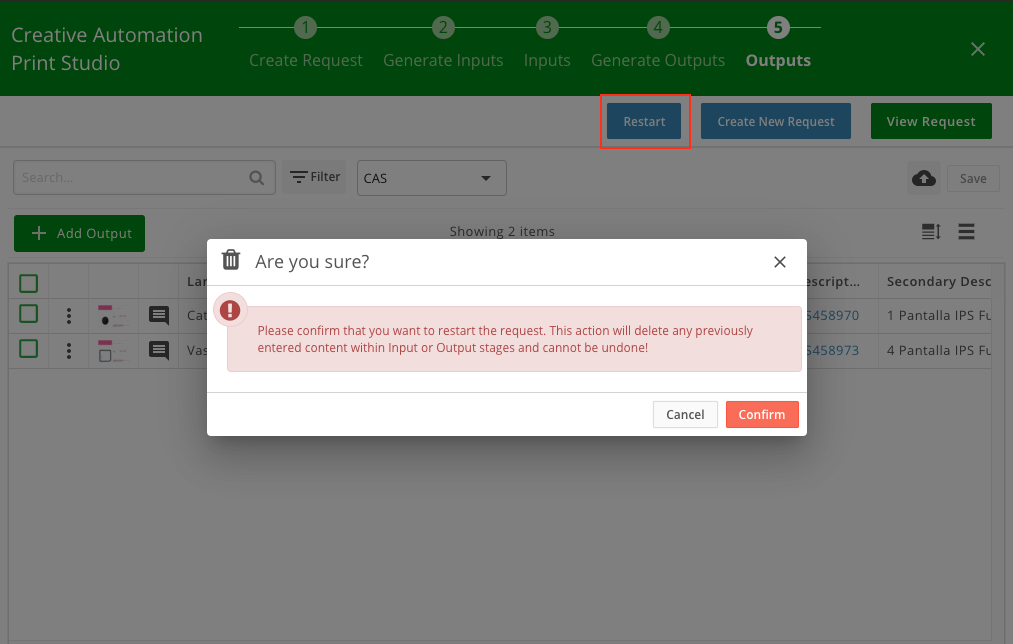
In case of any errors during CA Print Studio workflow, it is possible to clean the data and start the process from scratch.
The Restart button is present on the both "Generate Inputs" and "Outputs" steps and when clicked will delete(inactivate) all the items that were created as a result of the CA Print Stution workflow.
Only items belonging to this specific request will be a subject to clean-up.
Note!
Before version 14.0.0:
Merge PDF module will be cleaned only when mapped in CA Print Studio App. If mapping for the Merge PDF module is missing, item in this module will remain untouched and new version of the file will be be uploaded as a result of the new CA Print Studio cycle.
Starting from version 14.0.0:
Merge PDF module will be cleaned only when 'Cleanup Merged on Reset' property is enabled in CA Print Studio App settings.
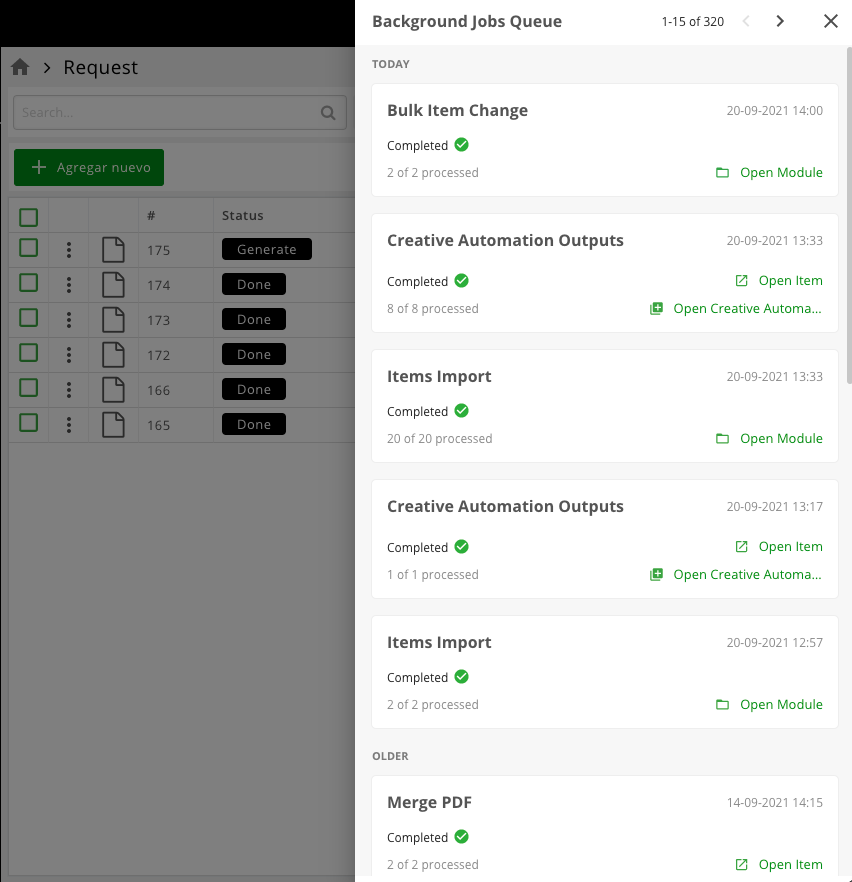
Status and Monitoring
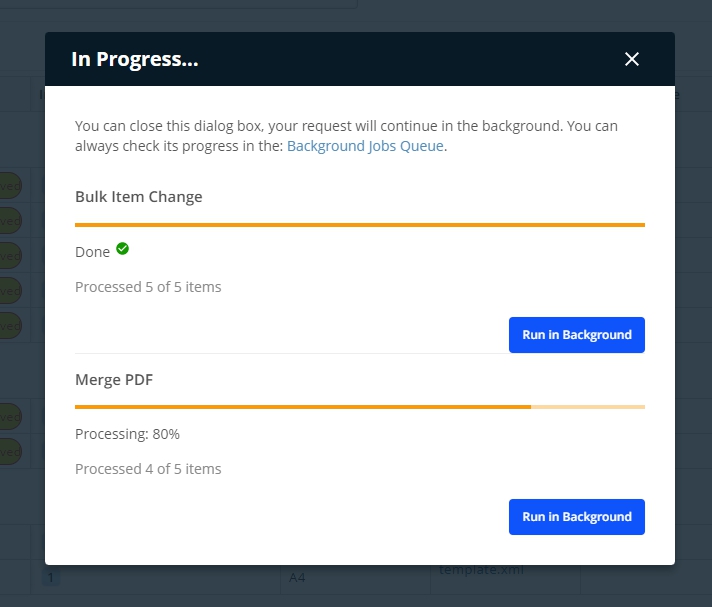
Latest status for all the CA Print Studio operations are available in the Background Jobs panel that can be accessed from the dashboard. More information on Background Job is available here.
Background jobs panel gives the progress and status on the following:
Items import
Bulk item change
Output generation
Merge PDF
Limitations
It is possible to have several active Apps of this type configured but currently only the first one will be used.
CAS Field Usage Template access restrictions are not respected. Fields on the forms can be hidden only for regular users by ‘Search Result’ and "Search Result (Micro)" field usages
Next/Previous navigation is missing for items opened from Inputs or Outputs step
If output cannot fit target size - file will be merged without imposition