Overview
Important: Before enabling Xero Connected Service, an Encodify administrator must first ensure that it’s enabled within your infrastructure.
1. Xero account configuration
1.1. General
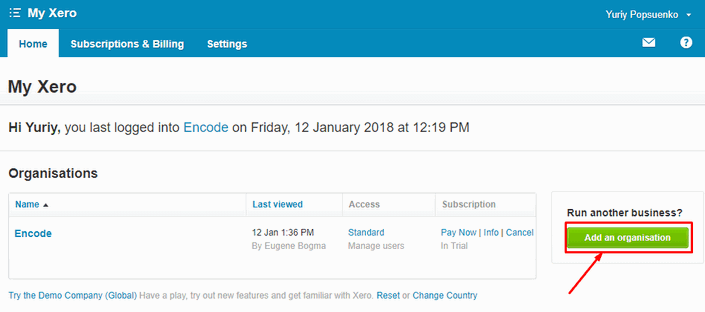
Add your organization on https://my.xero.com/!xkcD/Dashboard
Enter the Company and create a contact in the menu Contacts > All Contacts > Add New Contact.
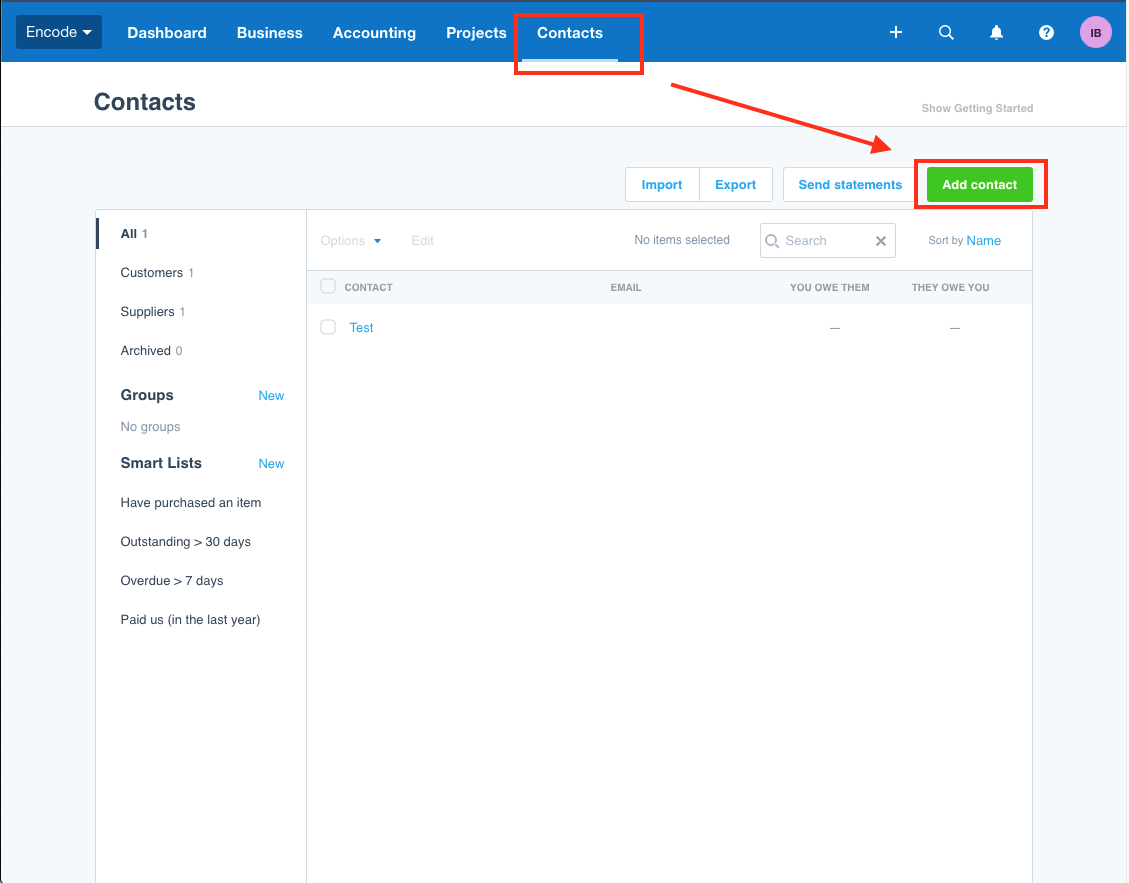
Enter the contact and take its ID, it will be needed to specify in the Encodify item you want to sync with Xero document.
.png)
Go to https://developer.xero.com/myapps/ and create a private app for managing connection on Xero side. Here enter the Company or application URL which is your systems URL.
Paste the same URL to the OAuth 2.0 redirect URI field. This field will have to be updated with another URL later during configuration of the connected service.
.png)
OAuth 2.0 credentials will be available in the view app page.
Client id and Client secret will be needed for configuring the service in Encodify.
Click Generate a secret to get the client secret.
.png)
1.2. Tracking Category config
Go to Xero organisation Dashboard page https://my.xero.com/!xkcD/Dashboard, enter Accounting -> Advanced -> Tracking categories
.png)
.png)
Add the category tracking and options for it via the Add Tracking category button, for example:
City: Kyiv, Odessa
Country: Ukraine, Denmark
Note the category ID which is visible in the browser navigation bar (you must have at least 2 categories to see the ID). This ID will be specified in the corresponding CategoryID field in Encodify Linked Item as well as Category options (they can be just the text values).

Encodify Tracking Category fields must be mapped in Xero service in Encodify (see Mappings section below).
.png)
1.3 Currency config
You will configure currencies for the cases where invoices will be posted in currencies other than your organization's default currency.
To set the available currencies for the organizations go to your organization's dashboard (https://go.xero.com/Dashboard/) and under your organization name, click Settings and then select Currencies on the page that opens.
.png)
.png)
.png)
2. Encodify service configuration
Please, note!
- In case your system has an existing XERO connected service and account, it is required to create a new connected account, while the service itself can be used after upgrade.
Preconditions
- Xero connected service is controlled by the system propeties setting, therefore before configuring the service make sure that enable.connections.xero is set to your site ID or is enabled for all sites.
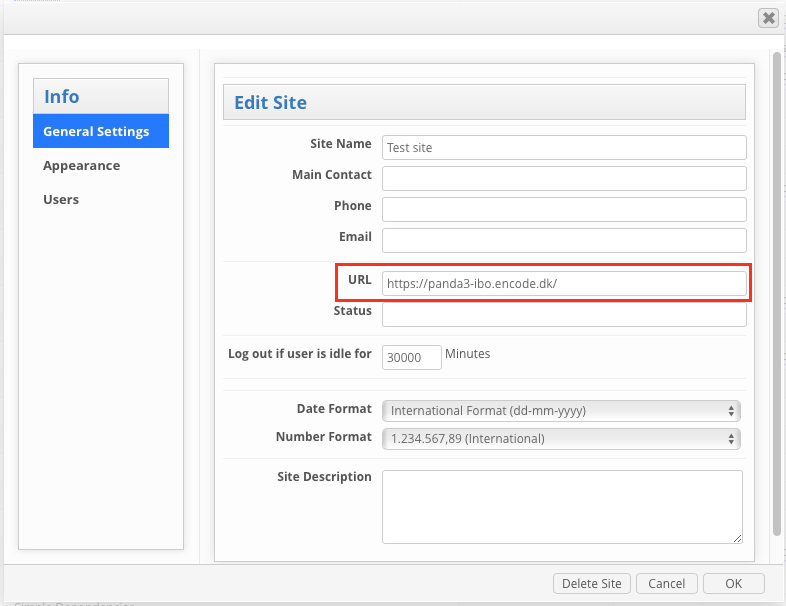
- Make sure that your site has valid URL in System configuration > Site edit
2.1. Account configuration
Click Add Service next to the XERO service type on the Add Service tab in Site Configuration > Connections > Connected services
Step 1
Parameter | Description |
|---|---|
Service Name | Descriptive name of the integration service. The name will be displayed in the configuration of “Send to connected service” action |
Account | You can select from existing accounts or leave “Create new...” to create the new one on this step |
Client ID | Client Id from the previously created xero app. |
Client Secret | Client secret from the previously created xero app. |
Scope | openid,email,profile,offline_access,accounting.settings,accounting.transactions,accounting.contacts,accounting.journals.read,accounting.reports.read,accounting.attachments |
Webhook Key | Needed for establishing Xero-to-Encodify connection for status synchronization. If you are configuring a new connected account this field should be left empty |

Step 2
Select a user that will be used for the integration, remember that selected user whould have API access enabled. Please, note: User mapped in Xero connected service is used only as an agent on behalf of which syncronization is done, but all the access restrictions related to the user(module, ,status, group access) are ignored during syncronization Encodify > XERO > Encodify.
Get the Xero Tenant id by performing the following steps:
Go to https://developer.xero.com/myapps/ > select your app and enter it
In the OAuth 2.0 redirect URI field, paste the value that is present in the Callback url field on the current wizard step in Encodify and click Save.
e.g. https://panda3-ibo.encode.dk/ibo/rest/site/1/connection/121/oauth2/callbackGo back to Encodify system > copy the value that is present in the Authorize url field and open it in the separate browser tab.
On the XERO authorization page, enter your XERO credentials > confirm access for your application.
As a result of successful authentication, the following json will be returned
{"result":"Auth code was successfully processed"}Copy the value in the Tenants URL field and open it in the new browser tab.
Copy the tenantId value from the returned json
[{"id":"9f821b4f-d137-44d7-a23b-13a9d74578c7","tenantId":"b9aa9a4e-06e8-459c-88f3-c868eb074ea3","tenantType":"ORGANISATION","createdDateUTC":null,"updatedDateUtc":{"nano":563200000,"year":2020,"monthValue":4,"dayOfMonth":14,"hour":7,"minute":22,"second":24,"dayOfWeek":"TUESDAY","dayOfYear":105,"month":"APRIL","chronology":{"id":"ISO","calendarType":"iso8601"}}}]
Paste the just copied tenantID to the Xero Tenant id field
.png)
Select Xero Type (note that only Invoice is currently supported)
5. Select the corresponding Header and Line item modules.
6. Copy the value of the Send notifications to field and save it locally (it will be required to set up Xero > Encodify integration).
Step 3
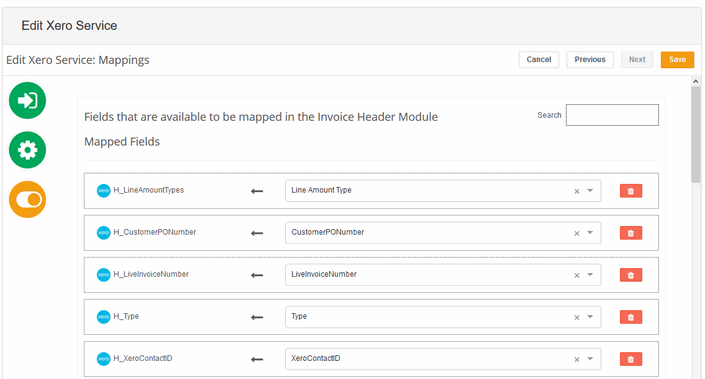
On this step, you can map the fields from Encodify to the fields in Xero. Click on the Xero field in Available fields section to add one to mapping.
In the Mapped fields section you have to select the corresponding field from the Encodify module to map it to Xero field.
Please note!
The list of required fields that will need to sent to XERO and therefore mapped in the the service depends on the invoice status values. However the following list of fields are mandatory for all types of status:
Required fields in Header module:
Status
XERO contact ID
Invoice date
Due date
Currency Code
Invoice Type
Line amount type
3. Configure Xero-to-Encodify sync
Please, note the following:
Currently, the Xero > Encodify integration is limited only to the Status field in the Header module. This synchronization will also ignore any actions configured in the module and will update the status of the invoice in Encodify no matter if any actions are configured in the Header module or not. Please, also note that it will not trigger any actions in the Encodify e.g. action with event "Update"
In order to have status synchronization from Xero to Encodify, you have to additionally configure Xero webhook.
Go to https://developer.xero.com/myapps/ > select your app and enter it.
Switch to the Webhook tab.
Paste the URL saved on Step 2 (6.) into the Webhook key field. Alternatively, webhook URL can be copied from the connected service > Step 2 > Send notifications to field.
Click Save and copy the webhook key.
Go back to the Encodify system > Connections > Connected services > Connected accounts tab.
Open the corresponding xero connected account for edit > paste the webhook key copied previously > save the connected account.
Test the backward syncronization by going to back to the xero app configuration page > Webhooks and click Send "Intent to receive". Correctly working integration from Xero to Encodify should show the OK status.
.png)
Note!
In case Intent to receive request does not return OK, check the following:
- Nginx settings does not reject XERO requests
- Webhook URL is correct with corresponding site and service ids
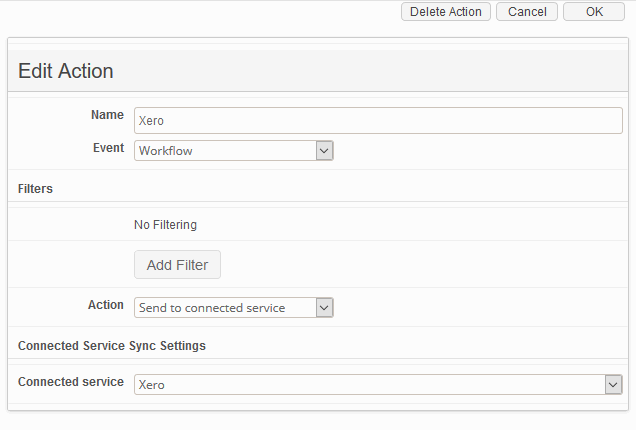
4. Configure action
If you want Xero records updated when you perform CRUD operations in Encodify, you have to create action for the required event in the Headers modules in Module > Actions. The typical use case is configuring an action triggered on Workflow status change, so when Encodify item is ready, the user is changing the status to e.g. SUBMITTED, and corresponding Xero document will be created.
5. Statuses supported by Xero
AUTHORISED
DELETED
DRAFT
PAID
SUBMITTED
VOIDED
Please, note that the values are case-sensitive.
6. Fields for mapping
Header module
Field Name | Field Type | Field Content |
|---|---|---|
Status | Status Field | Text |
InvoiceAutonumber | Fixed Text | Automatic Numbering |
LiveInvoiceNumber | Fixed Text | Text Concatenation (Name Field) |
XeroInvoiceID | Text Field | Text. This field should not be manually populated/modified in Encodify system. On successful syncronization this field will be populated automatically with invoice ID returned by XERO. This value will be further used to link the Encodify item with corresponding XERO invoice ID, which you can see in the URL when viewing invoice item in XERO system. For example: https://go.xero.com/AccountsReceivable/Edit.aspx?InvoiceID=5c27cb9c-3ec4-41b5-a5cb-4ee76b57c0c8 |
CustomerPONumber | Text Field | Text |
XeroContactID | Text Field | Text |
ClientAccountNumber | Text Field | Text |
Date | Text Field | Date/CalcDate |
DueDate | Text Field | Date/CalcDate |
CurrencyCode | Select Box | Text |
Type | Select Box |
|
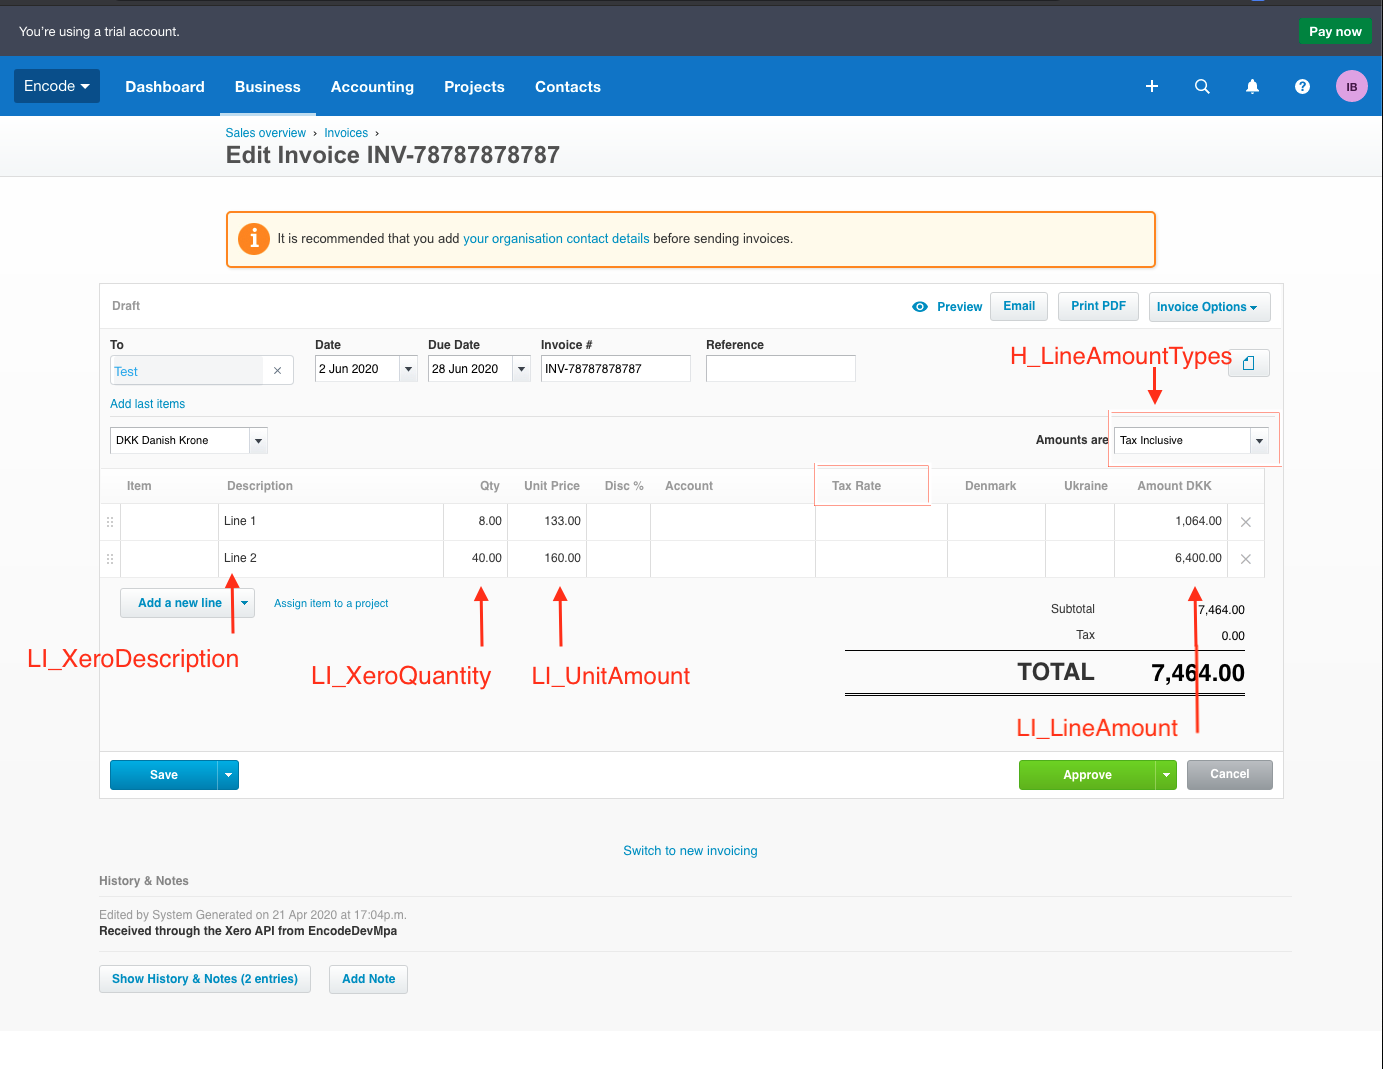
Line Amount Type | Select Box |
|
Inline module
Field Name | Field Type | Field Content |
|---|---|---|
Description | Text Box | Text (Name Field) |
Quantity | Text Field | Integer |
UnitAmount | Text Field | Integer |
TaxType | Text Field | Text. The list of the acceptable XERO Tax type values can be found here: https://developer.xero.com/documentation/api/types#TaxTypes Specifying tax type, make sure it is compliant with the Line Amount type selected in invoice header. |
TaxAmount | Text Field | Decimal numeral |
LineAmount | Text Field | Decimal numeral |
AccountCode | Text Field | Text |
LiveInvoiceID | Select Box | Module link to field InvoiceAutonumber in Header module. This field link the line items with the invoice header and is required for creating an invoice in Xero, if empty or not mapped, sync will fail with exception in server log. e.g. |
Tracking Category | Select Box | Modulelink |
Tracking Category ID | Text Field | Text |
Tracking Category Options | Select Box | Text |
As mentioned earlier, depending on the invoice status on synchronization with XERO, additional fields might be requited to send to XERO. Some fields have predifined set of acceptable values or requirements in regards to the data sent. It is recommended to check the field requirements in XERO API documentation (https://developer.xero.com/documentation/api/types) in order to avoid broken integration.
Below is the example of the XERO fields and mapped Encodify fields
Troubleshooting
You can trace potenial problems in XERO connector in GrayLog searching for the SyncConnectedServiceQueueListener class. For example:
message:*SyncConnectedServiceQueueListener*
message:*SyncConnectedServiceWebhookQueueListener*
Other class names to search for logs
dk.encode.ebms.connections.xero
XeroWebhookRestController
XeroServiceImpl
For investigating fails for rabbit processing filter by class:ConditionalRejectingErrorHandler
Error: The organisation for this access token is not valid
This occurs typically when a Demo company is being used to test/develop an application. Demo companies reset every 28 days, and in doing so all existing data including access tokens and private applications are disabled. Other possibilities are if the organisation has been suspended or disabled for billing issues or the subscription has been cancelled.
Resolution: Create a new Xero Application for connection with the new demo company, or renew the subscription for existing custom organisation.
Error: No enum constant com.xero.models.accounting.Invoice.TypeEnum
Occurs when the value of the Invoice type value sent from Encodify to XERO is not from the list of supprted by XERO.
Supported invoice types from official documentation:
https://developer.xero.com/documentation/api/accounting/types#invoices