
Location: Site Configuration > Site Configuration >Portal Page Elements
The Portal page designer is intended to enhance the Portal page look and functionality. It does so by letting you add elements to the Portal page that provide instant access to selected items stored on the site in different modules, so you do not have to track down those items in their separate modules.
Now there is only one type of Portal page elements that you can configure:
Search — a search form on the Portal page used for running a search across a number of chosen modules.
All Portal page elements that you create are listed on the page, where you can sort them by any of the criteria specified when creating an element (i.e. the name of the element, type of the element, the element’s sort order on the Portal page), as well as by the name of the user who created a particular element and the date and time when it was created.
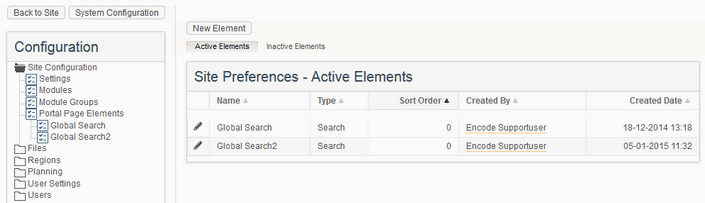
Fig.10. Portal Page Elements
To add a new element to the Portal page, follow these steps:
On the toolbar, click New Element.
In the dialog box that opens, select the type of the element in the Type list.
In the Name box, type a name for the element.
In the Sort Order box, type a number that will determine the position of the element among other elements on the Portal page.
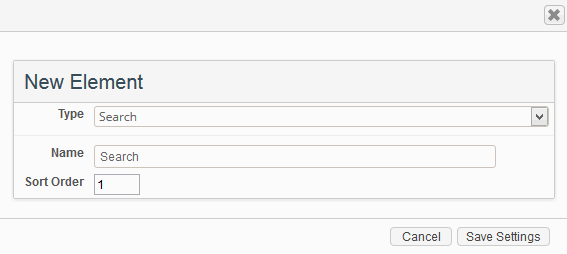
Fig.11.: Creating a “Search” Portal page element
Creating Portal page elements adds subsections to the Portal Page Elements section of the configuration menu. Go to those subsections to configure the elements that you create.
To edit a Portal page element, follow these steps:
Click the Edit icon next to the name of the element that you want to edit.
In the dialog box that opens, make your changes to the element.
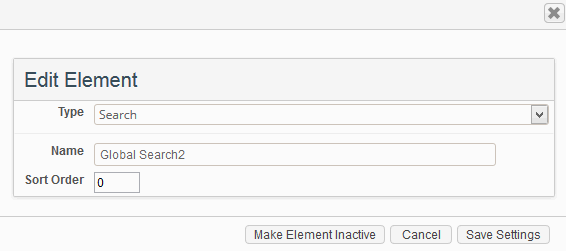
Fig.12.: Editing a Portal page element
You cannot delete Portal page elements but you can make them inactive. Making an element inactive removes it from the Portal page so it can no longer be used. To make a Portal page element inactive, follow these steps:
Click the Edit icon next to the element that you want to make inactive.
In the dialog box that opens, click Make Element Inactive on the toolbar.
Inactive elements are listed in a separate tab, where you can edit and sort them on the page just like you do active elements.
If a Portal page element that you have made inactive happens to be useful again, you can “revive” it by making it active. To make an inactive element active again, click the Edit icon next to it, and then click Re-activate Element on the toolbar of the dialog box that opens.
To configure the settings of a Search element, follow these steps:
Go to Site Configuration > Portal Page elements.
Under the Portal Page Elements menu click Search link.
On the toolbar, click the Settings button with the element name on it.
In the dialog box that opens, select the modules you want to be involved in global search.
Select the Show Users checkbox if you want the site users to be included in search (relevant users will then be returned for queries).
In the # of Results per Page box, type the number of results that you want to be displayed on a page in the Search Results window.
In the Splash Text on Portal Page box, type the text that you want to be displayed above the search box on the Portal page.
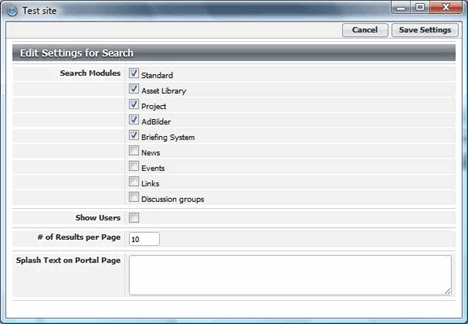
Fig.16: Configuring a Search element