Location: Site Configuration > Site Configuration > Modules
An EBMS site consists of modules. This section looks at the general module management from the site-wide perspective. That involves creating new modules, translating module names into different site languages, making modules inactive (or making inactive modules active again), as well as exporting active modules from the site to XML format and importing them back again.
All modules that you create are listed on the page where you can sort them by any of the criteria specified when creating a module (i.e. the name of the module, type of the module, the module’s sort order on the Portal page), as well as by the name of the user who created a particular module and the date when it was created.
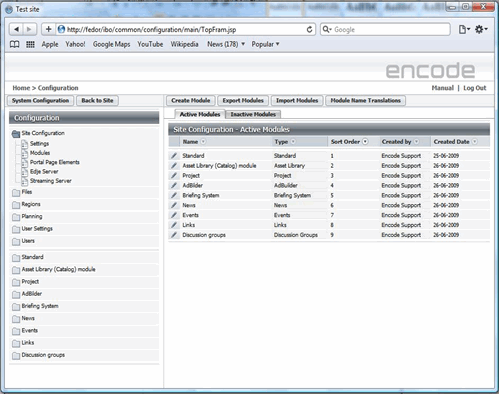
Fig.3.: Module’s configuration page
Create Module
To add a new module to your site, follow these steps:
On the toolbar, click Create Module.
In the dialog box that opens, select the type of the module in the Type list.
In the Name box, type a name for the module.
In the Sorting selectbox, type a number that will determine the position of the module among other modules on the Portal page.
If you have chosen type “Module” (the most frequently used), you can also specify the Template.
The template allows to create module with some predefined settings. It is possible to select from 2 configuration templates on Module creation, that define whether the module will contain media data or not. Note, that Module can be reconfigured later if needed.
Template | Configuration |
|---|---|
With Preconfigured Media Settings and without Audit Fields | The regular media related functionality is available in configuration. |
Without Media Settings and Audit Fields | File field is not created and media file holders/convertors are absent. “With Preview” mode search result is also not available. |
With Preconfigured File Area Settings and without Audit Fields | Module with preconfigured file area |
Users | Defines a module for User Management. All necessary fields and configuration are created automatically. Note, user management module is created with three dedicated execute task actions of special type “Update users” which are required to handle the synchronization of users. Do not remove them in order to keep functionality working. Starting from 9.101 module for User Management is created by upgrade task and cannot be created manually |
With Preconfigured Media Settings and Audit Fields (default) |
Default (Audit) fields will be created in addition to the basic configuration of the module Note! User Managment Module need to be enabled on the site in order to create such modules
|
Without Media Settings and with Audit Fields | |
With Preconfigured File Area Settings and Audit Fields |
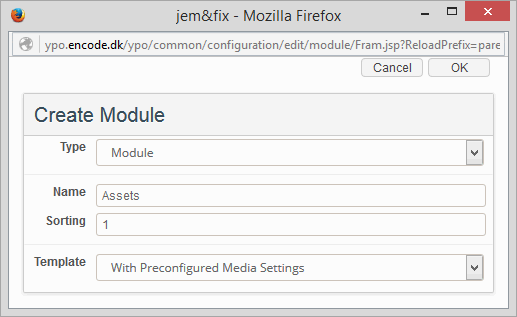
Fig.4.: Creating a new module
Change Module Sort Order
New created modules are placed in the bottom of the list.
Changing of module sort order is possible by using "Change Sort Order" button or Up/Down arrows in modules list.
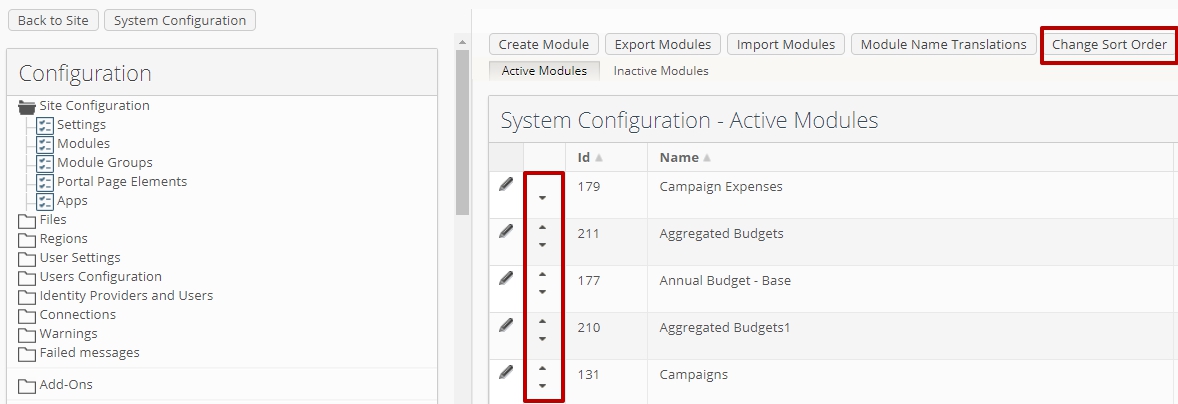
Fig.5.: List of Modules
“Change Sort Order” button opens a pop-up window with a table with 2 columns: input box for order index and Name of a module, and Re-Number, Cancel, OK buttons.
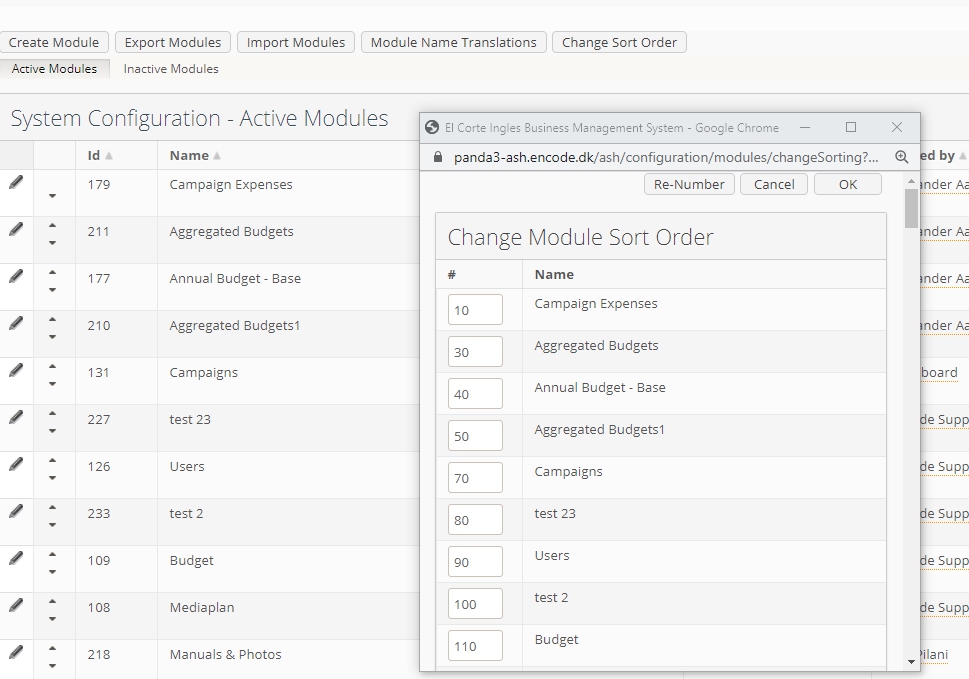
Fig.6.: "Change Module Sort Order" window
Re-Number button resorts modules but doesn't save resorted list, OK button resorts modules, save the result and closes the window
Make Module Inactive
Some of the modules you create may become obsolete with time when you no longer need them. So as not to clutter your site with such useless modules, you can “hide” them by making them inactive. Inactive module are not available to the user and do not appear on the Portal page.
To make an active module inactive, follow these steps:
Click the Edit icon next to the module that you want to make inactive.
In the dialog box that opens, click Make Inactive on the toolbar.
Inactive modules are listed on a separate tab, where their names appear highlighted in red, to indicate their ’inactive’ status. Note that you can edit the settings of inactive modules and sort them on the page just like you do active modules.
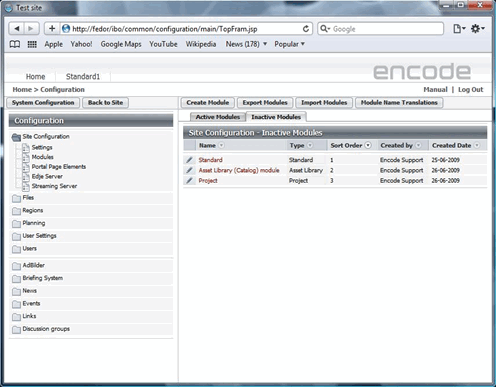
Fig.7.: The Inactive Modules page
Re-activate Module
If a module that you have once made inactive happens to be useful again, you can “revive” it by making it active. To make an inactive module active again, go to the Inactive Modules tab, locate the module you want to reactivate, click the Edit icon next to it, and then click Re-activate Module on the toolbar of the dialog box that opens.
You can edit the settings of both active and inactive modules. To edit the settings of a module, follow these steps:
Click the Edit icon next to the name of the module that you want to edit.
In the dialog box that opens, make your changes and click OK to save them.
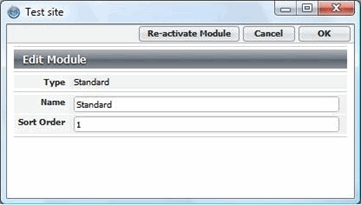
Fig.8.: Editing the settings of a module
Delete Module
It is possible to delete obsolete modules on corresponding site that are not in use for some period of time.The main difference between inactivation and deletion of modules is that you won't be able to reactivate and "show" deleted module in system as well as all associated data and files will be cleaned up after module deletion to not overload file system and DB.
Active and Inactive modules can be deleted.
To delete module, follow these steps:
Click the Edit icon next to the module that you want to delete
In the dialog box that opens, click Delete Module on the toolbar.
Submit module deletion in modal

Fig.9.: Edit module page with "Delete Module" button
Note: You should be aware that module deletion will clear associated files and data and may impact entities in webapp that are connected with or referenced to the deleted module!
Export/Import Modules
You can export and import active modules of a site in the form of XML files. To export one or more modules, follow these steps:
On the toolbar, click Export Modules.
In the dialog box that opens select the checkboxes next to the modules that you want to export, and then click OK:
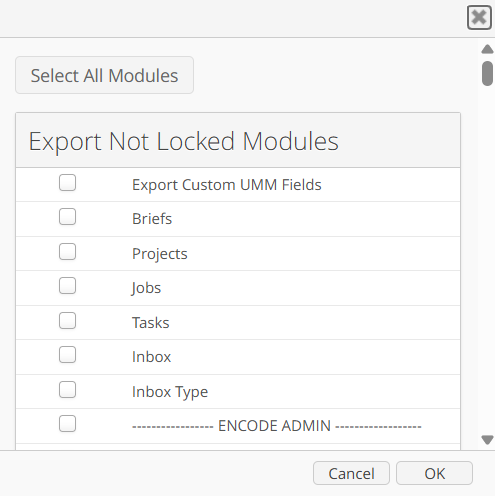
Fig.10.: Exporting modules from the site
To import modules, follow these steps:
On the toolbar, click Import Modules.
In the dialog box that opens click From File to locate the file, and then click Import;
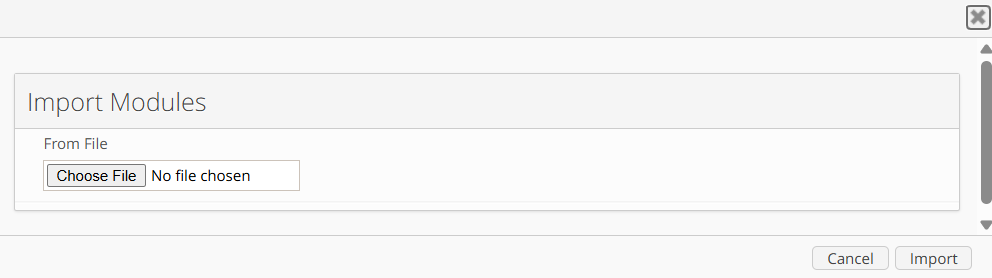
Fig.11.: Importing modules
If imported XML doesn't have enough data to recreate all structure (e.g., there are calculations or module links, pointed to another, not included in the xml, module or Access Rights etc) - then User has to match them on real entities from the site/system which the xml importing to.
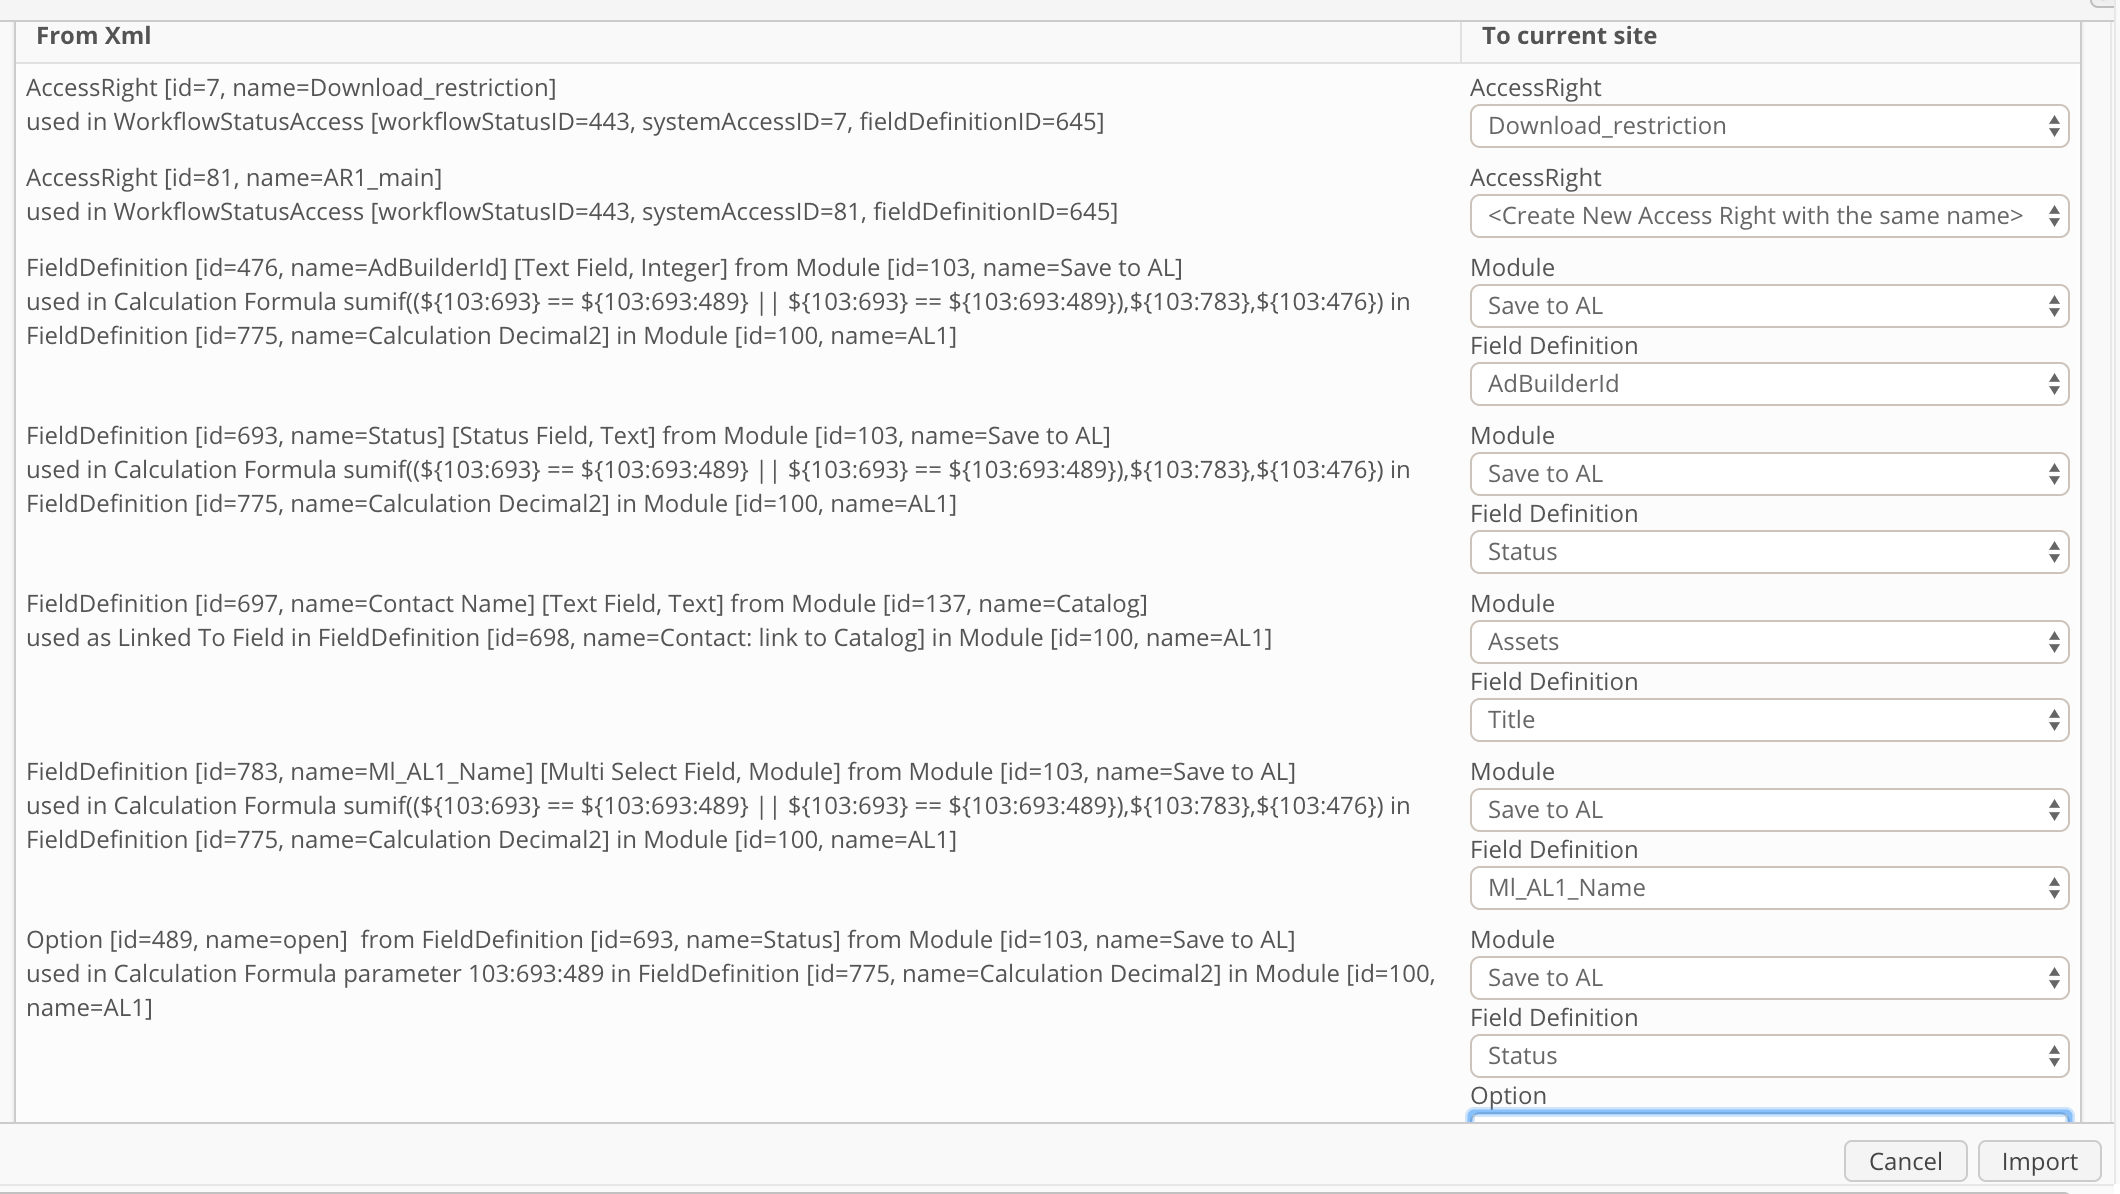
Fig.12. "Match External Entities" list in Import Module window
After the matching, import starts.
Metadata Module
New checkbox "Metadata" is added to Module settings.
If a Metadata module is selected in the Export window, the config of the module will be exported along with its data (file fields values are out of scope). Files with data are exported together with config xml file as a zip archive. If the zip file is uploaded to import, config and data of included modules will be imported.
If there are ModuleLinkOptions in configuration, they are always included in config xml. If those ModuleLinkOptions are items from a Metadata module and the Metadata module is exported too (with data), then ModuleLinkOptions items will be imported first, then all other items from the Metadata module will be imported.
Metadata module items are exported as an xml file (individual for every Metadata module) and imported to the corresponding new target module by Encodify usual FieldImport engine.
UMM custom fields
There is a checkbox "Export Custom UMM Fields" in Export Modules window. It appears if UM Module is configured for the site and it has Custom fields.
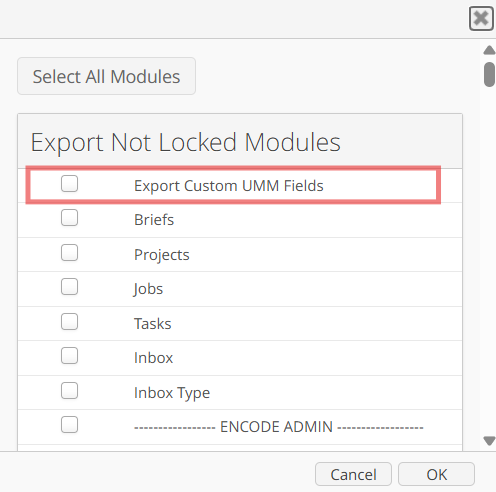
If "Export Custom UMM Fields" is checked, all UMM Custom fields are exported inside xml node.
If "Export Custom UMM Fields" is not checked, only linked UMM Custom fields are exported inside xml node (those have fields in exported module linked to). So, if there are linked Custom UMM Fields they always are exported.
There is a checkbox "Import Custom UMM Fields" in Import Modules window, above Matching Entities section. It appears if UMM configured in the target site and import xml has all Custom fields (not only linked).
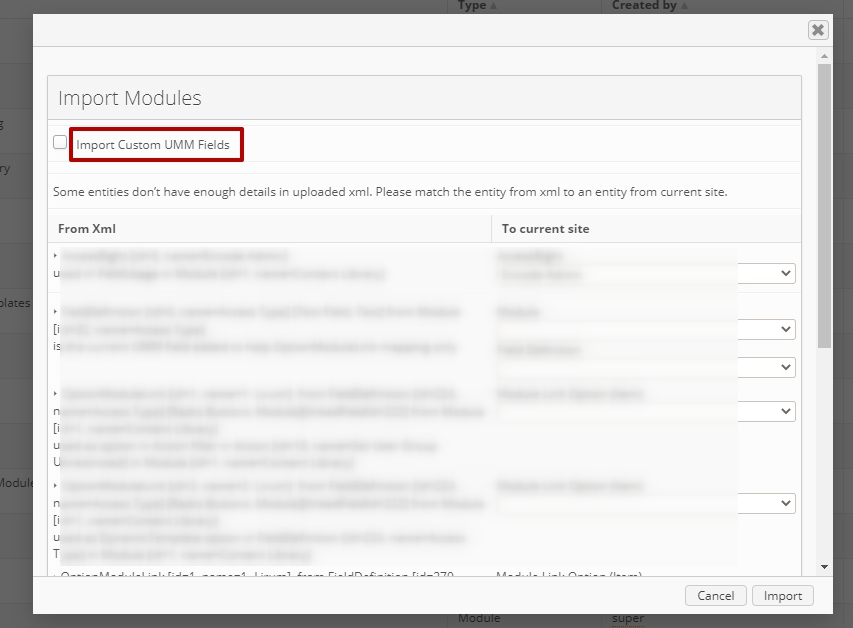
If UMM Custom field should be imported (there is in xml) but the same field already exists in the target site UMM, field copy is not created. "The same field" means "the same name, Field Type and Field Data". If only names are equal, a new field is created (imported) with a suffix like "(1)".
If "Import Custom UMM Fields" is not checked, only linked UMM Custom fields from xml node are imported to target site UMM ("linked" means if field from imported module has link to UMM).
if UMM configured in the target site and import xml has only linked Custom fields, then "Import Custom UMM Fields" checkbox doesn't appear, all linked Custom fields are imported automatically.
if UMM is not configured in the target site and import xml has UMM config with Custom fields, then not linked Custom fields are ignored, but linked Custom fields are shown in Matching Entities list. User can assign them to the right field in the right module.
If the imported module has a link to a Custom UMM field and an option of this field is used in imported module configuration - in this case, the Custom UMM field can't be automatically created during import because OptionModuleLink should be created too. OptionModuleLink is an item in linked module and can't be created (at least in the current implementation), only configuration can be created, not data. Therefore, both, Linked Field Definition and OptionModuleLink (item) should be matched by Configurator during import. Doesn't matter if Linked Field is in UMModule or in a regular module. If OptionModuleLink (item) doesn't exist in External Entities list, Linked Field Definition can be created automatically during import.
if User selects UMM as a usual module and exports it, it will be imported as the usual module, not like UMM. To see "Import Custom UMM Fields" checkbox in the described scenario, don't export UMM from the source site as a usual module (uncheck checkbox near Users module in the list of modules for export).
If the purpose to move the whole site with all modules + UMM to a new one:
Steps-1
Go to Site Configuration > Modules > Click on Export Modules button
Select all the modules EXCEPT module "Users" > Select "Export Custom UMM Fields" checkbox > Export
Create new site > Enable UMM in it
Go to Site Configuration > Modules > Click on
Steps-2:
Export all the modules from the site with "Export Custom UMM Fields" checkbox selected.
Create a new site ( don't enable UMM on it! ).
Import exported modules on the site. After import, enable the imported Users module as UMM on the target site.
"Import Custom UMM Fields" checkbox appears if UMM from the exported site should be merged with UMM on the target site.
If UMM should only be copied to the target site, it should be exported and imported as a usual module and later configured as UMM on the target site.
Note! Next sections in Module settings are still not covered by export/import:
Field Dependencies
Proofing
External File Structure
Menu Elements: file area
Comments
Email Notification
Actions "Send to connected service", "Scheduled report", and "Notification by query"
Print Templates
Workflow: CopyTo mapping; User Groups (only Access Rights are done)
AdBuilder settings
Briefing settings
Access right settings for Apps
Access right settings for Rules
Limitations:
Action Filters with Titles, Divisions, Users, Regions, Sub Regions, and Countries should be completed after import manually by Configurator. Аfter import, this Filter will not appear in Action Filters and should be created manually;
Module with Enabled Order Basket with Module Storage can be imported to the site where such module already exist. So there will be 2 modules with enabled Order Basket although only one such module can be created manually. Option "Enable Order Basket with Module Storage" should be disabled in one of the modules manually by Configurator after import;
For HTTP Actions:
HTTP_AUTHENTICATE_WITH_CONNECTED_SERVICE property always should be completed manually after import;
HTTP_URL is always exported as an empty string, it should be changed after import manually by Configurator;
Only xml structure of Import Settings can be exported/imported: Template File is exported, no data from Template File;
"Send to connected service" actions cannot be exported/imported;
Empty date format replaces by null in Import settings of imported module;
Scheduled Import action cannot be exported/imported with other module settings;
Some modules cannot be imported (Error executing SQL task);
Error occurs on exporting modules from some sites (NullPointerException);
Imported rules contain incorrect information;
Incorrect number of items get exported if Link to item was used in various configuration settings;
Item is missing in the actions filter of the imported module if contains empty fields.
Question:
trying to import modules to a brand new empty site. I exported the entire sites module and when I import I get the following. (Both sites same version)‣ FieldDefinition [id=0, name=Brief Type] [Text Field, Text] from Module [id=2830, name=Coty Unit Type]
I don't get how I can have a field id of 0.
Answer:FieldDefinition [id=0, name=Brief Type] is not just FieldDefinition with Id = 0, it's part of a pair "FieldDefinition-OptionModuleLink", please, see Module Configuration Export/Import
bullet "Module Link option (OptionModuleLink)..."
In your case, there is a site with modules and the modules have data. The data is used in the configuration as
options in DynamicTemplate in FieldDefinition [id=34071, name=Brief Type] in Module [id=2828, name=Briefs]
Option of Order Type field in Ordering Action in Module [id=2822, name=Content Archive]
Option of Order Type field in Ordering Action in Module [id=2873, name=Templates].
The main problem is that for now we can only export/import the structure of configuration, not the data of modules. Options can be exported/imported only for plain option fields, not Module Link fields (where options are items of a module).
Therefore during that import you see "FieldDefinition-OptionModuleLink" pairs in the Mapping Entities List: ImportEngine don't know what should be used as those options (modules will be created during import, but they will be empty and there will be no data (items) to use as options on Module Link fields) and suggests to Configurator to map all OptionModuleLink to some real items.
Because you import to a new empty site you haven't the specific items to map yet. Maybe, in the nearest future export/import of linked data will be added, but for now we doesn't have it. As workaround you can try to temporary 'fake' map those "FieldDefinition-OptionModuleLink" pairs to some Fields-Options from another site and then (when import completes) create appropriate items in modules, and then update manually configuration of Field [id=34071, name=Brief Type] in Module [id=2828, name=Briefs] to add right options to DynamicTemplate. And update Option of Order Type field in Ordering Action in Module [id=2822, name=Content Archive] and Option of Order Type field in Ordering Action in Module [id=2873, name=Templates].
Translate Module Names
If you need module names to be translated to the language that you specify in Site Settings or User Settings, you can enter translations of module names by entering translated name of each module for English or Danish language.
To enter translations for module names follow the below described steps:
Go to Site Configuration>Site Configuration>Modules.
On the top bar, click Module Name Translations.
In the Translation window that opens, there are two tabs where you enter translations for module names for two languages English and Danish.
Click the tab with the language you want to enter module translations for. On the left pane you will see the list of module names in the original language. Enter the translation to the required language for each module name on the left pane.
Click Save Translations. Now that the translations are created, you will have module names translated when you change the language for the site or a user.

Fig.13. Module Name Translations
Note! Module names translations are applied to site. You will not see module name translated in Site Configuration, in the list of inactive modules and when importing/exporting modules.
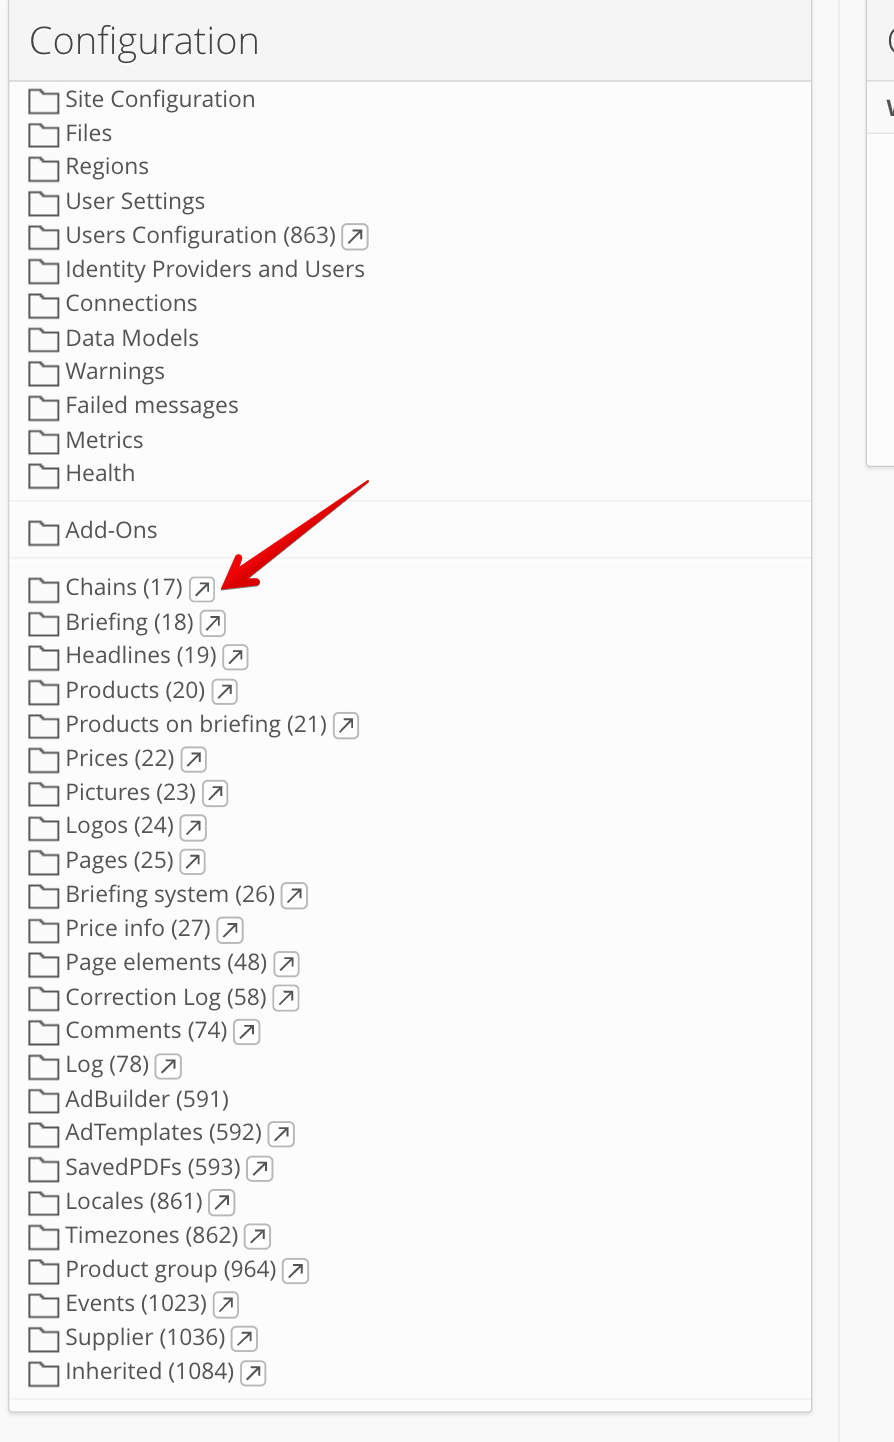
Direct link to Module
It is possible to navigate to corresponding module via "Link to module" icon. Direct link navigation is available for modules of types: Module, Briefing.
Please note: navigation direct link is not available for module of type: Adbuilder
Click on "Link to module" icon for UMM opens new tab with the list of users - https://{yourWorker}/panda/site//home#/users
Click on "Link to module" icon for module with data opens new tab with corresponding module - https://{yourWorker}/panda/site//home#/home#/module//view//
Click on "Link to module" icon for module of type "Briefing" opens in new tab briefing list -https://{yourWorker}/panda/common/custom/Briefing/main/Fram.jsp