Overview
Important: Before enabling Google Cloud Vision Connected Service, an Encodify administrator must first ensure that it’s enabled within your infrastructure.
1. Configure Google Cloud
Go to Google Developers console https://console.developers.google.com
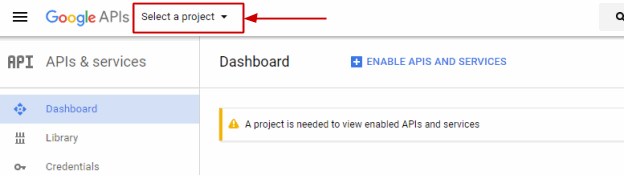
Create a project or use an existing one by clicking Select a project.
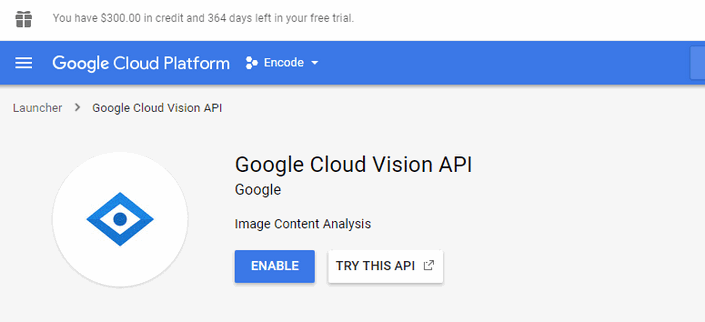
Search for Google Cloud Vision API service and click Enable (note, Google will ask for a payment card to confirm you are not a robot, though the trial period is free).
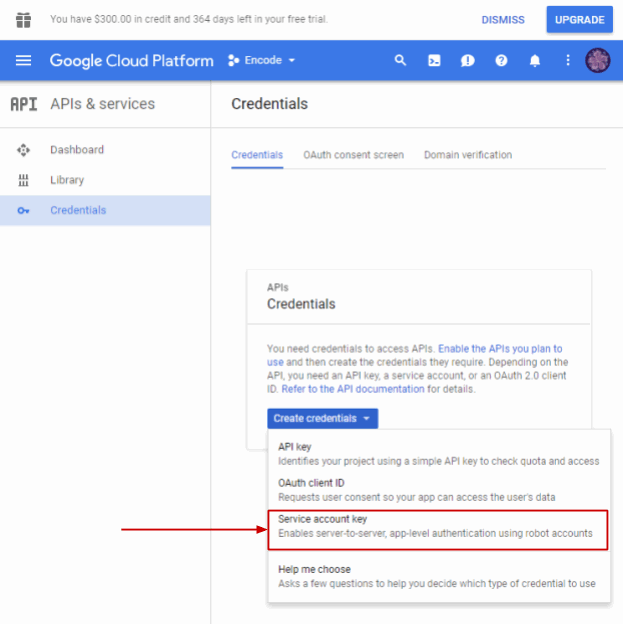
Go to Credentials and create a Service account key, which is needed to allow Encodify to access the Google Cloud Vision API.
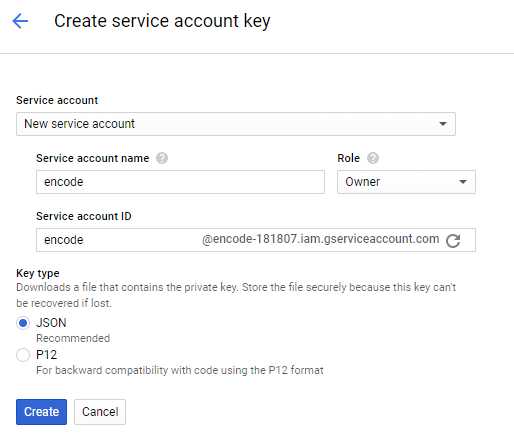
Select New service account, choose key type JSON and role depending on the permissions you want to give. After clicking Create the JSON file will be generated and downloaded to your local machine.
2. Configure the Encodify system
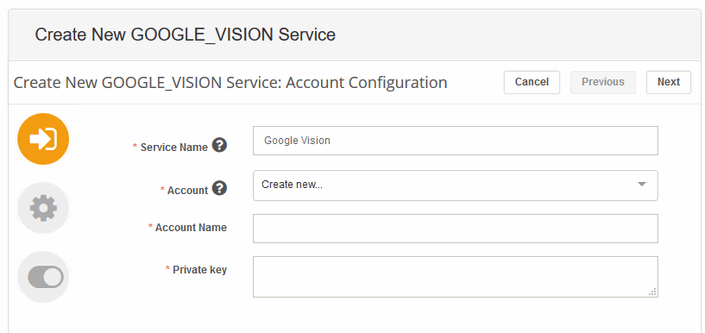
2.1. Account configuration
Parameter | Description |
|---|---|
Service Name | Descriptive name of the integration service. The name will be displayed in the configuration of “Send to connected service” action |
Account | You can select from existing accounts or leave “Create new…” to create the new one on this step |
Private Key | This field accepts the content of the JSON file, which is provided by Google and can be downloaded on your Cloud Platform Console Credentials page. Open the JSON file with a text editor and Copy-Paste its content into this field |
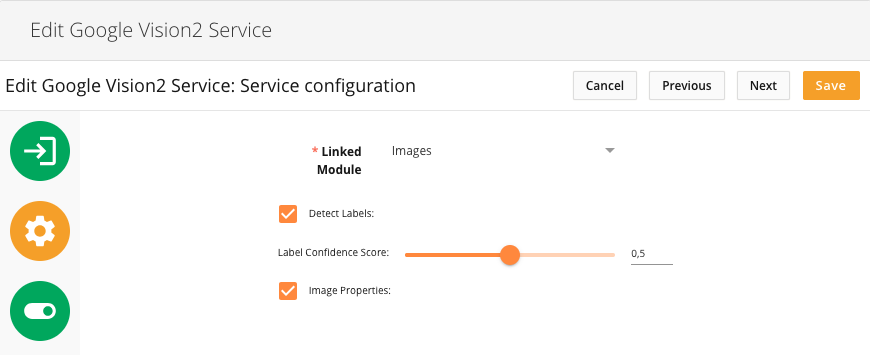
2.2. Service configuration
Parameter | Description |
|---|---|
Module | A module in Encodify that will be used for storing data |
Detect labels | Enables automatic label detection as a result of image processing. |
Label Confidence Score | Controls the filtering of the detected labels by confidence score.
|
Image properties | Enables automatic dominant colours detection as a result of image processing. |
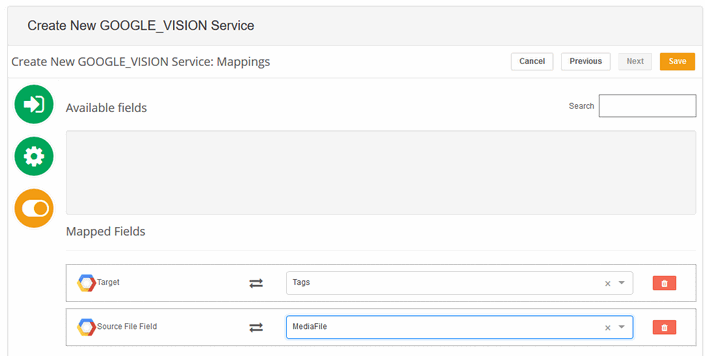
2.3. Mappings
Parameter | Encodify Field Type | Description |
|---|---|---|
Media Holder | File | The initial image will be uploaded to this field. Any available media holder can be selected |
Label | Multiselect (text and module link) | Requires mapping when the "Detect Labels" option is enabled. |
Image Properties | Multiselect (text and module link) | Requires mapping when "Image Properties" options are enabled. Keeps the list of identified dominant colours as a result of image analysis- |
2.4. Actions configuration in the module
For the Google Vision service to work, actions need to be configured in the module for which the connected service was configured.
The following events are available for the Send to connected service action:
Create
Update
Delete
Сreate and Update
Workflow
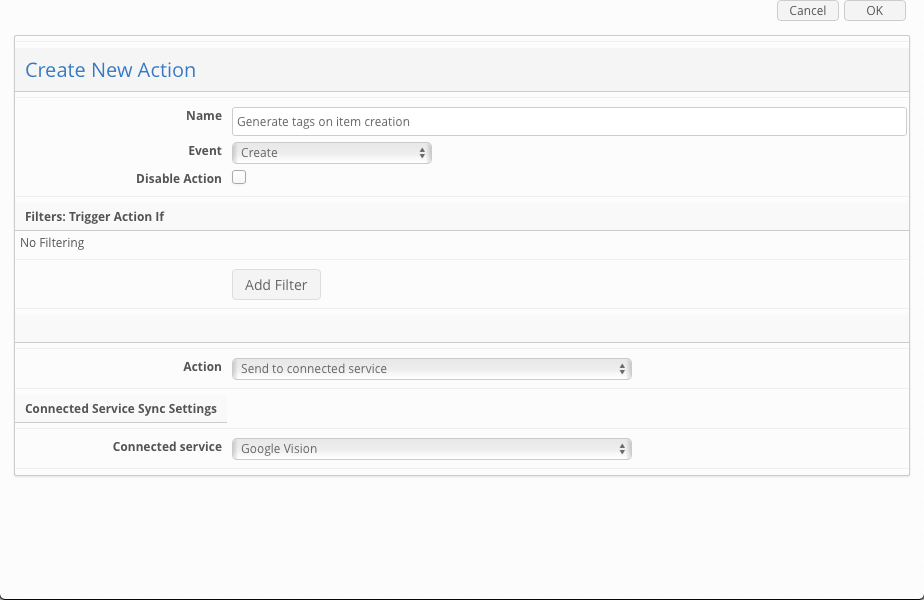
To create an action:
Click Create Action in the Actions menu in Module Configuration.
Enter action name > select the event.
Add filters if needed.
Select Send to connected service in the Action field.
Select the configured Google Vision connected service.
Save.
Please note!
Action will be triggered only in case a new file is uploaded to the mapped file field. This is valid for all types of events (except Delete). This means, for example, that connected service will not trigger tags generation if the user updates an item without uploading a new file, when connected service integration is configured for the Update event.
3. Google Cloud Vision in use
Once the configuration is done, you can upload the image file (only JPG, PNG, GIF, BMP) to the mapped module field and the field mapped as Target will be filled in with tags that describe the image.
Note, for large images you will not see the result immediately as it will take some time while the image is sent to Google Cloud, analysed, and the result is returned.
The Google service has limits regarding the number of processed images and their size. Please see this page: https://cloud.google.com/vision/quotas