After reporting functionality has been activated and set up in Site Configuration, under Add-Ons menu, the user can proceed with creating the reports, specifying filtering criteria for data extraction and generating report.
In order to create a report, follow the steps described below:
Go to the module that you specified as a reporting one in configuration, and click Add.
In the Name field, enter the name of the report.
If you leave the Module Containing Templates field blank, the system will create xml template automatically. Otherwise, you can upload ready xml templates that were previously configured.
Click OK to save the report.
As soon as the report item is created, the Get Report button appears next to the Info button. If you uploaded the xml template with report configuration, when creating a report, by clicking the Get Report button, the report will be generated in accordance with the setup in the xml template.
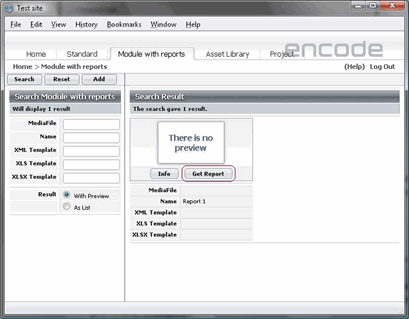
Fig.3.: Generate report according to the configuration
If you left the Module Containing Templates field blank, you have to proceed with report configuration that includes the following:
Selection of modules, from which data for the report will be extracted
Selection of module fields that will be displayed in the generated report
Specifying filtering criteria for the module fields, that will result in the exactly needed data extraction
In order to select modules for the report, perform the following steps:
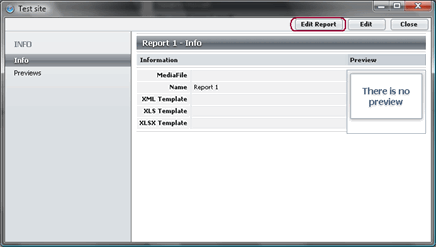
If you are in the With Preview mode, click the Info button of the created report item. Otherwise click the Edit icon.
In the window that opens, click Edit Report.
In the Edit Report window, on the General Settings tab, the list of all the modules available on site will be displayed with the check boxes next to each. By selecting the check boxes, you specify from which modules the data will be taken for the report and the system adds them as tabs in the left pane of the window for entering filtering criteria.
Note! Modules that are not available for selection for report generation are: Briefing, AdBuilder, Discussion groups and Links.
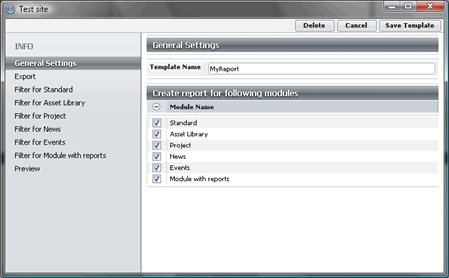
Fig.5.: Report configuration — modules selection
Move to the Export tab. The list of module fields that corresponds to the selection of modules on the General Settings tab will be displayed. By selecting the check boxes next to module fields, the user specifies from which fields the data will be taken for the report.
The user can also include log information to the report, by selecting the corresponding check boxes in the Include Log Information section. Log information includes:
download log
change log
workflow log
workflow
comments
general comments
Note! Log information check boxes are available for selection only when logging is enabled for the module itself. Otherwise, the Include Log Information section will be unavailable.
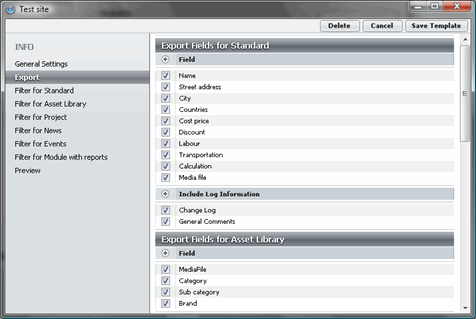
Fig.6.: Include log information to the report
If you want all the data from the specified modules and module fields to be extracted to the report, click Save Template to save report settings.
Click Get Report to generate the report according to your configuration.
In the Get Report window, select format of the generated report. Currently, you can choose between .xls and .xlsx formats.
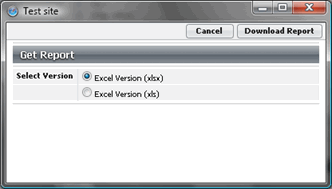
Click Get Report to generate and download the report. In the standard pop-up window, you can select whether to save the generated file to some directory on your computer, or open the report in Excel.
In the generated excel file, data from different modules are displayed on different tabs. If you included log information to your report, corresponding tabs with log info prefix will follow the tab with main module data.
Note! When generating reports with large amount of data, please take into account that .xls format files have limitation of 64000 lines. XLSX files do not have such limitation, but when generating reports with large amount of data, the worker should be started with large volume of memory.
If you want only the exactly needed data to extract for the report, you can specify filtering criteria for the module field. In order to set filters for the reports, perform the following steps:
Select the report item and click Info.
Click the Edit Report button.
In the Edit Report window, click the tab with the module name for which you want to set a filter.
In the Filter section, in the right pane, click the Add Criteria button. A new criteria entry will be added.
Click the Name drop-down list — the list of all fields available in the selected module will be shown. Every field type has its own filters. The list of field types and the corresponding filters are listed in the table below.
Field type
Filter
Text fields
Contains
Does not contain
Begins with
Ends with
Is equal to
Numeric fields
Is equal to
Is greater than
Is less than
Optioned fields
Is equal to
Is not
Module links
Is equal to
Is not
Date fields
Next/Previous
{number} days, weeks, months, years
Period selector:
Today
Yesterday
Tomorrow
Last/This/Next:
Week
Month
Quarter
Year
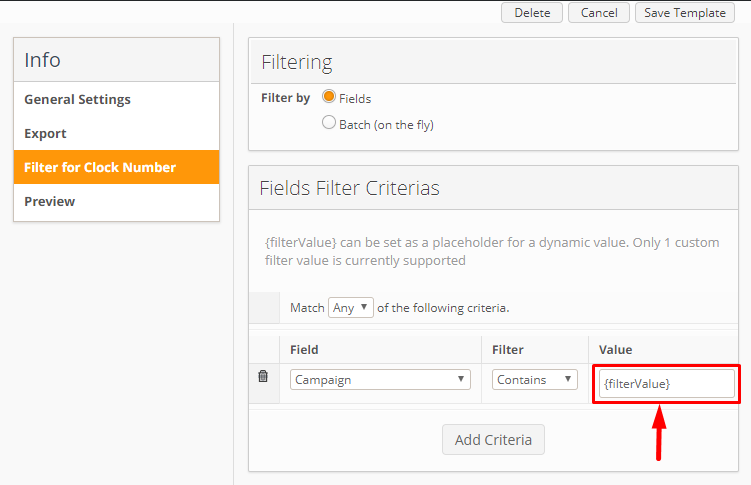
It is possible to configure filter by field value that is not predefined in filter settings but can be specified just before the Report generation. It is also used in Batch Actions for generating the Report link with filtering.
To configure this, specify the key placeholder
{filterValue}as a filtering value. For exampleField
Filter
Value
Campaign
Contains
{filterValue}
 Now in the Get Report window, you will have the possibility to enter the filtering value:
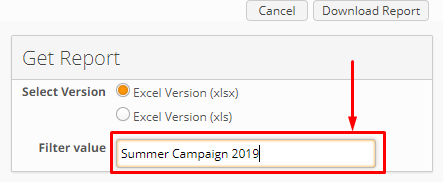
You can add as many criteria as you need for each separate module, to retrieve only the exactly needed data for the report.
The preview of the generated report according to the filtering criteria is available on the Preview tab.
Note! Report preview functionality is only available if you have
devMode=truein yourSystem.propertiesfiles.After you have selected all the modules to extract data from and specified all the filtering criteria to limit the amount of data retrieved, click Save Template to save template configuration.
Click Get Report to generate the configured report.
Select the format of the generated report (.xls or .xlsx) and click Download Report.
Known limitation: date in downloaded .xls and .xlsx format won’t be shown in human readable format in Numbers app for Mac OS