Configuring SSO with Microsoft Azure AD

Prev Next

Setting up SSO for Azure


This guide will help you configure “Azure OpenID” in the Encodify platform with step-by-step instructions and screenshots from the Azure portal.

Configuring OpenID Connect for Encodify through Azure


  • First, navigate to Site Configuration → Identity Providers and Users → Identity Providers in the Encodify system.

  • To create a new provider click the button “Add New IdP

  • For the field Name ID, use only English letters and no spaces. This value will be used later as part of the URL.  

  • For Display Name for Login Page, use a name that you would like users to see on the login page as a label for the login button.  

  • Ensure the Authentication Method is set to OpenID Connect.  

  • The Email Domains field is optional but can be used to add a restriction based on allowed email domains for authorisation. Any user with an email address that belongs to specified domains will be able to log in. You can specify domain names separated by a comma, e.g. encode.dk, microsoft.com

  • Click Next to proceed to step 2

  • Link your IdP configuration to an existing Login URL and Login Page, or create new ones. Each IdP can be linked to only one Login URL. See Configuration of Login URL for more details.

  • Click Next to proceed to step 3

  • On the third tab we find “Details” from actual integration. At this step, we will need data from both the Azure Application and data from this page.

  • First copy link specified at a page as Callback URL

Azure Portal

  • First of all navigate to the “Azure Portal” and log in. Microsoft Azure Portal

  • Now, using the search bar navigate to “App Registrations”

  • Register a new Application by clicking on the '+ New registration' button and filling in only the “Name”

  • Once it is registered you are automatically redirected to Application “Overview”, and now it is necessary to continue on Encodify Platform to get the last parameter to configure and use this information from Azure.

  • So now, let’s go to Azure Dashboard -> Search for “App registrations” -> Find the application created.

  • Once again we are here, we go to the “Authentication” section inside the left menu about our Application.

  • As suggested on screenshot click on “+ Add a platform”. Here select “Web”

  • And on the next step copy the value from Encodify Platform “Callback URL”.

  • As the last step inside Microsoft Azure we need to configure the “Client Secret", to achieve that we must go to “Certificates & Secrets” and click on “+ New client secret”.

  • Now inside this menu open on the right, please add description and expiration time as you need. Once it is created you can copy “Secret” to use it in the Encodify Platform wizard.

  • Now to set up all values in the Encodify platform we must go to “Overview” to find all the necessary values to set. Here we can find on one hand Client Id:

  • Following the “OpenID Connect metadata document” endpoint we can find all necessary values to finish the configuration inside the Encodify Platform in “Identity Provider Wizard”.

Finalise IdP Configuration

  • Return to the Encodify system and based on the data obtained in the last step, here in this screenshot, you can see how to link values with fields in the “Identity Provider” wizard inside Encodify.

  • Next 2 pages, access rights mapping and user groups mappings are not supported when the IdP provider is Azure, because it is not possible to expose extra attributes in tokens from Azure, only standard fields, like name, email, etc.

  • Click Next and Next again to proceed to step 5


  • The next step is Default User Properties which allows specific params like Access Rights and some fixed attribute values, like in my example Division is set to Managers for users, which will be set for the new user on login with auto-provisioning.

  • Click Next to proceed to step 6

  • This step allows setting default user groups for users, which will be set for the new user on login with auto-provisioning.

  • Click Next to proceed to the last step

  • The last step of the wizard allows specifying a Welcome Email and “First Login” Message for new users. If those are enabled, a user who logs in to the Encodify system first time will receive the email and will see the modal window with welcome text on entering the site using current IdP authentication.

  • Click Save IdP to finalise the IdP configuration

  • After saving new Identity provider should be present in the list of Identity Providers

Configuring SAML for Encodify through Azure


Receiving the Federation Metadata URL

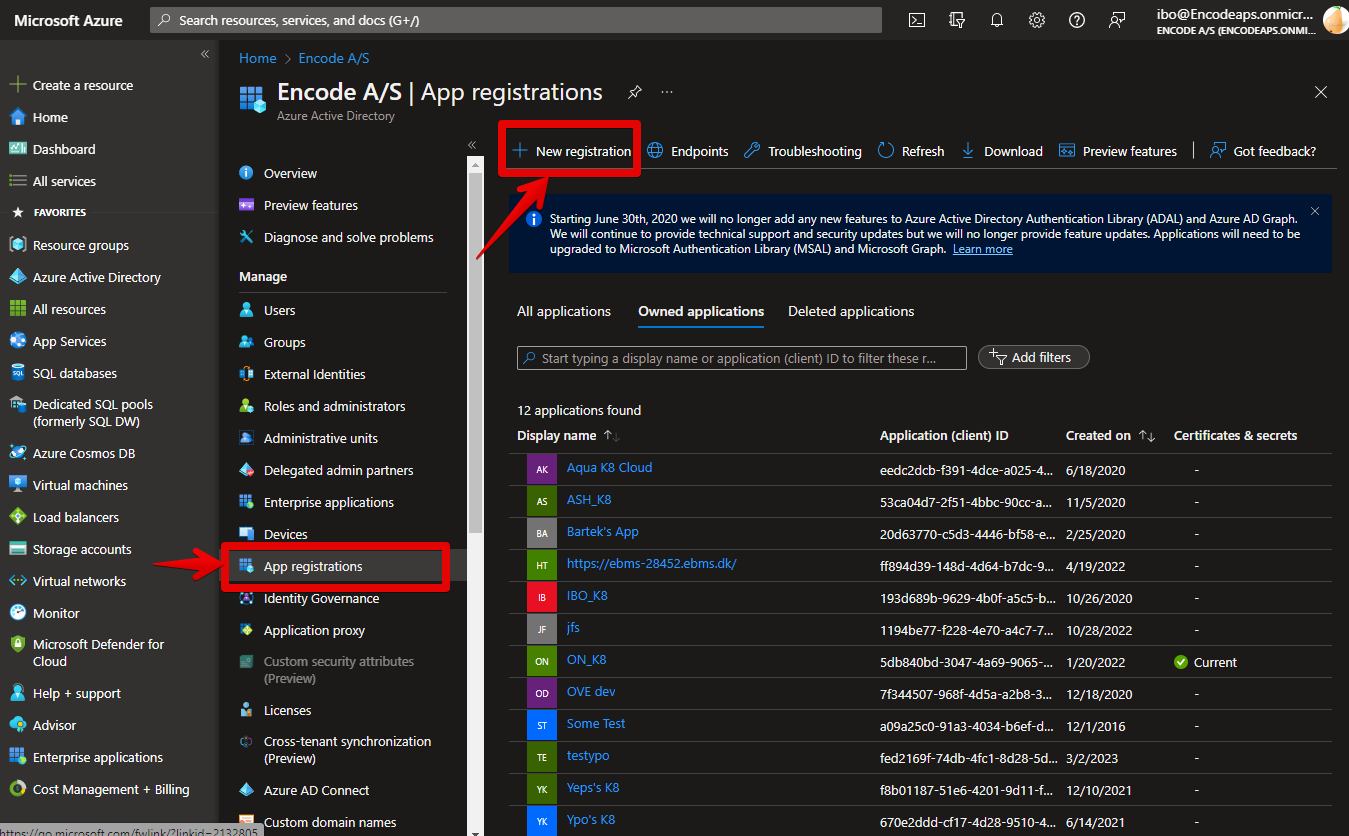
  1. Sign in to your Azure portal page using the following URL: https://portal.azure.com/ (Microsoft account should be created in order to be able to sign in).
    image2.png

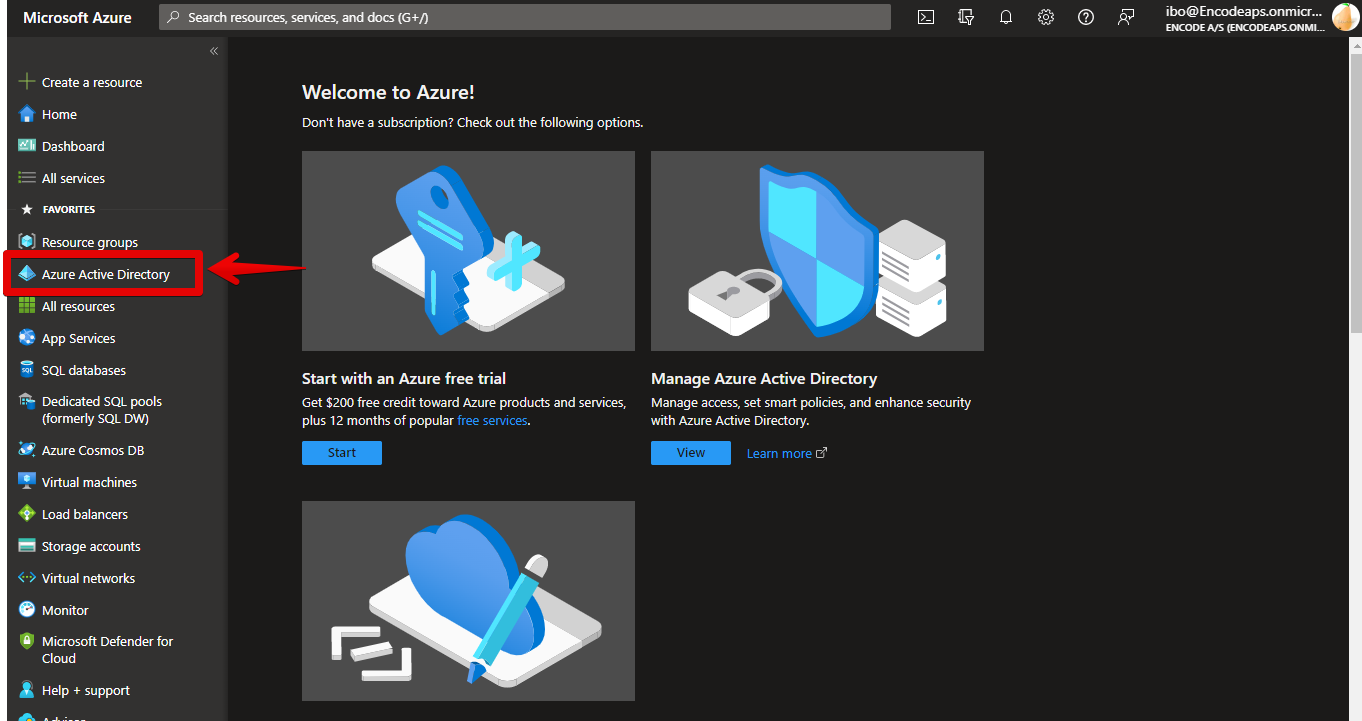
  2. Go to Active Directory service (if you don’t have it on the sidebar, click More services and find it the service list). Note, that Active Directory service is available only for an account with a paid subscription (you can use free trial subscription for testing purposes).

    Assuming you already have a specific directory created (otherwise you can use default directory or create a new one using New icon).

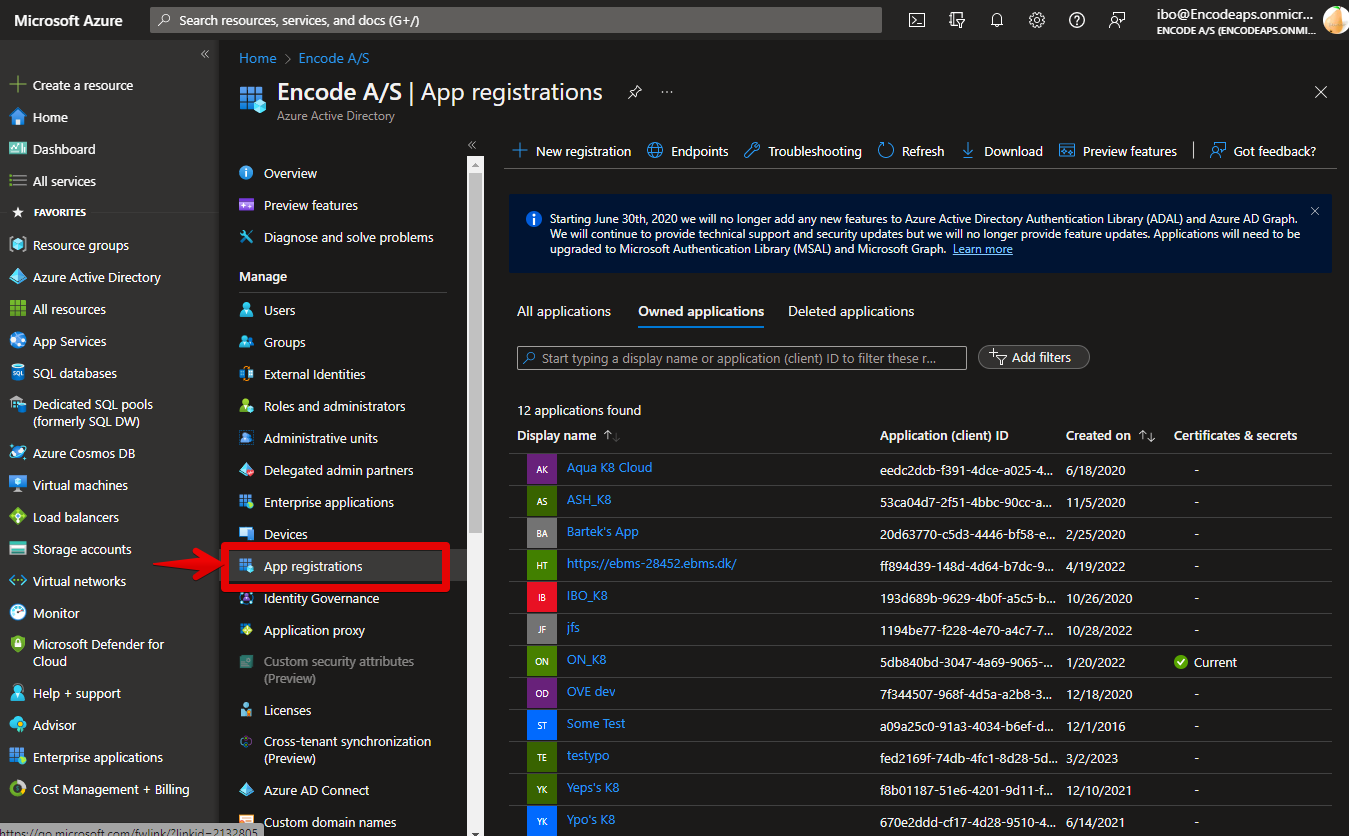
  3. Click App registrations menu in the Manage section on the left sidebar.

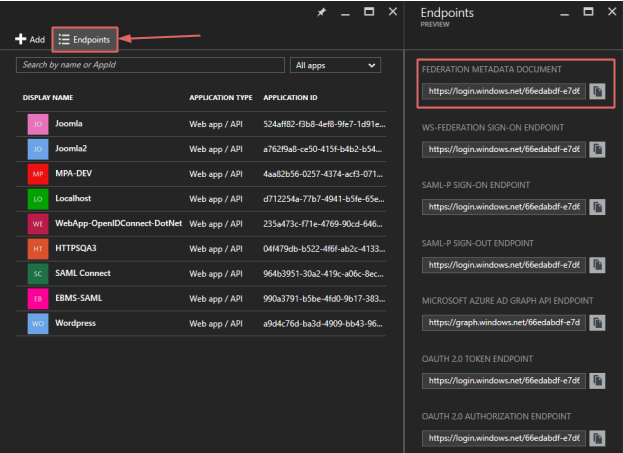
  4. Go to application list window and click Endpoints button. Find Federation Metadata Document endpoint URL. You need it when configuring Azure AD IdP profile in Encodify system.

    image7.png

Configuration of SAML Application


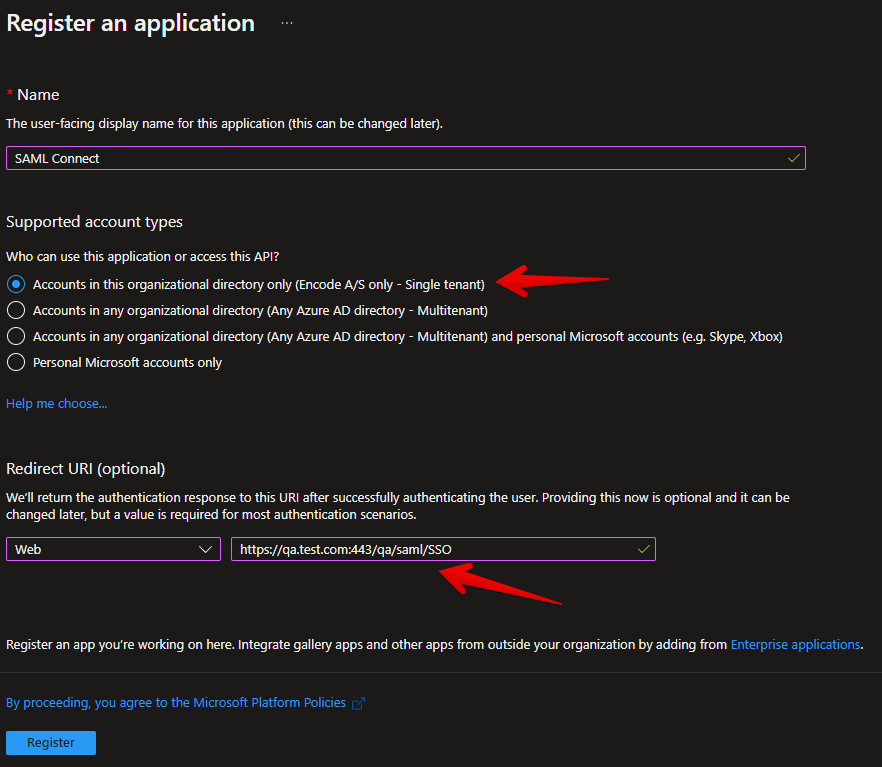
  1. Click New registration in the application list window that is appeared (it might be initially empty).

  2. Specify initial settings for the new app in the Register an Application window appeared and confirm settings clicking the Create button on the bottom:

    Parameter

    Description

    Example

    Name

    Application name, minimum 4 characters length

    SAML Connect

    Supported account type

    Who can use this application

    Encodify only - Single tenant

    Redirect URI

    URI to which Microsoft Azure AD will send SAML authentication tokens for authenticated users.

    {encodeServerURL}:{port}/{worker}/saml/SSO

    Web

    https://qa.test.com:443/qa/saml/SSO

    Beware of new requirements from Microsoft/Azure that custom domains have to be verified. If we are hosting the system on Encodify domain (*.encodify.com) we need to add a TXT/MX record to our DNS settings. If it is hosted on a client domain (encode.client.com) then it must be done by the client.

    See more: https://docs.microsoft.com/en-us/azure/active-directory/fundamentals/add-custom-domain

  3. Switch to the Manifest tab in your app window.

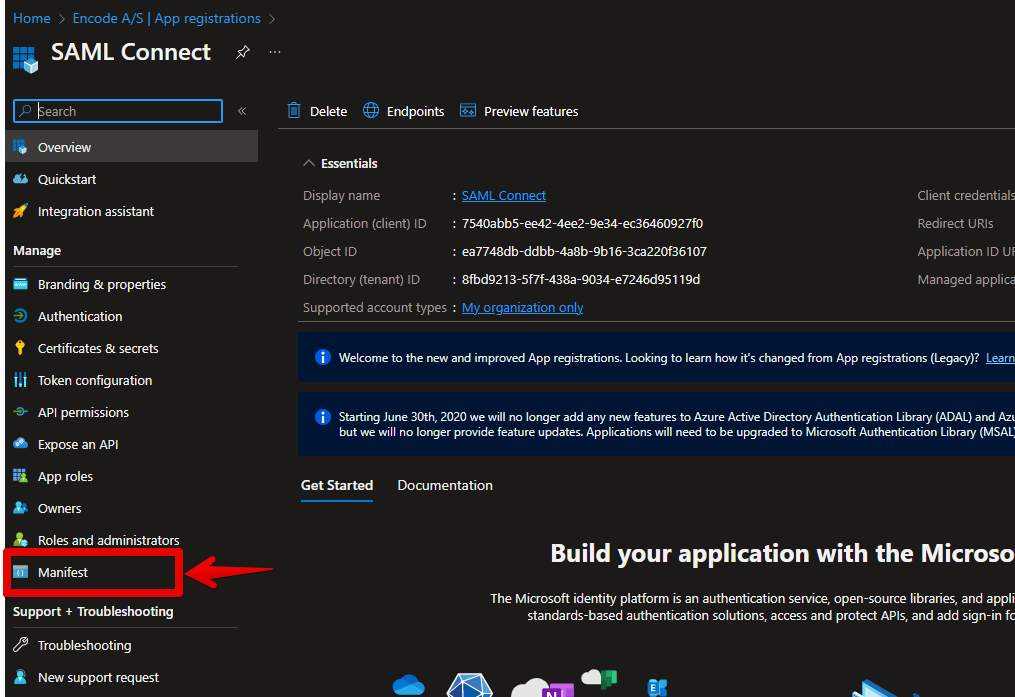
  4. In the Edit manifest window, which shows the settings in JSON format, specify the next parameters (you can find these in your IdP settings In Encodify system):

    Parameter

    Description

    Example

    groupMembershipClaims

    Enables sending user groups in SAML token

    All

    identifierUris

    The URI used as a unique logical identifier for your Encodify system:

    {encodeServerURL}:{port}/{worker}/saml/metadata

    https://qa.test.com:443/qa/saml/metadata

    replyUrlsWithType

    URI to which Microsoft Azure AD will send SAML authentication tokens for authenticated users.

    {encodeServerURL}:{port}/{worker}/saml/SSO

    https://qa.test.com:443/qa/saml/SSO

    {
    	"id": "15db0d06-4b48-44be-a2ac-ca51c92c0c9d",
    	"acceptMappedClaims": null,
    	"accessTokenAcceptedVersion": null,
    	"addIns": [],
    	"allowPublicClient": false,
    	"appId": "dbc79949-9d63-4778-827f-26eb1fd7b3f2",
    	"appRoles": [
    		{
    			"allowedMemberTypes": [
    				"User"
    			],
    			"description": "Read-only access to device information",
    			"displayName": "Read Only",
    			"id": "601790de-b632-4f57-9523-ee7cb6ceba95",
    			"isEnabled": true,
    			"lang": null,
    			"origin": "Application",
    			"value": "ReadOnly"
    		}
    	],
    	"oauth2AllowUrlPathMatching": false,
    	"createdDateTime": "2018-09-04T12:20:22Z",
    	"description": null,
    	"certification": null,
    	"disabledByMicrosoftStatus": null,
    	"groupMembershipClaims": "All",                               <----- 1
    	"identifierUris": [
    		"https://qa.test.com:443/qa/saml/metadata"            <----- 2
    	],
    	"informationalUrls": {
    		"termsOfService": null,
    		"support": null,
    		"privacy": null,
    		"marketing": null
    	},
    	"keyCredentials": [],
    	"knownClientApplications": [],
    	"logoUrl": null,
    	"logoutUrl": null,
    	"name": "SAML Connect",
    	"notes": null,
    	"oauth2AllowIdTokenImplicitFlow": true,
    	"oauth2AllowImplicitFlow": false,
    	"oauth2Permissions": [
    		{
    			"adminConsentDescription": "Allow the application to access YPO on behalf of the signed-in user.",
    			"adminConsentDisplayName": "Access YPO",
    			"id": "f2a01a5f-4880-4249-9b89-9a2b6f3757c5",
    			"isEnabled": true,
    			"lang": null,
    			"origin": "Application",
    			"type": "User",
    			"userConsentDescription": "Allow the application to access YPO on your behalf.",
    			"userConsentDisplayName": "Access YPO",
    			"value": "user_impersonation"
    		}
    	],
    	"oauth2RequirePostResponse": false,
    	"optionalClaims": null,
    	"orgRestrictions": [],
    	"parentalControlSettings": {
    		"countriesBlockedForMinors": [],
    		"legalAgeGroupRule": "Allow"
    	},
    	"passwordCredentials": [],
    	"preAuthorizedApplications": [],
    	"publisherDomain": null,
    	"replyUrlsWithType": [
    		{
    			"url": "https://qa.test.com:443/qa/saml/SSO",  <------- 3
    			"type": "Web"
    		}
    	],
    	"requiredResourceAccess": [
    		{
    			"resourceAppId": "00000002-0000-0000-c000-000000000000",
    			"resourceAccess": [
    				{
    					"id": "311a71cc-e848-46a1-bdf8-97ff7156d8e6",
    					"type": "Scope"
    				},
    				{
    					"id": "a42657d6-7f20-40e3-b6f0-cee03008a62a",
    					"type": "Scope"
    				}
    			]
    		}
    	],
    	"samlMetadataUrl": null,
    	"signInUrl": "https://qa.test.com:443/qa/",
    	"signInAudience": "AzureADMyOrg",
    	"tags": [],
    	"tokenEncryptionKeyId": null
    }
  5. Save Manifest settings using Save button.