-The AdBuilder as a system is made up of several modules linked together in a way that enables the user to access and use their resources from one central module. Apart from the three basic modules that are necessary for the AdBuilder to function properly, you can additionally set up five optional modules that will enable the AdBuilder users to share the results of their work with external users.
The following table lists all the modules that you can have in the AdBuilder and explains the role that each module has in the system.
Module | Type | Mandatory | Purpose |
|---|---|---|---|
AdBuilder | AdBuilder | Yes | Central module that the other modules are linked to so that they can interact and share their contents with it. This is the module where users edit XML templates and put together their Ads. |
Template | Module | Yes | Stores XML and PDF templates used for creating Ads. The XML template defines the basic document properties such as the dimensions of the document, color space etc, as well as the layout of elements on an Ad. The PDF template provides a background for an Ad. |
Image | Module | Yes | Stores the images that users can insert in their Ads. |
Save PDFs | Module | No | Used for storing Ads from the AdBuilder on the site, where they are available for downloading as PDF documents as well as further editing in the AdBuilder (you will be able to save your changes to another item). The system creates a new entry for every Ad saved to this module. |
Save PDFs (Project) | Module | No | This additional module can be set to show the saved PDFs from AdBuilder. The main difference is that you can modify already saved PDF without making a copy and have all your PDF versions attached to a single project item. |
Insertion | Module | No | “External” module to which the AdBuilder users send final drafts of their Ads in PDF format. An Insertion module is intended for one particular type of external user (such as an in-house print shop, an external supplier etc). You can have up to three Insertion modules linked to the AdBuilder. |
This section explains how to set up the modules involved in the AdBuilder, both mandatory and optional ones. In each case, only the minimum configurations are covered, for example, those that ensure the AdBuilder’s basic functionality. Providing these configurations are observed, you can customize the modules to suit your individual needs.
For any of the modules covered below, you can either use an existing Encodify module of the appropriate type or create a new one. In order to create a new module, follow these steps:
Go to Site Configuration>Site Configuration>Modules and click Create Module on the toolbar.
In the dialog box that opens, select the required type of module in the Type list.
In the Name box, type a name for the module.
In the Sort Order box, type a number that will determine the position of the module among other modules on the Portal page.
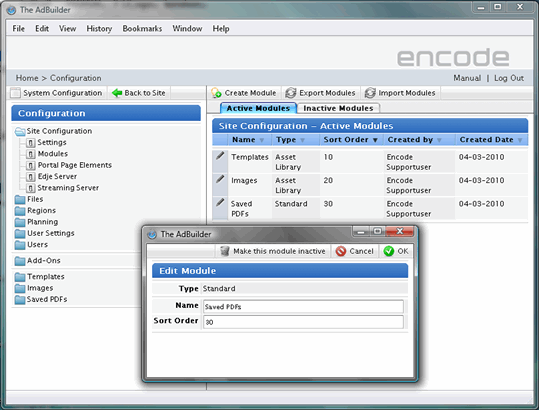
Fig.1. Create required modules
Note! To see what type of module is required in each case, see AdBuilder organization in the previous chapter.
Template Module
The Template module (also known as Master Templates module) must contain two file fields to upload XML and PDF templates. You may also create a text field with the name.
To configure the Template module, follow these steps:
Go to Site Configuration >Template module > Field Definition.
Create a field for XML templates, selecting File as Field Content.
Create a field for PDF templates, with File as Field Content.
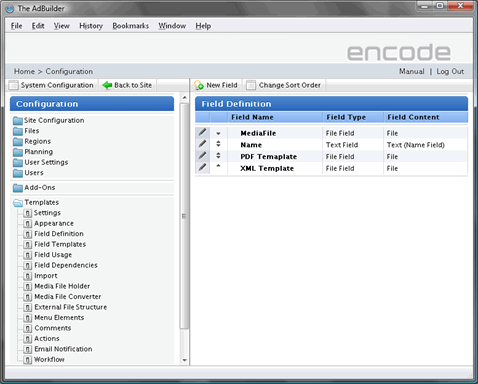
Fig.2. Create Fields in Templates module
After all the required fields are created and mapped in the AdBuilder configuration module, adbuilder button will be displayed for the template module.
AdBuilder button is available from the following places:
Classic UI
- "With Preview" module search in classic UI
New UI
- Module search result > Gallery view
- Module search result > Split view (contextual menu)
- Module search result > Grid view (contextual menu)
- Item Info sheet
Dashboard
- List widget icon (only for Master Templates module)
- List widget (contextual menu)
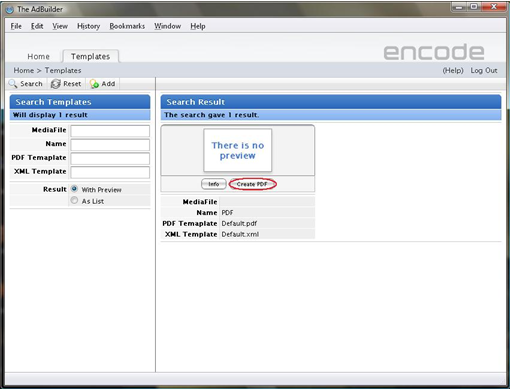
Fig.3. Template module: Search result view
Image Module
The Image module must, first of all, contain a Media File Holder for storing images that users can put on their Ads. The default configuration of the Module includes the original Media File Holder that you can use for this purpose. Alternatively, you can create your own custom Media Holder to upload images to.
You may want to have some other fields in the module as well, such as a text field for image names and other fields for storing image-related data. Once you have created all the necessary fields, you can specify which of them should and which should not be available to users when they access the module from the Micro Search dialog box in the AdBuilder.
Note! In the AdBuilder, the Micro Search dialog box is the means through which the user can access the contents of a linked Image module when assigning images to Picture fields on a template. The user can run a search in the module using the Search Menu on the left side of the dialog box and then select images by clicking the Assign Picture buttons under the items returned.
As Administrator, you can specify which of the Image module fields should be displayed in the Search Menu and in the Search Result view of the Micro Search dialog box. This is set in the Field Usage>Display tab of the module configuration menu where the respective display areas are referred to as Search (Micro) and Search Result (Micro).
The Micro Search functionality is also available when selecting a final image for a picture field on the Ad. The search then returns those of the assigned images that match the user’s search criteria, and the user can select a picture by clicking Insert Item under the image.
To configure the Image module, follow these steps:
In the module configuration menu, go to Appearance and click Edit Appearance on the toolbar.
In the dialog box that opens, select the Show Ref. # checkbox. This will be helpful for users who choose to assign images by specifying their reference numbers (also referred to as Picture ID’s in the AdBuilder).
Create fields you need under Field Definition.
Go to Field Usage>Display and click Edit Field Usage on the toolbar.
In the dialog box that opens, select the checkboxes under Search (Micro) and Search Result (Micro) opposite the fields that you want to be displayed in the respective areas of the Micro Search dialog box in the AdBuilder. To prevent the display of a particular field, clear the checkbox opposite this field.
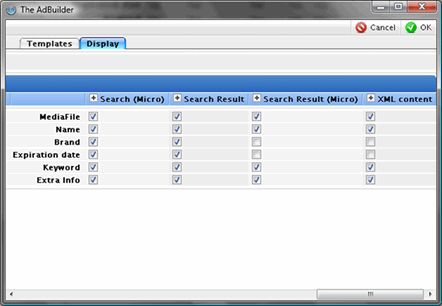
Fig.4. Configuring the display of fields from the Image module in the Micro Search dialog box
Saved PDFs module
Every time the user saves an Ad from the AdBuilder to the “Saved PDFs” module, this creates a separate item in that module, from which users can download the saved PDF file to their computers.
You will need to create some mandatory fields in this module, which will help users distinguish between items with different Ads. They are the following fields:
Three File fields for storing PDF files, modified XML templates and copies of original PDF templates
A Text field for storing the name of an Ad saved to the module
A Date field to store the date of an Ad entry
An Integer field for storing a unique number that serves to identify ID of the AdBuilder module
With the exception of the text field, all of the above fields are filled automatically when the user saves the Ad to the module.
When saving an Ad to the module, the user may be prompted to fill out some additional details about the file being saved, in the Save dialog box. A specific field template from the Saved PDFs module is used as the form that the user needs to fill out. You will need to create a custom field template for this purpose, which will comprise the fields relevant for the user to view in the Save dialog box. Alternatively, you can customize the default All template to serve the same purpose.
To configure the Saved PDFs module, follow these steps:
In the module configuration menu, go to Field Definition and create the mandatory fields and any other fields that you need. Remember to create the following fields:
File field for storing the PDFs
File field for storing modified XML template
File field for storing original PDF template
Text field that will store Ad’s name
Date field to store the date of the created Ad
Integer field to store AdBuilder ID
If you want users to specify some details when saving their Ads to the module, under Field Templates, create a template to represent a form for those details.
Go to Field Usage >Templates and click Edit Field Usage on the toolbar
In the dialog box that opens, configure the template that you have created. To add a field to the template, select the checkbox opposite the field name; to remove a field from the template, clear the checkbox opposite its name.
Note! Make sure you include the Name Field into the template, otherwise it will be impossible to use the template.
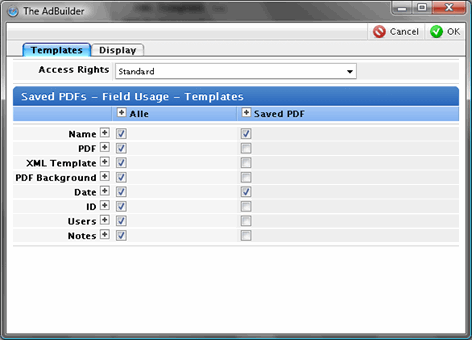
Fig.5. Configuring a field template in the Saved PDFs module
Note! The “Saved PDFs” module can also be used for saving AdBuilder XML templates in Layout XML format, which is a format supported by InDesign. You can configure the AdBuilder module to ensure that every time the user saves an Ad from the AdBuilder to the “Saved PDFs” module, this generates a Layout XML version of the template, which is saved along with the original XML template. If you want to make use of this option, you will need to create a file field in the module to which the Layout XML template could be saved.
You may want to configure the module in a way that will enable users to download Ads saved to it. To do that, you need to enable the download function for the Media File Holder generated from the file field that you have created for storing PDFs. To activate that function, follow these steps:
In the module configuration menu, go to Media File Holder and click the Edit icon next to the Media File Holder used for storing PDFs.
In the dialog box that opens, select the Enable “Download file” checkbox.
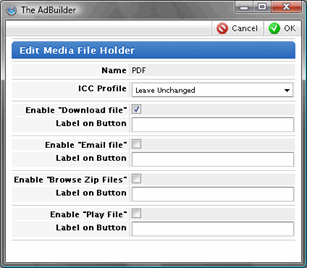
Fig.5. Activating download for the Media File Holder designed to store PDFs from the AdBuilder
Saved PDFs (Project) module (decommissioned in version 14.0.0)
Unlike the usual Module, this type of Saved PDFs module does not require you to configure any mandatory fields or special field templates. However, make sure you have File Area created, to which files from the AdBuilder could be uploaded. This will involve the following steps:
Go to module Menu Elements.
Create a new menu element or use an existing one (e.g. Info).
In the created menu element settings add a new File Area, make the file service module visible on the menu element.
Note! Make sure that Name fields both in “Saved PDFs” and “Saved PDFs (Project)” modules coincide, otherwise, warning message will inform you about the incorrect configuration, and you won’t be able to save the settings.
Note: Menu Elements are decommissioned for New UI in version 15 and replaced by Item Views
Insertion Module(decommissioned in version 21.0.0)
At least one text field (e.g. ‘Name’) need to be created in this module.
The main purpose of Insertion module is using the action, which sends an email with a link to saved PDF, on performing Send to Insertion operation. The module itself does not store sent PDF and represents only a text information, used in Ad.
Action can be configured in Site Configuration > Insertion module > Actions > Create Action. Use placeholder ${PdfLink} to insert the link to PDF into email message.
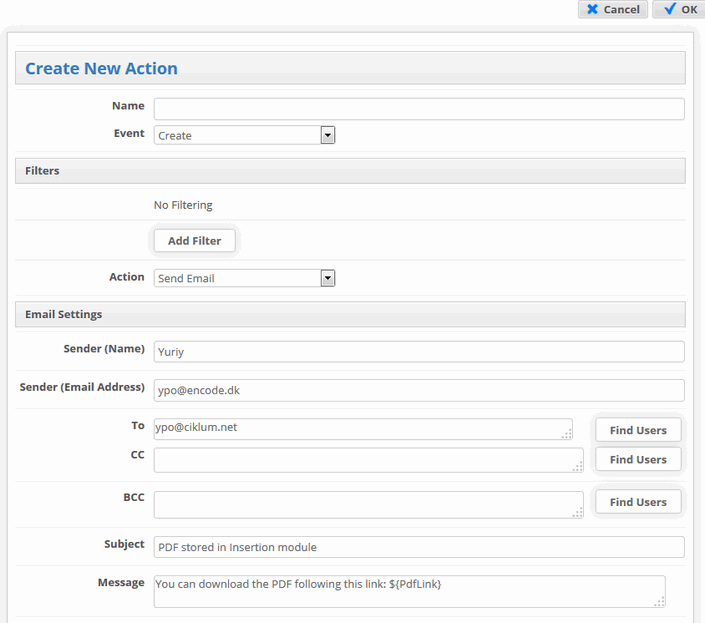
Fig.6. Configuring the action in Site Configuration > Insertion module > Actions > Create Action for sending an email with a link to PDF.