This guide provides an end-to-end operational overview of how to configure, deploy, and manage the Multimodal AI Data Extraction rule within the platform. This advanced functionality enables your system to transmit structured text data and media files from specified modules directly to an artificial intelligence service, subsequently capturing and recording the analytical results back into your system workflow.
Rule Configuration
The configuration is divided into five primary configuration steps.
Step 1: Basic Info and Triggering Conditions
Defines the rule's identity and the specific trigger criteria.
Field | Description |
|---|---|
Name | Enter a unique name for the rule (e.g., "Product Description Extraction"). |
Description | (Optional) Briefly explain the purpose of this AI-based extraction. |
Active Toggle | Ensure this is switched ‘On’ for the rule to run. |
Type | Select Multimodal AI Data Extraction from the dropdown. |
Sort Order | Determines the priority if multiple rules are triggered simultaneously. |
Module | Select the primary module (e.g., Products) that will trigger the extraction. |
IF Condition | Set the criteria that must be met for the rule to be executed. |
Step 2: Fields from Main Item
Identify which specific field data from the main item should be sent to the AI.
Field | Description |
|---|---|
Analysed Module | This defaults to the module selected in the Conditions section. |
Analyse Data in Fields | Click Add Field to specify the field data you want the AI to evaluate and extract from. It is also possible to select File fields and define whether the original file or its rendition should be sent for extraction. |
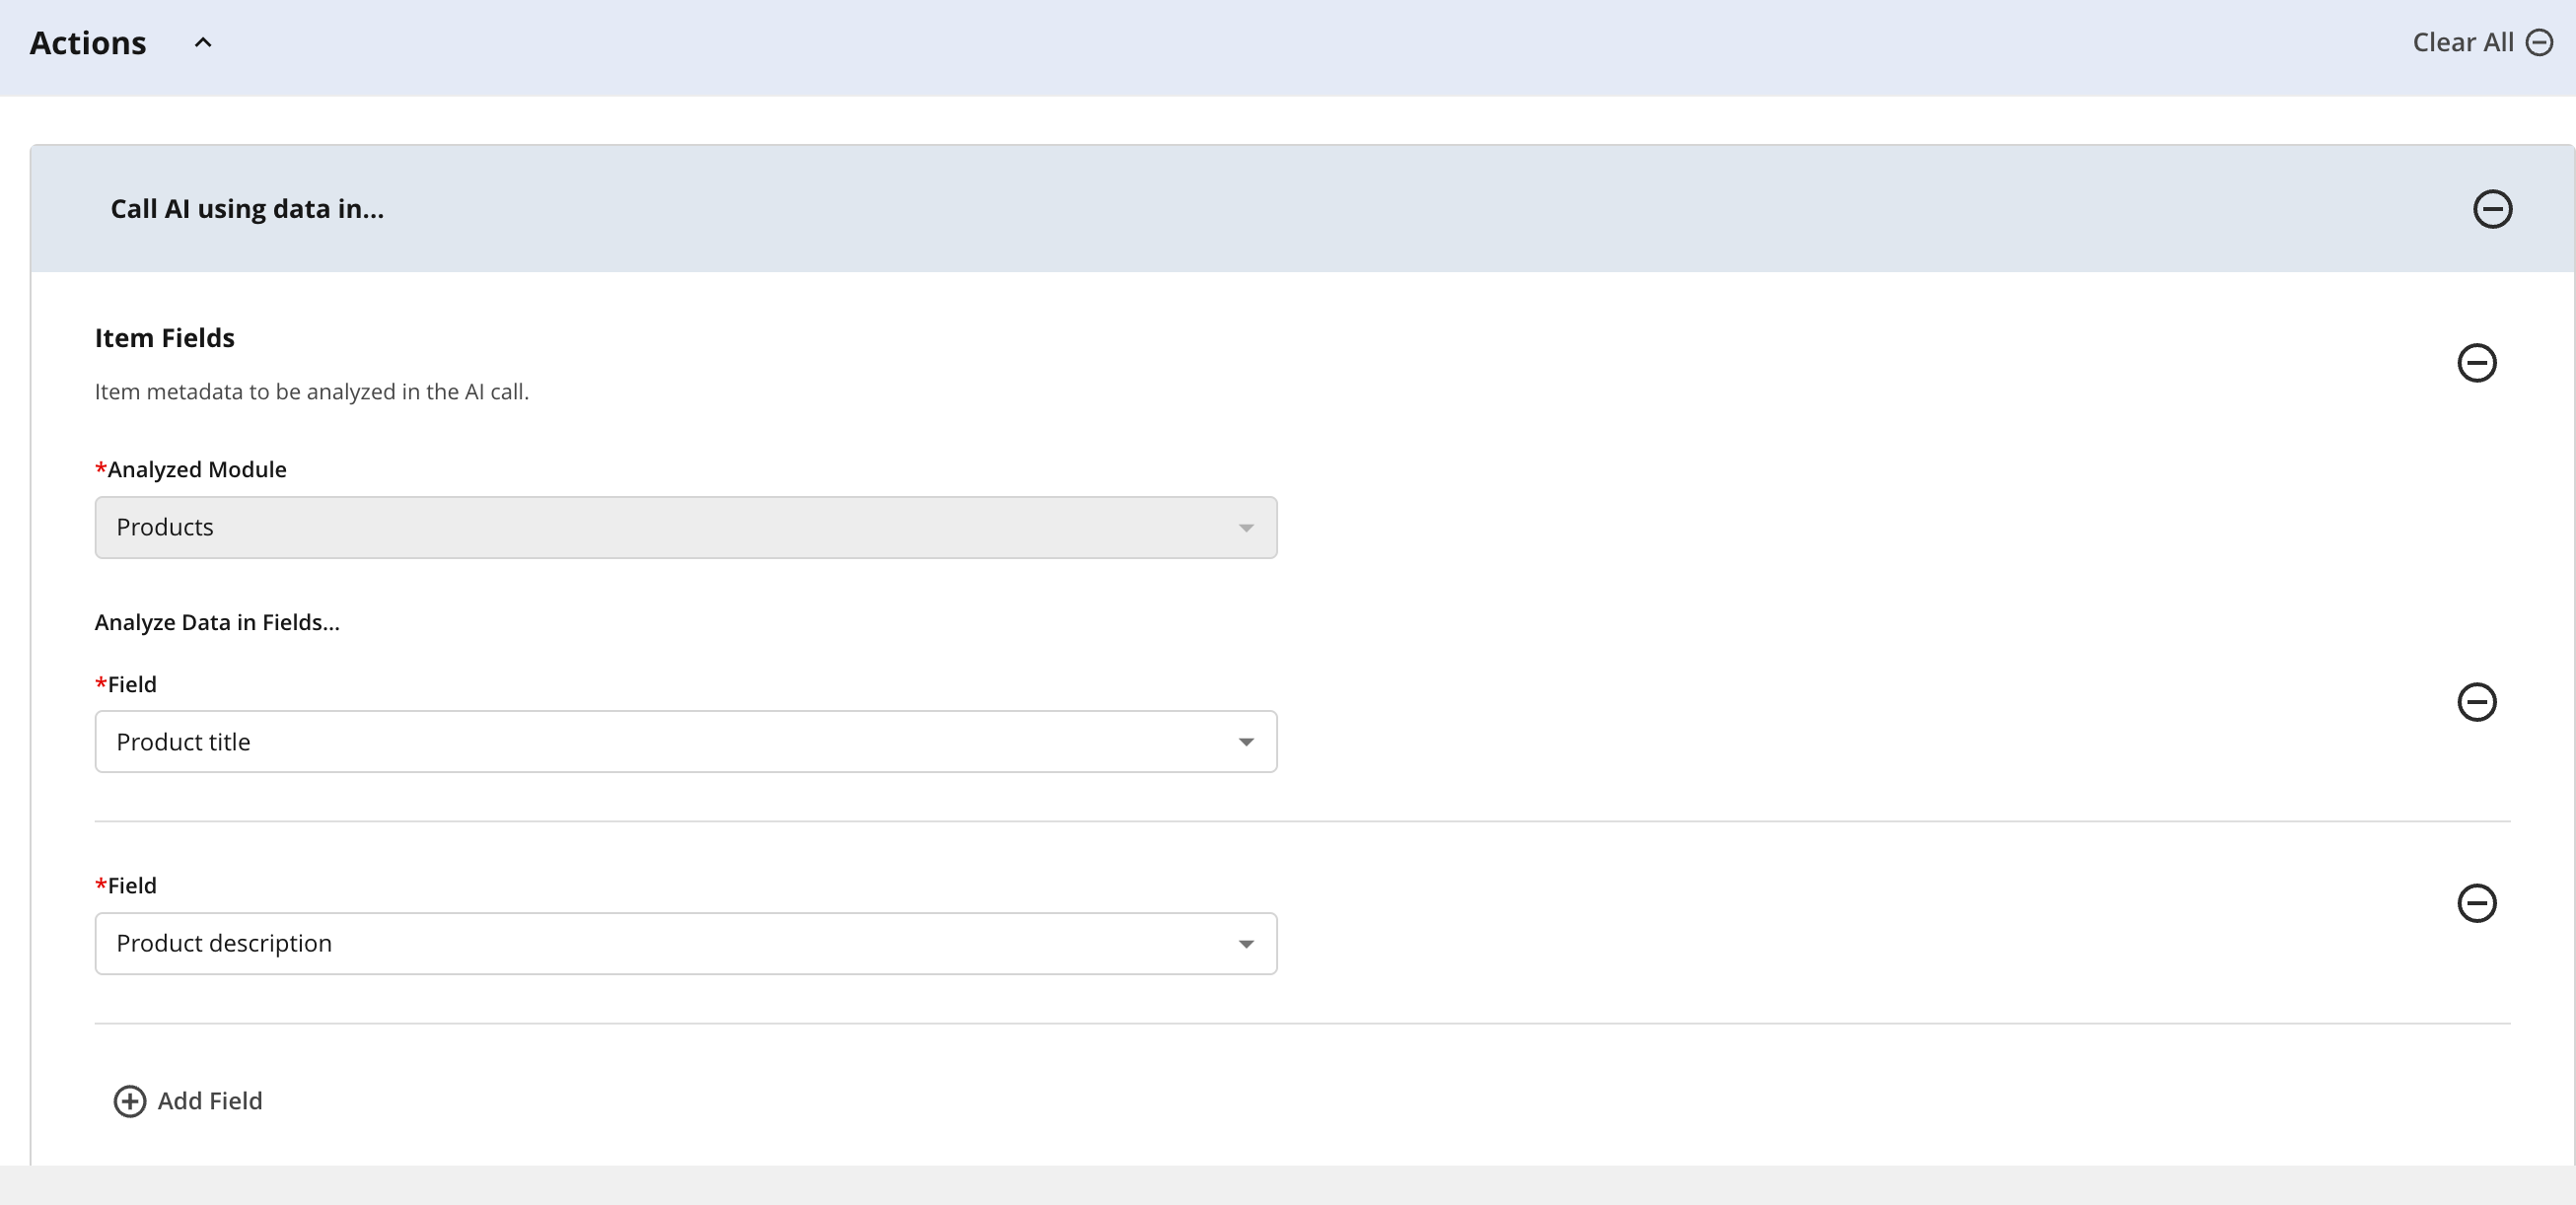
Form with fields to analyse
Step 3: Fields from Linked Modules
Select additional data from linked modules to be sent to the AI.
Field | Description |
|---|---|
Linked Module | Select the linked module. Note that only modules with module links to the main module can be selected. Direct links from the main module to linked modules are not supported. |
Link Field | Identify the field that connects the two modules. |
Filter by Field/Values | (Optional) Narrow down which linked items are sent (e.g., only items where Status is "Available" or "Ready"). |
Analyse Data in Fields | Select the field(s) to send. |
Media Holder | For file fields, specify if the original file or rendition is sent for extraction. |
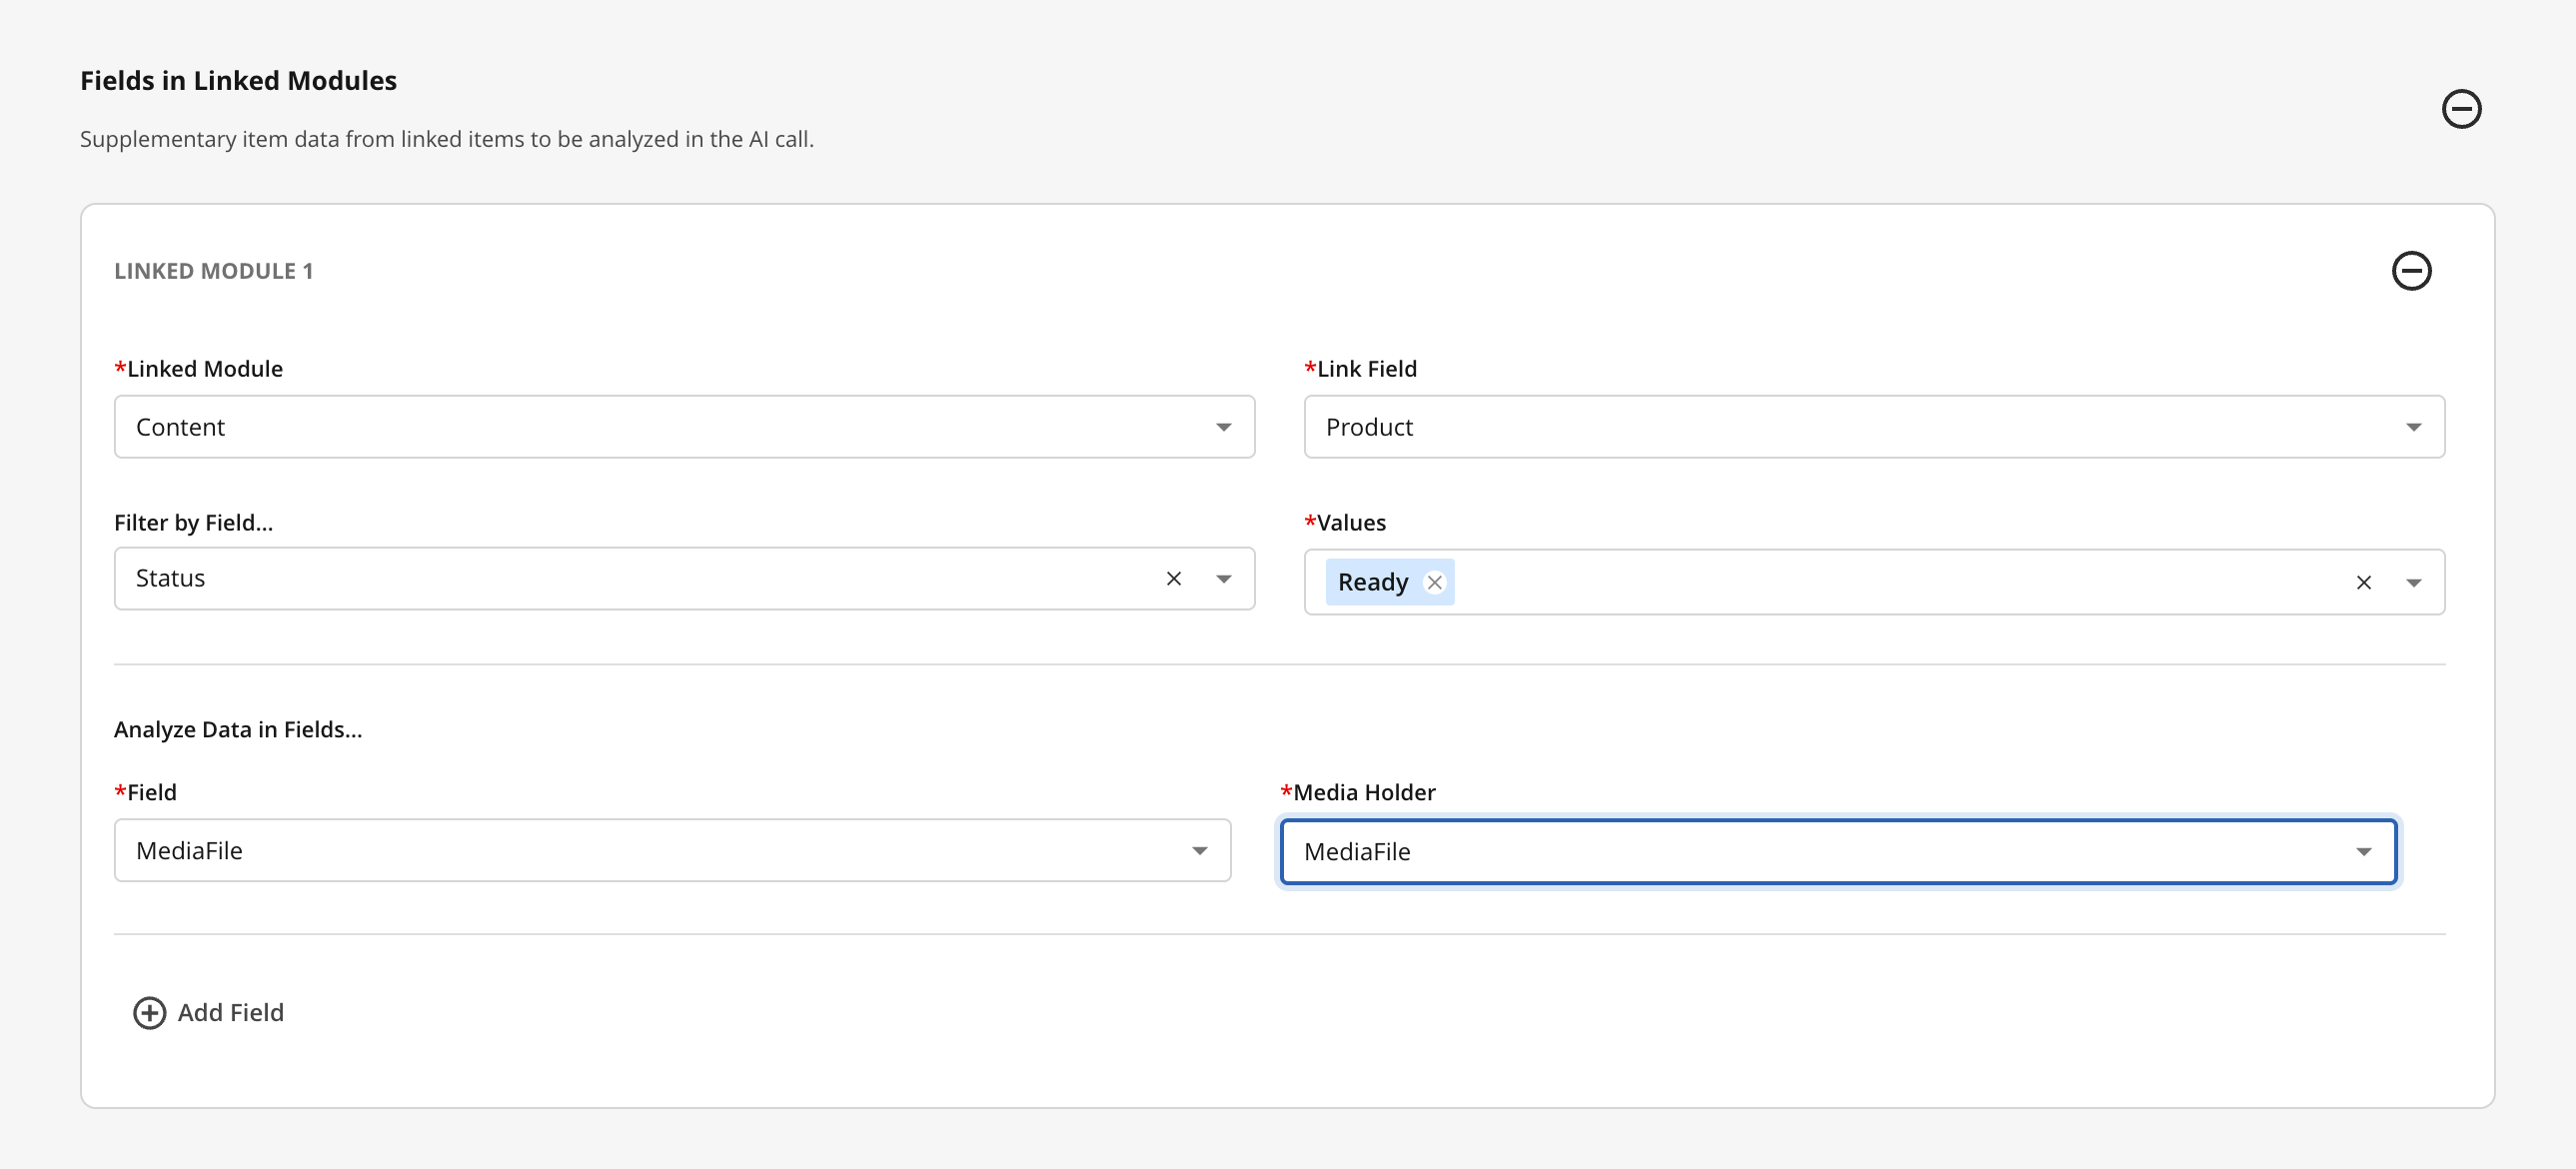
Adding fields from the Linked Module(s)
Step 4: AI Instructions
Defines the exact directive and analytical framework communicated to the AI.
Field | Description |
|---|---|
Prompt for AI | Utilise the rich text editor to compose clear, concise, and unambiguous instructions. The prompt input field natively supports Markdown formatting for enhanced structural clarity. |
Example High-Level Directives | "Analyse the provided product title, product description and the attached product images. Write an improved description based on the product title, description and images in fluent, professional English. Target name: must include product name, length 20-40 characters.Target summary: must include product description, length 50-100 characters." |
Enable Grounding | When enabled, the AI may use external search results to supplement the assessment. |
When extracting data, generative AI models can occasionally suffer from "Conversational Drift"—returning chatty filler text instead of raw data. To prevent this, explicitly list your target fields in the prompt along with strict character or formatting constraints. |
It is recommended to use Google Gemini or AI Studio to develop solid prompts before adding to the Encodify platform. Other Generative AI platforms might yield similar results.
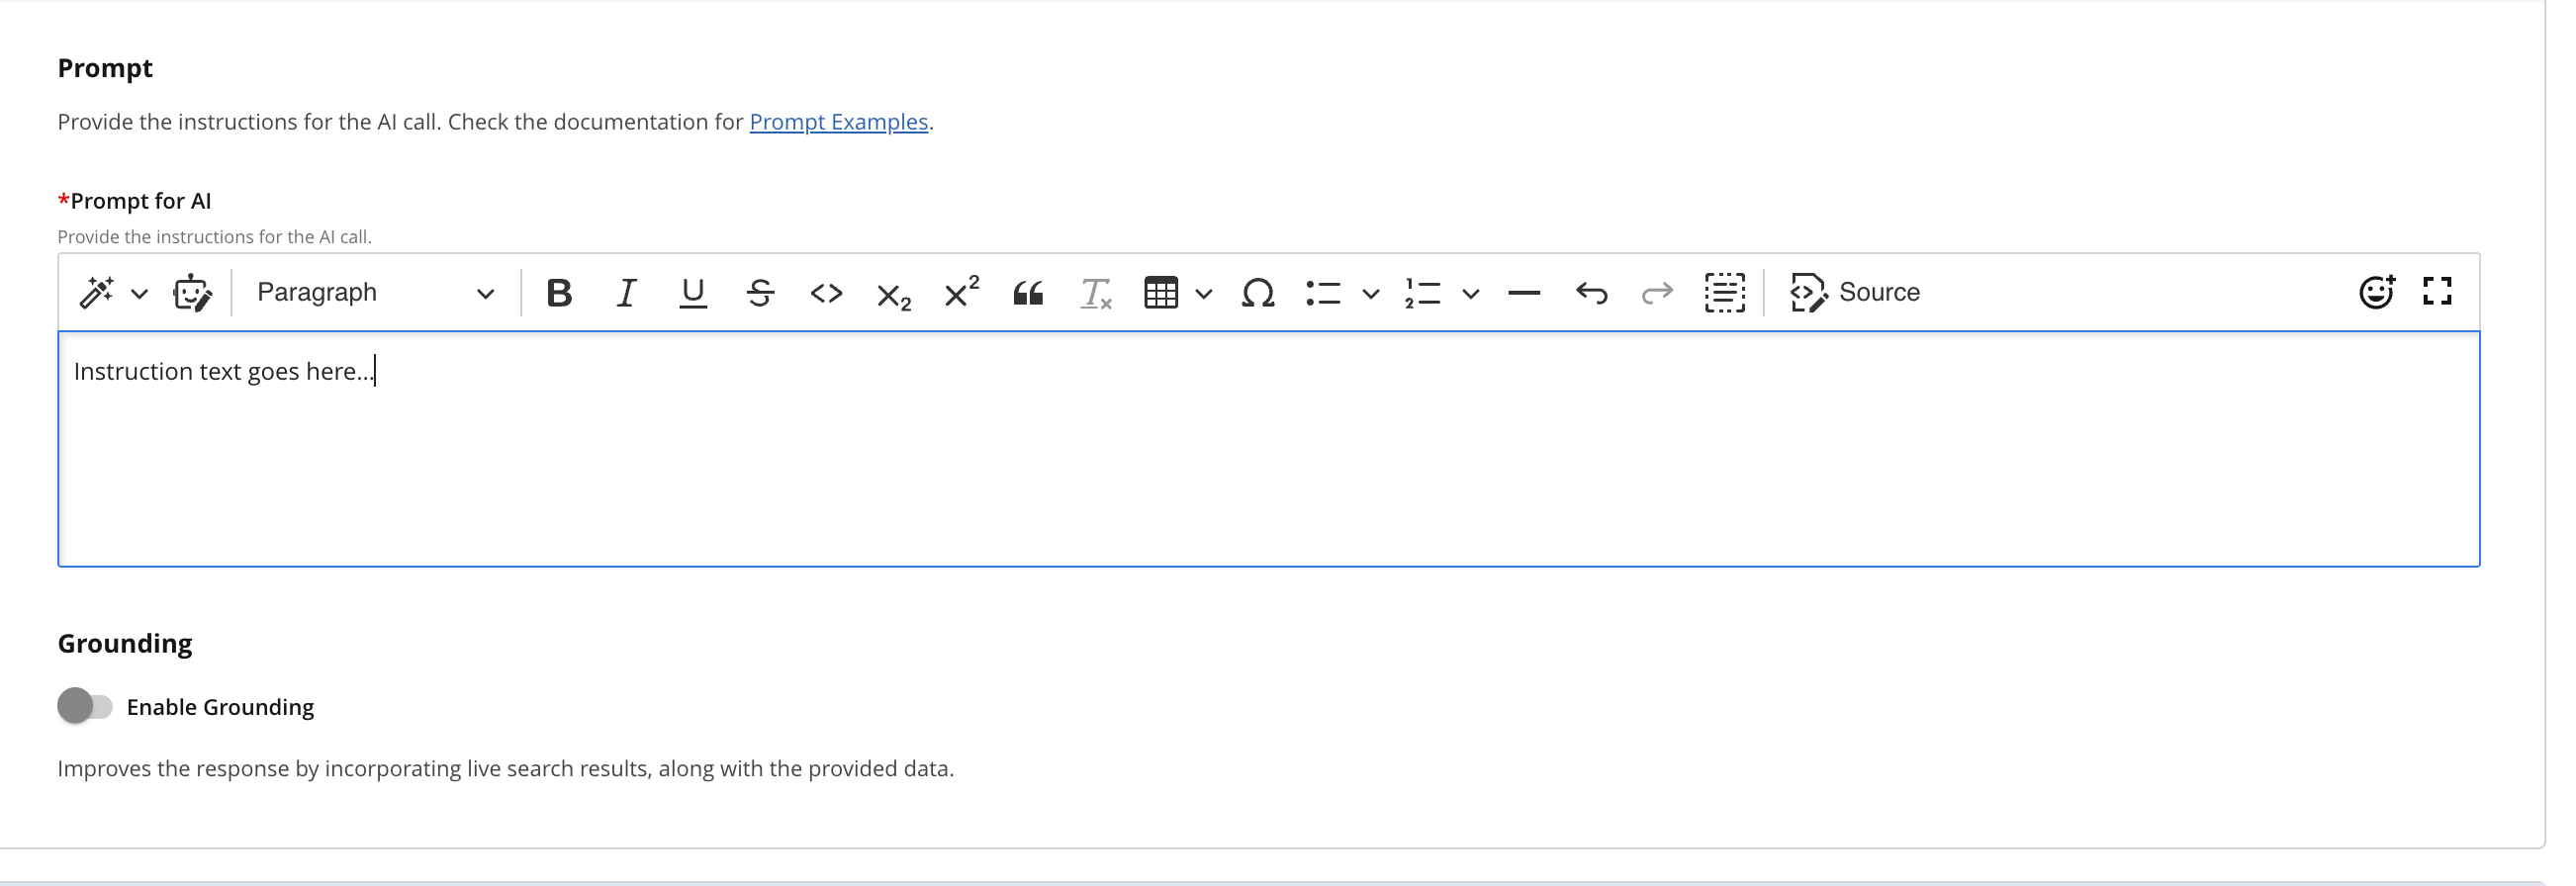
Instruction text input area for AI prompt creation in a document editor.
Step 5: Storing the Results
Define how the AI's response should be stored.
Field | Description |
|---|---|
Storage Method | Choose between Save in Current Item or Create Inline Item. |
Status Field Mapping | Map the statuses to your main module's field options so you can track progress (e.g., Map "In Progress," "Completed Successfully," and "Failed"). |
AI’s output field mapping is the same regardless of which save method is selected. Saving to a separate module will require the module and the linked field specified.
Field | Description |
|---|---|
Target Field(s) | Select the specific module fields (e.g., text, numeric, or date fields) where the extracted data values will be recorded. |
Status Code & Error Message | Vital for troubleshooting failed calls. |
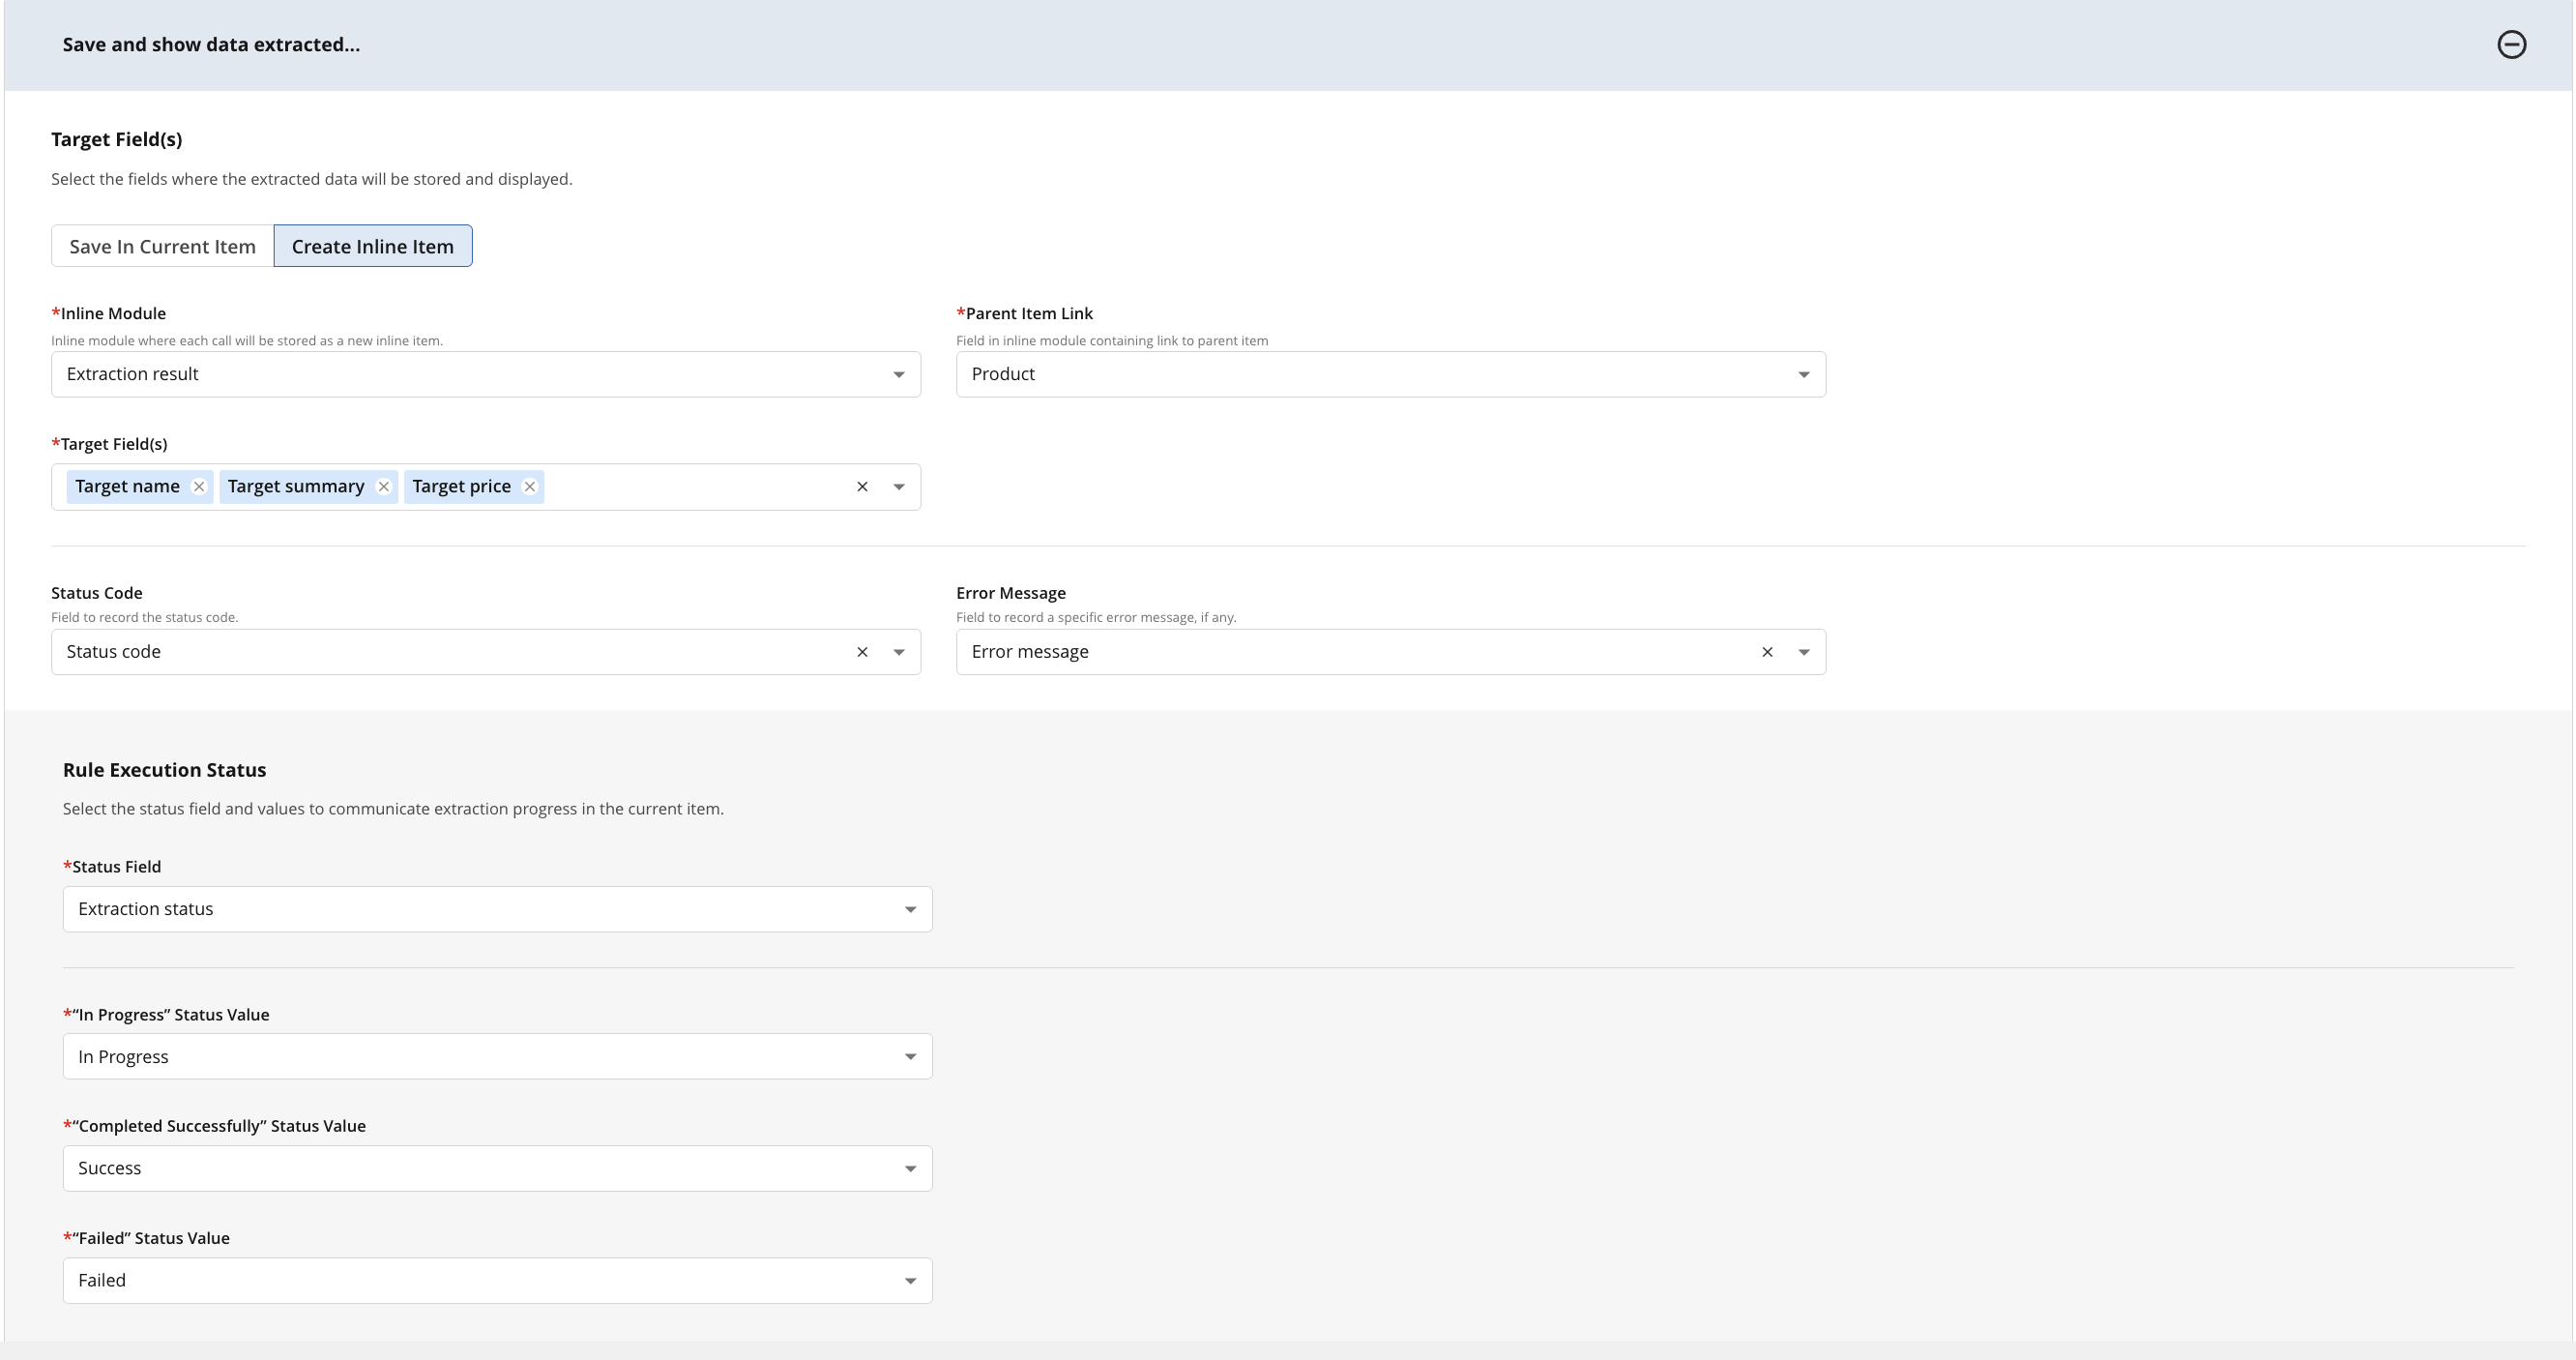
Mapping of fields in target module and Status field values
Rule Execution Logic
This rule does not, contrary to other rules, have a subtype or event that triggers it. Instead, it is governed by the following logic:
Logic Component | Description |
|---|---|
Action Trigger | Execution is triggered by a Create or Update action on the main item within the selected main module. |
Status Gatekeeper | The rule will only run if the mapped Status field value does not equal the options mapped as "In Progress," "Failed," or "Completed Successfully." This prevents infinite loops. |
Filter Match | The item must meet the specific criteria defined in the Conditions section (if any). |
Once triggered, the item status will shift to "In Progress" until the AI service returns the data to the mapped result fields. Successful assessments will set the main item’s status to the option mapped as “Completed Successfully“.
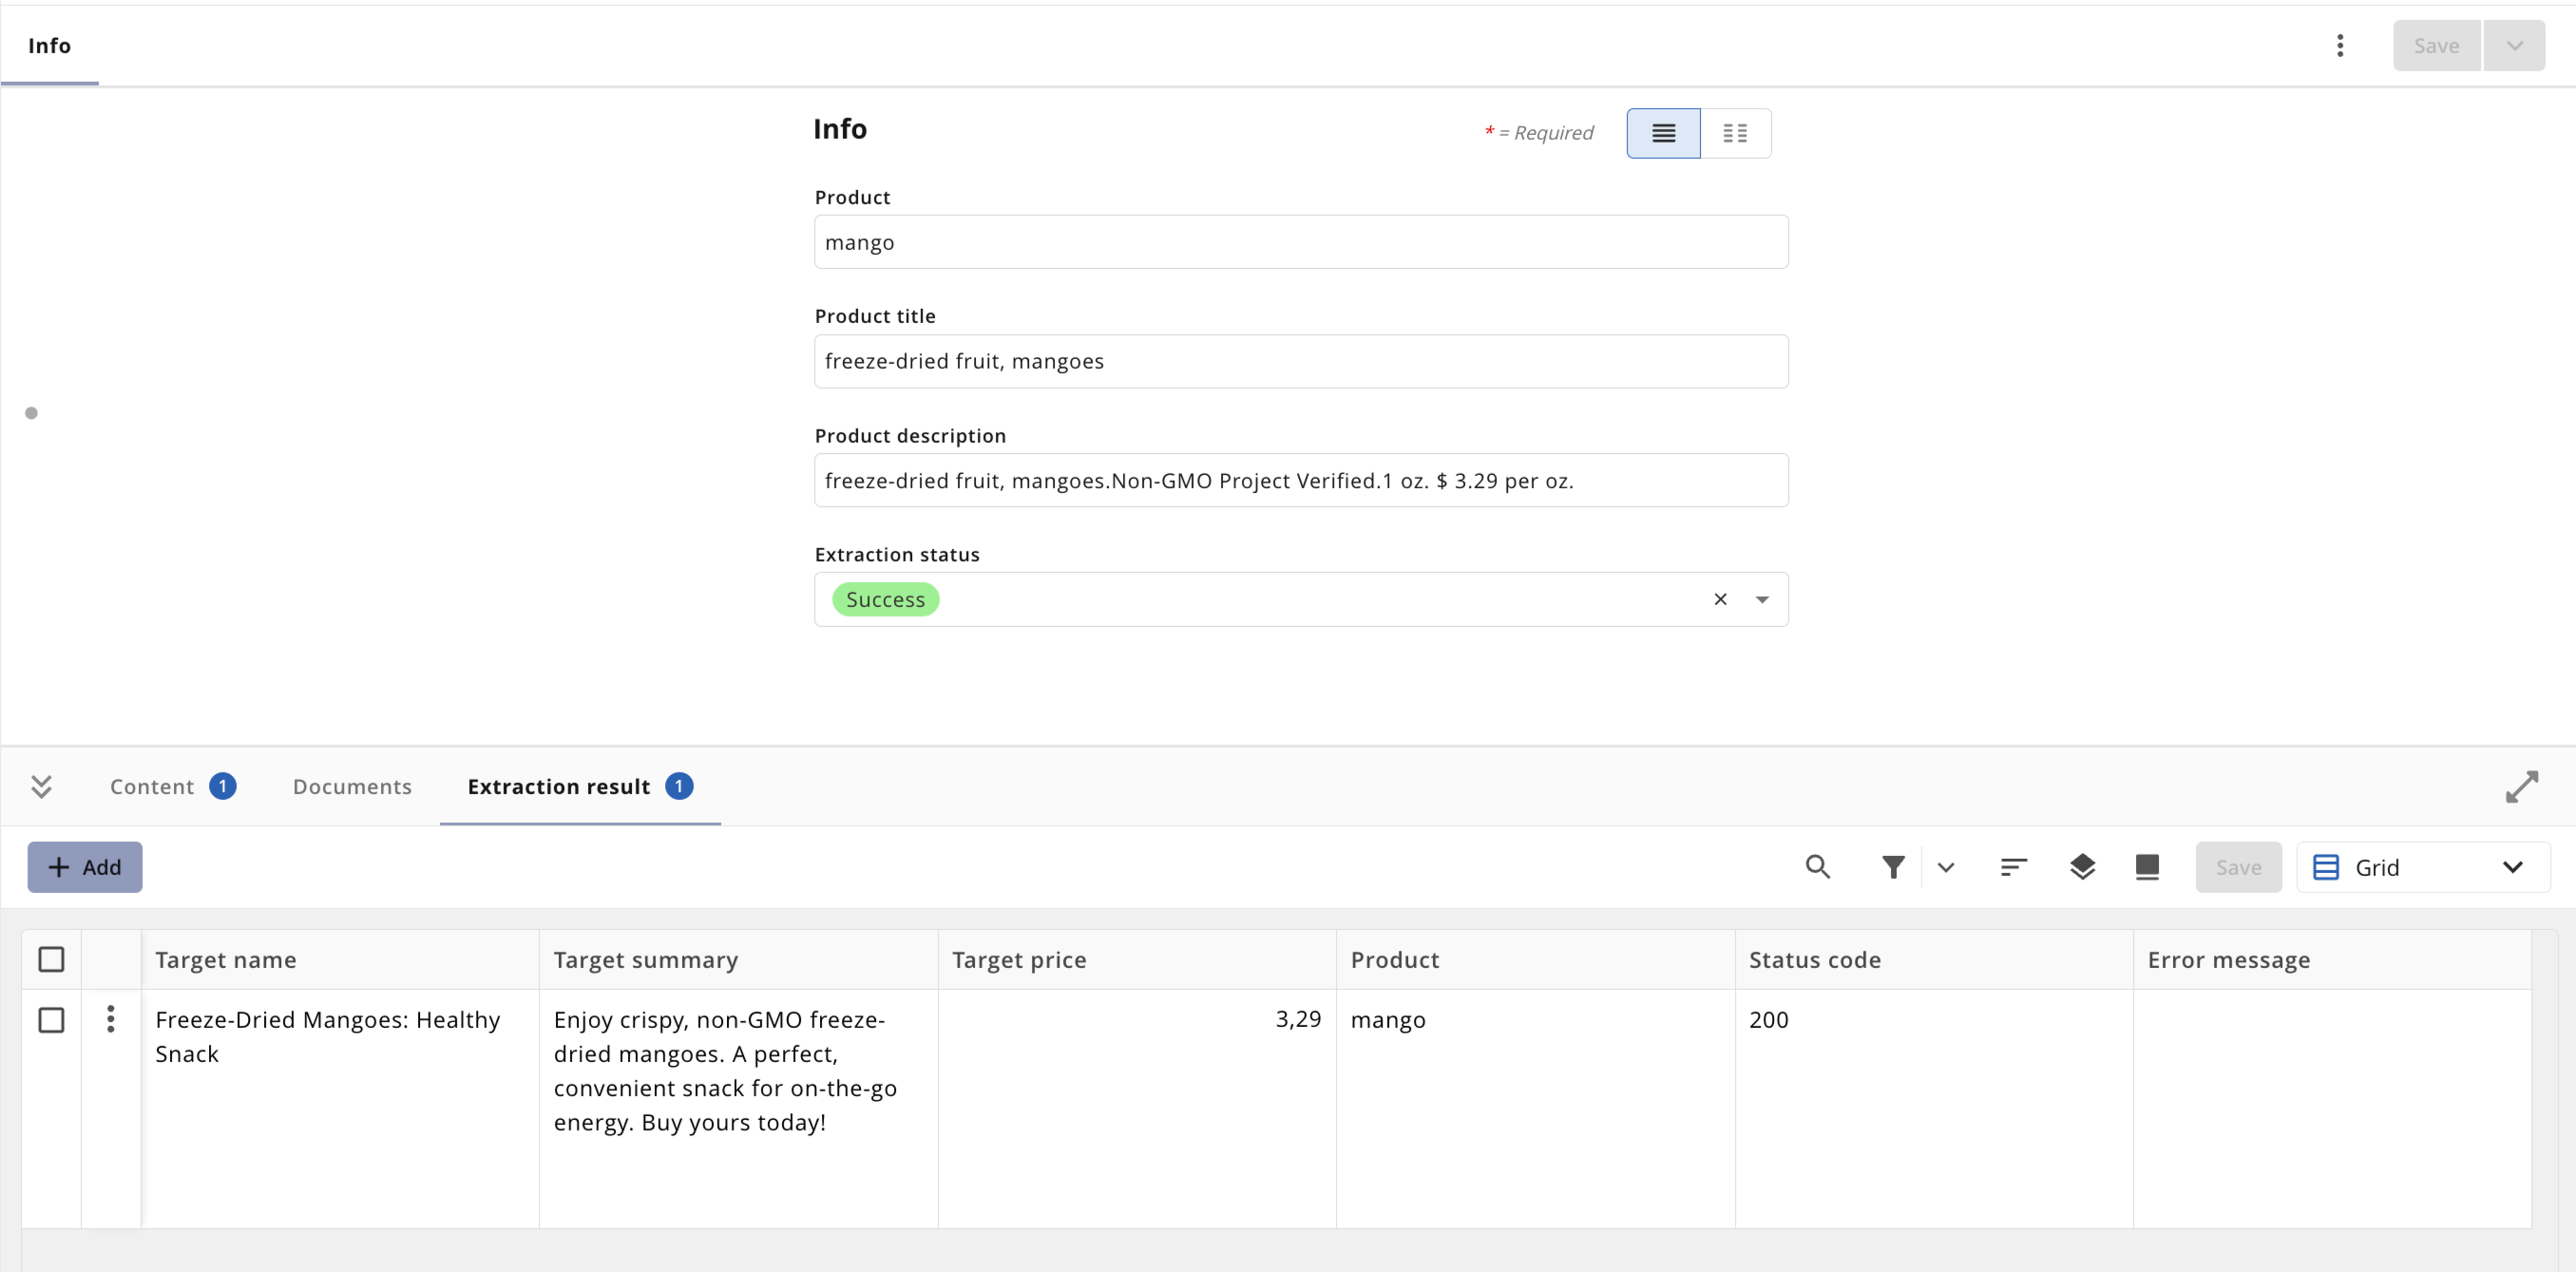
Example of the main item with the linked extracted result and successfully completed status.
Technical Limitations and Troubleshooting
To ensure seamless execution, prevent infinite loops, and avoid file evaluation failures, all AI automation rules must operate within specific technical boundaries. All guidelines regarding payload constraints, status gatekeeping, race conditions, file naming, etc. are centralised in our foundational documentation.