Encodify InDesign plug-in is designed to tag elements in your InDesign document and export the result to an XML file, which can then be imported into Encodify AdBuilder.
Installation
There is a single repository containing different versions of the plugin for both macOS and Windows.
You can download the latest version here:
https://drive.google.com/drive/folders/1oc2QScCyrHfIAI7wi2bHmluHBvFJXtE5
To deliver the plugin to clients, please download the versions needed and send it. It's not possible to share the Google Drive link with external users
The plug-in comes in the form of a single file named EncodifyPlugIn.InDesignPlugin.
To start using it, perform the following configuration steps:
For MacOS
Unpack downloaded archive
Place the file in the Plug-Ins folder of your InDesign installation and restart InDesign.
For Windows
In the Adobe Indesign > Plug-Ins folder, create a folder called "Encodify"
Unpack downloaded archive
Copy the contents of the unpacked archive to the directory created on step 1. It i important to make sure that along with the EncodifyPlugin file, the (EncodifyPluginResources) directory are copied(present).
Restart Indesign.
Encodify Menu
The plug-in adds a menu called Encodify to the InDesign menu bar. The Encodify menu contains the plug-in commands, which will be discussed in detail in the sections below.

Figure 3‑1: Encodify Menu
Encodify Tags Panel
The Encodify Tags panel (or side bar) shows the tag structure of the document you are editing. This includes the basic properties of the document - its name, dimensions and resolution, page names and the properties of its tagged elements (tag attributes and their values).
You can show or hide the Encodify Tags panel like any other InDesign panel. To show or hide the panel, choose Window > Encodify Tags from the main menu.
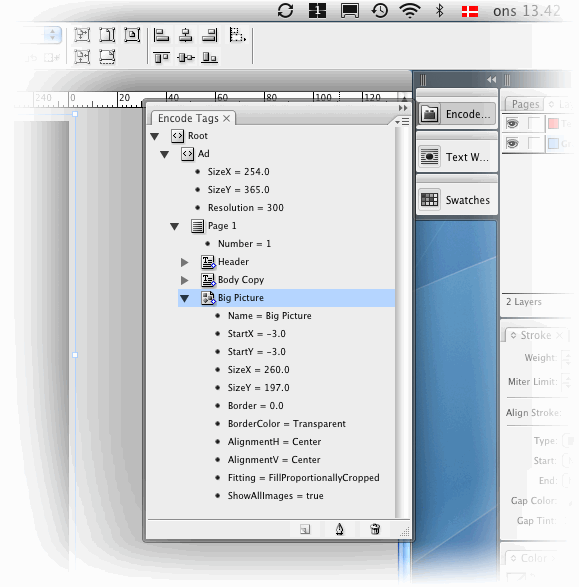
Figure 3‑2: Encodify Tags panel
Using the plug-in
This section explains how to apply tags to elements in your InDesign documents, edit and remove tags, and export a tagged document to an XML file.
Applying tags to elements
To tag a specific element:
Using the Selection tool, select the field that you want to tag.
Do one of the following:
right-click the selected field, and then select Tag Element.
choose Encodify > Tag Element from the main menu.
click the Tag Item icon at the bottom of the Encodify Tags panel.
In the dialog box that opens, enter a tag name for the field and click OK.
Note that tagged elements can be selected either directly on the page using the Selection tool or by clicking on their names on the Encodify Tags panel.
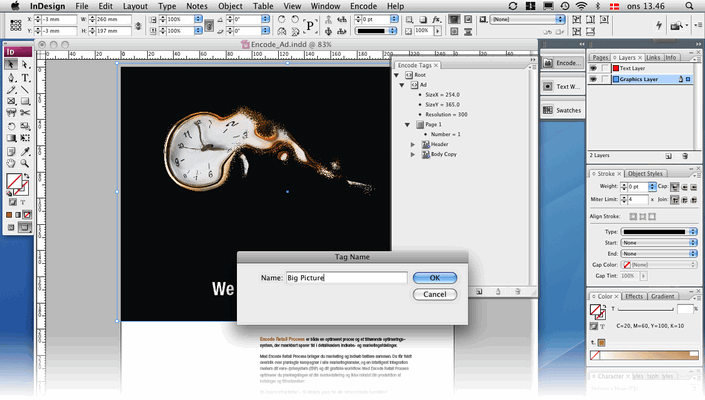
Figure 4‑1: Applying a tag to an element
Editing element tags
To edit the tag of an element:
Do one of the following:
Select the element on the page, right-click on it, and then select Tag Element.
Select the element, and then choose Encodify > Tag Element from the main menu.
Double-click the element that you want to re-tag in the Encodify Tags panel.
In the dialog box that opens, edit the tag name as necessary and click OK.
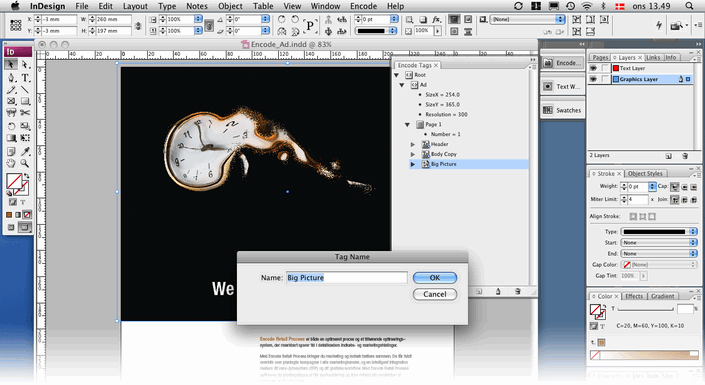
Figure 4‑2: Editing a tag
Deleting element tags
To delete the tag of an element:
Select the element that you want to remove the tag for.
Click the “Trash Can” icon at the bottom of the Encodify Tags panel.
Auto-tagging
You can tag all elements on a layer at once. This is called auto-tagging, when all elements are tagged with default names.
To auto-tag elements:
From the main menu, choose Encodify > Auto Tag Layer.
In the dialog box that opens, select the layer that you want to tag the elements on. If you want to tag all elements on all layers, select All Layers.
Click OK.
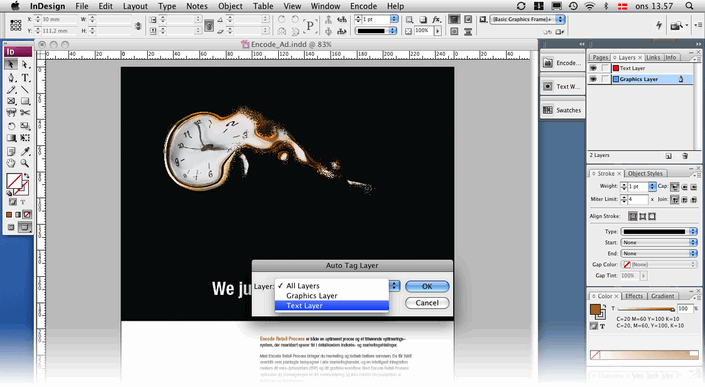
Figure 4‑3: Auto-tagging elements
Exporting from InDesign
To export your tagged document to an XML file:
From the main menu, choose Encodify > Export XML to AdBuilder.
In the Save dialog box that opens, enter a name for the file (you may leave the default name, which uses the name of the original InDesign document), specify the location where you want to save the XML file, and then click Save.
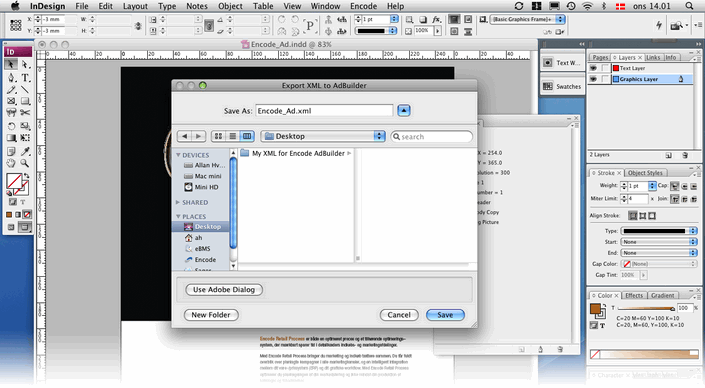
Figure 4‑4: Exporting a tagged document to XML
Importing XMLs to Encodify AdBuilder
To import the resulting XML template to Encodify AdBuilder, follow these steps:
Log on to your AdBuilder site.
Go to the module with AdBuilder templates and do one of the following:
If you want to create a new item for the template, click Add on the toolbar. In the dialog box that opens, upload the XML template to the appropriate file field, enter the necessary data in the other fields, and then click OK.
If you want the update the template in an existing item, locate the item and click the Info button under it. In the dialog box that opens, click Edit on the toolbar. In the Edit dialog, upload the template to the appropriate field, edit other fields as necessary and click OK.
Click the Create PDF button under the item to go to the AdBuilder module.
Importing XML with Changes from Encodify AdBuilder to InDesign
Changes made in Encodify adBuilder can be imported back to InDesign by following the simple steps:
Download the xml template file from the corresponding field in Encodify system.
In the InDesign, make sure the document from which the original XML template was exported to Encodify is opened.
Click Encodify> Import AdBuilder XML > Upload the file.
Changes to elements will be imported.
What is important to remember:
New elements or pages created in the Encodify AdBuilder will not be imported to InDesign
Only changes to the elements with the same tags as in Indesign will be imported. It means that if the element name has changed in the AdBuilder, InDeisgn will no longer recorgnize it after import.